Kindle Not Connecting to PC: How to Fix it
Find out how others managed to get rid of the issue
Key notes
- When your Kindle is not connecting to the PC, it's usually the connection to blame.
- A quick fix involves fully charging the device and then connecting it to another port on the computer.
- For many users, updating the Kindle driver did the trick.
Amazon’s Kindle reader began as a simple e-book reader, but it has slowly evolved. Like any tablet, you may encounter trouble with it. Some users reported that Kindle is not connecting to the PC, and there may be times when it does not appear on your PC.
There are several solutions you can try to make your computer access the Kindle device, and we will walk you through each one!
How do I get my Kindle to connect to the computer?
Before we start with the complex ones, here are a few quick solutions:
- Press the power button on the Kindle for 30 to 60 seconds until the device restarts to perform a hard reset.
- Make sure the Kindle is charged. Keep it plugged in for an hour before connecting it to the PC.
- Use a different USB port to connect the Kindle.
- Use another cable.
- Connect the Kindle to another computer to verify whether the problem lies with the previous PC or the Kindle itself.
- When connecting the Kindle, configure it as a camera during the initial setup. Several users reported that this helped when Kindle was not connecting to the PC.
- Download Calibre and use it to connect the Kindle.
If none work, move to the ones listed next.
1. Enable ADB
A workaround is to enable Android Debug Bridge (ADB) on your Kindle. You can try both (disabling and enabling) and see which fixes the problem.
You can easily change this setting by going to Settings, choosing Device, and then enabling/disabling ADB.
2. Install Kindle driver
- Open Device Manager, expand the Portable Devices. And you will see your Kindle or MTP device.
- Right-click the Kindle or MTP device and choose Update driver.
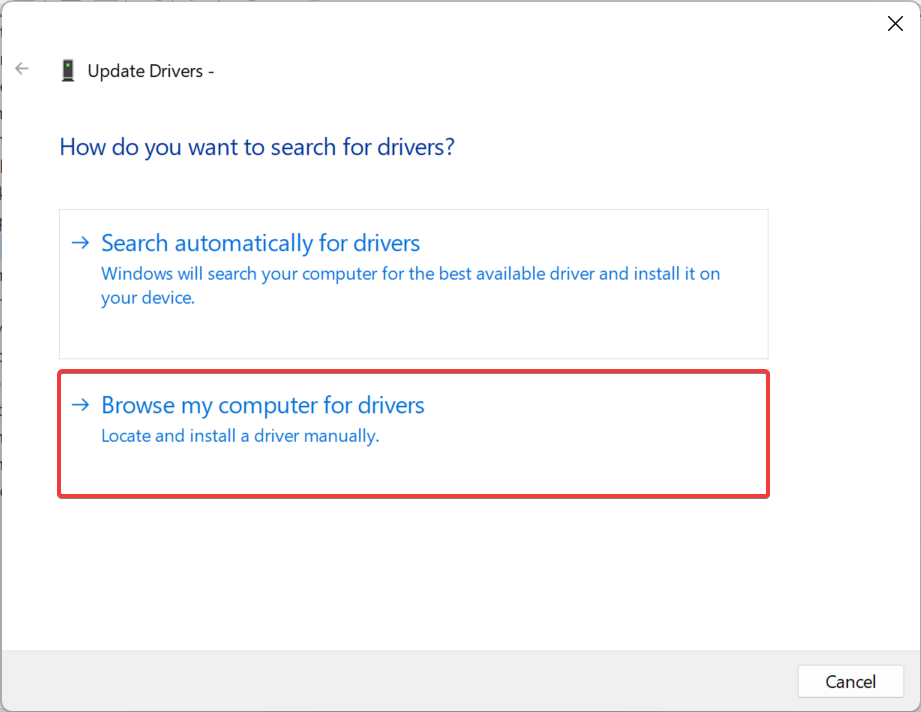
- Click on Browse my computer for drivers.
- Select Let me pick from a list of device drivers on my computer.
- Check Show compatible hardware, and the right model will list. Here choose MTP USB Device and click Next.
- Click Yes to confirm.
If your PC cannot detect your Kindle, the cause might be due to the Windows Kindle driver being missing or install failure.
When this happens, you will see a device with a yellow exclamation or an MTP or USB driver with an exclamation under Portable Devices in Device Manager. So, simply install the Kindle driver and have things running in no time.
- Download and install Outbyte Driver Updater.
- Launch the software.
- Wait for the app to detect all faulty drivers.

- Now, it will show you all the malfunctioning drivers listed to select the ones to Update or Ignore.
- Click on Update & Apply Selected to download and install the newest versions.
- Restart your PC to ensure the applied changes.

Outbyte Driver Updater
Secure your Windows PC with Outbyte from various errors caused by problematic drivers.3. Reinstall the latest Kindle software for Windows 10
- Go to Settings, select Installed apps, and then click on Apps and Features
- Look for Kindle software and click Uninstall.

- Restart your PC
- Go to the Amazon downloads page to download and install the latest Kindle Software for Windows 10.
When Kindle is charging but not connecting to the PC, reinstalling the dedicated software should do the trick!
4. Disable the USB selective suspend
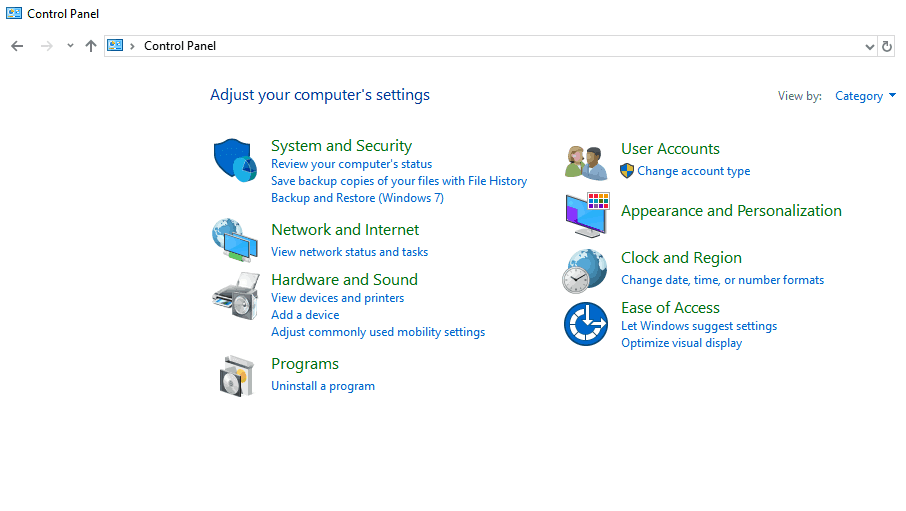
- Open the Control Panel, and click on Hardware and Sound.
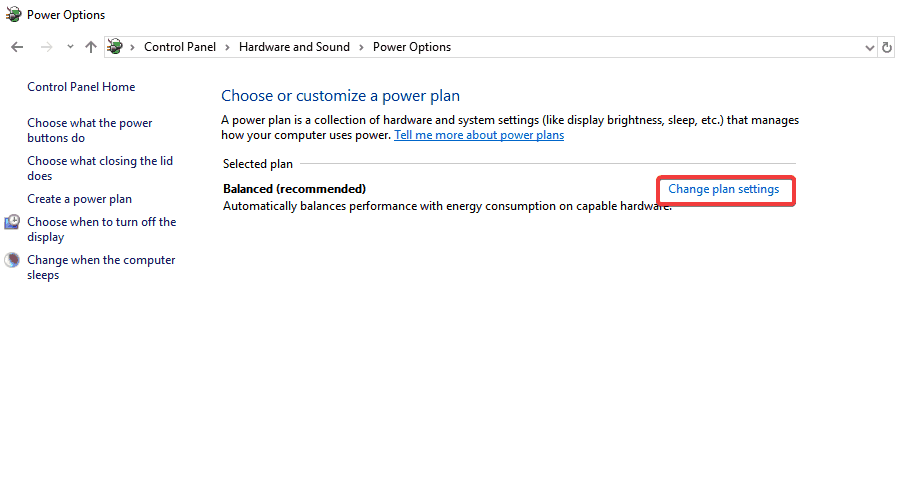
- Click on Power Options.

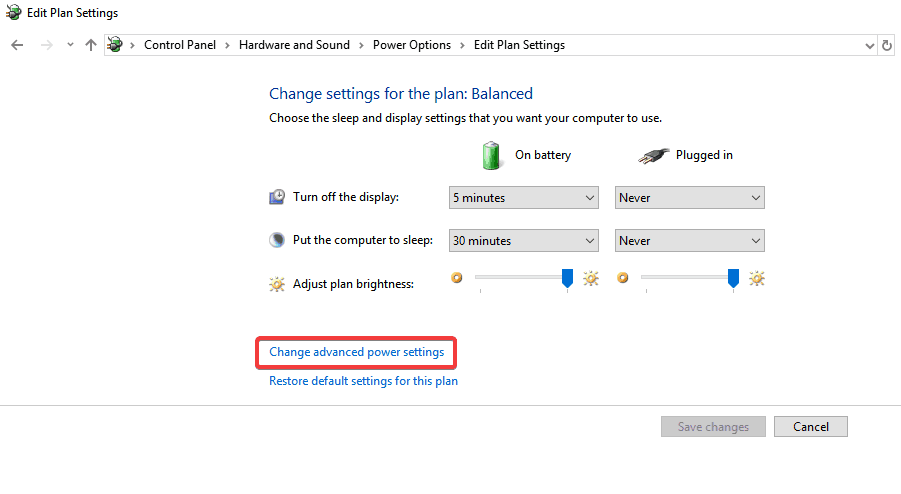
- Select the power plan you are using and click on Change plan settings
- Click Change advanced power settings
- Search for USB settings from the list of options and click on it to expand
- Click on USB selective suspend settings and select Disabled in both cases (On battery and Plugged in)
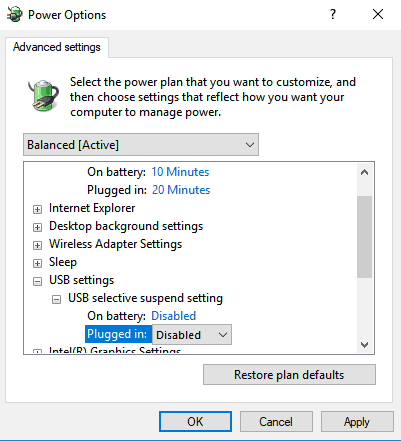
- Click Apply and OK to save the changes.
- Restart your Kindle and your computer and check if this has solved the problem
Many users reported that disabling the USB selective suspend feature also fixed their problem when Kindle is not connecting to the PC. The USB selective suspend feature allows the hub driver to suspend an individual port without affecting other ports on the hub.
It is enabled by default in portable computers to help conserve power and help maintain long battery life.
5. Uninstall and reinstall USB controllers
- Press Windows + R keys, type devmgmt.msc, and click OK.
- Expand Universal Serial Bus Controllers, right-click on the affected device, and select Uninstall device.
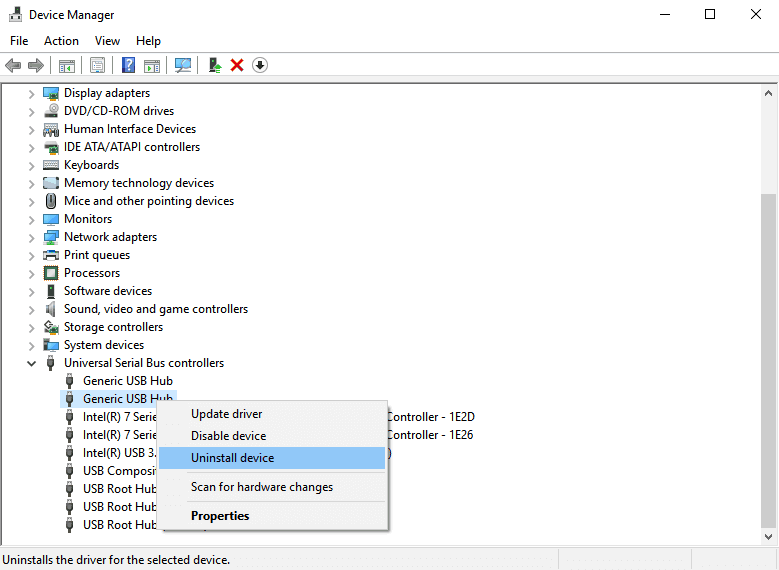
- Perform the same step for other devices. When completed, restart the computer.
Another suggestion users make is to uninstall and reinstall USB controllers when Kindle is not connecting to the PC via USB.
Kindle is a great device, but as you can see, sometimes your computer cannot find it. If you face this situation, please try any of the solutions from this article.
Also, learn how to use Kindle Text to Speech on the PC. Tell us which fix worked for you in the comments section.
Read our disclosure page to find out how can you help Windows Report sustain the editorial team. Read more


Improve this guide


User forum
4 messages