How to Convert Windows 11 Install.WIM to Install.ESD (or Backwards)
Use the DISM command for easy conversion
6 min. read
Updated on
Read our disclosure page to find out how can you help Windows Report sustain the editorial team Read more
Key notes
- Both ESD and WIM formats offer unique benefits, but the better compression of ESD makes it the preferred choice.
- You can convert install.wim to install.esd using the built-in methods or with a third-party tool.
- Keep reading to find out the exact steps!
The Windows installation files, when downloaded from different websites, may contain either the install.wim or install.esd image file in the Sources folder. But if you want, there’s always the option to convert Windows 11 install.wim to install.esd or vice-versa.
It’s a relatively simple process but requires high system resources. Your PC may crash in the absence of available resources (RAM, DISK, or CPU), or the active processes and programs may not run properly. But since it doesn’t take long, you won’t face a lot of problems.
Which is better, ESD or WIM?
The ESD (Electronic Software Download) file format uses a newer conversion algorithm, and the file is relatively smaller in size than the WIM (Windows Image) counterpart. On the other hand, the WIM image file is serviceable, meaning you can update, add, or remove components.
Users prefer ESD files when creating a bootable drive formatted using the FAT32 filing system since the drive size has a 4 GB limit. And the WIM took up more storage space.
In all, it comes down to the user-specific requirements when choosing between the ESD and WIM operating system files.
How to convert ESD to WIM or WIM to ESD?
 Tip
Tip
1. Via Command Prompt
1.1 Mount the ISO file
- Go to Microsoft’s official website, select the OS edition, choose the product language, and then download the Windows 11 ISO.
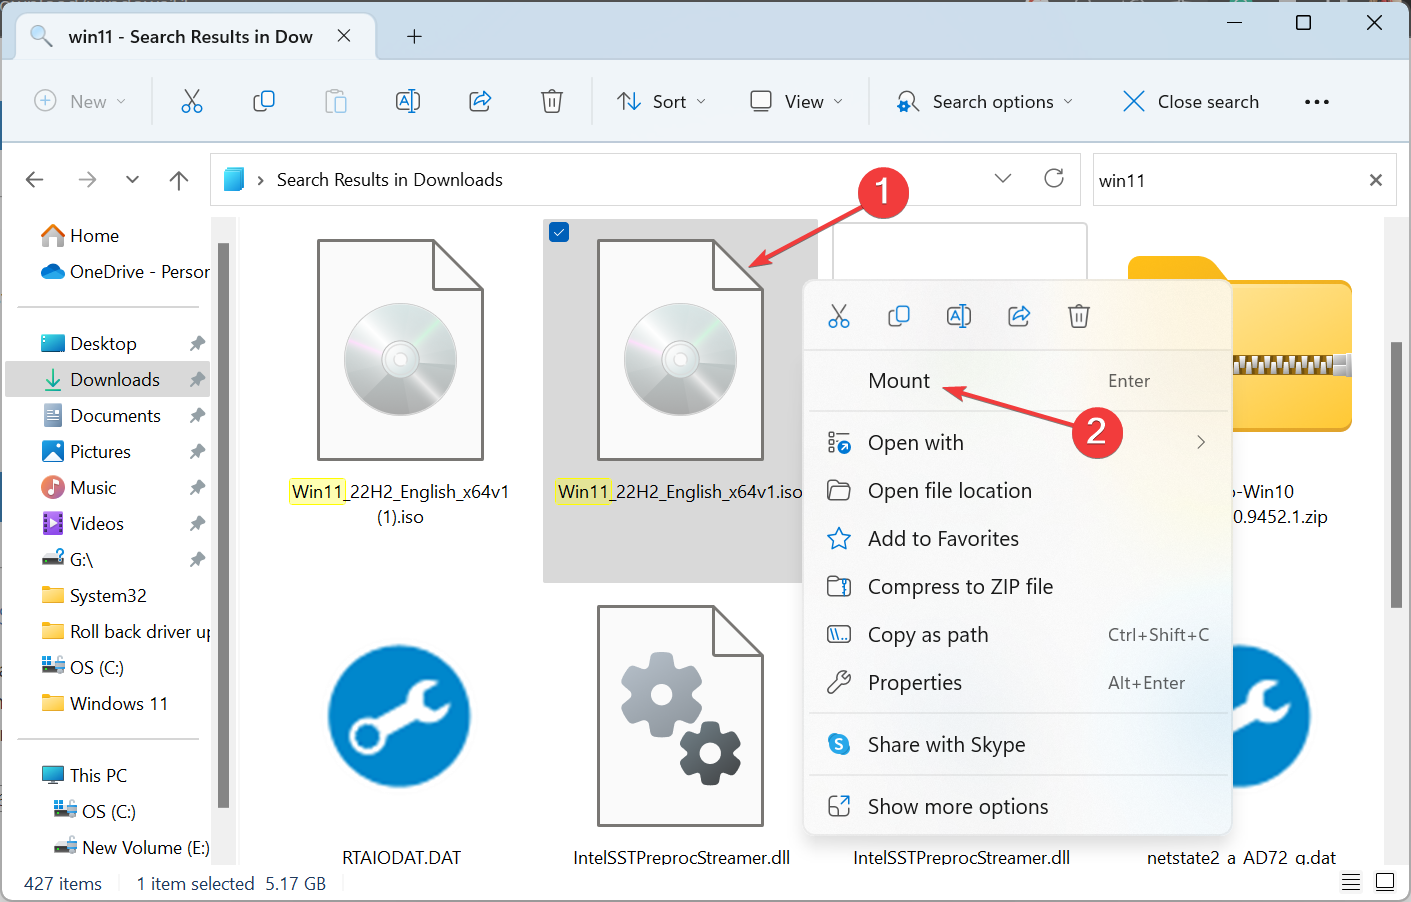
- Right-click on the downloaded ISO file and select Mount.
- Wait for the confirmation prompt to appear (takes a few seconds), and then click Open.
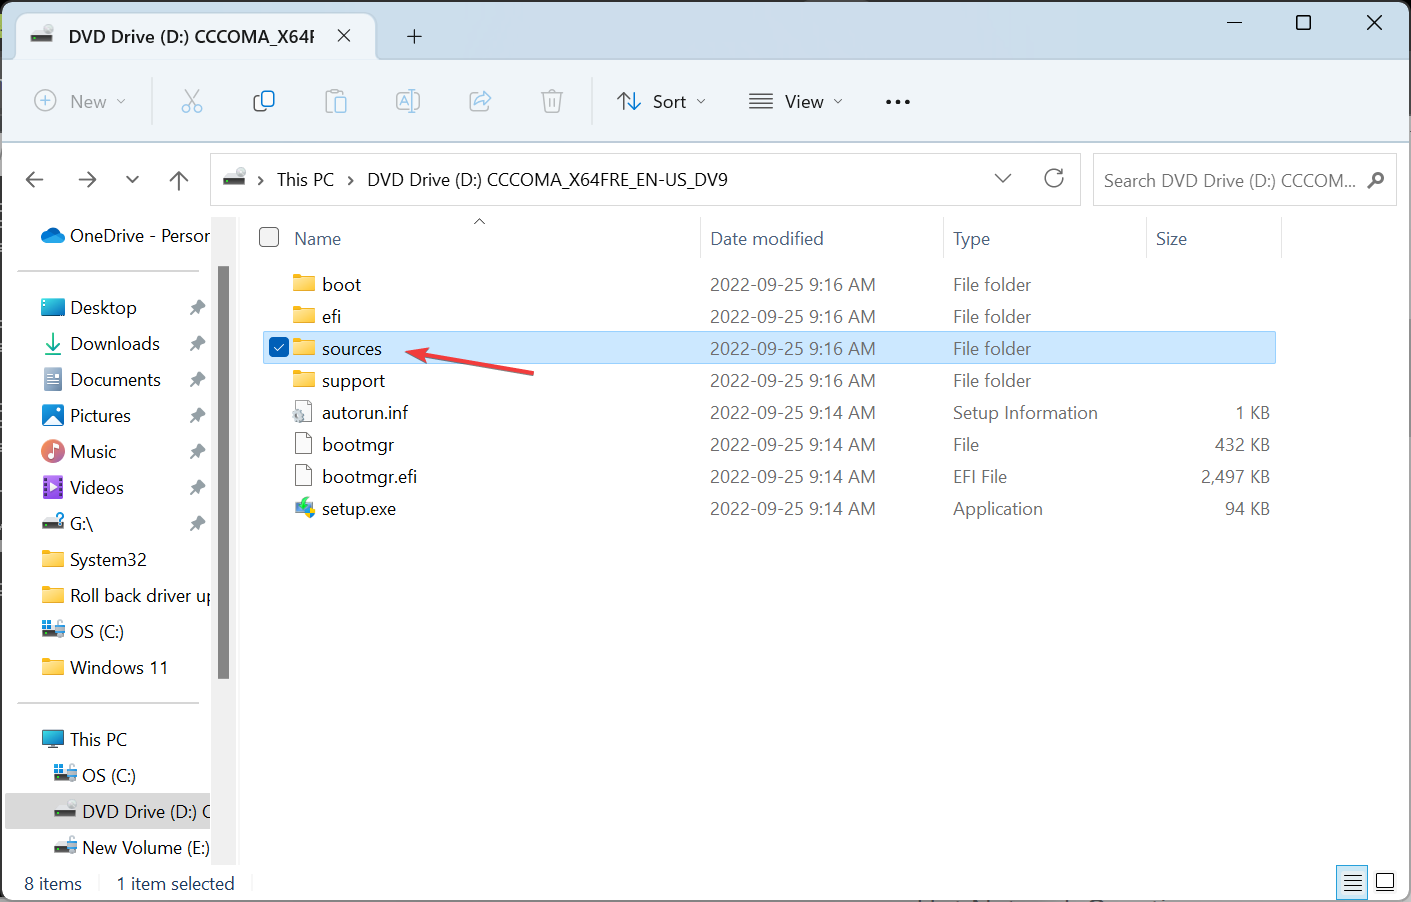
- Double-click the sources folder.
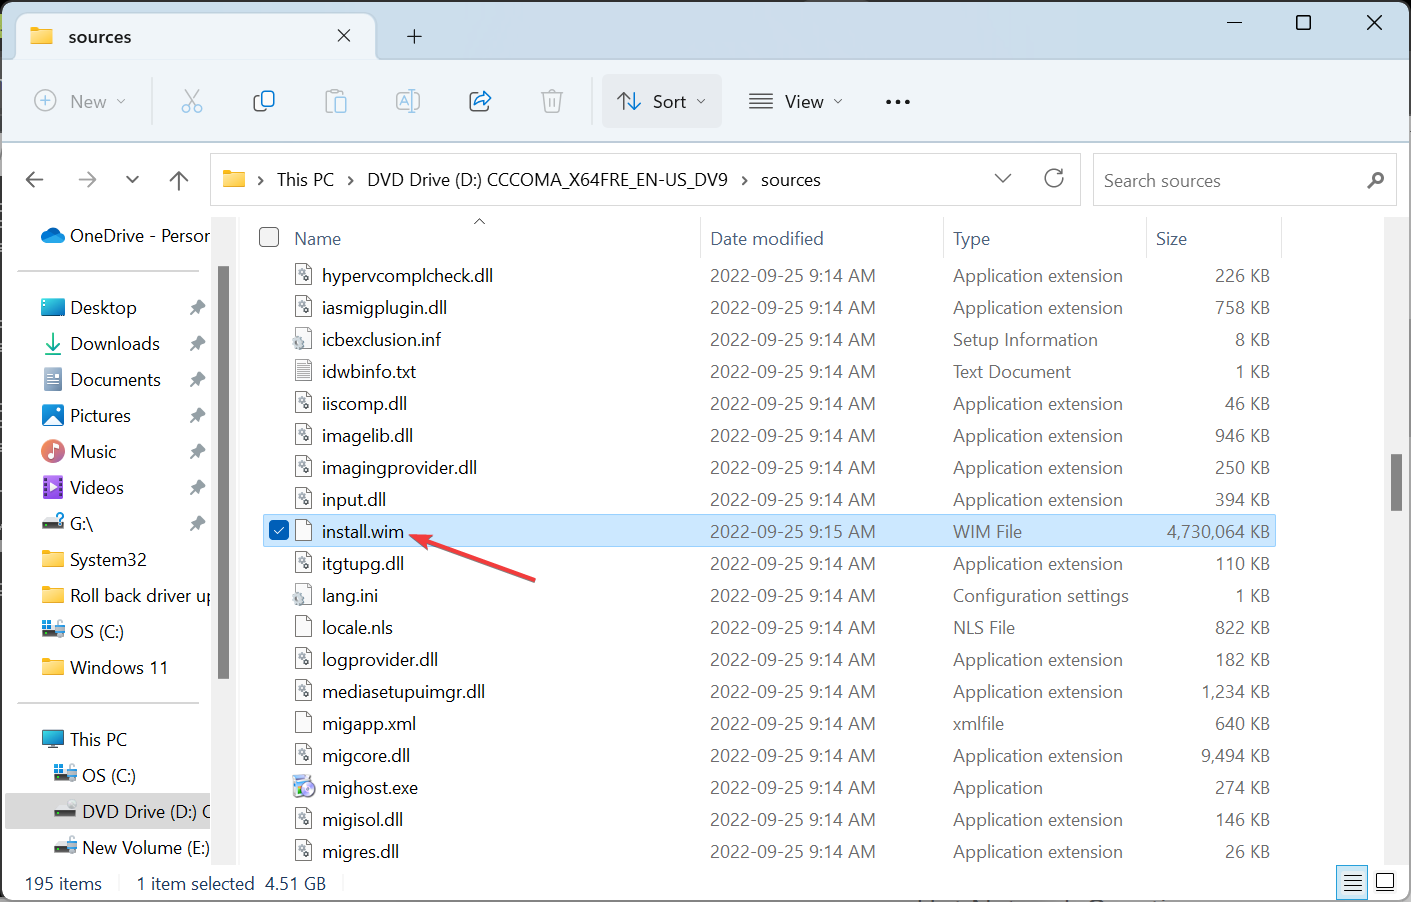
- Locate the install.wim file, then copy and move it to the C: drive (requires administrative privileges). You can choose any other location if desired.
1.2 Convert .wim to .esd with cmd
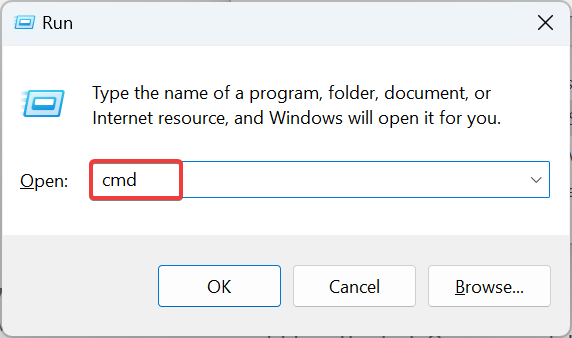
- Press Windows + R to open Run, type cmd, and hit Ctrl + Shift + Enter.
- Click Yes in the UAC prompt.
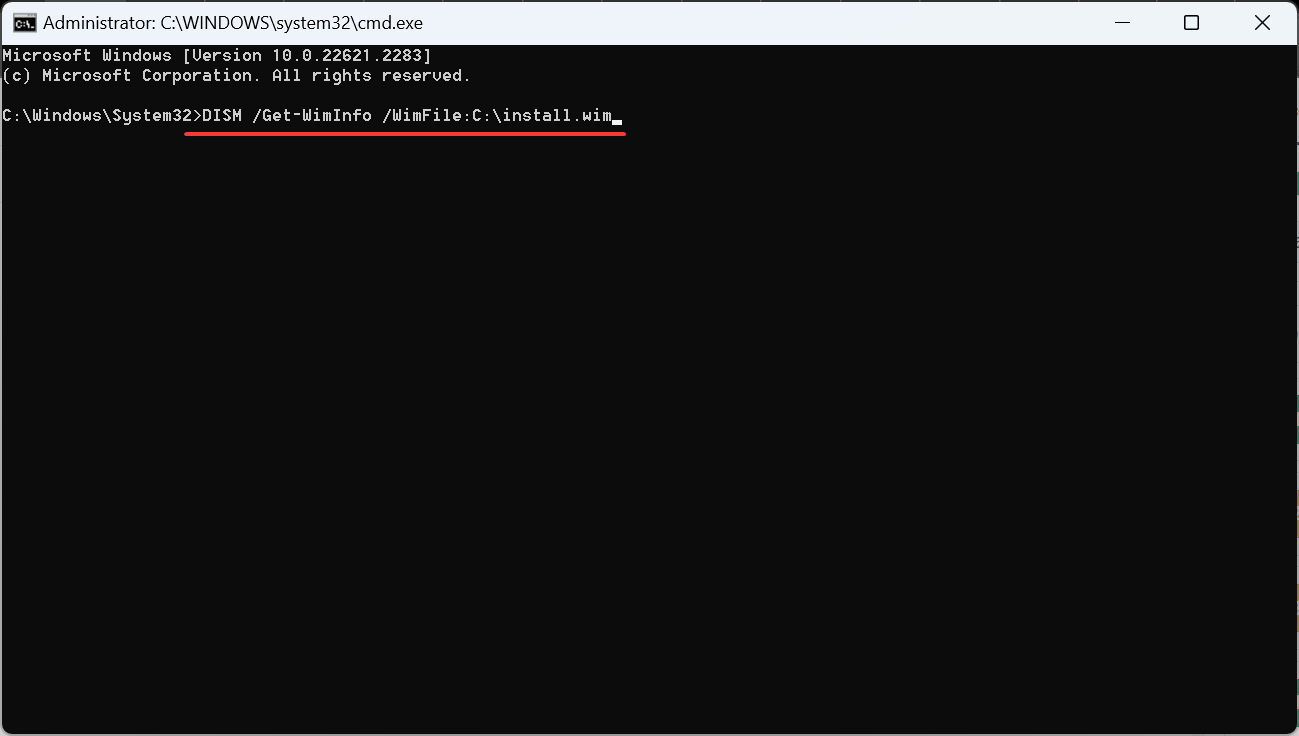
- Paste the following command and hit Enter (replace the file path at the end in case you didn’t choose the C: drive earlier):
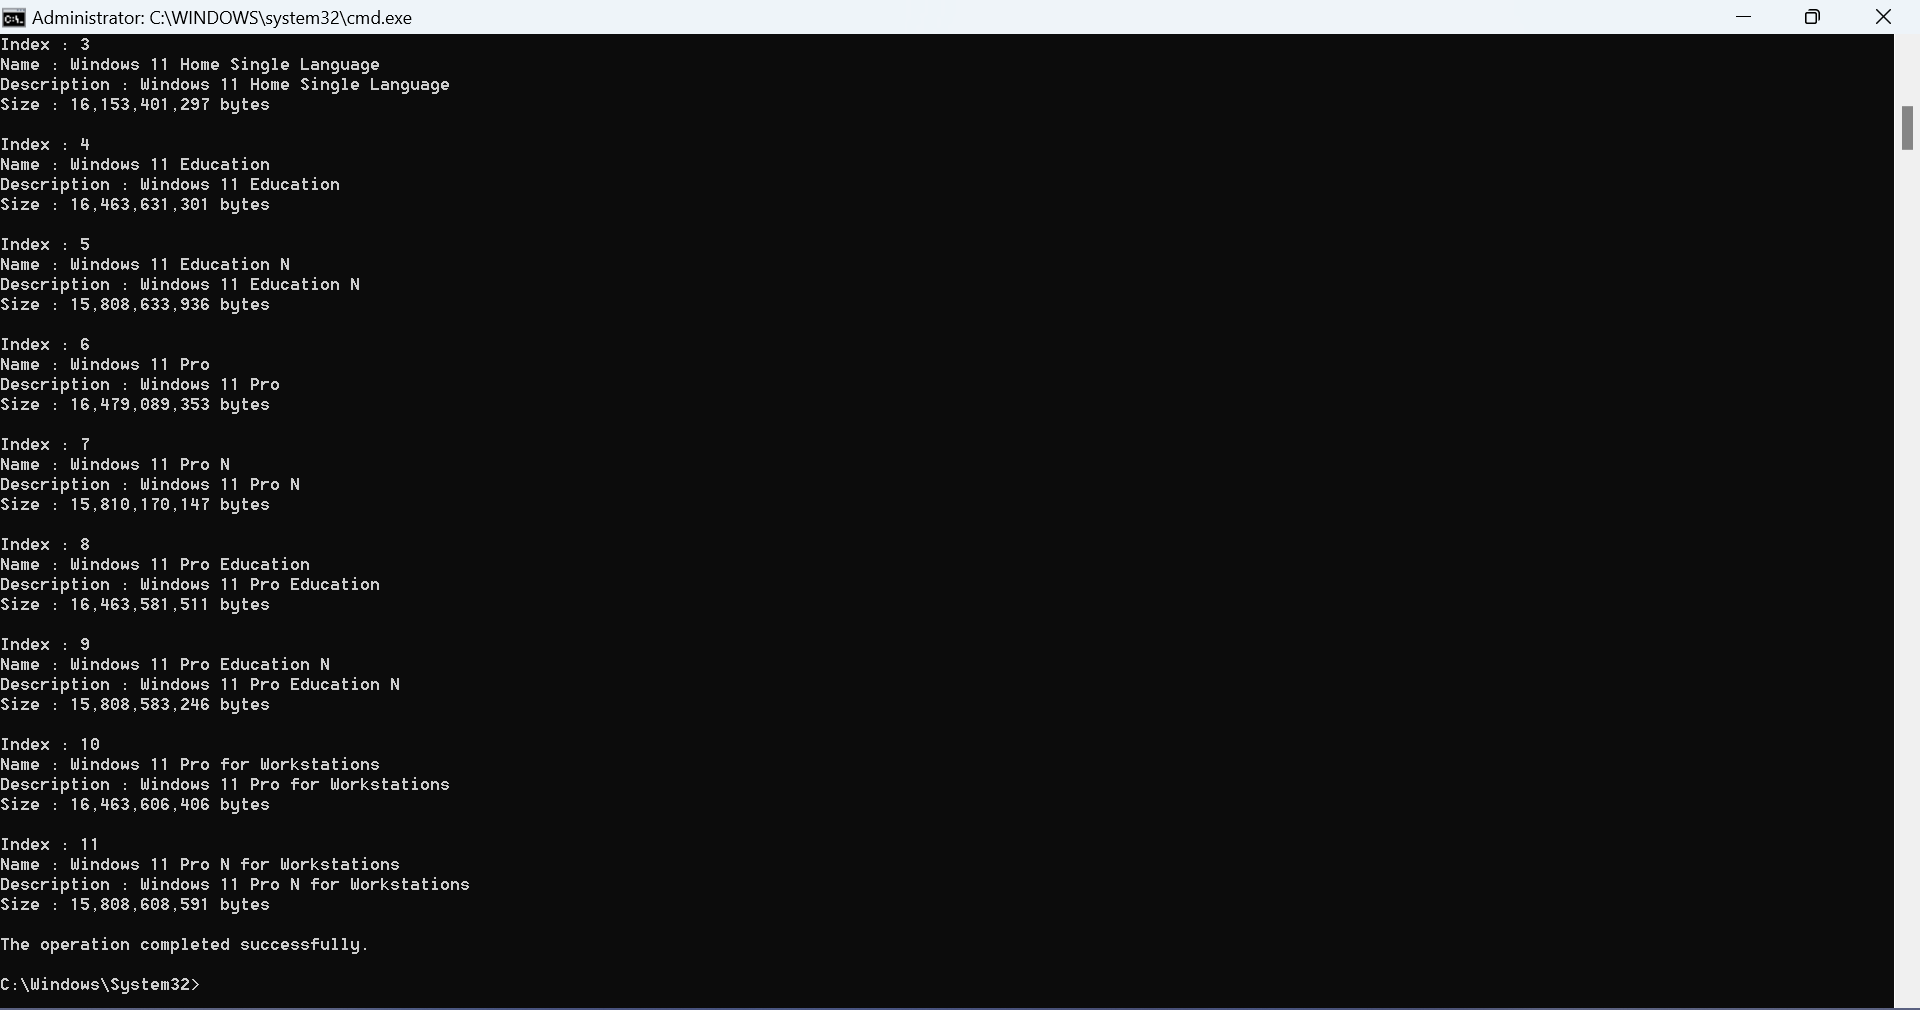
DISM /Get-WimInfo /WimFile:C:\install.wim - The Command Prompt now lists the various Windows editions available for installation, each assigned an Index number.
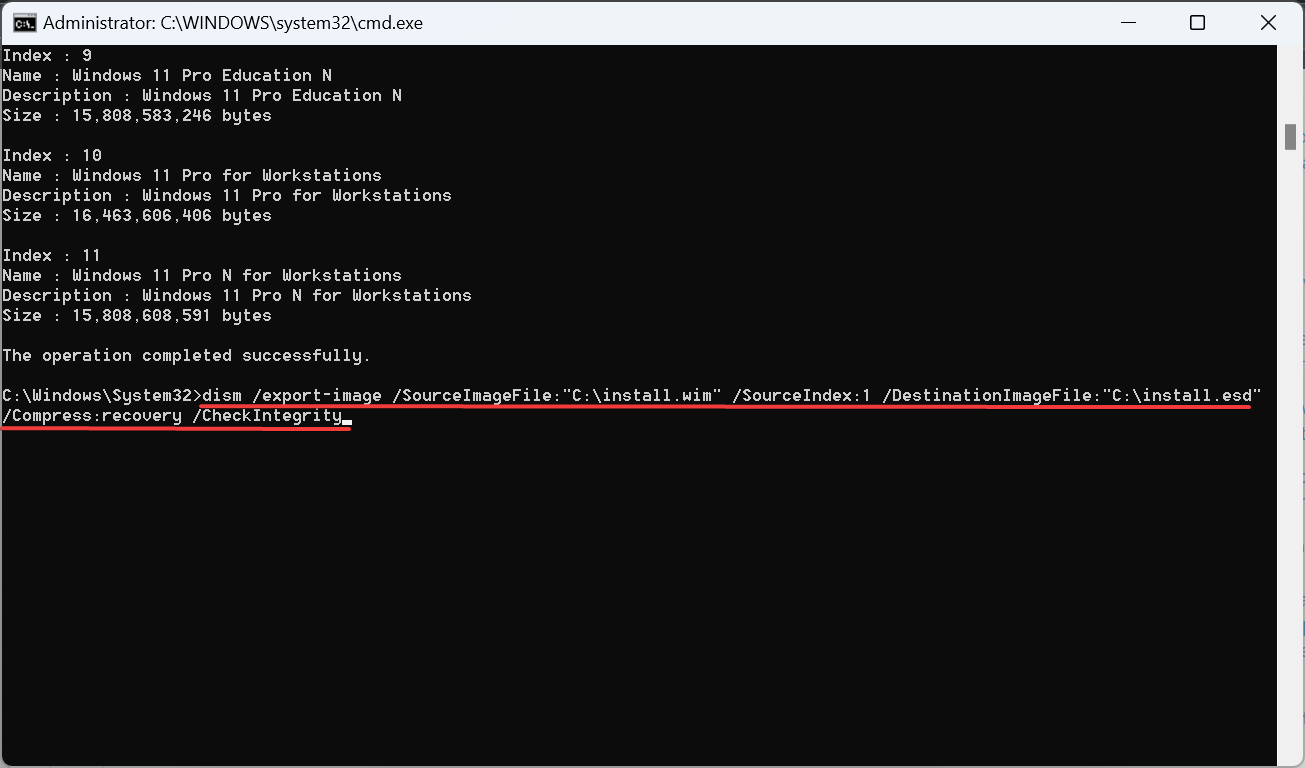
- Identify the one you want to install and execute the following command while replacing X with the Index number:
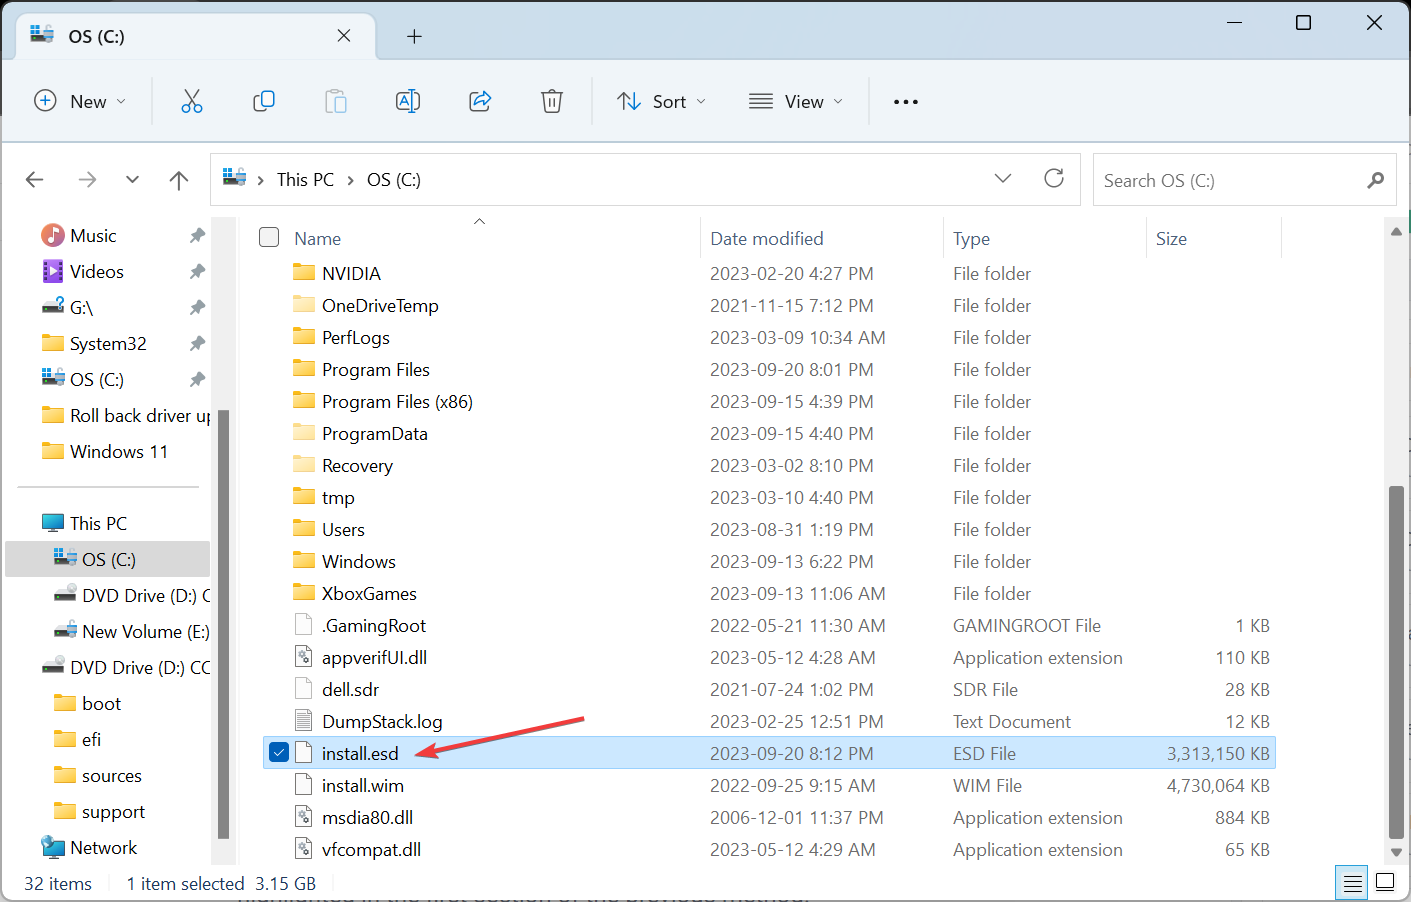
DISM /export-image /SourceImageFile:"C:\install.wim" /SourceIndex:X /DestinationImageFile:"C:\install.esd" /Compress:recovery /CheckIntegrity - The process will take some time, and the PC’s performance might be affected. Once completed, you will find the install.esd file in the same location, i.e., the C: drive.
The DISM command is the easiest method to convert install.wim to install.esd or vice versa in Windows 11. And if you get the DISM Source files could not be found error, check for any duplicate files or reinstate the .wim file in the concerned folder.
2. Using Windows PowerShell
- Move the .wim file to the desired location, preferably the C: drive, as highlighted in the first section of the previous method.
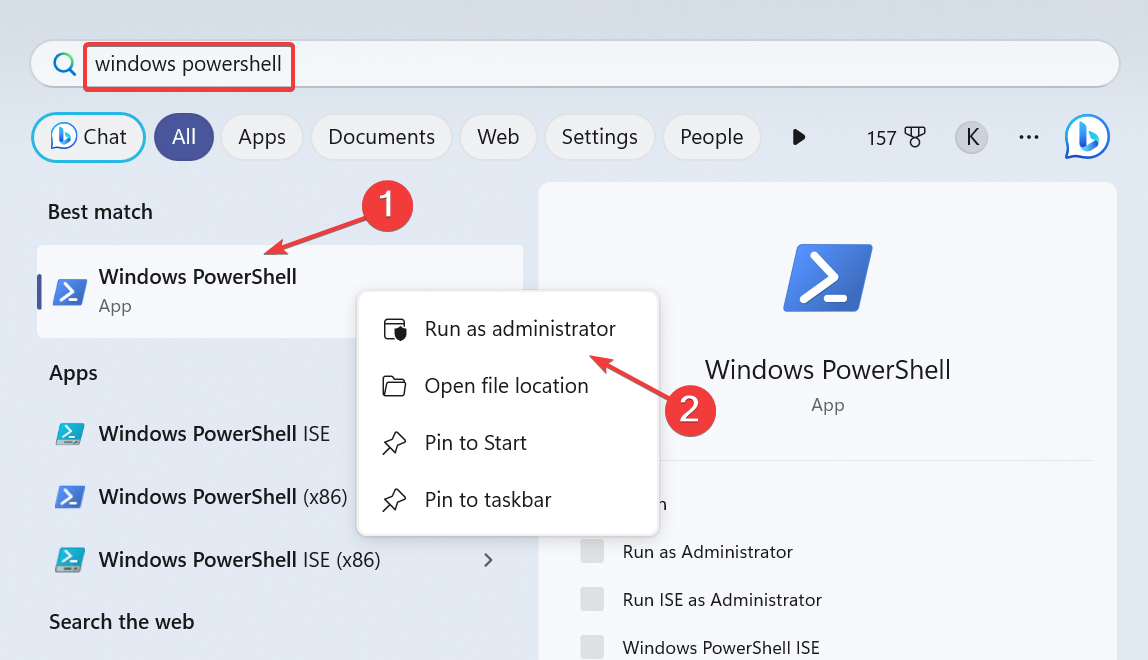
- Press Windows + S to open Search, type Windows PowerShell in the text field, right-click on the relevant result, and select Run as administrator.
- Click Yes in the UAC confirmation prompt.
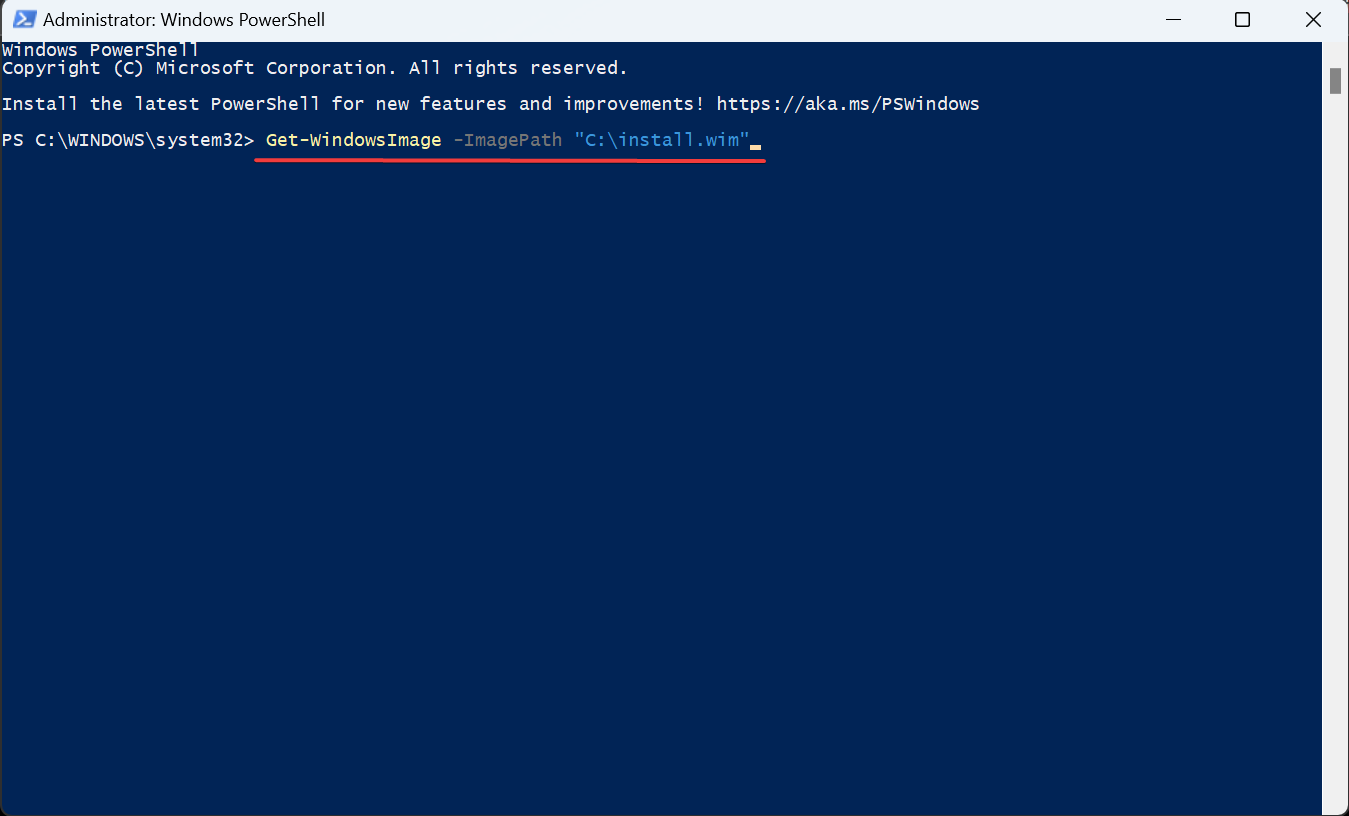
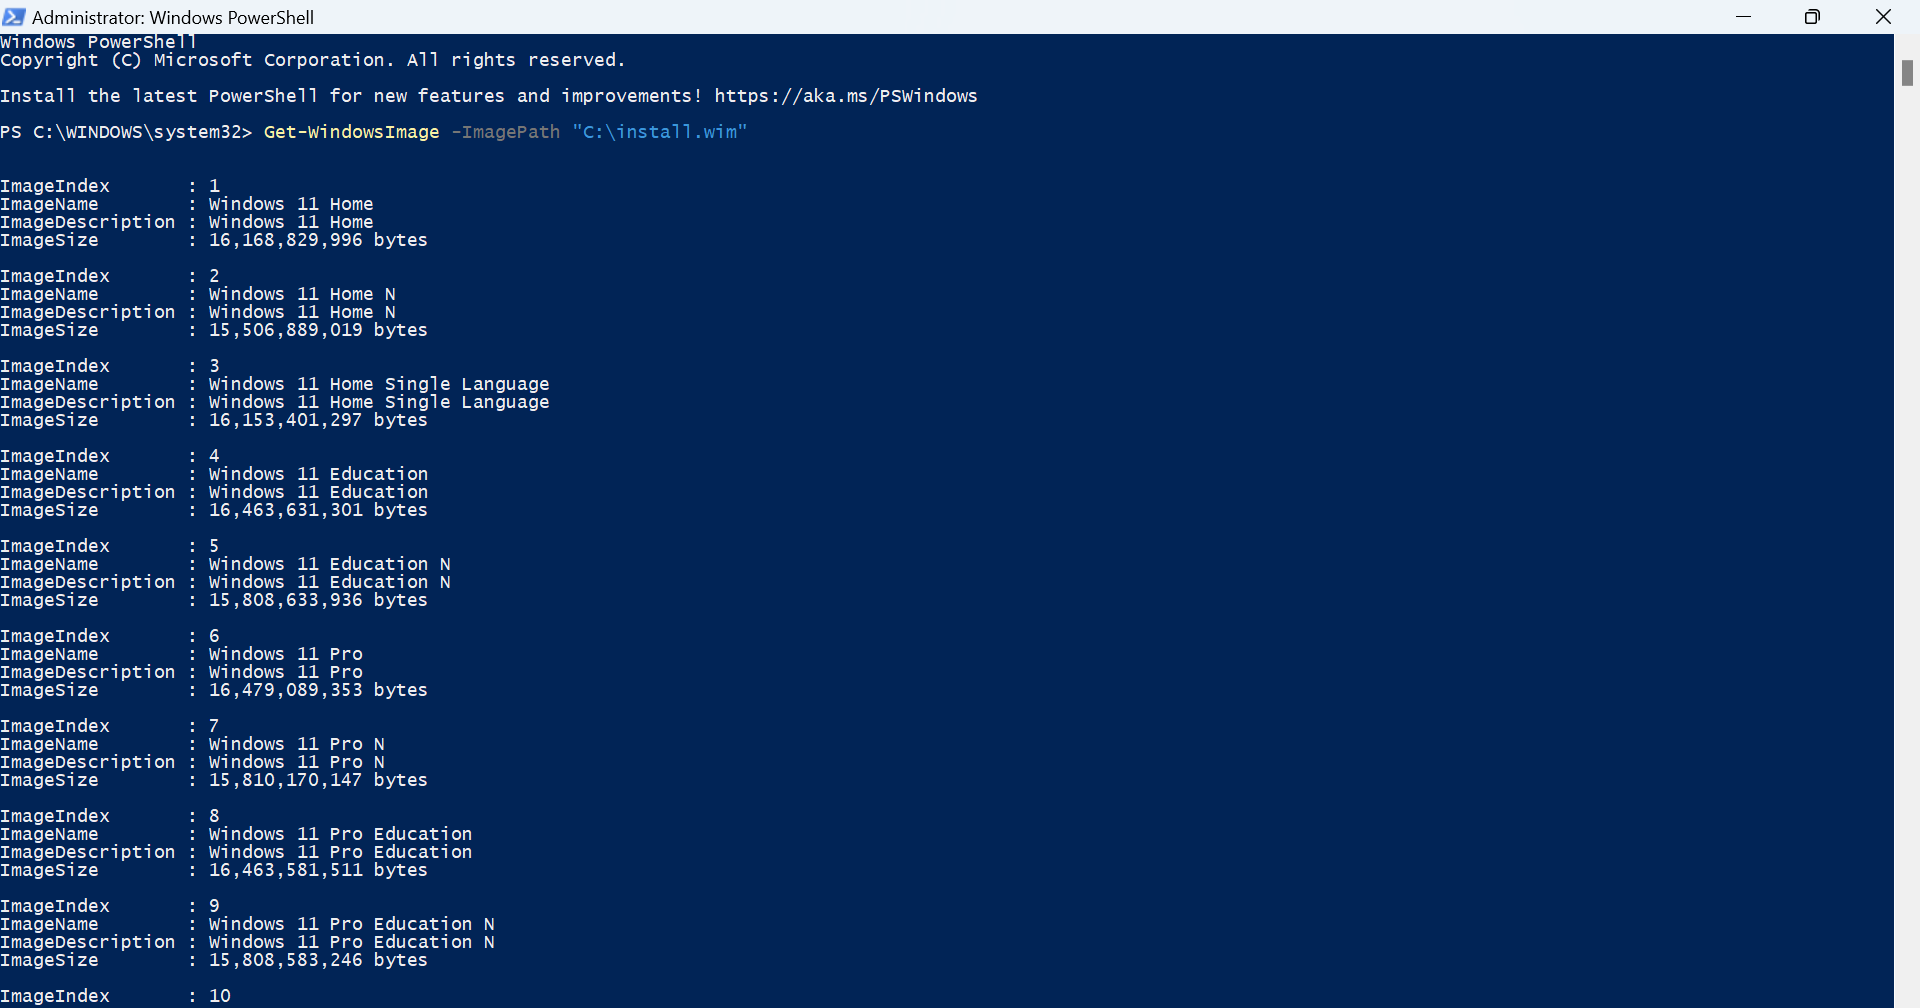
- Use the following command to highlight the various available Windows editions in the .wim file:
Get-WindowsImage -ImagePath "C:\install.wim" - Identify which edition you want to use from the list.
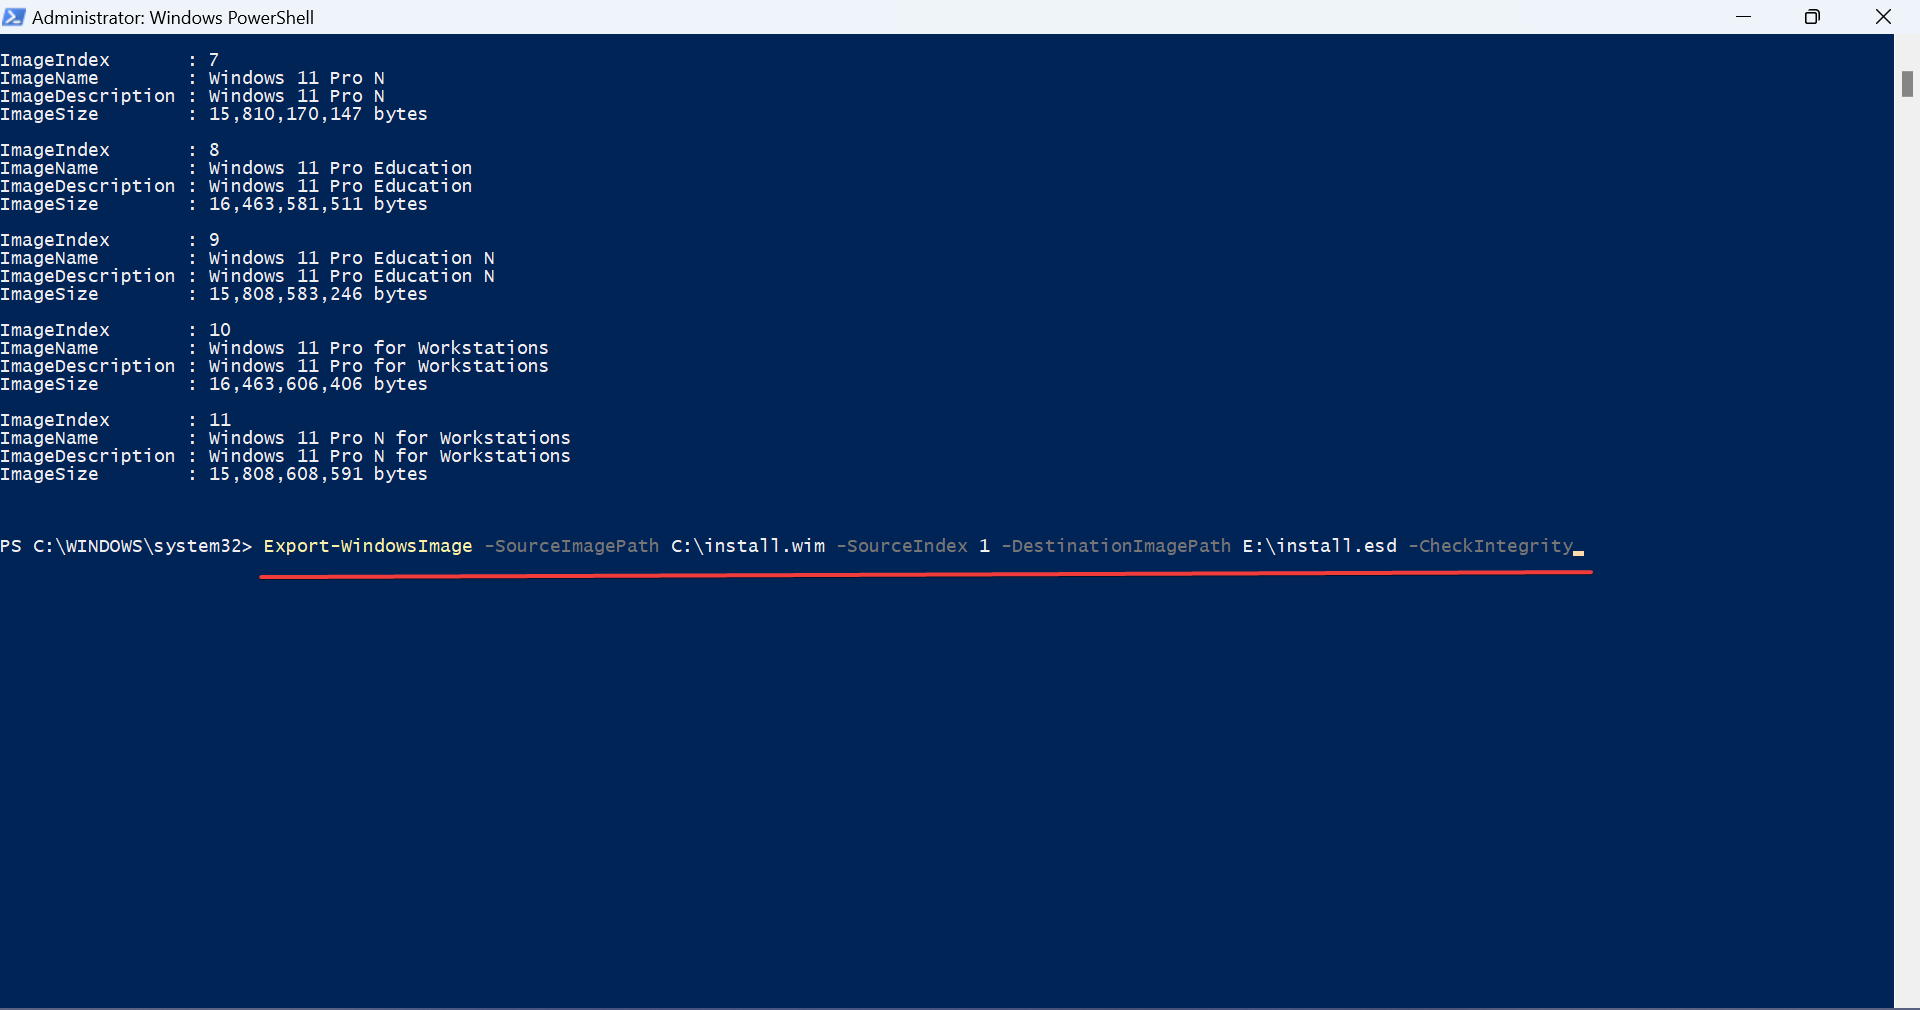
- Run this command to convert install.esd to install.wim in PowerShell for Index 1 and save the exported file to the E drive:
Export-WindowsImage -SourceImagePath C:\install.wim -SourceIndex 1 -DestinationImagePath E:\install.esd -CheckIntegrity
You must have realized how easy it is to convert Windows 11 install.wim to install.esd with the built-in options.
Besides, for converting install.esd to install.wim, the PowerShell command becomes (given you are using the same path and Index: Export-WindowsImage -SourceImagePath C:\install.esd -SourceIndex 10 -DestinationImagePath E:\install.wim -CheckIntegrity
3. With a third-party tool
- Go to the NTLite’s official website, and download the required setup depending on the Windows architecture.
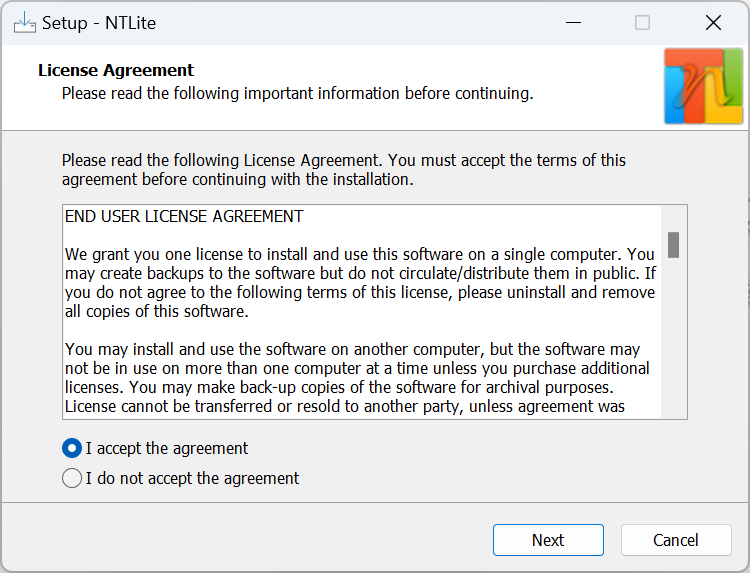
- Run the setup and follow the on-screen instructions to complete the installation process.
- Launch the NTLite tool, and when asked for a license, choose Free and click OK. The free version of NTLite works fine for converting install.wim to install.esd.
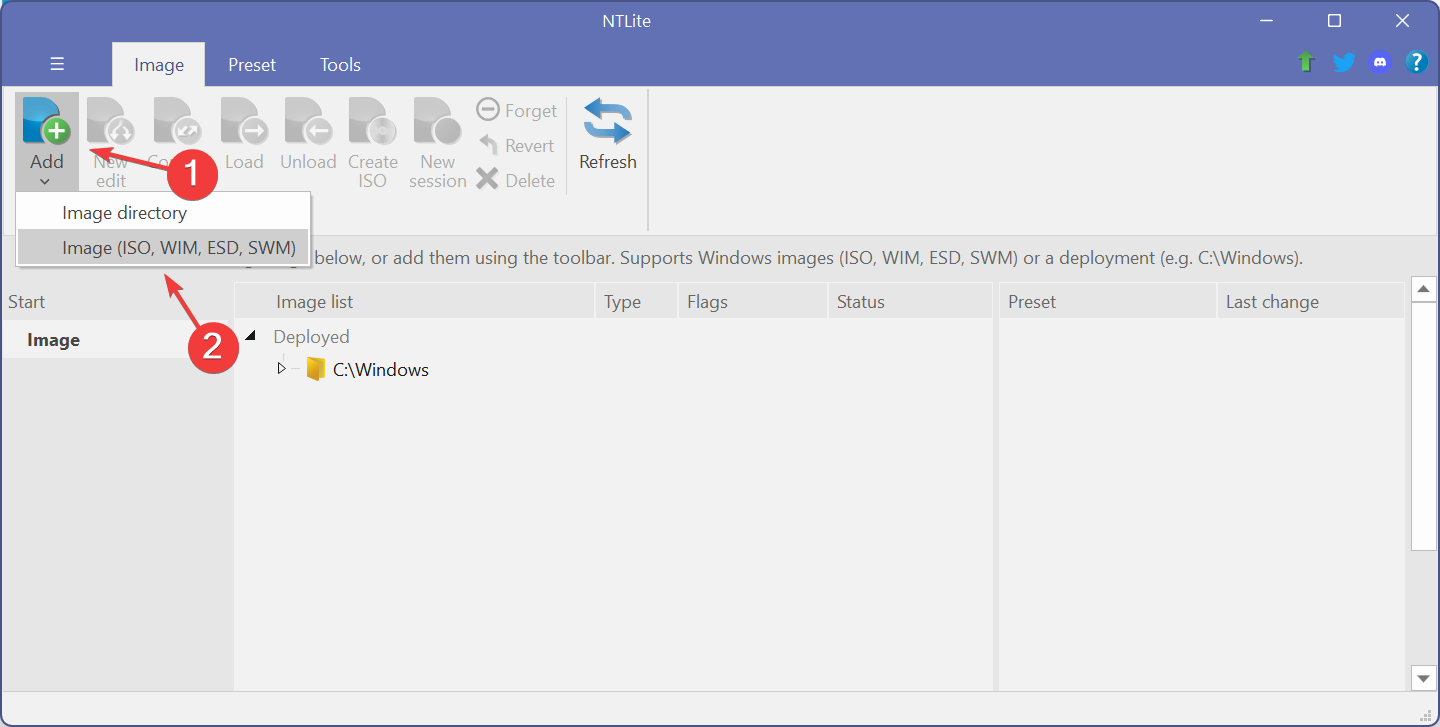
- Click the Add menu near the top-left and choose Image (ISO, WIM, ESD, SWM).
- Head to the .wim file’s storage location, select it and click Open.
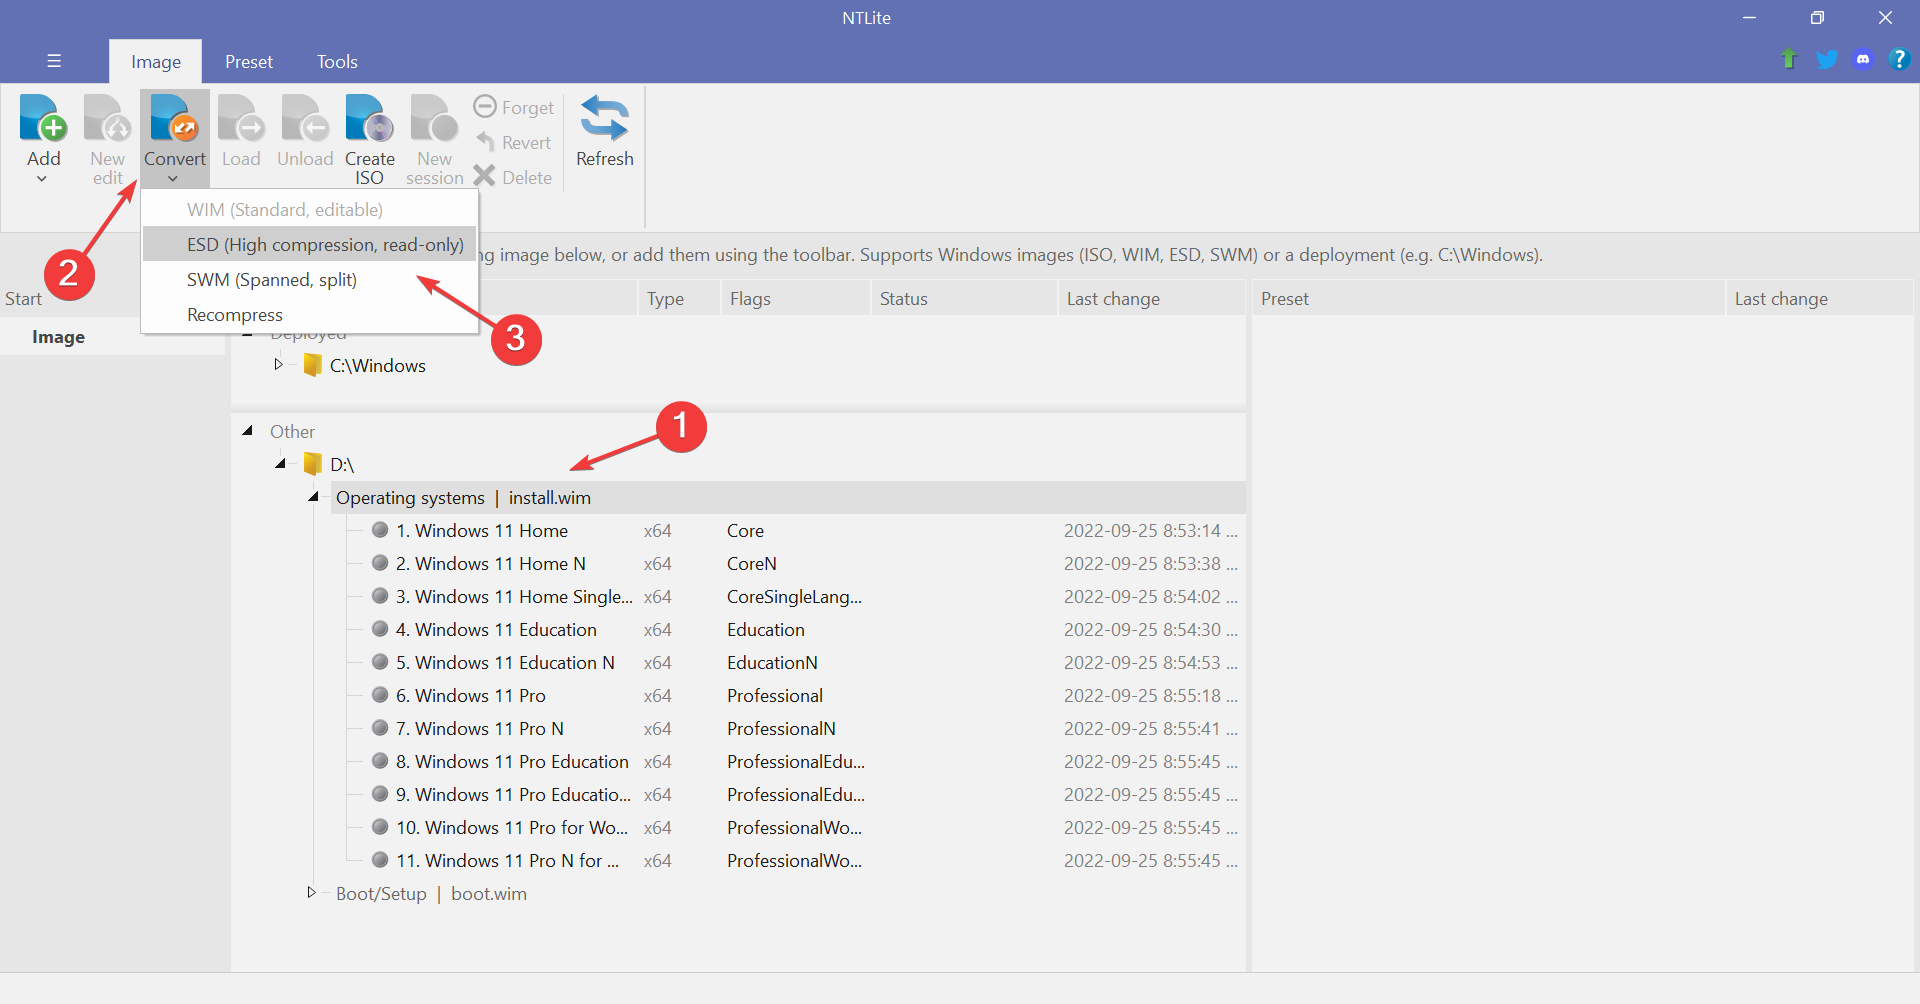
- Select the WIM file, click on Convert, and then choose ESD (High compression, read-only) from the flyout menu.
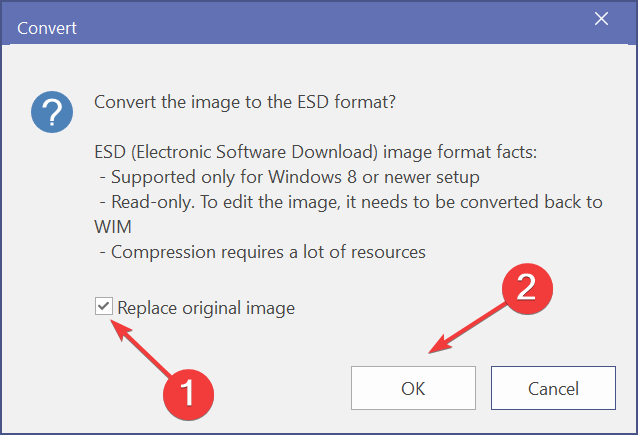
- Tick the checkbox for Replace original image if you don’t require the .wim file anymore, and click OK to confirm.
- Wait for the conversion to complete.
It’s that simple! To convert install.esd to install.wim using NTLite, just load the .esd file instead and use the convert option to export to .wim.
And once done, you can replace the install.wim file with install.esd in the USB flash drive before installing Windows.
Requirements for the conversion process
- Windows 11 ISO file
- A working PC with at least 8 GB of RAM, preferably 16 GB, if you don’t want the performance to be affected.
- Administrative permissions (or an administrator account).
- A third-party tool (if not using the built-in methods).
Comparison between install.wim and install.esd
| Parameter | install.wim | install.esd |
| Size | Larger (uses LZX compression algorithm) | Smaller (uses LZMS compression algorithm) |
| File type | Modifiable | Read-only |
| Support | All iterations | Only for Windows 8 and newer iterations |
If you were to choose between install.esd and install.wim, identify whether any changes are to be made to the installation. Say, injecting drivers, configuring Windows deployment options, or adding/removing the security updates. If not, install.esd should be the primary choice.
Now that you have a fair understanding of how to convert Windows 11 install.wim to install.esd and the differences between the two, installing the OS as an administrator won’t be a challenge anymore!
And in case you are still facing issues, a third-party utility is all you need! So,get a reliable tool to open .wim files.
For any queries or to share interesting tips and tricks with us and the community, drop a comment below.

