How to Enable/Disable Dev Drive Protection on Windows 11
The easiest way is using the Windows Security app
Dev Drive Protection is a feature under Windows Security used to protect the Dev Drive on your computer.
In this guide, we will discuss how to enable or disable Dev Drive Protection on Windows 11 using Windows Security and Registry Editor.
How can I enable Dev Drive Protection on Windows 11?
1. Using the Windows Security app
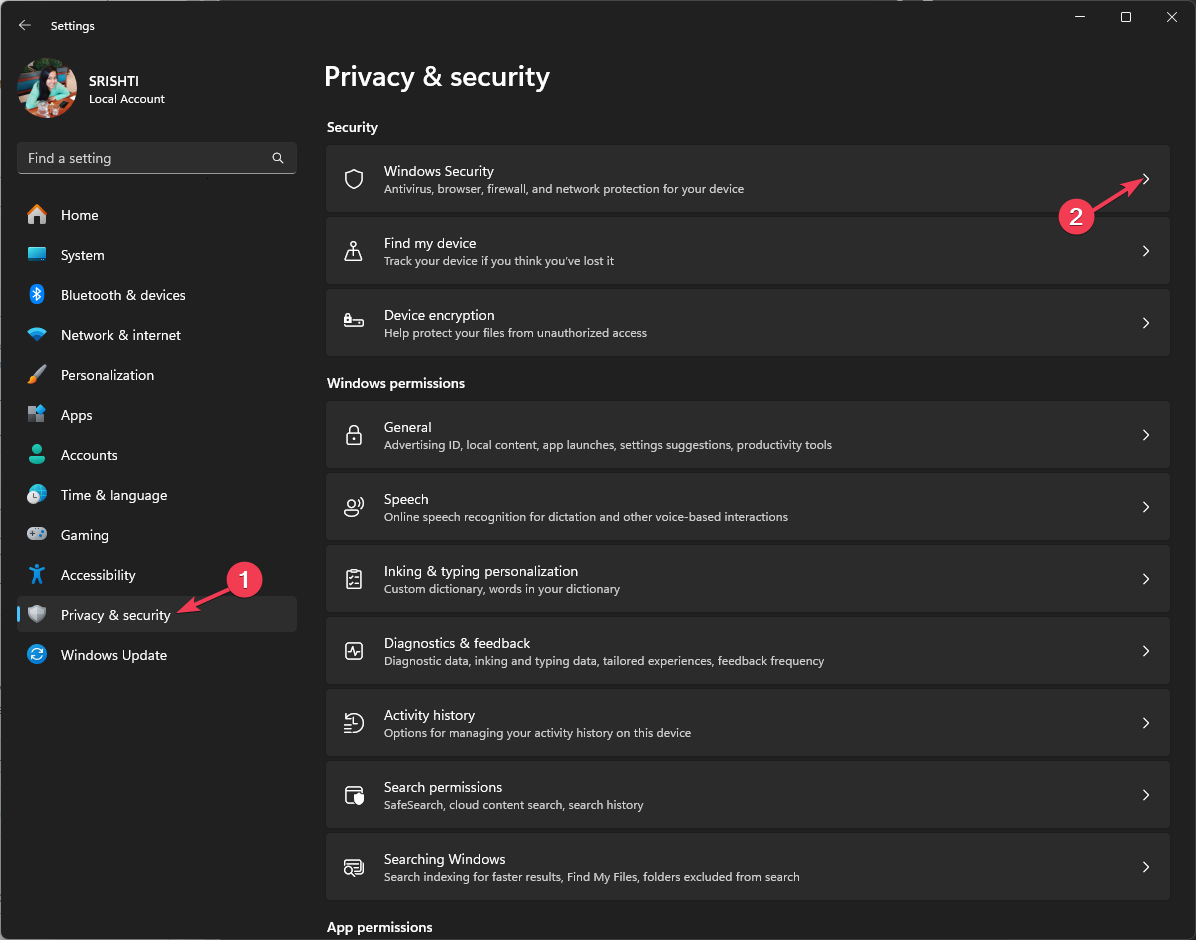
- Press Windows + I to open the Windows Settings app.
- Go to Privacy & security.
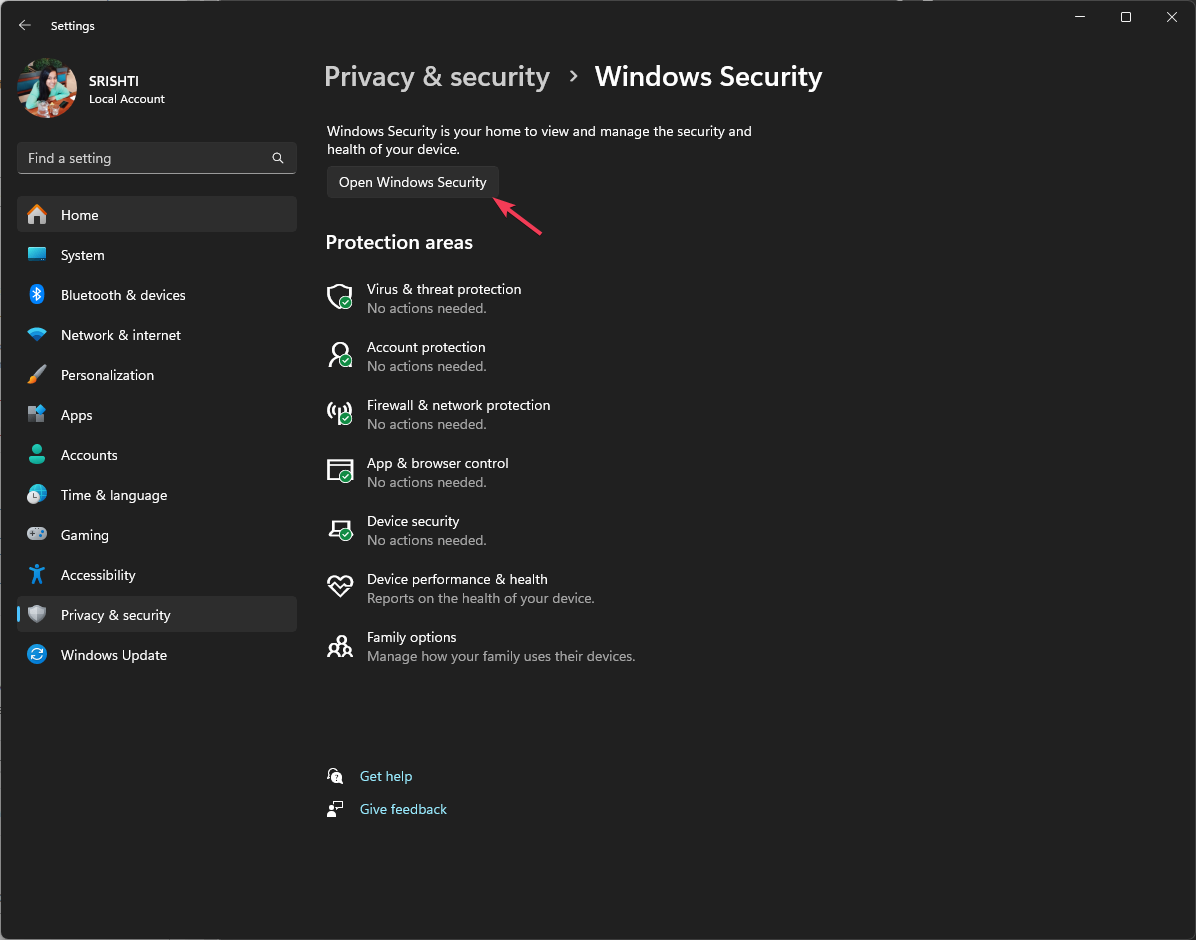
- Next, click Windows Security.
- Click the Open Windows Security button.
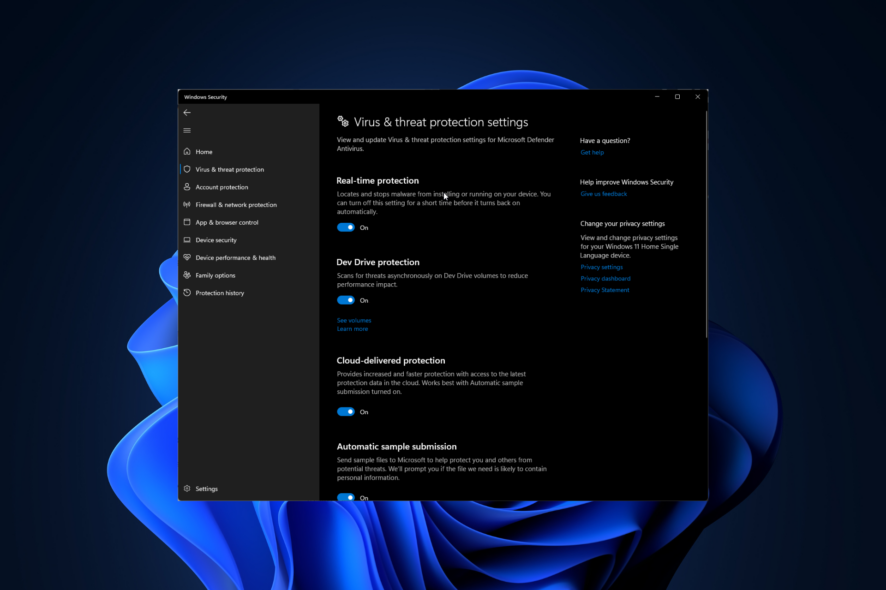
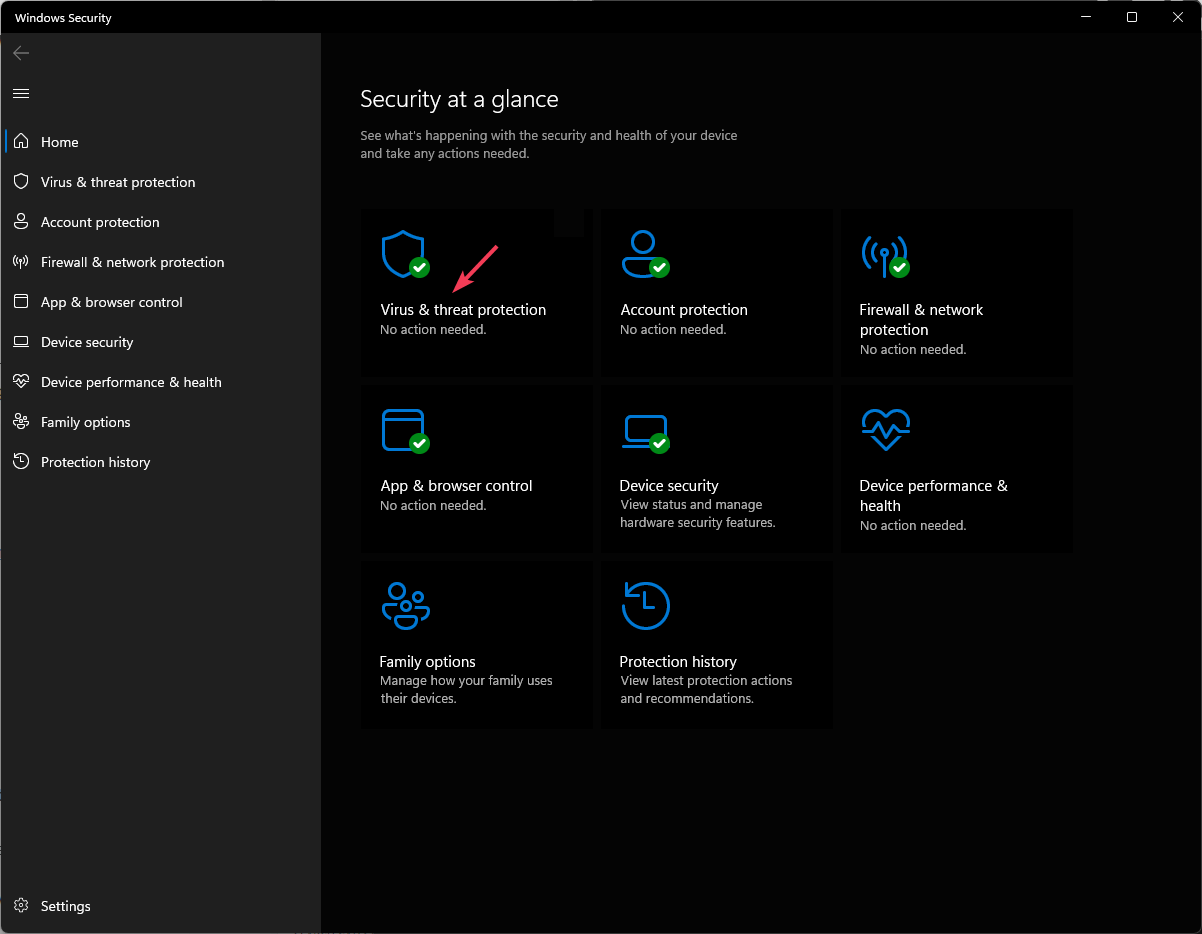
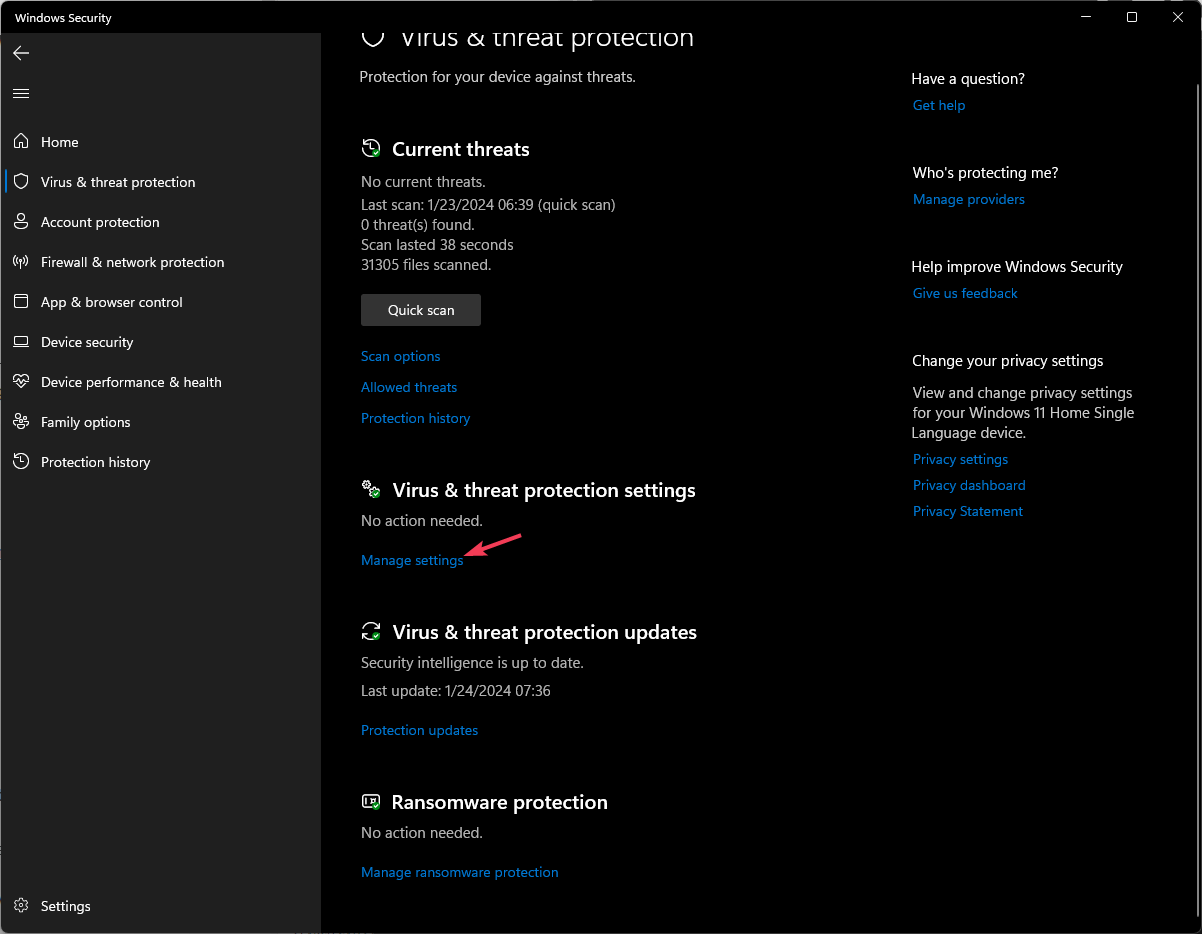
- Select Virus & threat protection.
- Click Manage settings.
- Locate Dev Drive Protection and click the toggle switch to turn it on.
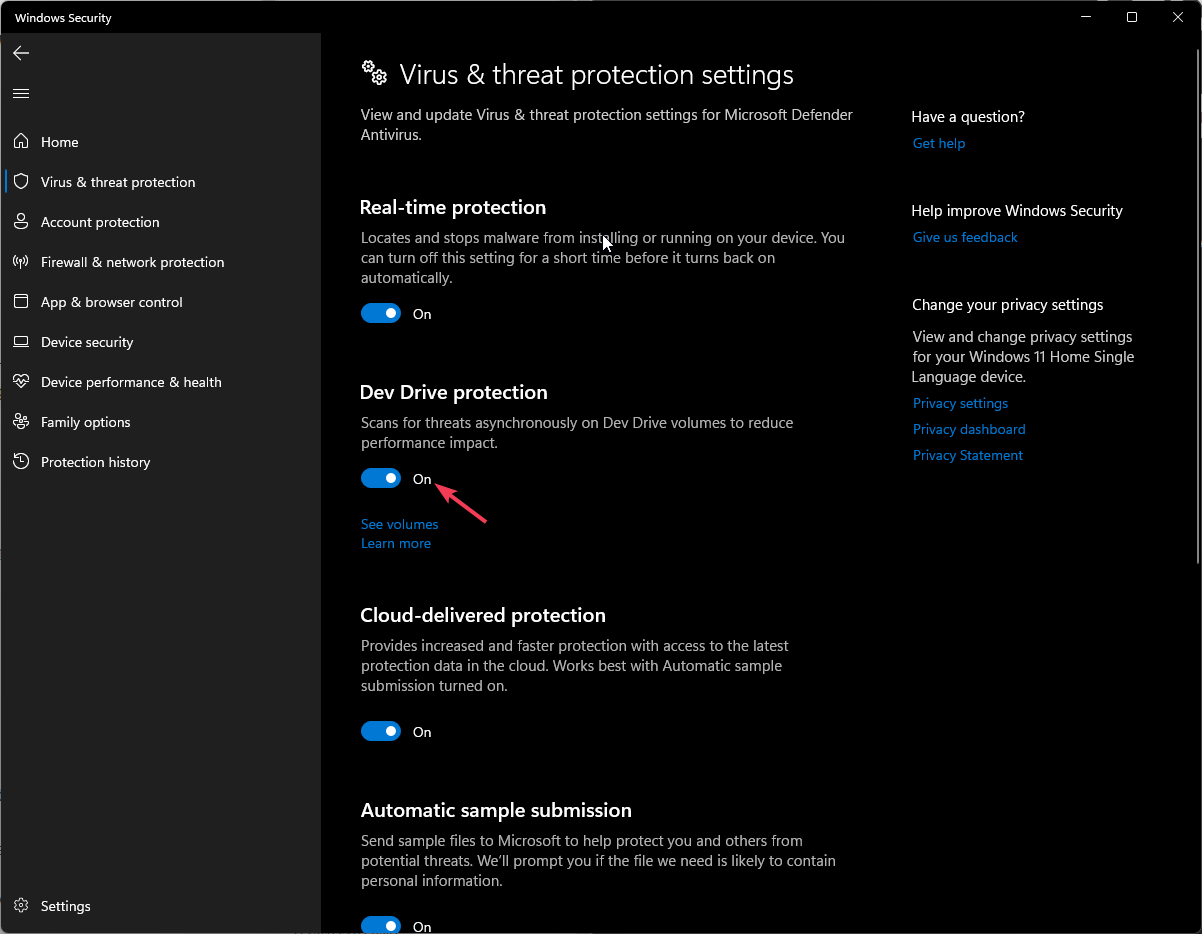
To turn off the feature from Windows Security, toggle off the switch anytime you like. In case you are wondering how you can set up a dev drive on Windows 11, we have a detailed guide to step-by-step process.
2. Using the Registry Editor
- Press Windows + R to open the Run dialog box.
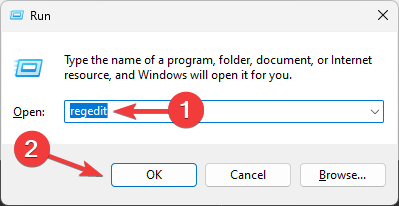
- Type regedit and click OK to open the Registry Editor.
- Before making any changes, you need to backup the registry entries. Go to File, then click Export. Save the .reg file in an accessible location.
- Go to this path:
Computer\HKEY_LOCAL_MACHINE\SOFTWARE\Microsoft\Windows Defender\Real-Time Protection - If you don’t find the Real-Time Protection key, right-click Windows Defender and select New, then Key. Name it Real-Time Protection
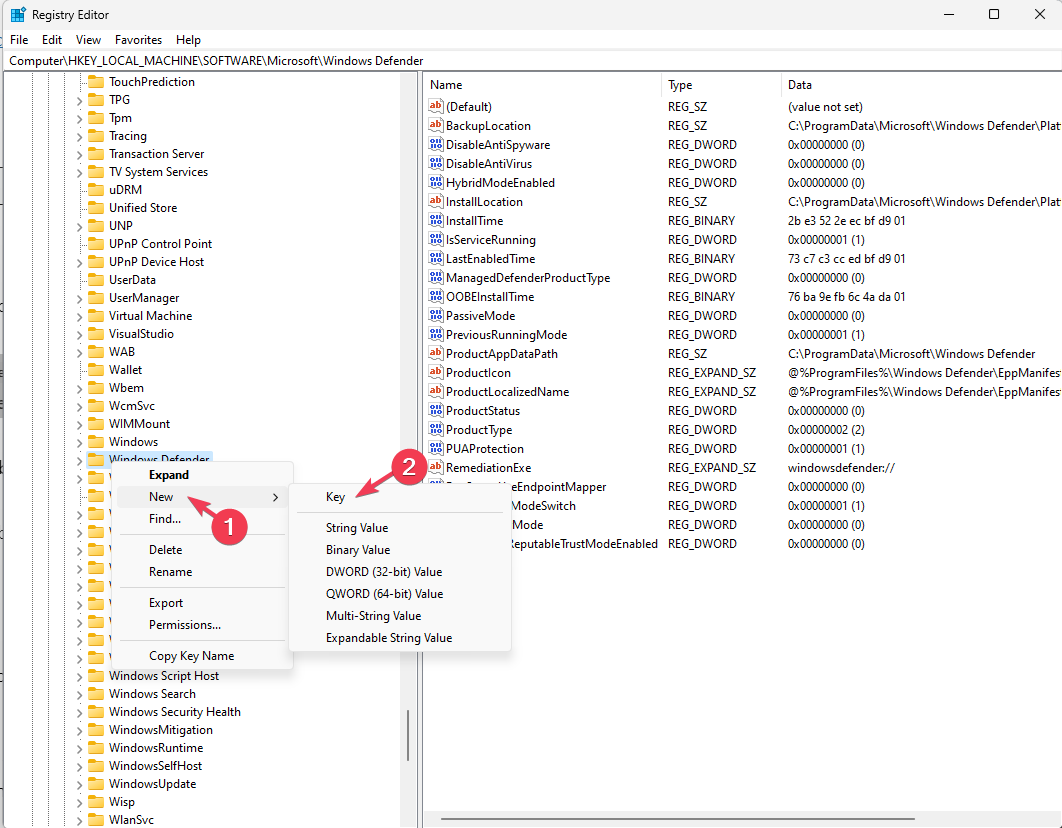 .
. - Right-click the Real-Time Protection key, select New, then DWORD(32-bit) Value, and name it DisableAsyncScanOnOpen.
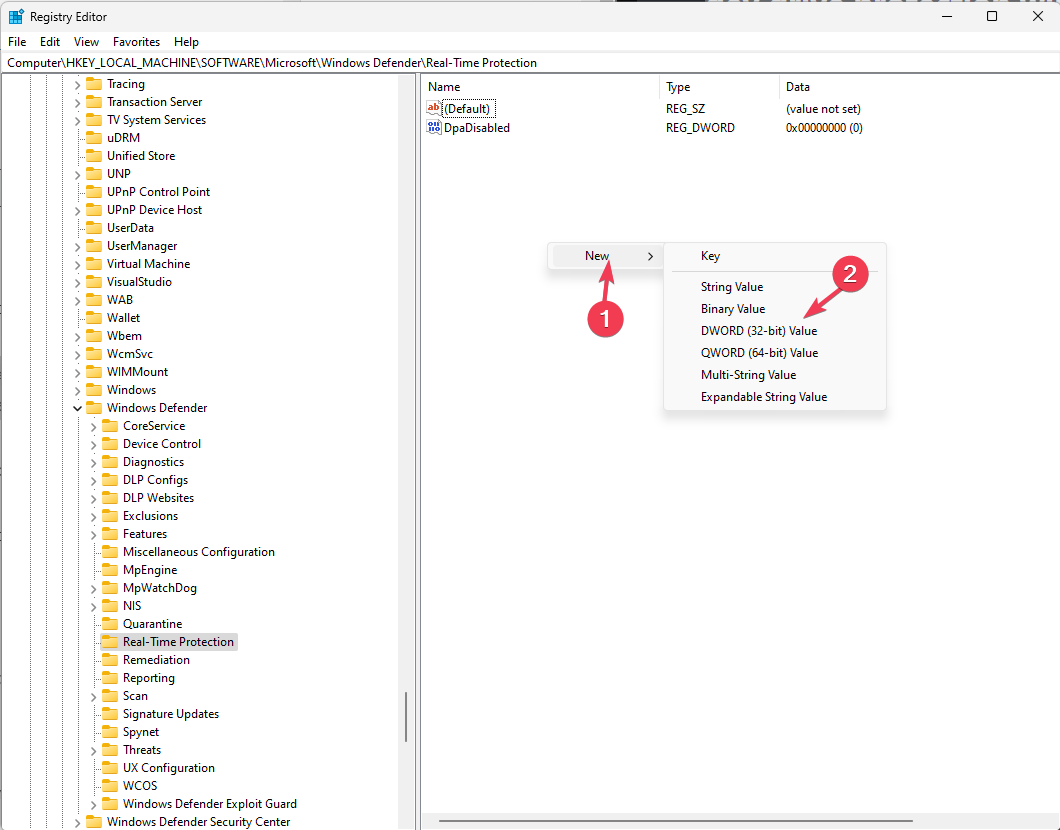
- Double-click the newly created DWORD, set the Value data to 0 to enable Dev Drive Protection, then click OK to save the changes.
- Restart your computer to save the changes.
If you ever want to disable the feature, go to the DWORD, double-click it, and this time change the Value data to 1, then click OK and reboot your PC.
In case you can’t create a Key or DWORD in the Real-time protection folder and encounter an error in writing the value’s new contents, it could be a permissions issue; read this guide to fix it.
In conclusion, you can use either Windows Security or Registry Editor to turn on or off the Dev Drive Protection feature. However, WR experts recommend choosing the former one as it is safer than the latter.
Before you leave, find out all about Windows SDK and start developing apps today! If you are not able to launch Windows Security on your Windows 11, you can try repairing the app; read this guide to learn more.
Which method would you prefer to enable the Dev Drive Protection feature on Windows 11? Feel free to mention it in the comments section below.
Read our disclosure page to find out how can you help Windows Report sustain the editorial team. Read more


Improve this guide


User forum
0 messages