Fix: 'Device in use' error causes no sound in Windows 10/11
![]() 4 min. read
4 min. read
![]() Updated on
Updated on
Share this article

Improve this guide
Read our disclosure page to find out how can you help Windows Report sustain the editorial team Read more
Key notes
- Many users reported not being able to play audio files in Windows 10 and getting a Device in use error message.
- There are various problems with your PC that may cause this error, but generally nothing major.
- Find below some tricks that will help you with this, such as updating or rolling back your drivers.
- We also show how to use the Windows Troubleshooter in order to tackle this specific problem.

It looks like audio-related issues are some of the biggest problems in Windows 10. And one of the most common problems is the “Device in use” error.
According to Microsoft, this error is quite common in new Insider builds, but you could also face it in the stable versions. There’s still no official workaround, however. So, while the development team is investigating the issue, we’re going to try and fix the issue on our own.
How to fix “Device in use” error in Windows 10
1. Use the Audio Troubleshooter
The first thing we’re going to try is also the simplest one. We’ll let Windows 10’s own troubleshooting tool try and solve the issue for us. As this tool can be used for dealing with all sorts of issues, it will probably be helpful with the “Device in use” error, as well.
Here’s how to run Windows 10’s built-in troubleshooting tool:
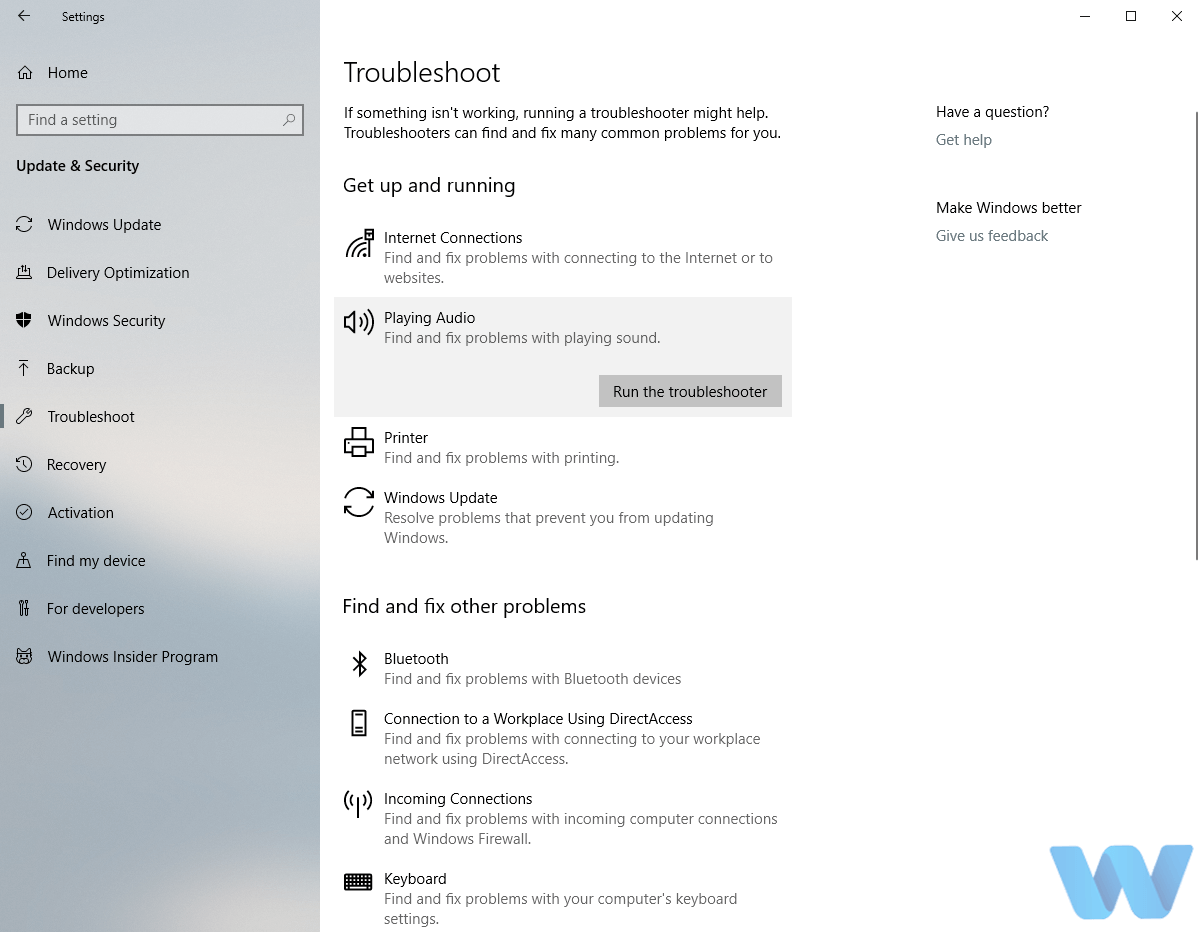
- Open the Settings app and go to Update & Security section.
- Select Troubleshoot from the menu on the left.
- Select Playing Audio from the right pane and click Run the troubleshooter.

- Follow the instructions on the screen to complete the troubleshooter.
2. Restart the Audio service
According to Microsoft, restarting the Audio service is probably the most effective solution to this problem. So, that’s exactly what we’re going to do now.
To restart the Audio service in Windows 10, do the following:
- Go to Search, type services.msc, and open Services
- Find Windows Audio from the list of services
- Right-click it, and choose Restart

- Wait for the service to restart

3. Update the USB drivers
The “Device in use” error can also be caused by an inappropriate or outdated audio driver that’s installed on your computer. So, the next thing we’re going to try is updating your audio drivers. If you’re not sure how to do that, follow these instructions:
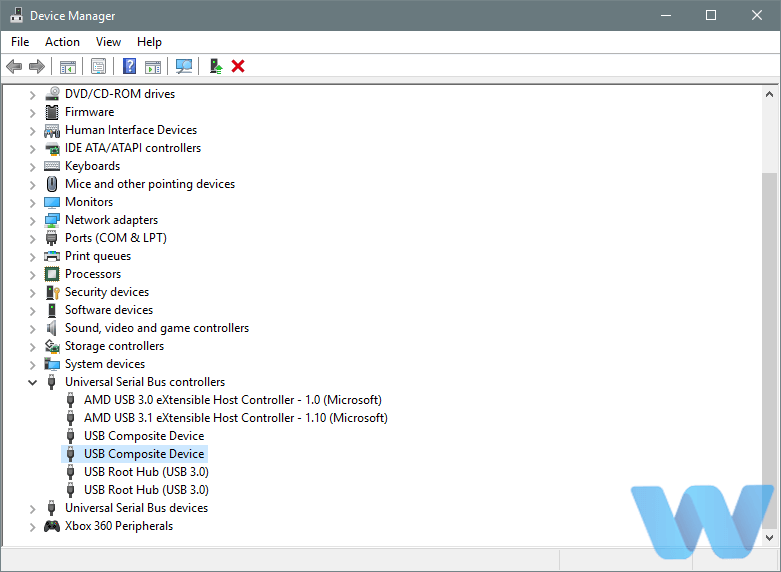
- Right-click the Start and select Device Manager.
- Navigate to Universal Serial Bus controllers and expand this section.
- Right-click your graphics device and open Properties.

- Select the Details tab.
- From the drop-down menu, open HardwareIds.
- Copy the first row and paste it into your browser’s address bar.
- The search results should show you the exact drivers you’ll need to install.
3.1 Update drivers automatically
Searching for drivers on your own can be time-consuming. So, we advise you to use a tool that will do this for you automatically.
Using an automatic driver updater will certainly save you from the hassle of searching for drivers manually, and it will always keep your system up to date with the latest drivers.
We recommend you give Outbyte Driver Updater a try because it is very easy to use, lightweight, and is proven to always find the corresponding driver version for your software.
On top of that, you can use it to have a fully automated driver management system. It uses up very few resources, so you can let it run in the background and regularly check on your drivers and update them when necessary.
4. Roll back the USB driver
On the other hand, maybe you installed a faulty driver, and that’s what’s causing the “Device in use” error. If you suspect that might be the case, go on and roll back your current audio driver. And here’s how to do that:
- Right-click Start and open Device Manager.
- Navigate to Sound, video, and game controllers.
- Right-click your audio device and open Properties.
- Open Driver tab.
- Click Roll Back Driver.
- Wait until the procedure finishes and restart your PC.
Now, check if you can hear audio from your computer. If Microsoft’s advice were correct, your problem should be fixed now. However, if the problem still persists, you should our article about audio issues in Windows 10, for even more solutions.
If you’ve tried everything we told you in this article, let us know about your results in the comments. Also, if you know about some workaround that we didn’t list here, please don’t hesitate to write it down below.