Disable automatic reboots after Windows 10/11 updates
3 min. read
Updated on
Read our disclosure page to find out how can you help Windows Report sustain the editorial team Read more

Windows 10 is all about updates. When Microsoft presented the the idea of “Windows 10 as a service”, it became clear that users won’t be able to use the system properly without installing updates. However, as good as Windows 10 updates are, there’s still one thing the the most users find annoying.
That, of course, are unexpected restarts when installing updates. Ever since Microsoft introduced updates for Windows, it is required to restart your computer to install them. User of previous versions of Windows had major problem with that, as installing updates interrupted, and wasted a lot of users’ work.
In Windows 10, however, the situation is slightly better. Windows Update now offers you full control over installing updates, as you can choose when exactly you want your computer to restart and install downloaded updates. But some users still don’t seem satisfied, as they usually forget to set a restarting time, and end up having their computers unexpectedly rebooted once again.
Because of that, users want to completely disable automatic restarts, and install updates when they choose to. That was possible in some previous versions of Windows, using the Group Policy Editor, but Microsoft removed this option in Windows 10. However, there’s actually a way to disable automatic restarts using another method, and we’re going to show you how.
How to disable automatic restarts after updates in Windows 10
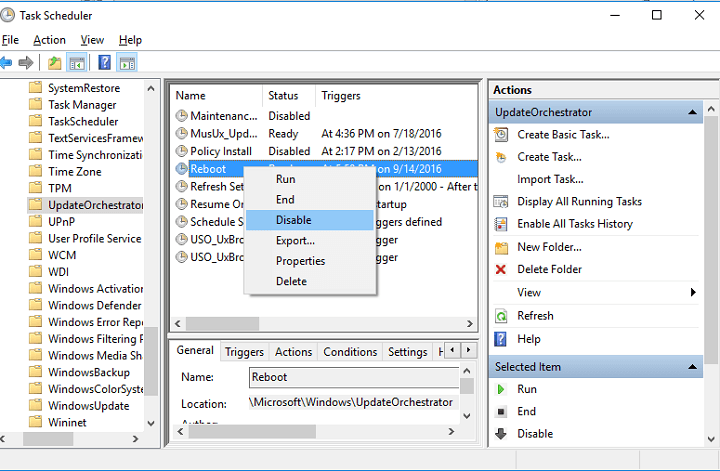
First thing you need to do is to the Reboot task in Task Scheduler. If you’re not sure how to do that, just follow these instructions:
- Go to Search, type task scheduler, and open Task Scheduler
- Head over to Task Scheduler > Task Scheduler Library > Microsoft > Windows > UpdateOrchestrator
- Find Reboot, right-click on it, and choose Disable
Once you’ve disabled Reboot, you need to forbid all users and groups from your computer to access this file. That way, you’ll disable automatic reboot for all users, and system also won’t be able to turn it back on. Here’s what you need to do:
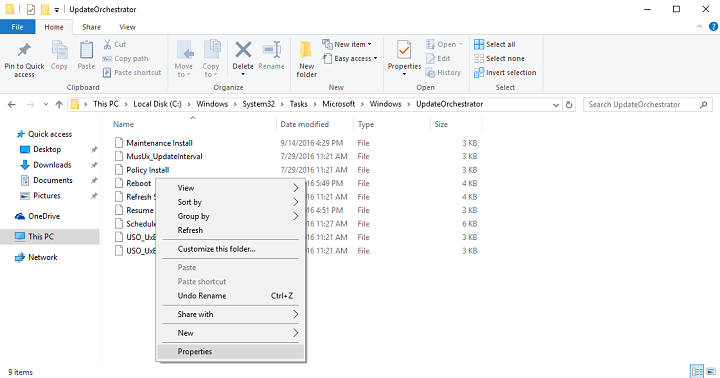
- Go to this path: C:\Windows\System32\Tasks\Microsoft\Windows\UpdateOrchestrator
- Now, find the Reboot file, and take ownership over it. If you don’t know how to do that, check out this article.
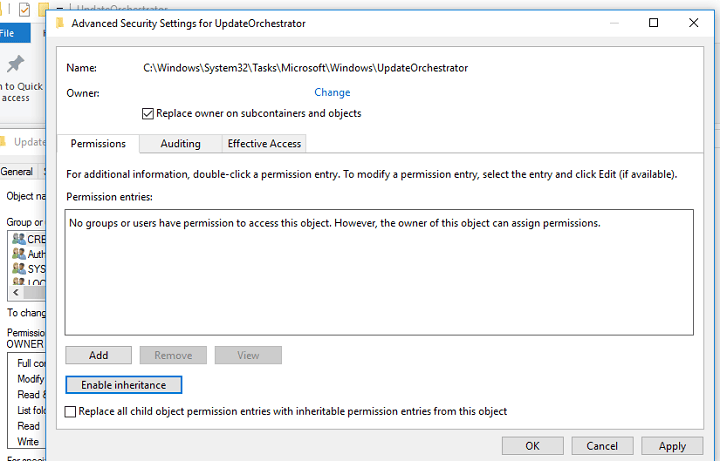
- We assume you’ll stay on the Advanced Security window after taking ownership over the file, so now go to Disable inheritance
- Once you perform this action, all users and groups should be removed. If there are any left, remove them manually
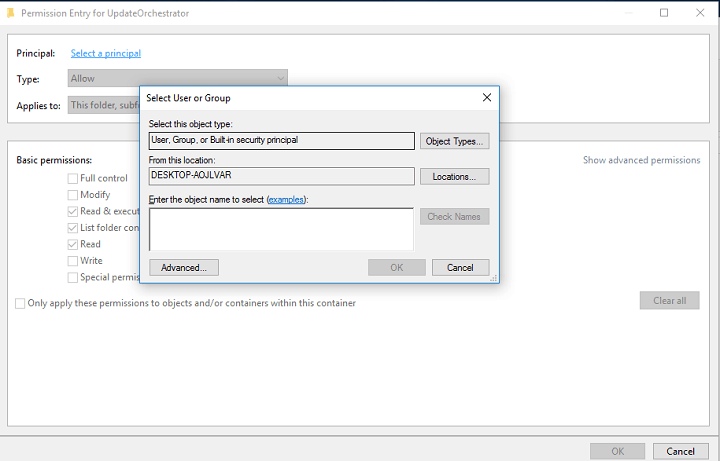
- Now, click on Add > Select a principal > enter your username under Enter the object name to select > Check Names > OK
- You should see only permission now on the “Advanced Security Settings” page, and that one should be full control for your user account
- Now, just click OK, and you’re good to go
There you go, after performing this process, your computer won’t reboot automatically every time you download a new update. But don’t be confused, this won’t prevent your system from receiving updates, they just won’t be fully installed until you restart your machine by yourself.
In case you have any comments, or questions about this method, just let us know in the comments below.
RELATED STORIES YOU NEED TO CHECK OUT:

