Fix: Disk Management Connecting to Virtual Disk Service
Restarting vital Disk Management services is a fast solution
4 min. read
Updated on
Read our disclosure page to find out how can you help Windows Report sustain the editorial team Read more
Key notes
- The Disk Management connecting to Virtual Disk service error stops the utility from launching.
- This problem is often associated with the disk drivers and a restrictive firewall settings.
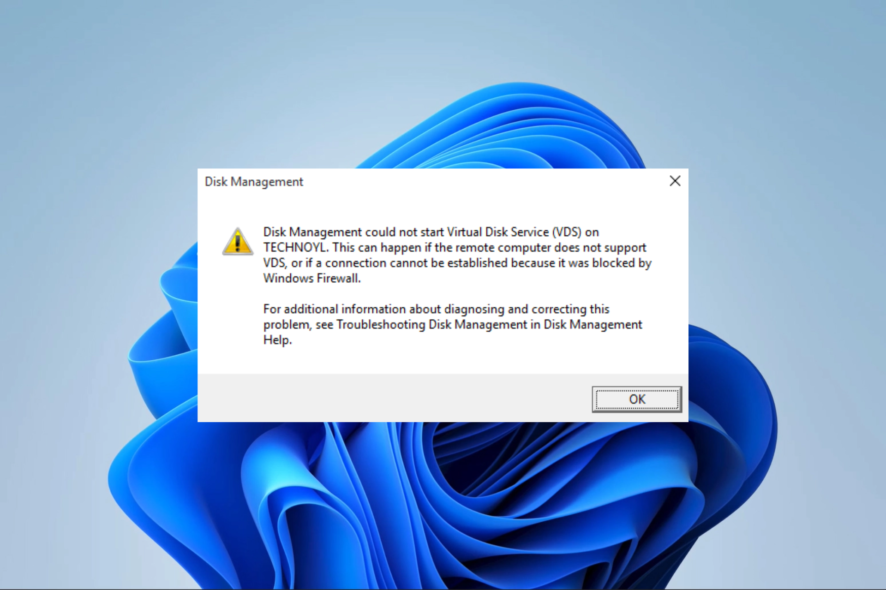
When accessing the Disk Management utility, a few of our readers have gotten a screen stuck with the message Disk Management connecting to Virtual Disk service.
For these users, it is impossible to access the utility, so we have come up with the most straightforward solutions you may explore in this guide.
Why am I stuck on Disk Management connecting to Virtual Disk service?
You could have trouble connecting to the Virtual Disk service in Disk Management for several reasons. Here are some potential causes:
- Firewall restrictions – Sometimes, you will have this problem using a restrictive firewall that blocks connections.
- Trouble starting the service – If Disk Management could not start the Virtual Disk Service, you won’t be able to connect to it at all.
- Disabled services – If the VDS (Virtual Disk Service) is not running, you may not have access to the management utility.
- Outdated drivers – The disk drivers are the main problem here, and if these drivers are outdated, you may expect varying problems using the Windows utility.
Note that the error message may vary as some users have gotten an Unable to connect to Virtual Disk Service error. This is the same problem, and the solutions below will work.
How to fix Disk Management connecting to Virtual Disk service?
Before getting into some practical solutions, you may try these workarounds:
- Use an alternative disk management tool – A few third-party management utilities will get the job done and may not pose the same error, so they may be worth trying.
- Eject peripherals – You may want to start by detaching all your external storage since some faulty peripherals may trigger the problem.
However, if the two workarounds do not work, you should proceed to more detailed solutions below.
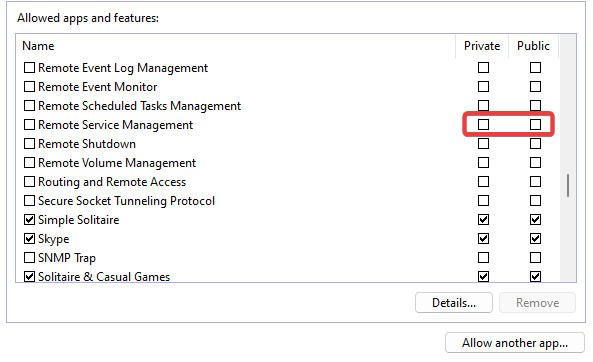
1. Change the firewall settings
- Press the Windows key, type firewall, and select the Allow an app through Windows Firewall option.
- Click the Change settings button.
- Tick both checkboxes in front of Remote Volume Management.
- Finally, click the OK button to save your changes.
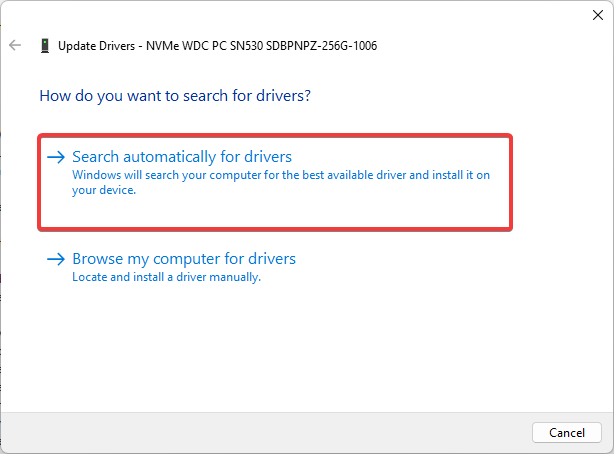
2. Update disk drivers
- Right-click on the Start menu and select Device Manager.
- Expand the Disk drives category, right-click on your disk driver, and select Update driver.
- Click Search automatically for drivers.
- Finally, follow the process to complete the update.
If you applied this method and it doesn’t seem to solve the issue, worry not because you can still fix it with a standalone app.
Accordingly, this driver manager will scan your PC for outdated or missing drivers, giving you the full report with the ones that need to be updated. From there, all you have to do is to press the button.
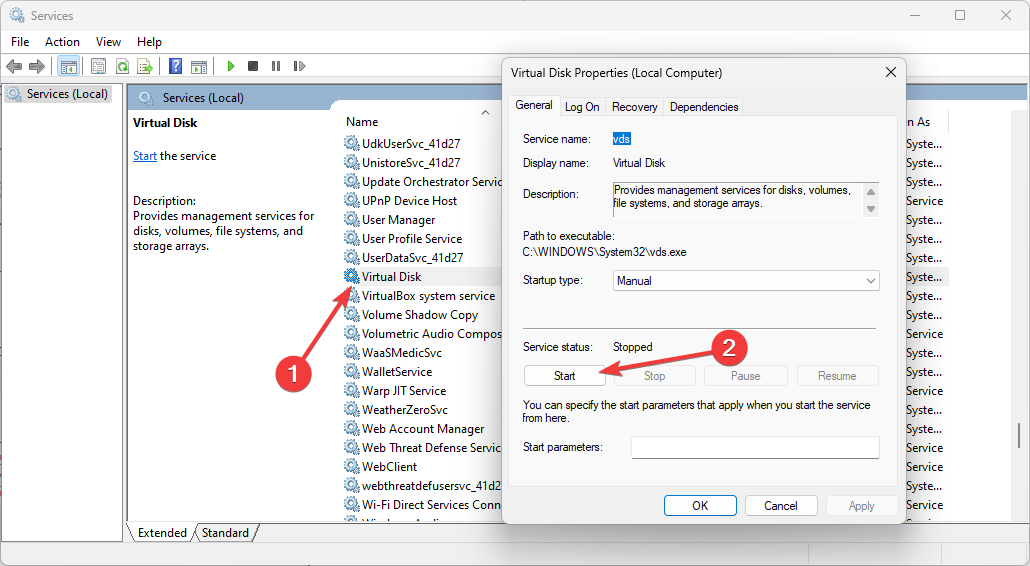
3. Enable the Virtual Disk service
- Press Windows + R, type services.msc, and hit Enter.
- Double-click on the Virtual Disk service and click the Start button if the service is not running.
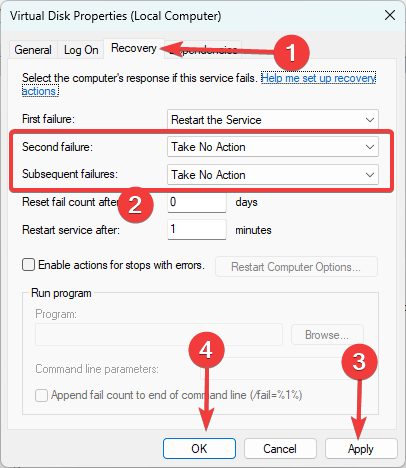
- Click on the Recovery tab, set Second failure and Subsequent failures to Take no action, then click Apply and OK.
- Lastly, reopen the Disk Management utility and verify the error is resolved.
4. Run important file and disk repairs
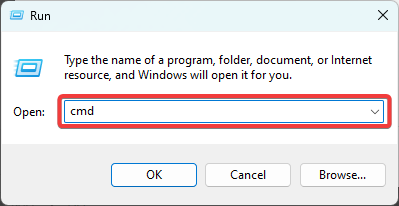
- Press Windows + R, type cmd, and hit Ctrl + Shift + Enter.
- Type the script below and hit Enter to locate and repair corrupted system files.
sfc /scannow - Now type the two scripts below, hitting Enter after each one.
exe /Online /Cleanup-image /Scanhealthexe /Online /Cleanup-image /Restorehealth - Finally, when the scripts are completely executed, verify if the problem is resolved.
Any of the above processes should fix the problem. However, we have not made these solutions in any particular order, and we encourage readers to start with what seems the most applicable.
We like to hear about your success, so please reach out to us in the comments section below and tell us which solutions worked best.







User forum
0 messages