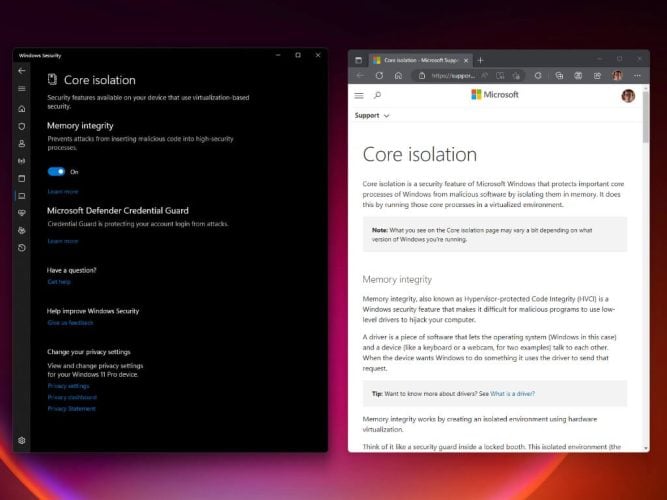
How (and why) to enable Core isolation’s Memory integrity feature to enhance security on Windows 11
3 min. read
Published on
Read our disclosure page to find out how can you help Windows Report sustain the editorial team. Read more

Core isolation’s Memory integrity feature on Windows 10 and Windows 11 helps enhance security. By enabling this feature, you can fight against extreme cybersecurity threats and malicious code. To enable memory integrity, you can use Windows Security, or make a quick edit to enable it via the Windows Registry Editor.
Why turn on Core isolation’s Memory integrity?
Memory integrity or Hypervisor-protected Code Integrity (HVCI) is a feature under Core isolation that is available on Windows 11. The core isolation technology contains the core processes of Windows but uses memory in a virtualized environment instead.
If Core isolation’s Memory integrity is turned off, you should enable it right away to protect your machine. Here are the benefits:
- Protection against malicious code:
- Prevent hackers from taking control: Enabling Memory integrity prevents unauthorized access to your PC, by hijacking unsecured drivers on your machine.
- Enhances overall security: HVCI improves overall security and protects your privacy on a Windows 11 PC.
Turn on Memory Integrity on Windows 11
If you want to activate Core isolation’s Memory integrity feature on your Windows 11 PC, you have to make sure a couple of things are enabled first:
- Enable virtualization on your PC. If it is disabled, you may need to enable it on your motherboard BIOS. Check your PC’s motherboard manufacturer for more information.
- Update Windows to the latest version. Just to be on the safe side and ensure you have the latest updates, it’s important to keep your PC up-to-date.
After you have verified your machine has virtualization enabled and your Windows 11 version is updated, follow these methods to enable memory integrity on Windows 11.
1. Enable using Windows Security Defender
Here’s how to enable Core isolation’s Memory integrity using Windows Security Defender.
- Click Windows 11 Start and type “Windows Security” and press Enter.
- Go to Device security and click Core isolation details.
- Under Core isolation, make sure the Memory integrity toggle is turned on.
- You may need to restart your PC for the changes to take effect.
2. Enable using Registry Editor
Please note: Before using this method, make sure your PC and CPU are fully compatible with Windows 11. If you try to enable this feature on unsupported CPUs, you may run into trouble, so keep that in mind. Here’s what you need to do.
- Click Windows 11 Start and type “regedit” and press Enter.
- Navigate to the following location:
HKEY_LOCAL_MACHINE\SYSTEM\CurrentControlSet\Control\DeviceGuard\Scenarios\HypervisorEnforcedCodeIntegrity.
- Double-click on Enabled.
- Set the value to 1 and click OK.
- Restart your PC for the changes to take effect.
Editing the Windows Registry should be used as a last resort to force-enable Windows 11 features. If you installed Windows 11 without TPM 2.0, you may not be able to enable Core isolation’s Memory integrity feature.
Core isolation’s Memory Integrity
Core isolation is a revolutionary technology tool for Windows 10 and Windows 11. By default, Core isolation’s memory integrity feature should already be active and ready to use on your PC.
Do you have a different method to enable Core isolation on Windows? Let us know in the comments.


User forum
0 messages