Windows 11 Snap Layouts: How to Enable & Use
The Snap Layouts feature is built-in on all devices
Key notes
- With the new Snap layouts feature, Windows 11 allows users to easily multitask by splitting the screen into multiple areas.
- This productivity feature helps you better organize and streamline your work.
- Discover which monitors can support this type of layout and how to access it by using a certain keyboard shortcut.

Microsoft’s Windows 11’s Snap layouts feature and others as well, capture everyone’s attention these days. Since it is designed to improve your PC experience and the way you communicate with others.
The OS comes with dynamic and powerful elements that support your work. Windows 11 packs some interesting features that will make all the difference and a new design that. Among other elements, introduces a taskbar with the Start menu in the center.
In this regard, you’ll benefit from a multitasking feature called Snap layouts. Whereby users who have larger monitors will be able to split them in various ways and organize them as they please.
Moreover, to take your capability to deal with multiple tasks at the same time to the next level, another good idea is to invest in a mouse that was designed with multitasking in mind.
What is the Snap layouts feature?
Firstly, Snap layouts is a feature that helps you arrange the windows on your screen in the best possible way, to help you multitask.
Basically, after you activate the function by using our guide below, when you hover over the maximize icon of any window, you will see multiple options to position it in your layout.
Moreover, the term snap refers to the fact that the window will immediately position itself in the designated spot.
Once you have created these window arrangements with Snap layouts, you can save them in Snap groups. Which will be accessible on the taskbar and which you can access later.
How to use Snap layouts on my Windows 11 PC?
1. Enable Snap Layouts using a keyboard shortcut
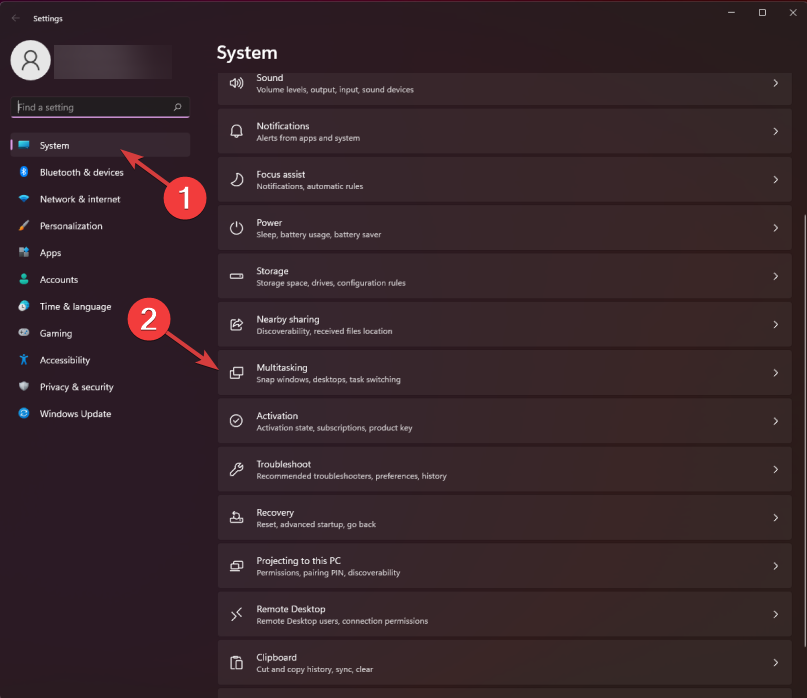
1. Press the Windows key on your keyboard or the Start button on the taskbar.
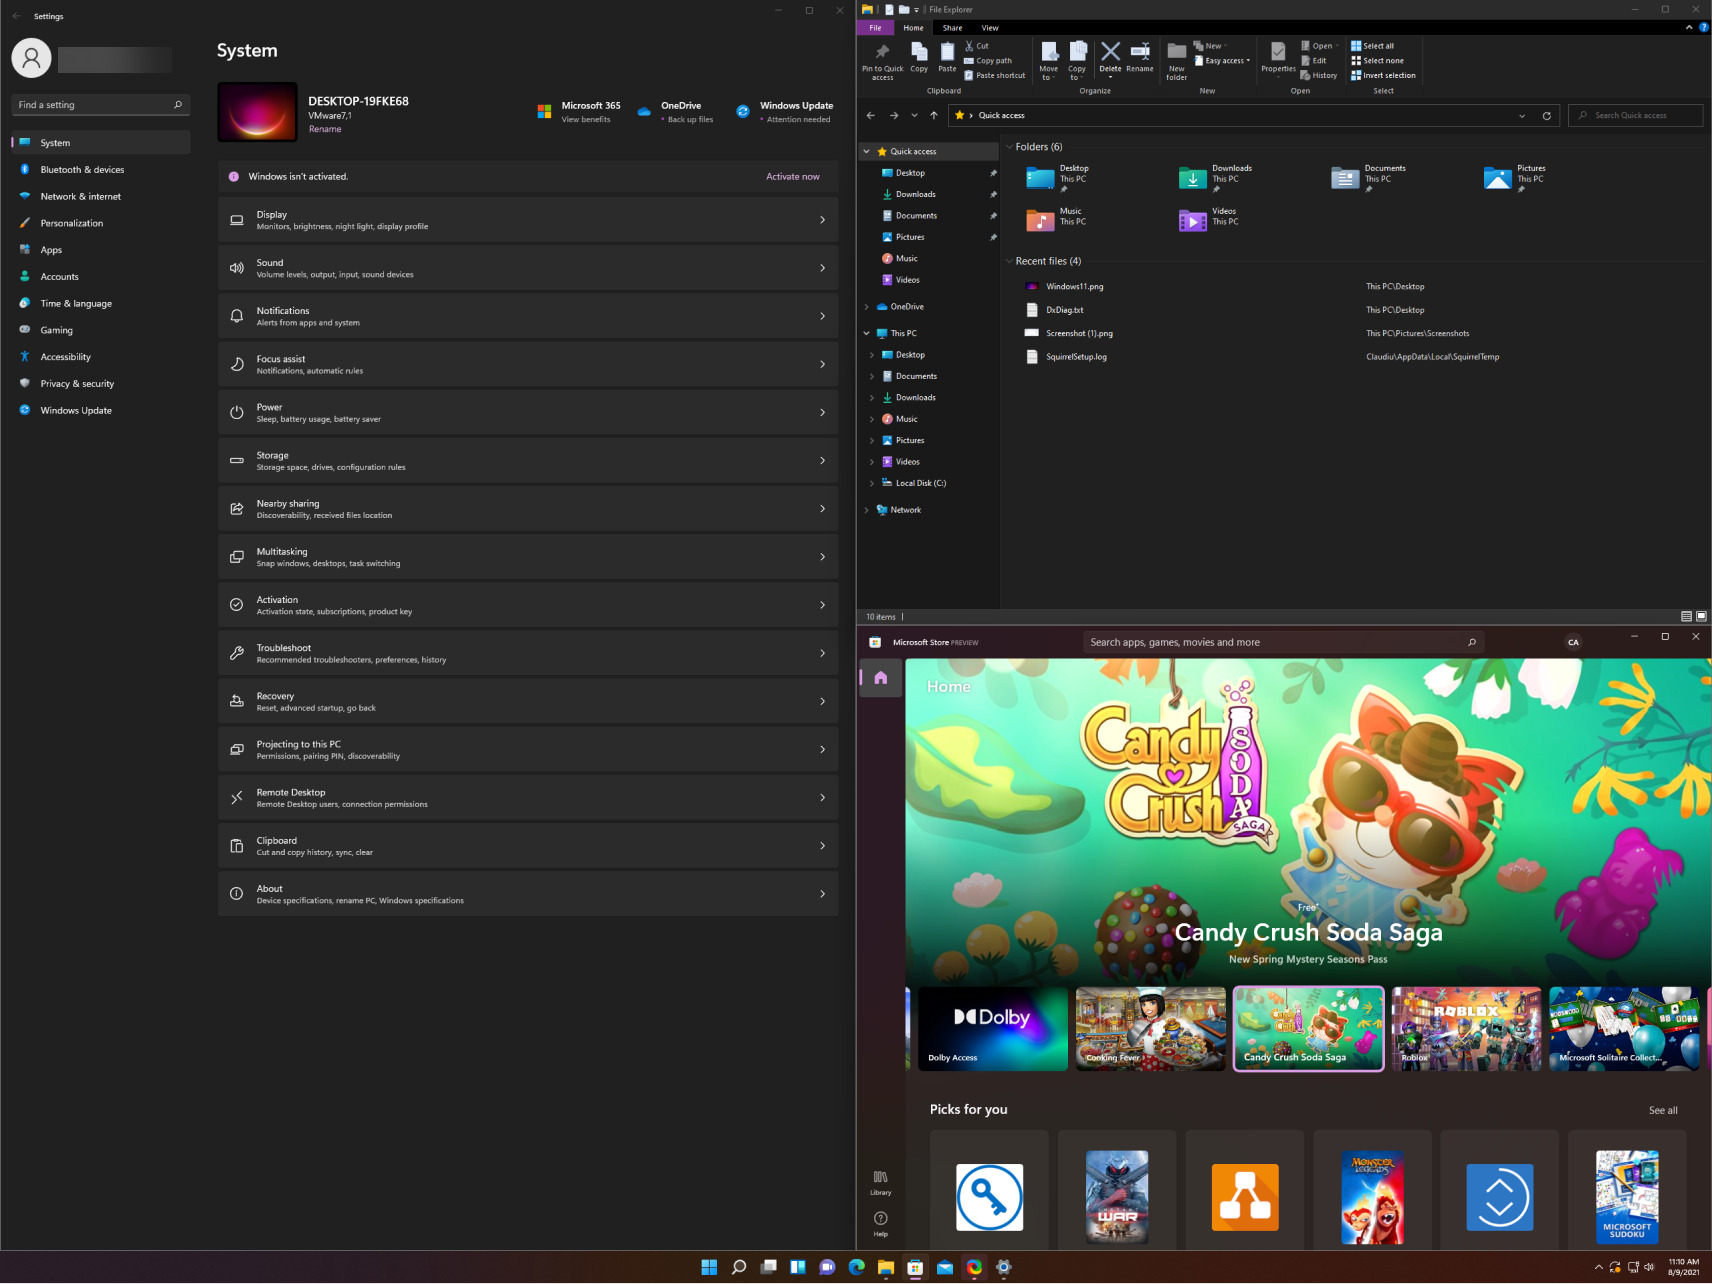
2. Type settings in the search box that opens and click on the result to open the Settings app.
3. Select the System category, and click on the Multitasking tab.
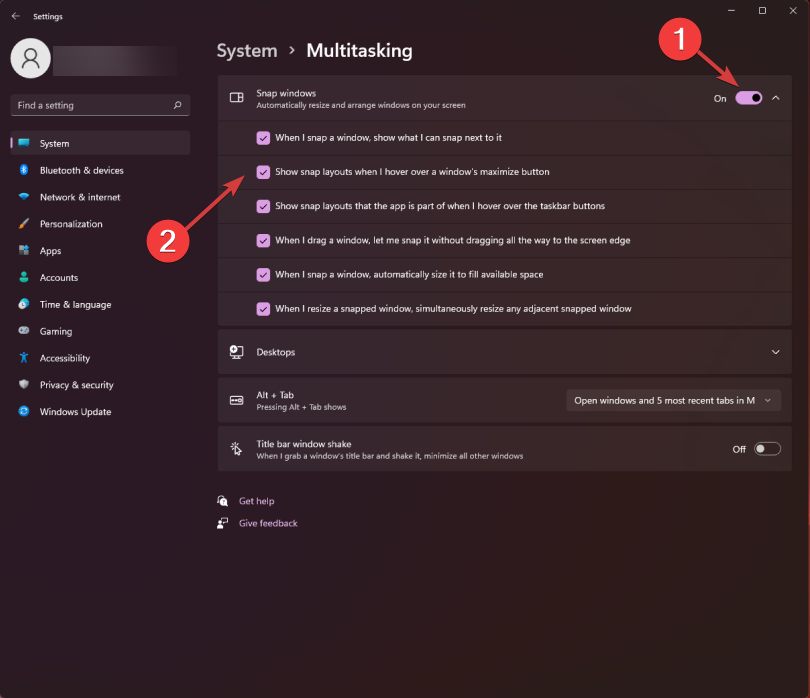
4. Toggle the Snap windows button to On. Then check the box next to the Show snap layouts when I hover over a window’s maximize button option.
5. Open the app or program you want to use the tool on and use the shortcut: Windows key + Z. It will trigger the Snap Layouts option for the current window.
Another method to open the tool is to hover over the maximize button of any window, and the snapping option will show up in the corner.
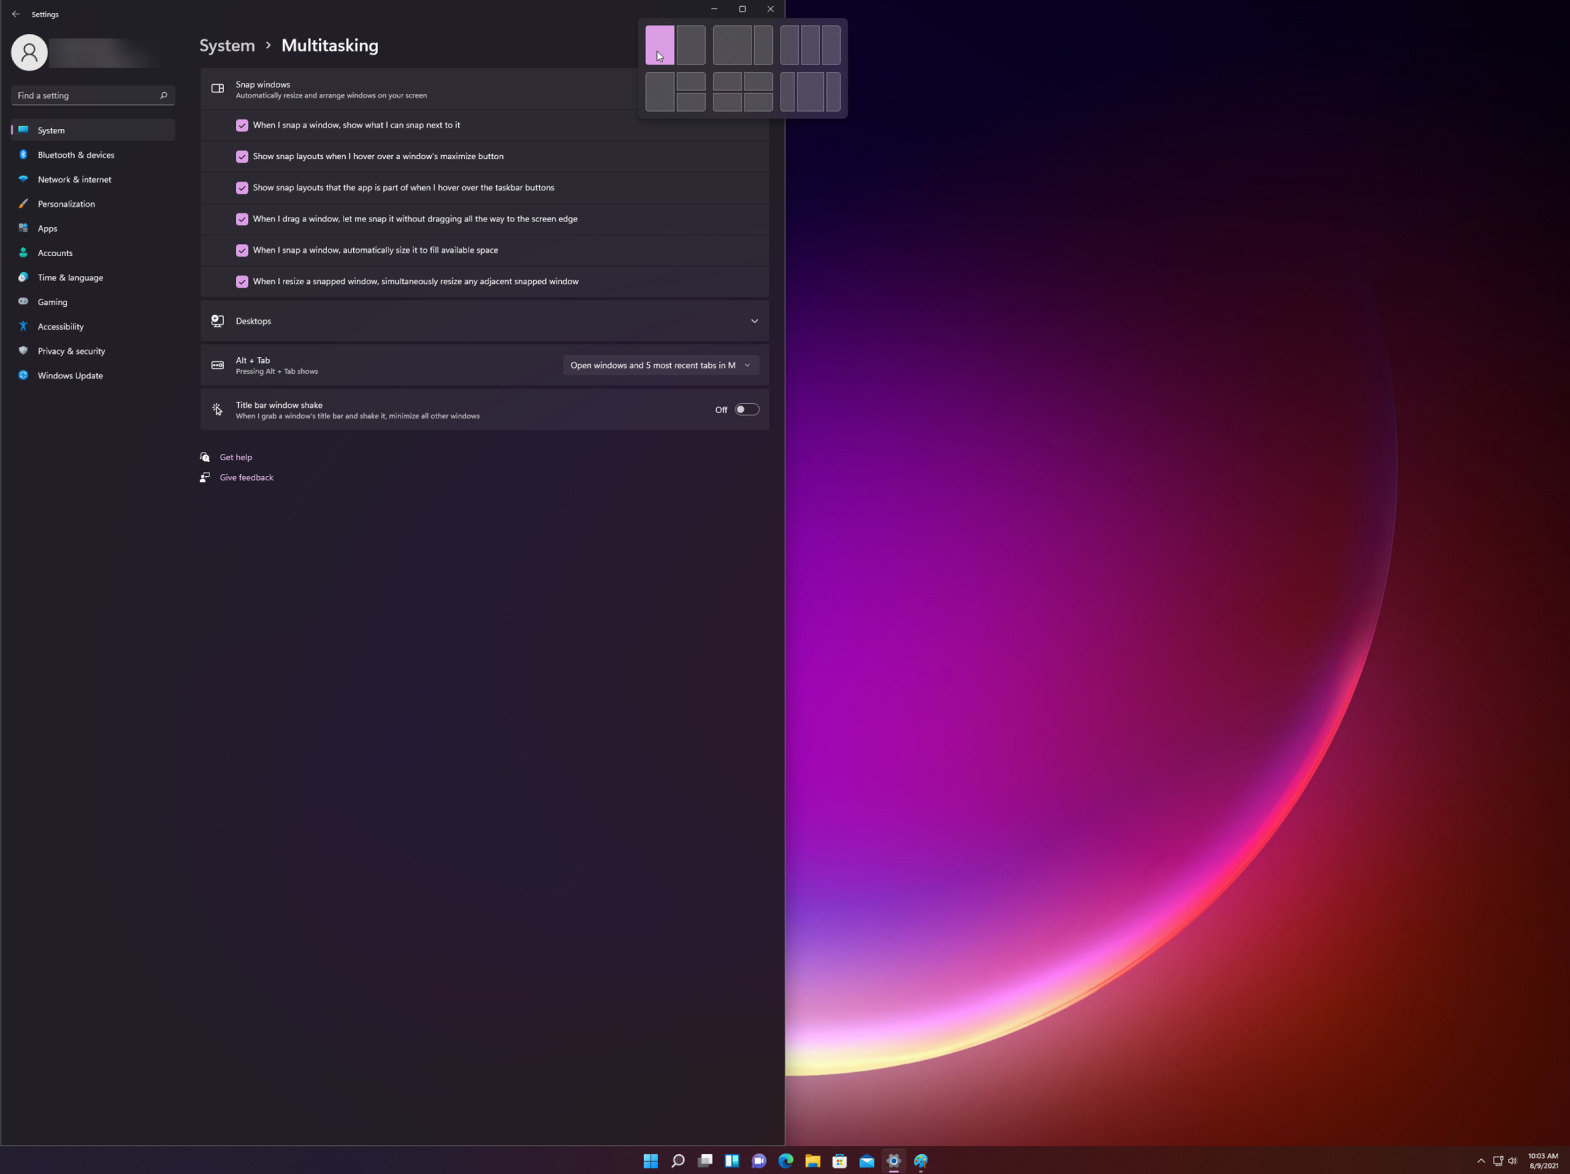
6. Choose from different layout options to arrange your current page with other apps.
The fastest way to use Snap layouts on your Windows 11 is to use a keyboard shortcut. Snap layouts should be enabled by default on most computers, but on some you need to manually enable it.
 NOTE
NOTE
It’s also worth mentioning that Microsoft has announced to users that older monitors with a resolution lower than 1920 pixels cannot fully benefit from this powerful feature.
Furthermore, given the system requirements and specifications of the new Windows 11, we find that a 1080p HD widescreen resolution is required. In order to enjoy the standard look offered by the Snap layouts feature.
2. Vertically snap in Windows 11
- First, hover over the maximize icon on the window you want to have to the left and choose the left column in the graphical options that appear (there are 3 custom Windows 11 Snap layouts options for vertical snapping: 2 columns, 3 identical columns, and 3 asymmetrical columns).

- Now hover over to the maximize icon of the second window and select the second column from the right.
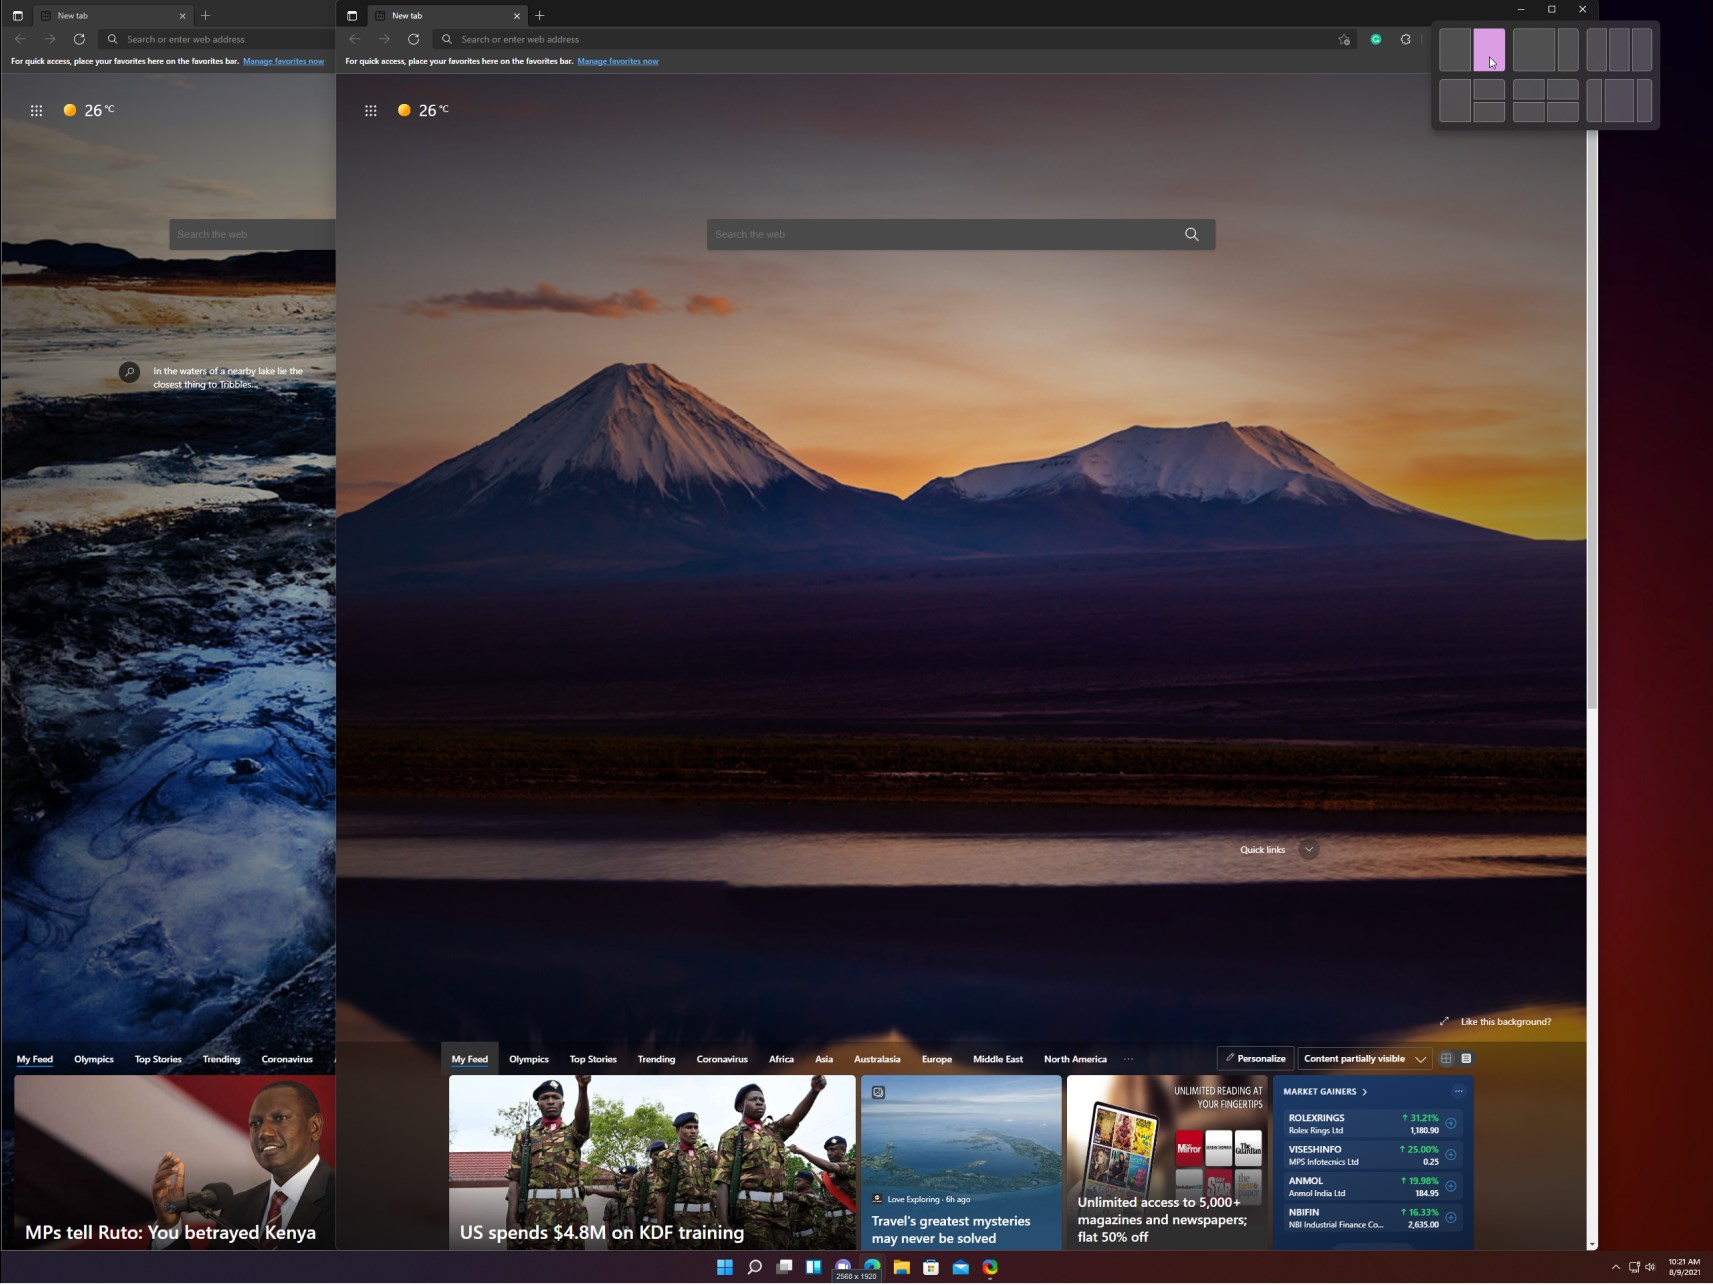
- The two windows will snap vertically. And you will be able to change their width by dragging your mouse from the window’s edge from the middle to each side.
If you choose any of the other vertical layouts, you will just need to select the proper setting for each of the windows in your arrangement. But, as you can see, it’s very simple to do so.
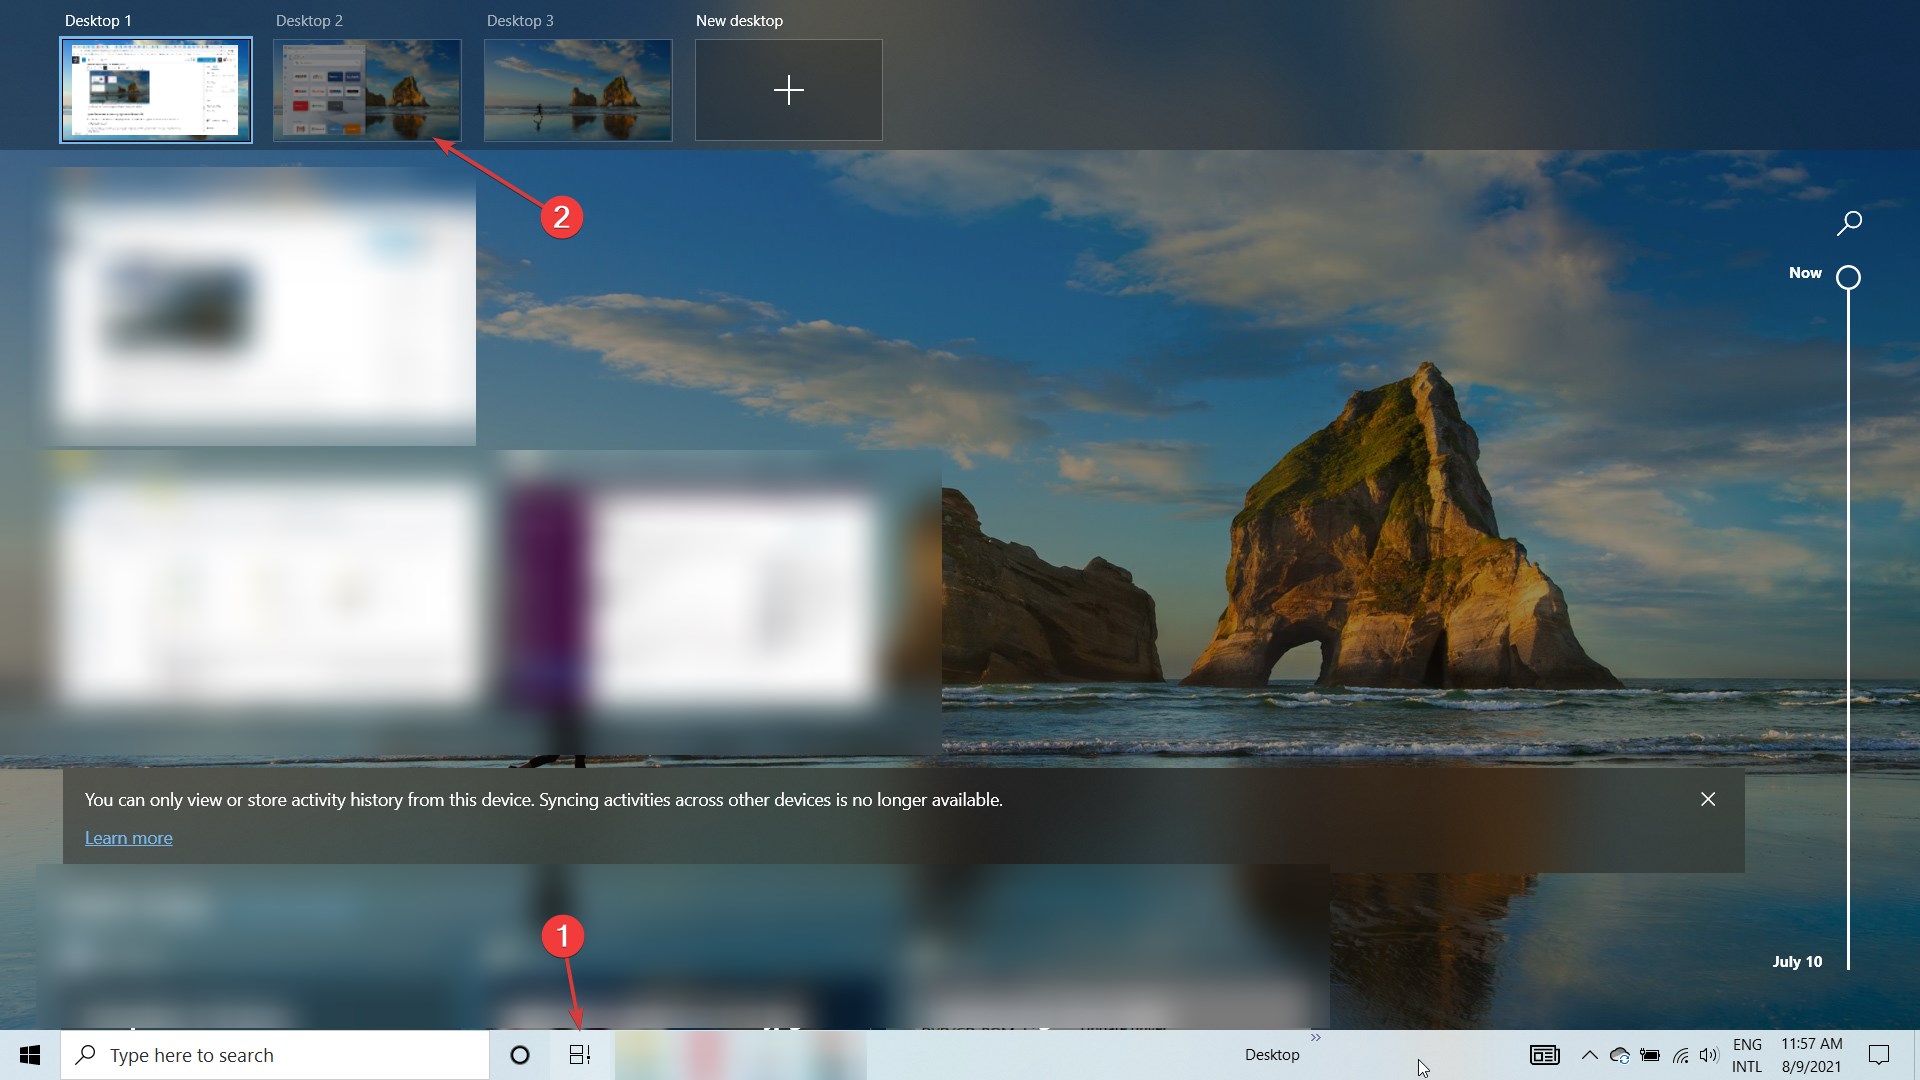
3. Use Snap layouts with virtual desktops
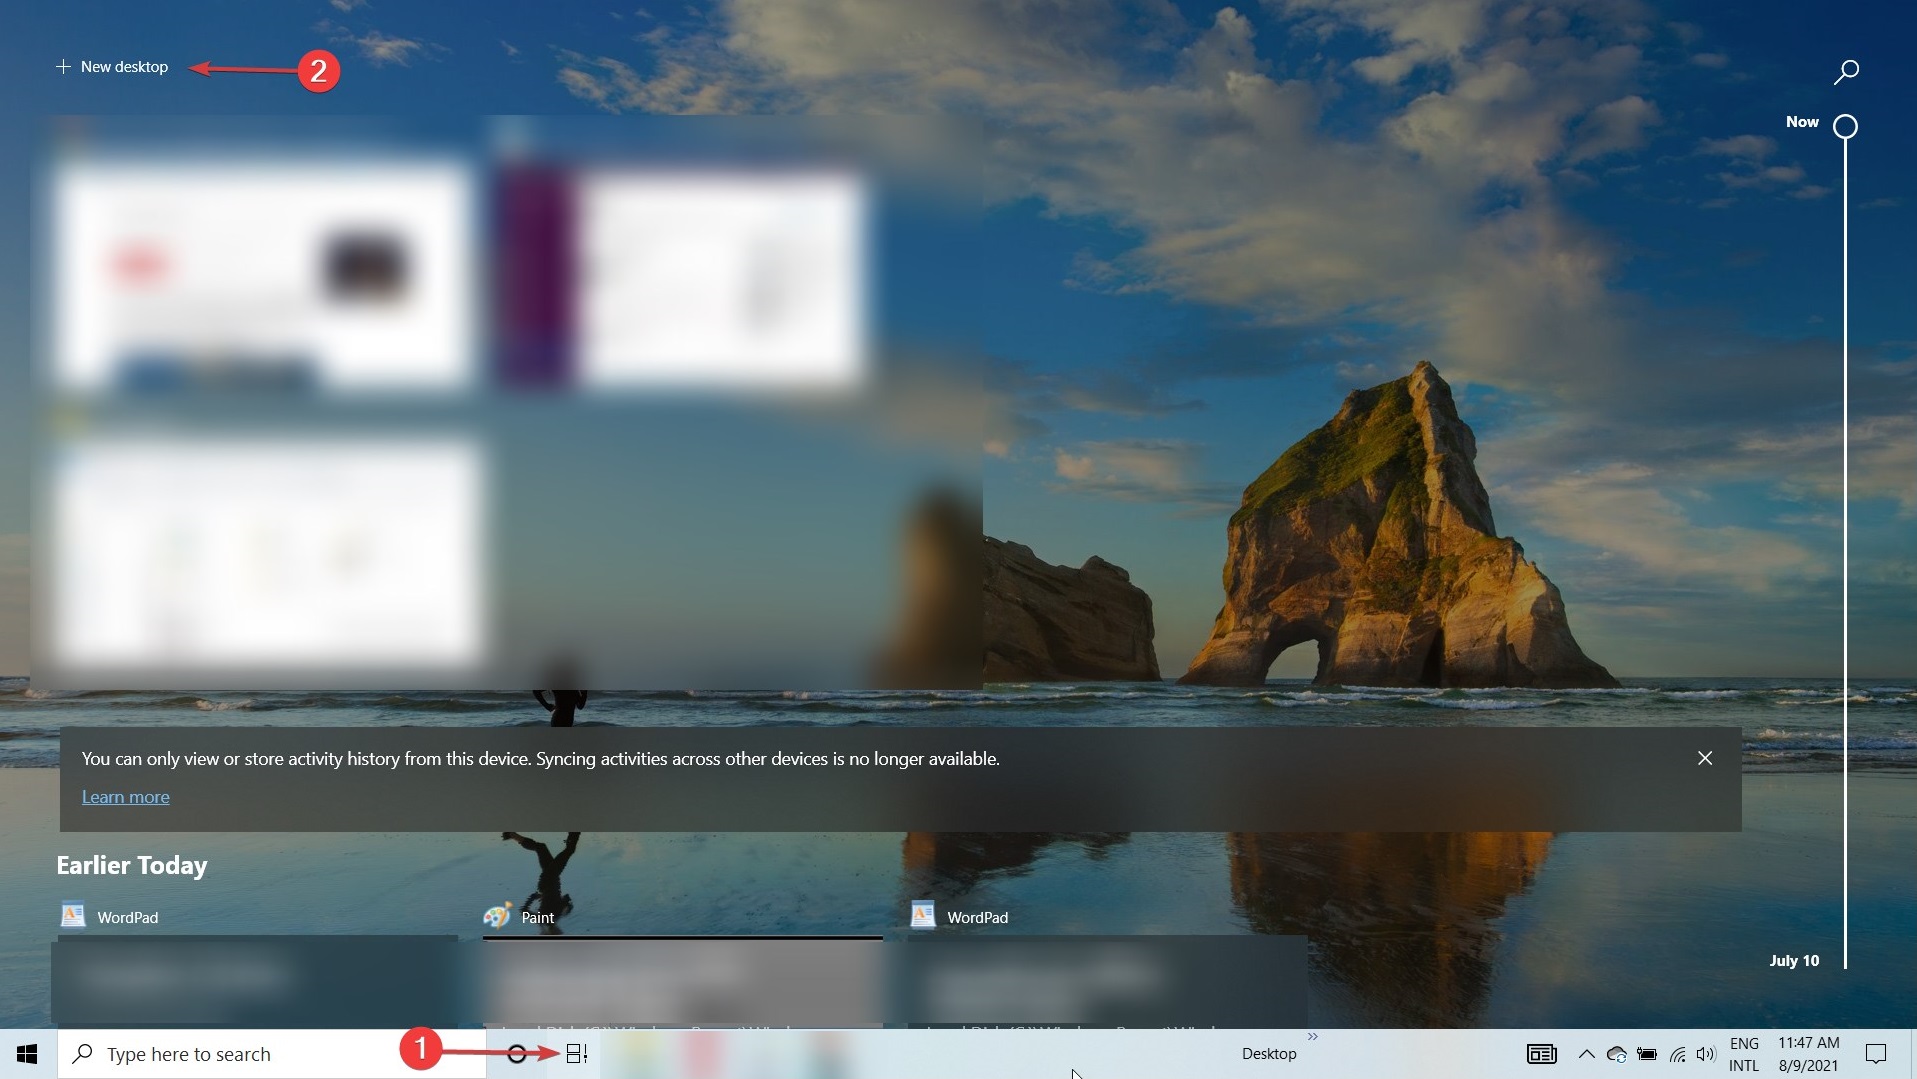
- Click on the virtual desktops icon on the taskbar and select the New desktop tab.
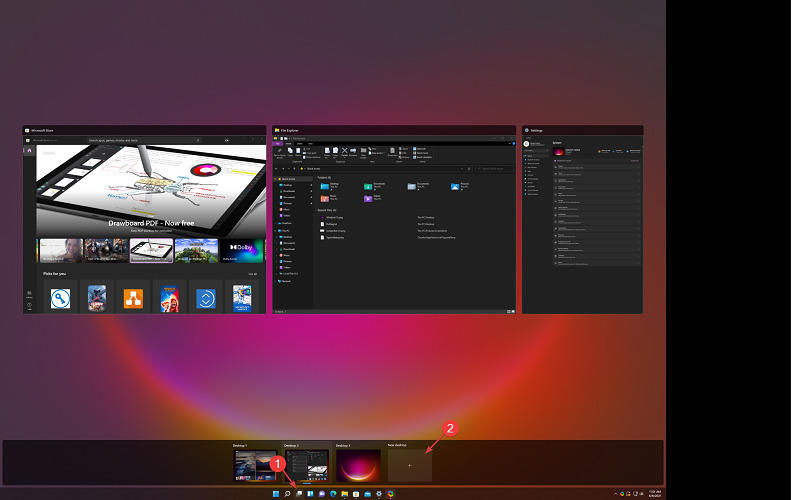
- Now you can select the new desktop by clicking again on the virtual desktops icon and selecting the new desktop you just created.

- Now you can just create a new snap layout just like you’ve seen on the previous solution. We’ve created a random one for you, just so you can see the possibilities.
- If you want, now you can toggle between the desktops you’ve created by either clicking on the virtual desktops icon and selecting the one you need or by pressing the Ctrl + Windows + Left or Right.
How to use Snap layouts in Windows 10?
Snapping windows in Windows 10 is not as elegant and straightforward as it is in Windows 11. But you can still do the job with a few additional moves.
- Click the Task view option from the taskbar and select New desktop.
- Select the Task view icon again and select the second desktop.
- Now open a window that you want to snap and press the Windows + Left or Windows + Right to snap the window vertically to the left or right. As you can see from our screenshot, it perfectly snapped to the left, covering half of the desktop.
- You can also take the window with your mouse from its title bar and release it close to one edge and it will snap automatically to that edge.
- Of course, you can adjust the window dimensions manually, with your mouse, by grabbing an edge with your mouse.
Quick tips on using Snap layouts in Windows 11
Here are some of the most interesting ways of using Snap layouts and groups to improve your multitasking:
➡ Divide work and fun
Note that it’s very important to separate the work-related apps and tabs from the non-work-related ones. And the motive is pretty obvious.
Snap layouts and groups can help you easily do that by grouping the apps and windows in a specific layout. And this is especially useful if you also use the multiple desktop feature from Windows 11.
➡ Looking for flights
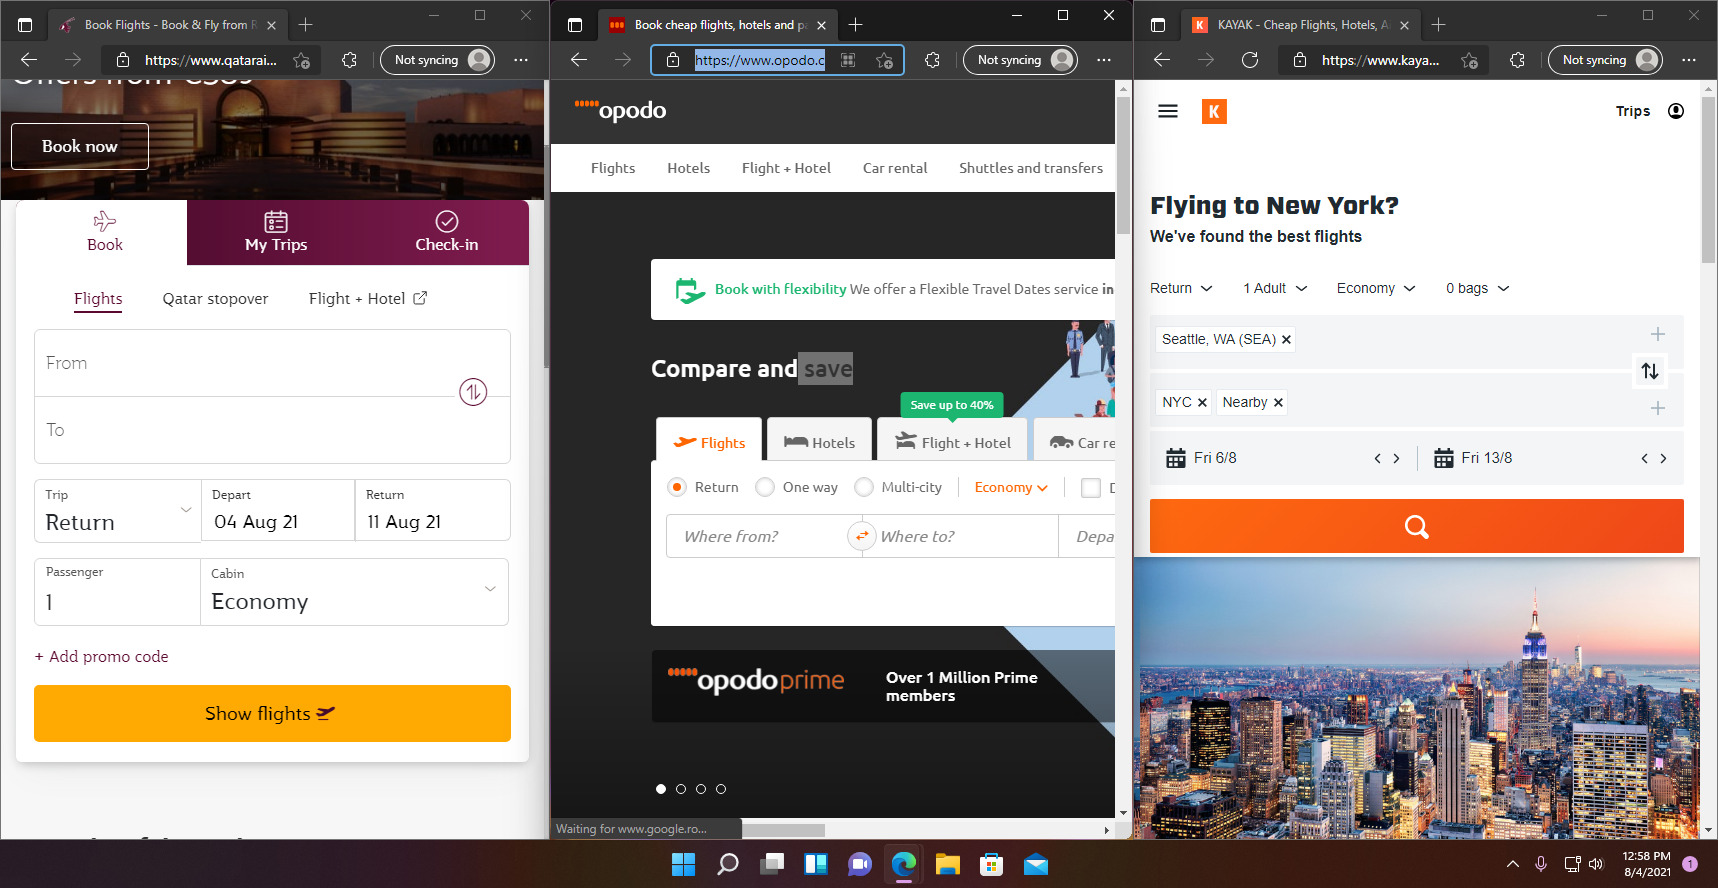
We all know how difficult it is to look for more convenient flights and routes looking on multiple websites and apps. Going from one to another can be painstaking.
With Snap layouts, you could just snap up to 4 of them in a window. Then check them easily, without going back and forth to each one.
➡ Confronting technical specifications
If you’re planning to buy a product, let’s say, the right Windows 11 compatible laptop, you’re going to check out all the technical specifications for each one, right?
With Snap layouts, you can start 3 browser windows. Snap them in the three-column layout and scroll them down on the same website to spot the differences immediately.
We hope our guide helped you enable the Snap layouts feature. And that our tips gave you some ideas on how to use it. You can finally start creating layouts to your liking, save and access them later in Snap groups.
And if you happen to change your mind, let us remind you that it’s incredibly simple to disable Snap layouts on Windows 11.
Whether you’re not used to the new format or it’s a matter of aesthetics, the choice is always yours. If you have any questions or suggestions, please visit the comments section below and drop us a line.
Read our disclosure page to find out how can you help Windows Report sustain the editorial team. Read more


Improve this guide


User forum
0 messages