How to Download & Install Epson L380 Drivers on Your PC (5 Ways)
Old fashion and new fashion ways but all work
3 min. read
Updated on
Read our disclosure page to find out how can you help Windows Report sustain the editorial team. Read more
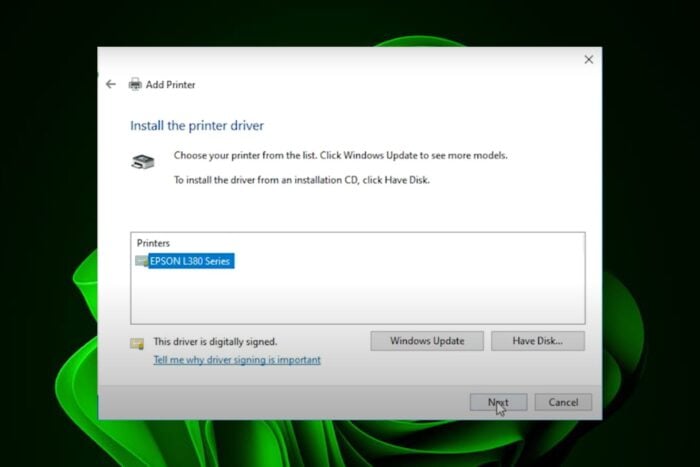
Installing a printer driver allows you to print your documents and for the Epson L380, there are several ways you can install these crucial drivers for your Windows 7, 10, and 11 devices.
How can I install the Epson L380 printer driver?
1. Download and Install from the manufacturer’s website
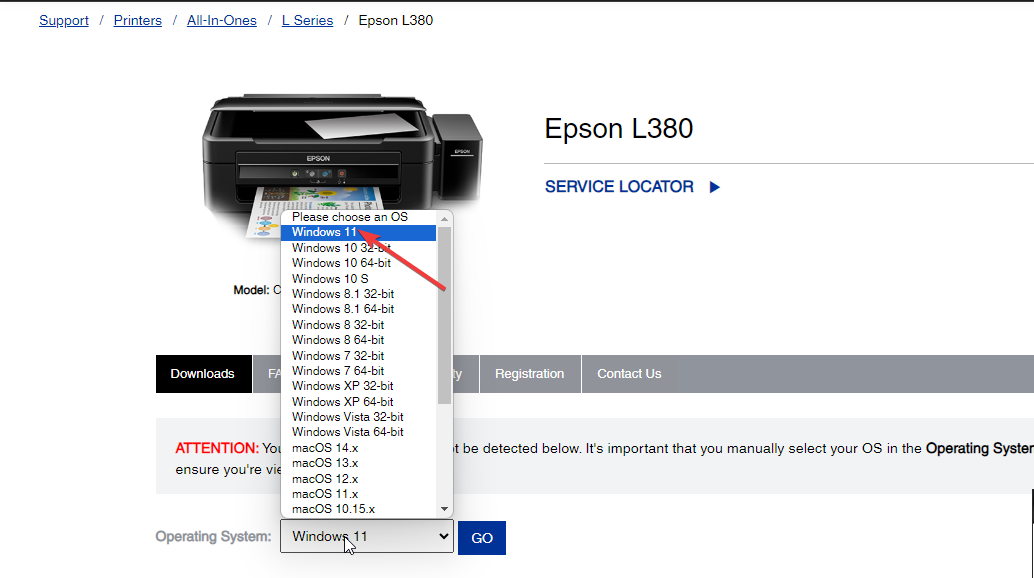
- Navigate to your browser and go to Epson’s official driver download page.
- Select your OS from the Operating System list. In most cases, it detects your Windows version but it can be incorrect so make sure you manually select for Windows 7, 10 or 11.
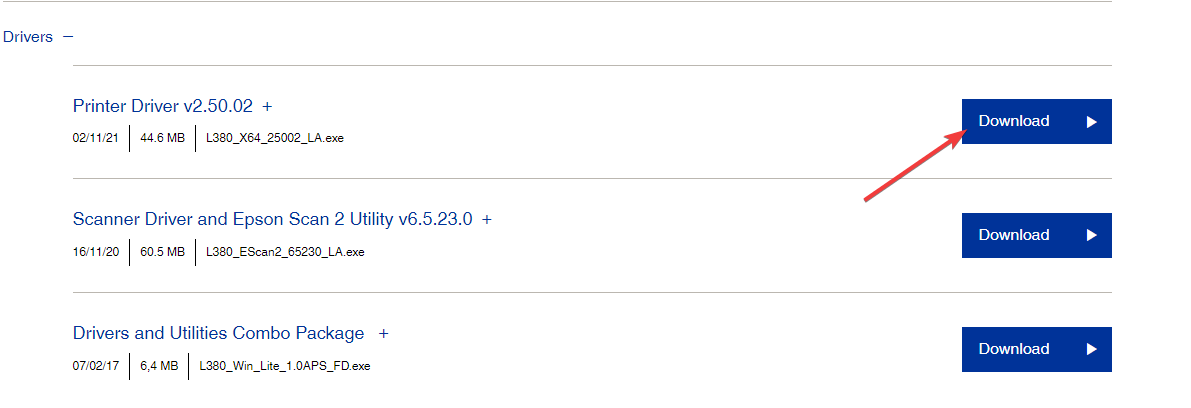
- Now, download the driver.
- Open the installer file and install it on your computer.
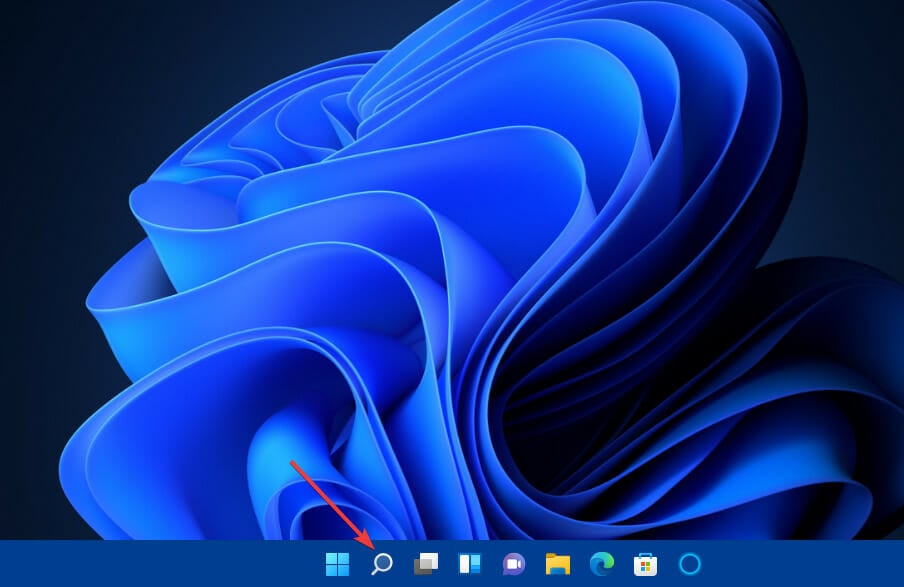
- Next, click on the taskbar’s magnifying glass icon.
- Type Control Panel within the search tool that opens.
- Select Control Panel to open that window.
- Next, select Large Icons on the View by drop-down menu.
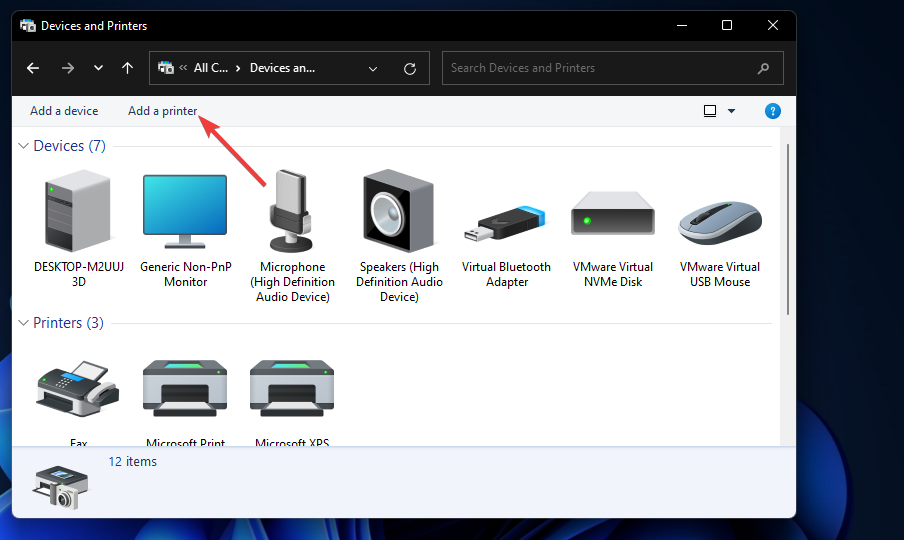
- Click Devices and Printers in the Control Panel.
- Then press the Add a printer button.
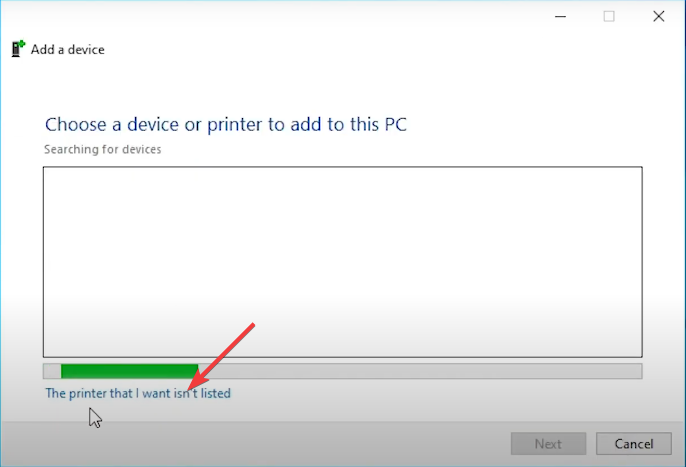
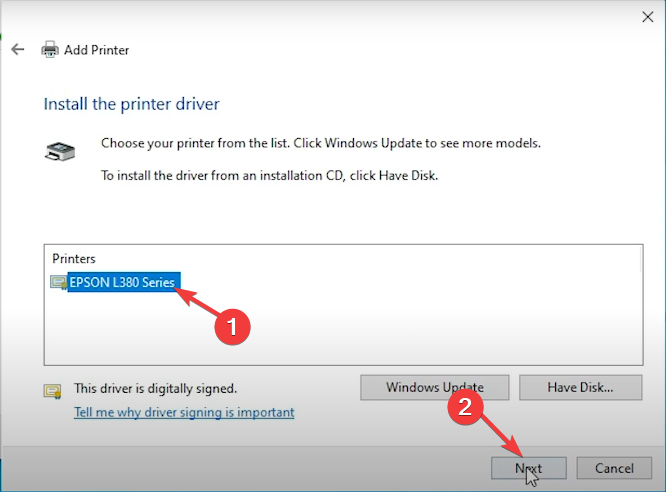
- Choose the L380 printer on the Add a device window, and press the Next button to install it. If not available, you’ll have to add it manually by clicking on the The printer that I want isn’t listed option.
- Press the Next button and follow the on-screen prompts.
- Hit the Finish button after the printer has been added.
- Restart your PC.
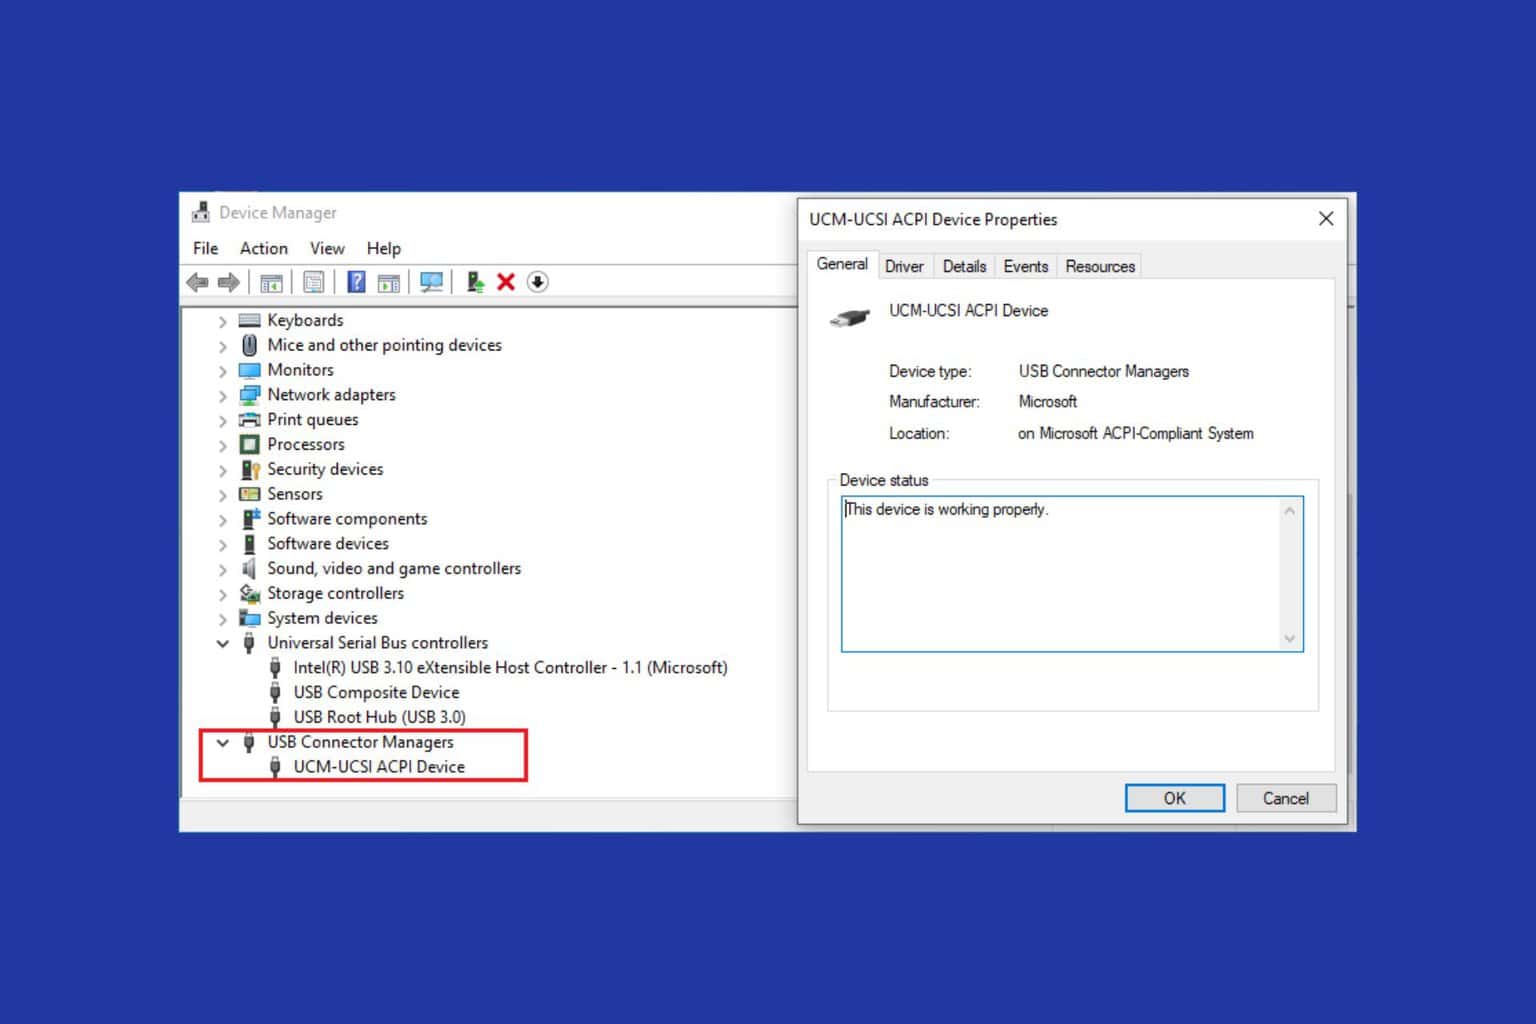
2. Use Device Manager
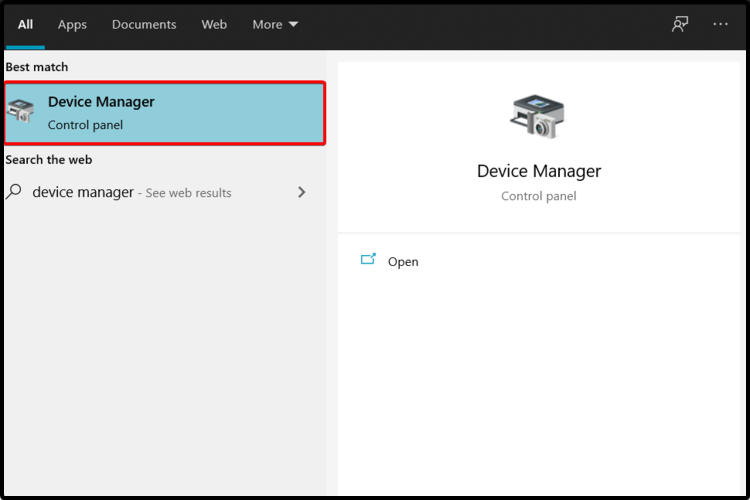
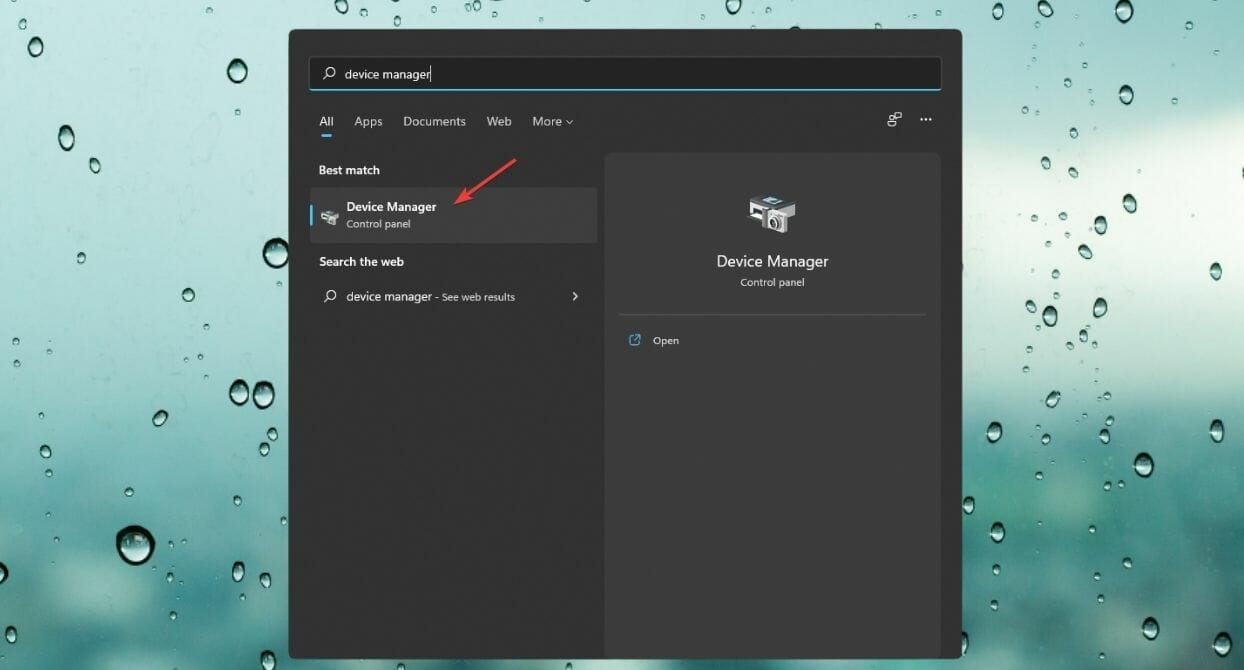
- Open the Start Menu, type Device Manager, and hit Enter.
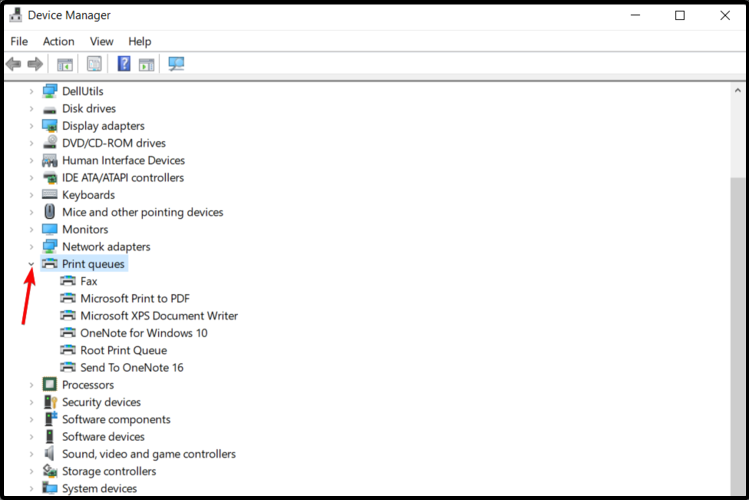
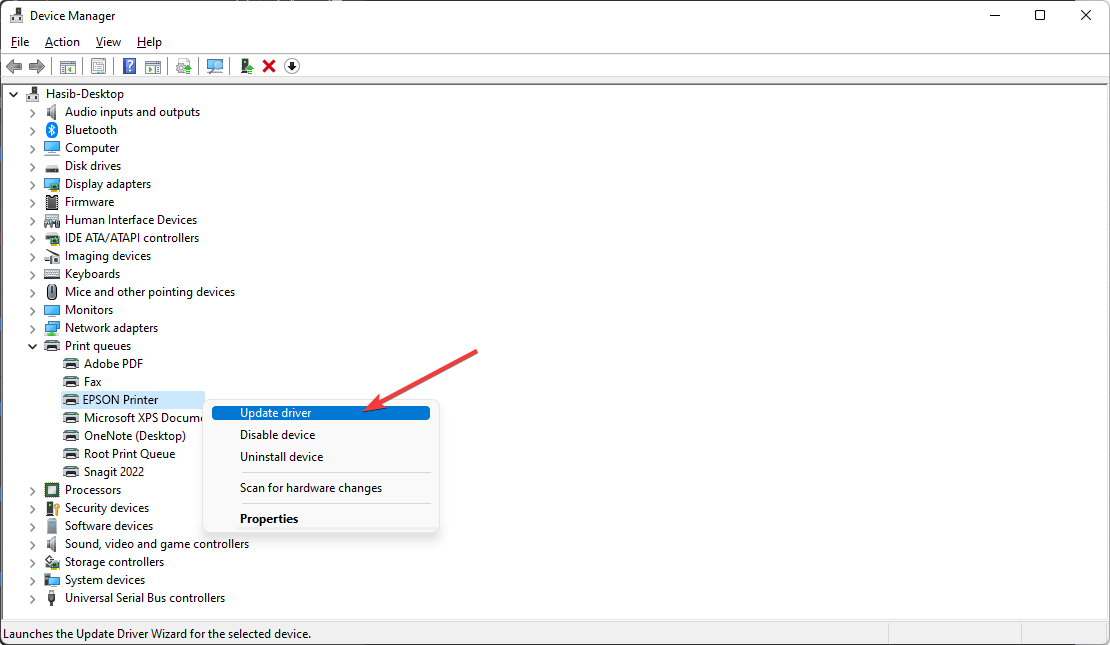
- Expand Print queues.
- Right-click on the one you need, and select Properties.
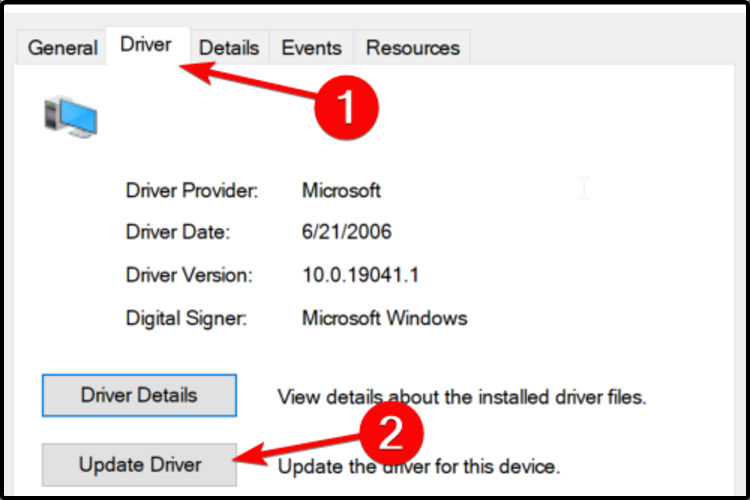
- Select the Driver tab and click on Update Driver.
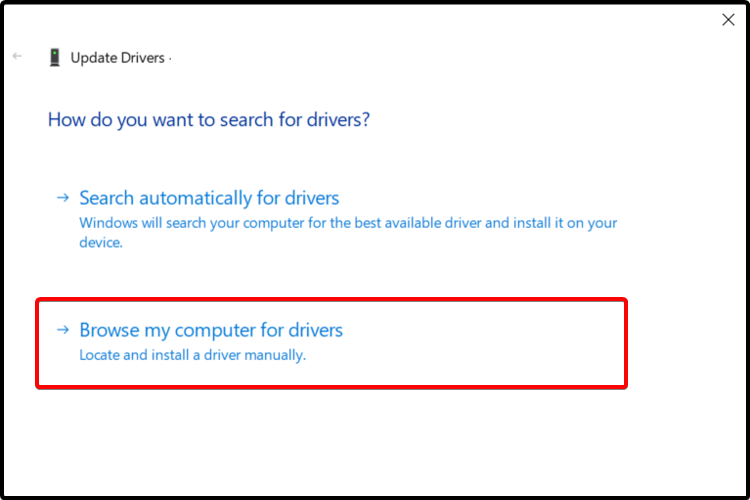
- Choose to Browse my computer for drivers.
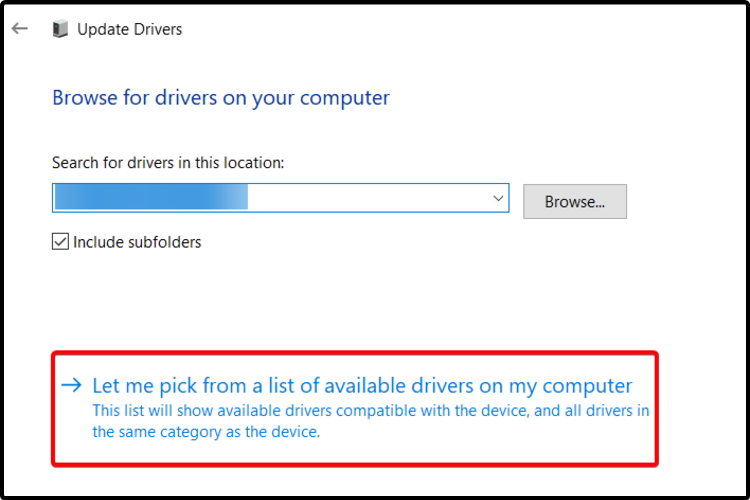
- Navigate to Let me pick from a list of available drivers on my computer.
- Click on Have Disk…, and locate your driver file.
- Select Next and wait until the installation is completed.
- Find the Epson device you want to update.
- If you don’t have the driver in your files, right-click on the device and choose Update driver.
- Click on Search automatically for drivers.
- Finish the update process.
3. Install drivers from Windows Update
- Connect your Epson printer to your Windows 11 computer using a USB cable.
- Press the Windows + I keys to open the Settings app.
- Then, click on Windows Update and select Advanced options.
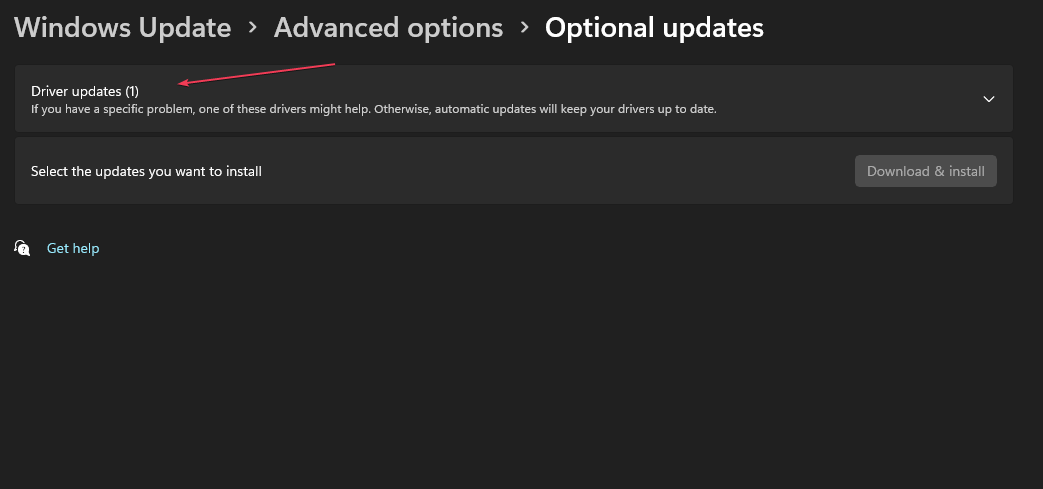
- Then, check Optional updates for available updates.
- Now, select Driver updates and click on Download & Install.
- Restart your computer.
4. Use a driver installer software
If you don’t want to do trial and error on how to download drivers for the Epson L380, use a a driver updater. There are a few specialized software that will make this task way easier for your.
All you have to do is download your chosen tool and leave the rest to it.
To download the drivers, connect your L380 printer to your PC, and the tool will identify missing drivers, match your device with the correct ones, and install them for you.
Wrapping up
For more models, check out how to download the Epson L130 printer driver, Epson et-4850 and Epson L360. We wrap up here but let us know which method is your go-to when downloading drivers in the comment section below.


User forum
0 messages