Error 1711: What does it mean and how to fix it
3 min. read
Updated on
Read our disclosure page to find out how can you help Windows Report sustain the editorial team. Read more
Key notes
- Error 1711 is a Windows Installer issue that arises when users try to update or install the software.
- Deleting msi.tmp files is one confirmed fix for error 1711.
- To explore some more easy-to-follow and thorough guides, check out our extensive Windows 10 Fix section.
- Our Windows Installation hub provides links to articles that include many more fixes for other install errors.

Error 1711 is a general installation issue that can arise when users try to install or update software in Windows. The issue can arise when users try to install MS Office applications, iTunes, WinZip, and other software. It is an MSI Microsoft installer error that stops software installation. The error 1711 message states this:
Error 1711. An error occurred while writing installation information to disk. Check to make sure enough disk space is available.
This issue can arise even when users have a reasonable amount of hard drive storage space available. Thus, freeing up disk space, as hinted by the error message, isn’t always the resolution. There are a few potential fixes for Windows Installer error 1711.
How to fix error 1711 in Windows 10
1. Delete msi.tmp files in the Installer folder
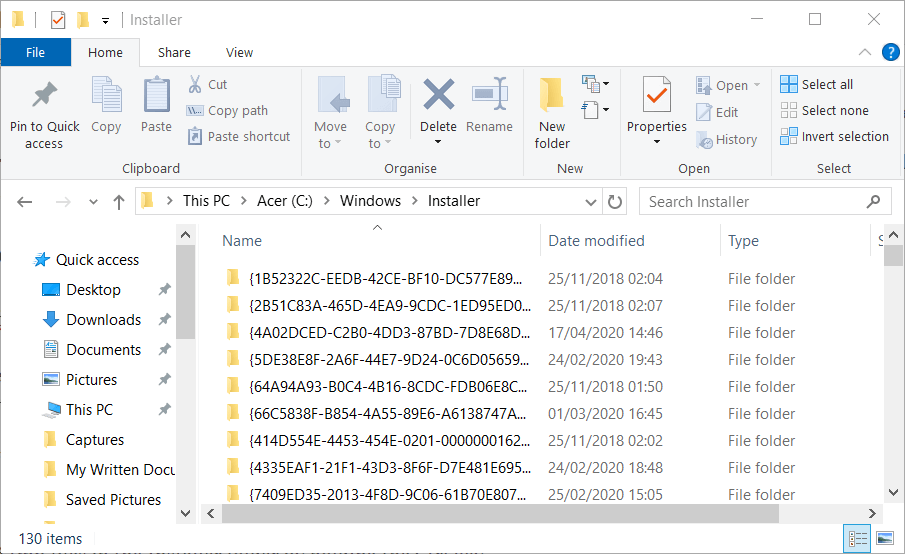
- Some users have confirmed they were able to fix error 1711 by deleting msi.tmp files within their Installer folders. Open File Explorer, which you can do with the Windows key + E hotkey.
- Open the Windows > Installer folder in File Explorer.
- Select all the msi.tmp files in the Installer folder by holding the Ctrl key.
- Click the Delete button on the Home tab.
2. Defrag the hard drive
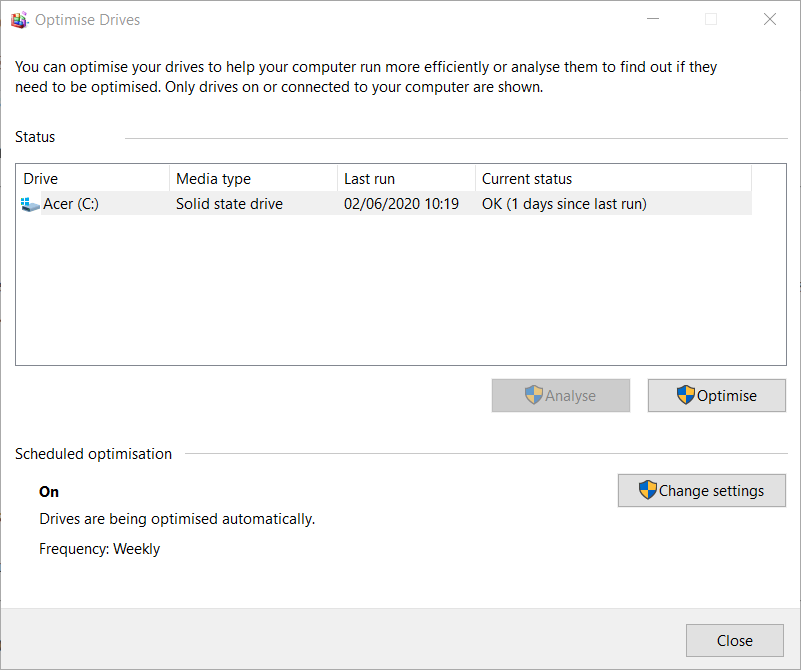
- Error 1711 can be due to a fragmented HDD. To find the Defragment and Optimize drives utility, open the search utility by pressing the Windows key + S keyboard shortcut.
- Type defrag in the search box.
- Click Defragment and Optimize Drives to open that utility.
- Select your primary HDD partition, and click the Optimize option.
- Thereafter, wait for the utility to complete the defrag, which might take a while.
3. Download the installation file again
Error 1711 can also be due to a corrupted MSI file download. So, try downloading the MSI setup file again. Then install the software with the new MSI.
4. Clear the Temp folder
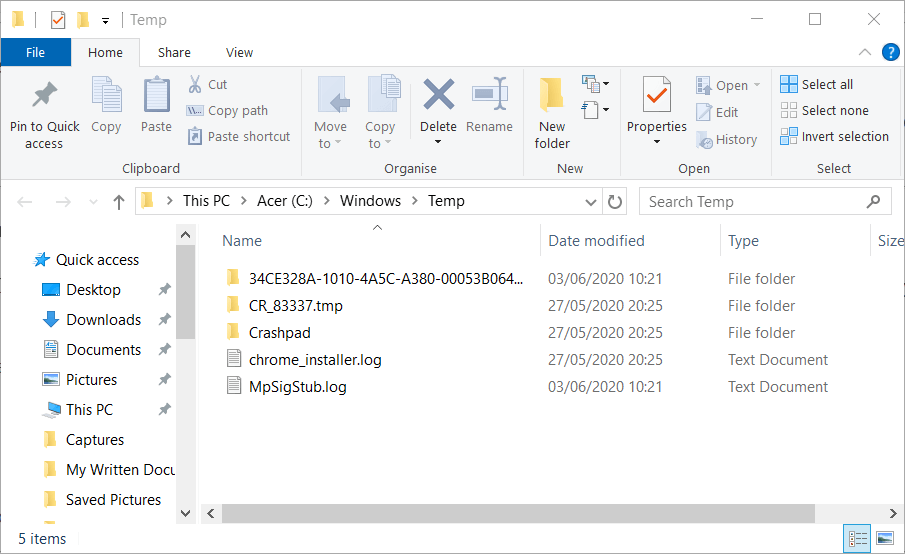
- If you don’t have much hard drive storage available, try clearing the Temp folder. To do that, open Run with the Windows key + R keyboard shortcut.
- Type temp in the Open box, and click the OK button.
- Press the Ctrl + A key combination to select everything in the Temp folder.
- Click the Delete button.
5. Clean the system files
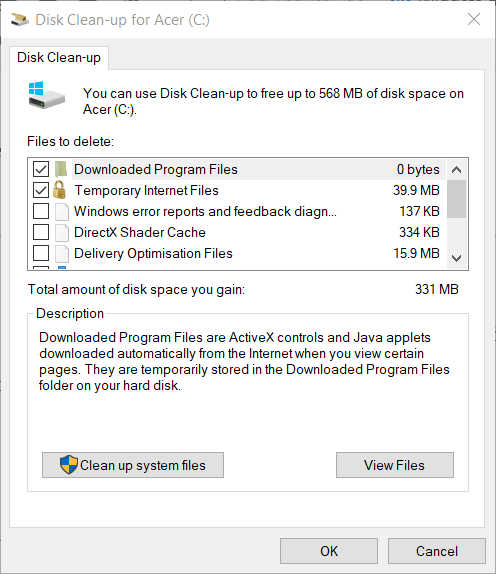
- In addition, try clearing superfluous system files with the Disk Clean-up utility. Open the Run window.
- Input cleanmgr in the Open box, and click the OK option.
- Next, click Clean up system files.
- Select all the checkboxes on the Disk Clean-up tab.
- Press the OK button.
6. Reregister the Windows Installer
- Registering Windows Installer is another confirmed fix for error 1711. Launch the Run accessory.
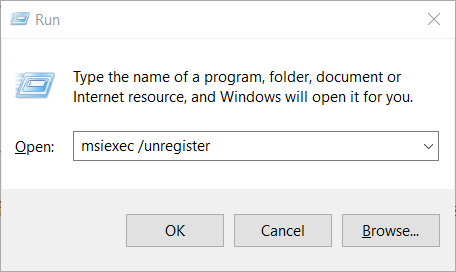
- Type msiexec /unregister in Run’s Open text box and click OK to unregister Windows Installer.
- To reregister Windows Installer, enter msiexec /regserver in Run and click OK.
7. Fix Error 1711 for MS Office
Error 1711 can often arise when users try to update an installed MS Office suite. Office users might be able to fix error 1711 by uninstalling Office in Windows 10. Then users can reinstall the latest Office version.
Press the Windows key + R hotkey to launch Run. Then you can enter appwiz.cpl in Run and click OK to open the uninstaller window. Select your MS Office suite and click Uninstall to remove it. Thereafter, install the latest Office version as outlined on Microsoft’s Office support page.
Those are some of the resolutions users have fixed error 1711 with. So, there’s a good chance they’ll resolve error 1711 so that you can install or update the required software.
[wl_navigator]


User forum
0 messages