Error Driver Failed Sleep: 4 Ways to Fix it
Reinstalling the faulty driver can fix this
![]() 3 min. read
3 min. read
![]() Published on
Published on
Share this article
Improve this guide
Read our disclosure page to find out how can you help Windows Report sustain the editorial team. Read more

Dealing with the Error_Driver_Failed_Sleep issue can be frustrating, especially when it leads to crashes and failures. Fortunately, there are several steps you can take to resolve this problem.
How can I fix the Error_Driver_Failed_Sleep error?
Before trying anything else, make sure that you have the latest Windows updates installed.
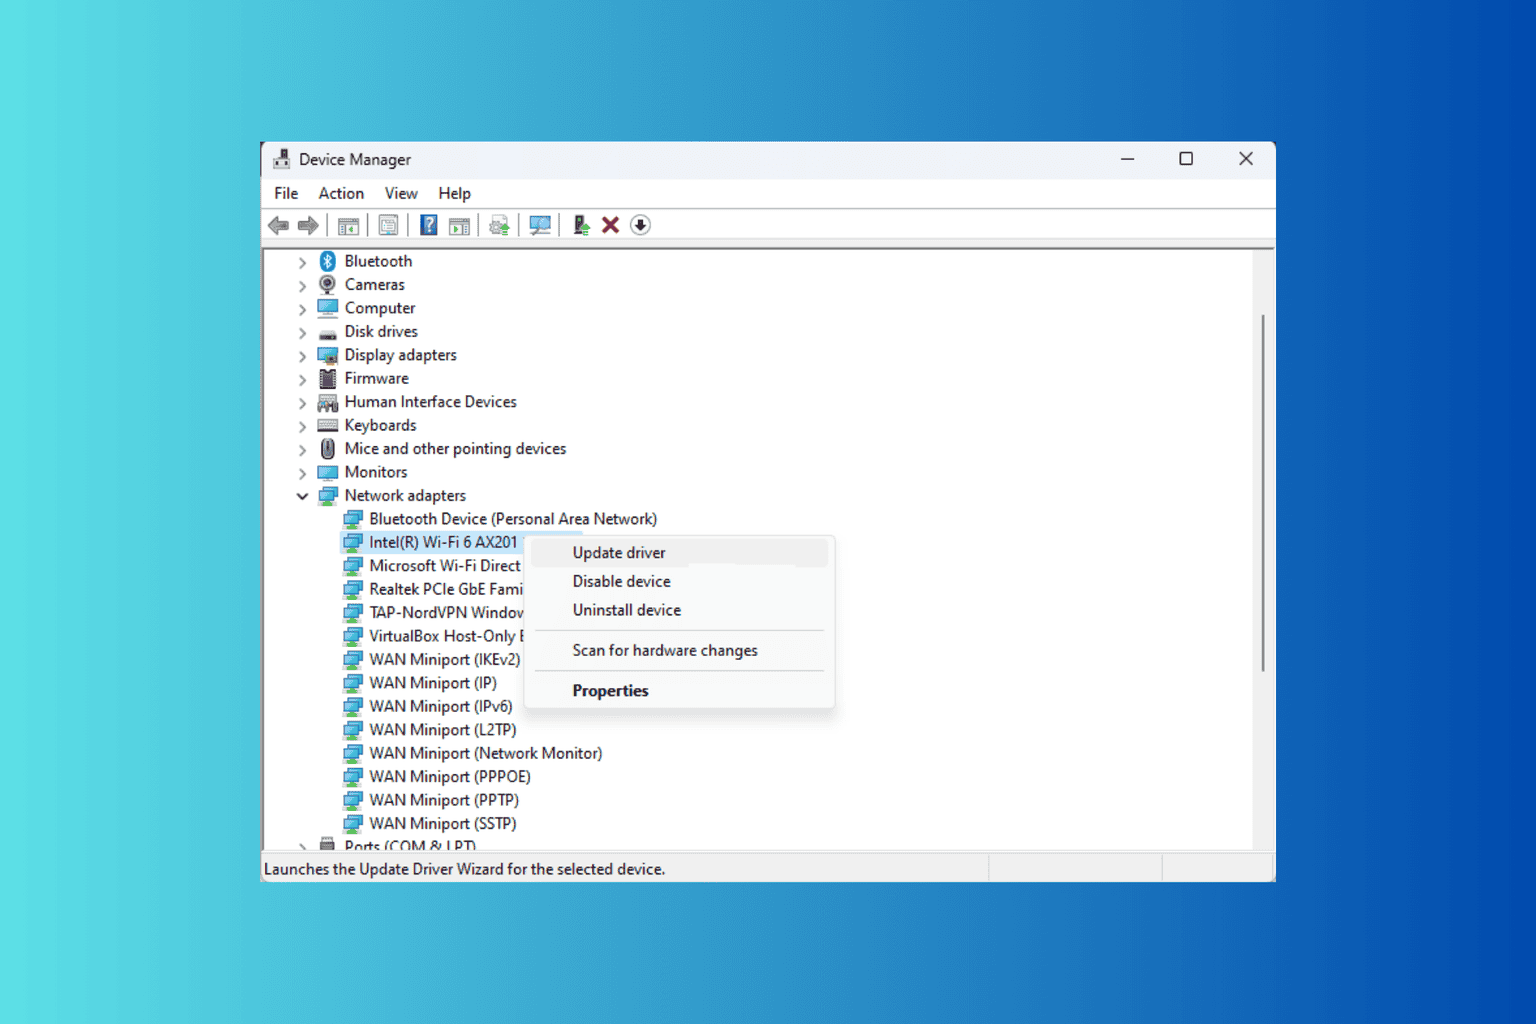
1. Check for faulty drivers
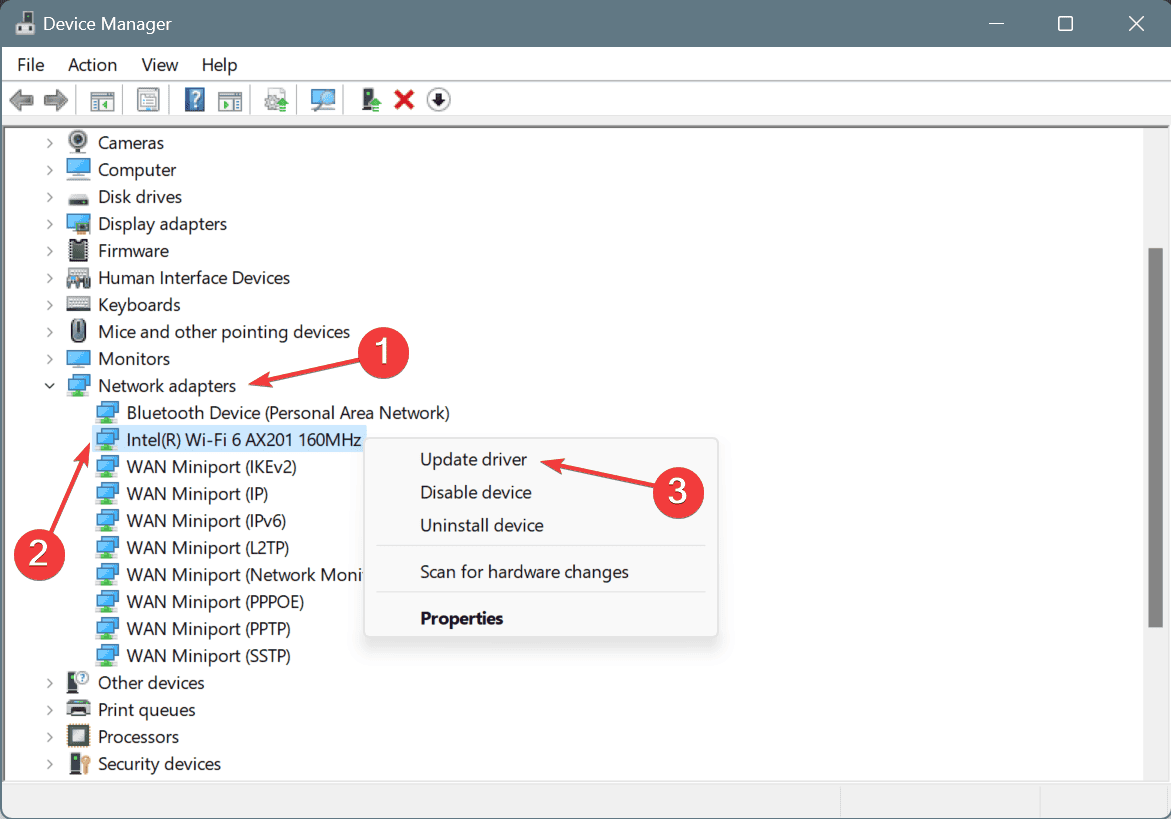
- Open Device Manager (you can find it by typing Device Manager in the Start menu search bar).
- Look for devices with a yellow exclamation mark, which indicates an issue.
- Right-click on the problematic device and select Update driver.

- Choose Search automatically for updated driver software and follow the prompts.

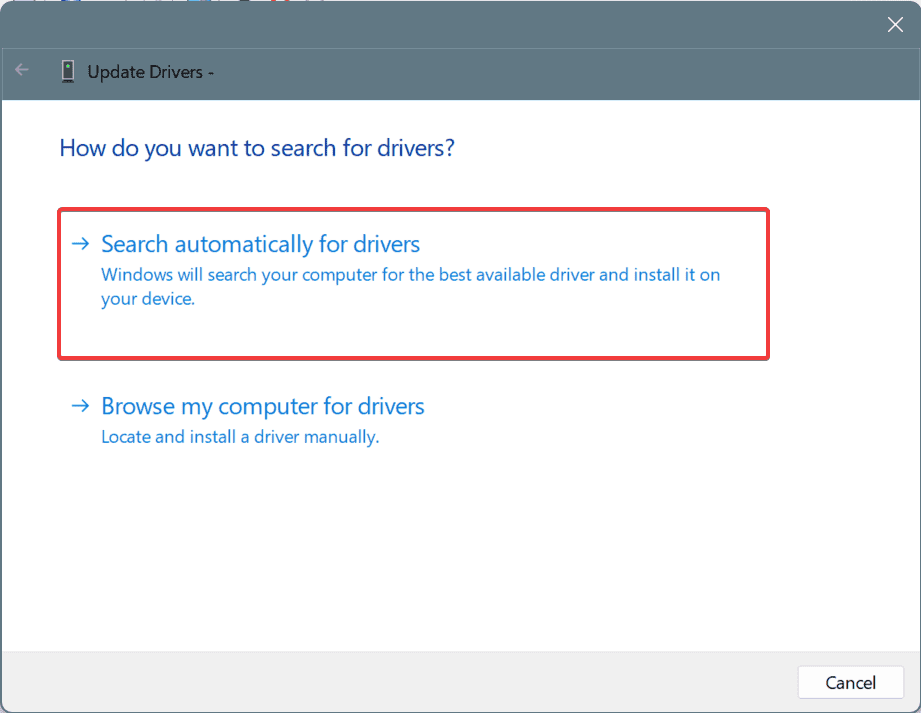
Alternatively, download the driver from the manufacturer’s website since Windows doesn’t always offer the latest drivers.
2. Disable fast startup
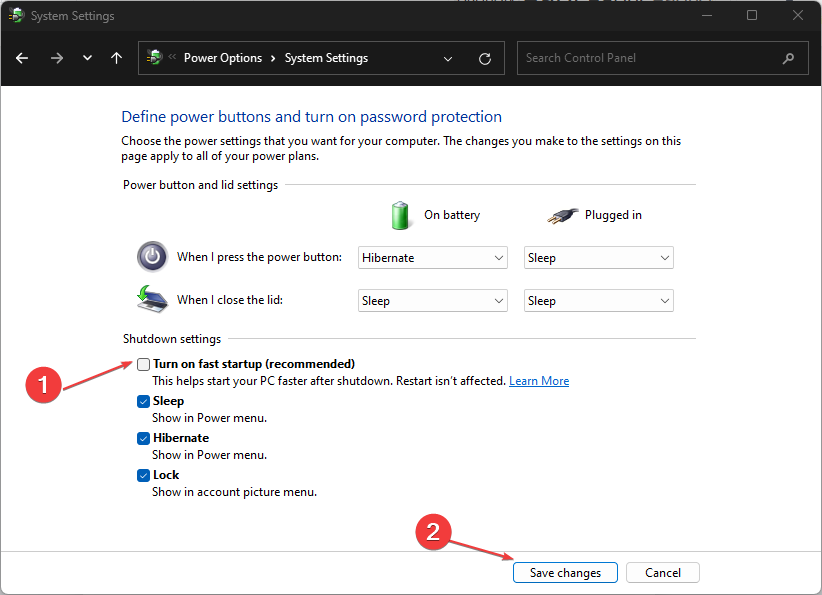
- Open search and type Choose a power plan. Select Choose a power plan from the list of results.

- Select Choose what the power buttons do on the left sidebar.
- Click on Change settings that are currently unavailable.
- Scroll down to the Shutdown settings section and uncheck Turn on fast startup.

- Click Save changes and restart your laptop.

3. Change power plan settings
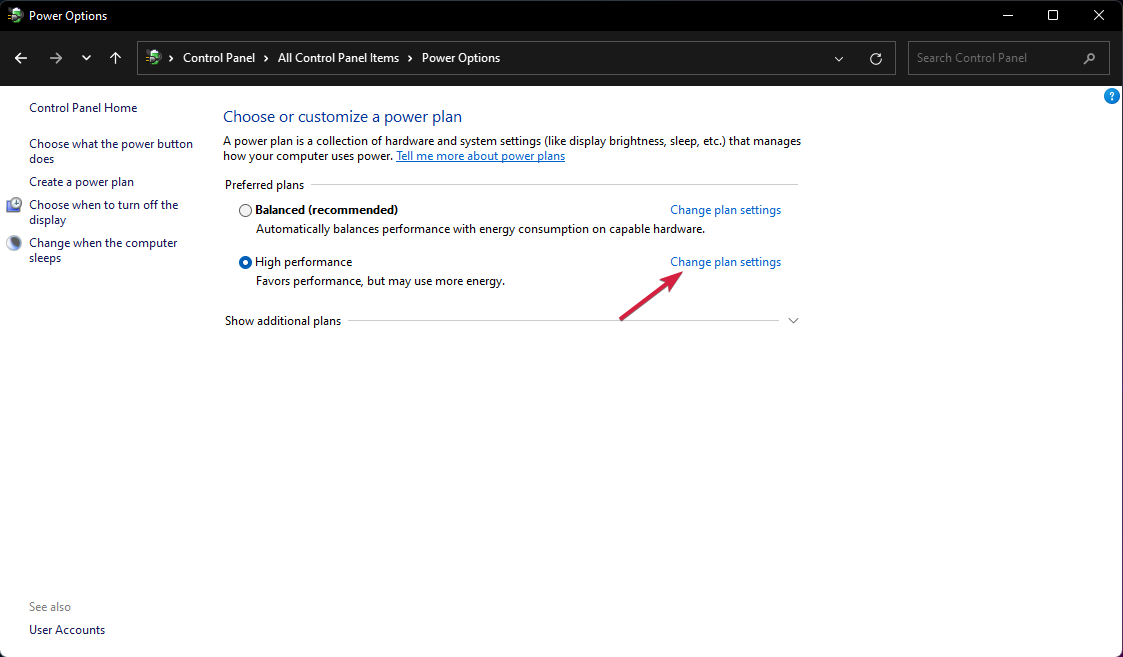
- Open Power plan settings as shown in the previous solution.
- Click on Change plan settings next to your selected power plan.

- Click on Change advanced power settings.

- Expand Sleep, then Allow hybrid sleep, and set it to Off.
- Expand USB settings, then USB selective suspend setting, and set it to Disabled.
- Click Apply and OK, then restart your laptop.

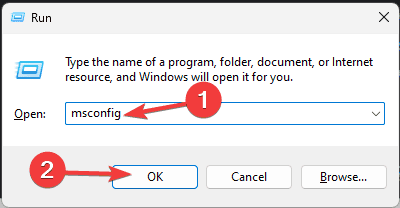
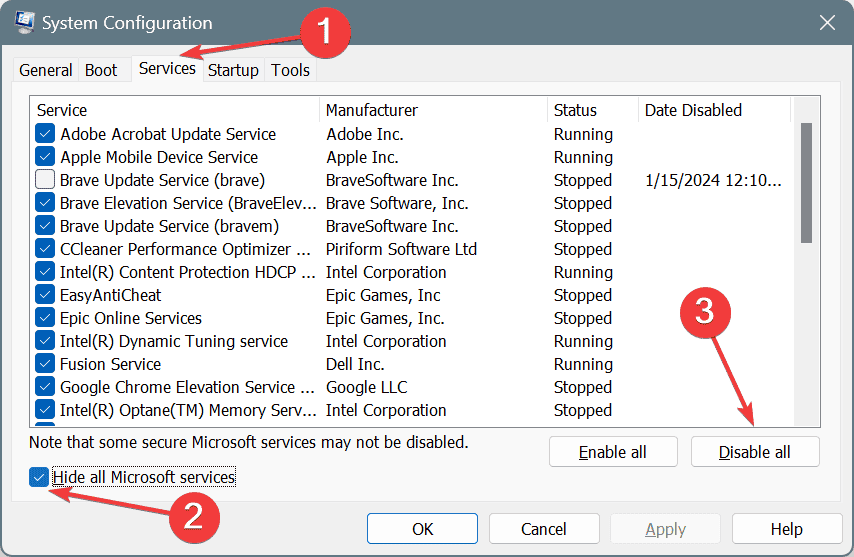
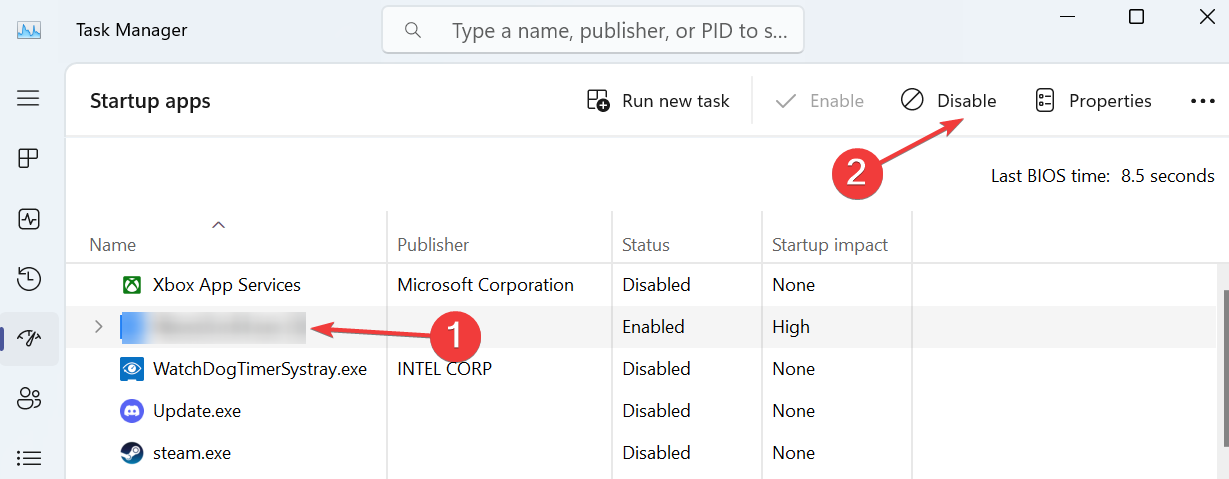
4. Run a clean boot
- Press Windows + R, type msconfig, and press Enter.

- In the System Configuration window, go to the Services tab.
- Check Hide all Microsoft services and click Disable all.

- Open Task Manager by pressing Ctrl + Shift + Esc.
- Go to the Startup tab.
- Select the unnecessary programs and select Disable.

Performing a clean boot helps identify if a third-party application or service is causing the sleep mode issue.
It’s important to mention that this error has the following code 633 (0x279) and according to Microsoft it means the following:
{System Standby Failed} The driver %hs does not support standby mode. Updating this driver may allow the system to go to standby mode.
By following these steps, you should be able to fix the Error_Driver_Failed_Sleep error. You can also flash BIOS if nothing else works for you.
We also have a guide on what to do if BSOD appears after installing drivers as well as an article on how to fix BSOD on Windows 11, so don’t miss them.


User forum
0 messages