How to fix fatal errors in Kasperksy Antivirus
Key notes
- The Kaspersky fatal error message usually appears during installation, and it is caused by other software conflicting with the antivirus.
- To resolve this issue, you can use the Powershell utility to repair corrupt system files.
- Make sure to remove any leftovers from previous antiviruses with tools that can uninstall stubborn software.
- If fatal errors continue to show up, you may consider using another cybersecurity app that is reliable and fully compatible with your PC.

Some users have reported encountering the error message Fatal error inside Kaspersky. This error usually occurs during the installation process of your Kaspersky software.
This error can be extremely annoying, especially if you’ve seen it being displayed every time you want to install Kaspersky.
The Fatal error message inside Kaspersky can be caused by a conflict between a third-party antivirus software that was installed in the past on your PC.
Moreover, it can be caused by the Host files that are needed to connect the Kaspersky installer to the download servers.
For these reasons, in this article, we will explore some of the best methods to apply in order to fix fatal errors during the installation of Kaspersky.
How do I fix the Kaspersky Antivirus fatal errors?
1. Run SFC command inside PowerShell (Admin)
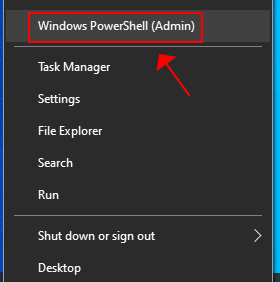
- Press the Win+X keys on your keyboard and select PowerShell.
- Type sfc /scannow inside PowerShell editor and press Enter.

- The process of scanning will take some time. Please make sure to wait for the process to complete.
- Check to see if the problem is resolved. If it is not, please follow the next method.
System File Checker is a great Windows 10 built-in tool that is often used to repair corrupted system files. This utility is available on all versions of Windows OS.
However, if the Sfc /scannow stops on Windows 10, you can take a look at our dedicated guide and easily fix this problem.
2. Uninstall other antiviruses
There are some antivirus software options that require you to use a specialized removal tool to delete the entirety of the files. Here are some examples: Avast, AVG, ESET, McAfee, Sophos, and more.
If you’ve used any of the above-mentioned antivirus software before trying to install Kaspersky, it is recommended to use any of these best third-party uninstaller tools to get rid of stubborn software.
Follow the on-screen instructions from the uninstaller tool you chose to completely remove any trace of older antivirus software, and then try to install Kaspersky again.
3. Check for any leftover registry keys
- Press the Win+R keys on your keyboard to open the Run dialog.
- Type regedit then press Enter.

- Navigate to the following link inside the Registry Editor window:
HKEY_LOCAL_MACHINE\SOFTWARE\Microsoft\Windows\CurrentVersion\Run - Expand the folder called Run and search for a registry key called avp**_post_uninstall (Ex. avp12_post_uninstall).
- Right-click the above-mentioned key and select Delete.
- Check to see if the issue persists.
Windows creates a registry key whenever you uninstall a Kaspersky product, and for some reason, this key gets forgotten by the installer when rebooting your PC to clear the files.
This registry key can cause conflicts with the new installation process of Kaspersky. In order to remove it completely, please follow the above steps.
It is also recommended that you clean your Windows registry from time to time. If you need more details, check our comprehensive guide.
4. Reset Hosts file to default settings
- Open the search bar and type Notepad, then tap or click the Notepad icon.

- In the Notepad file copy and paste this text:
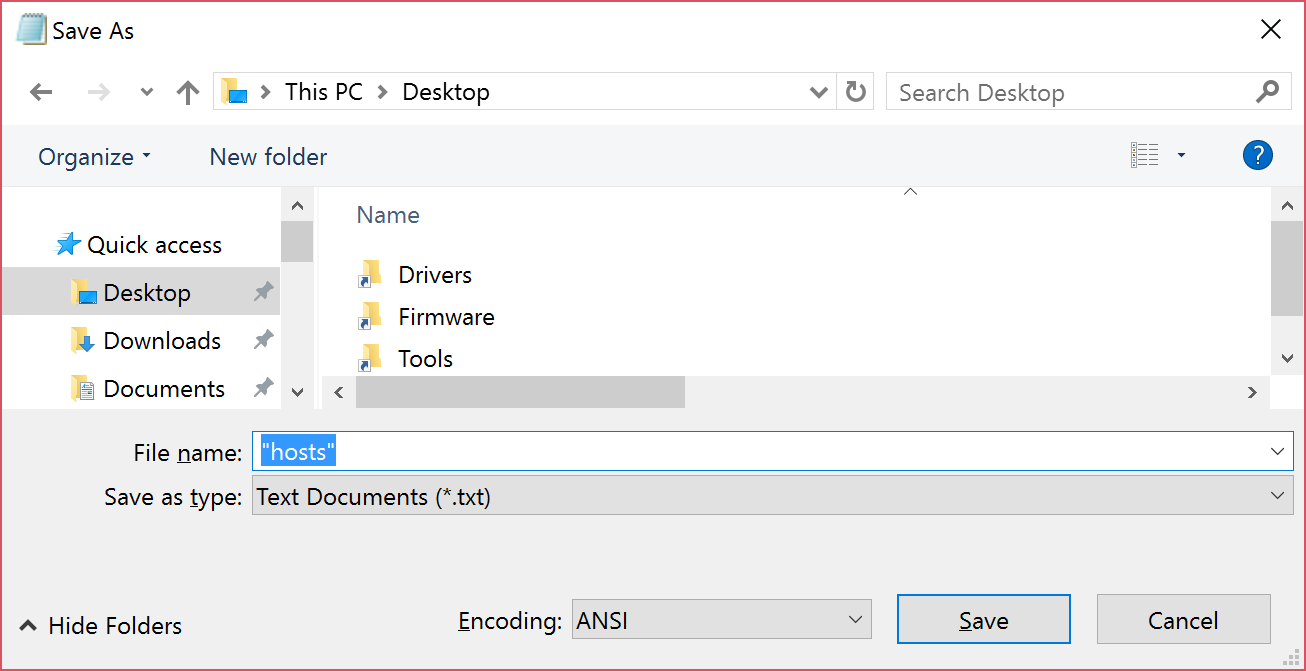
# Copyright (c) 1993-2006 Microsoft Corp. # # This is a sample HOSTS file used by Microsoft TCP/IP for Windows. # # This file contains the mappings of IP addresses to host names. Each # entry should be kept on an individual line. The IP address should # be placed in the first column followed by the corresponding host name. # The IP address and the host name should be separated by at least one # space. # # Additionally, comments (such as these) may be inserted on individual # lines or following the machine name denoted by a '#' symbol. # # For example: # # 102.54.94.97 rhino.acme.com # source server # 38.25.63.10 x.acme.com # x client host # localhost name resolution is handle within DNS itself. # 127.0.0.1 localhost # ::1 localhost - Click the File menu, select Save as, type hosts in the File name box, and then save the file to the desktop.
- Close the file and then click the start button and search for %WinDir%\System32\Drivers\Etc
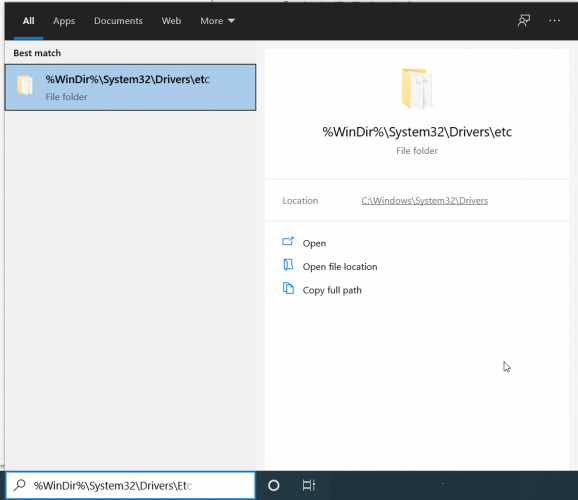
- Select the folder.
- Here, right-click over the Hosts file, select Rename, and then change the name of the file as Hosts.old.
- Move the Hosts file that you created from the desktop to the %WinDir%\System32\Drivers\Etc folder.
- If you are prompted to enter an administrator password, select Continue.
The Hosts file is very important for Windows. It is used by the OS to map human-friendly hostnames to numerical Internet Protocol (IP) addresses that identify and locate a host in an IP network.
5. Use another third-party antivirus
Kaspersky may be one of the best antiviruses, but, when you struggle with multiple errors, you might consider using another reliable solution.
We recommend you to use a cyber security tool that represents a new approach to truly integrated computer security.
The most recent version of its internal scanning engine, combined with custom Firewall and Antispam modules, utilize speed and precision to keep your computer safe.
The result is an intelligent system that is constantly on alert for attacks and malicious software that might endanger your computer.
⇒ Get ESET HOME Security Essential
In this article, we explored some of the best troubleshooting methods for dealing with the message of Fatal error inside Kaspersky.
If you want to discover even more solutions to keeps your computer safe, check our guide including the best antiviruses for Windows 10.
We would love to find out if these methods helped you solve your issue and manage to install Kaspersky Antivirus normally.
If you want to let us know, you can simply use the comment section found below this article.
Read our disclosure page to find out how can you help Windows Report sustain the editorial team. Read more


Improve this guide


User forum
0 messages