Fit Tile Option is Not Working? 3 Ways to Fix it
Set the wallpaper after you have Clean Boot your PC
Key notes
- Some users have reported that the fit tile option is not working on their PC which has disallowed them from setting their desktop image.
- You have to make sure that the image ratio and the format are accurate.
- By removing third-party programs and performing a Clean Boot, you should be able to fix the issue.
Several Windows users have reported that they cannot tile their wallpaper across a screen or multiple screens because the Fit Tile option is not working on their PC.
Hence, we will discuss what causes the Fit tile option to stop working and how to fix it in simple ways.
Why is the Fit Tile option not working?
There can be several reasons why the Fit Tile option is not working on your PC. Here are a few possible reasons:
- Image resolution – If the image resolution is too low, it may not be able to fill the screen perfectly, resulting in unexpected behavior or the option not working at all.
- Image aspect ratio – Should the image aspect ratio differs significantly from the screen’s aspect ratio, the image may appear stretched, cropped, or distorted.
- Third-party software conflicts – If third-party wallpaper management or customization software is installed, it could interfere with the built-in Windows options.
- Compatibility issues – In some cases, specific image formats may not be fully compatible with the Fit Tile option. Using standard image formats like JPEG, PNG, or BMP for wallpapers is best.
Above are a few possible reasons why the Fit Tile option is not working. To troubleshoot this issue, you can proceed to the next section.
What can I do if the Fit Tile option is not working?
Before engaging in any advanced troubleshooting or settings tweaks, you should consider performing the following preliminary checks:
- Disable or uninstall any third-party wallpaper software temporarily to see if it resolves the issue.
- Don’t use a small image as your desktop wallpaper.
- Check the image format to avoid compatibility issues.
Having confirmed the above checks, if the problem persists, you can work through any of the methods provided below to fix the issue.
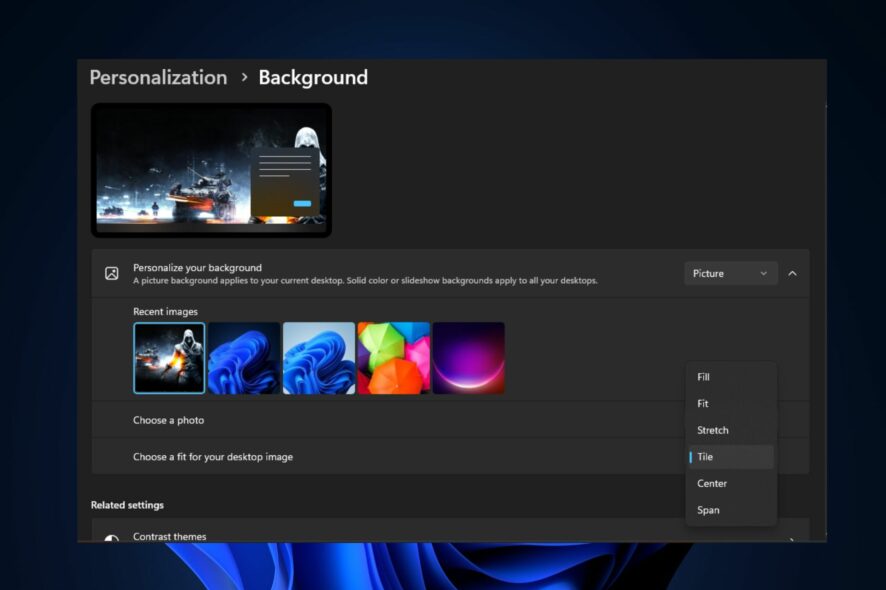
1. Set your desktop background image to default
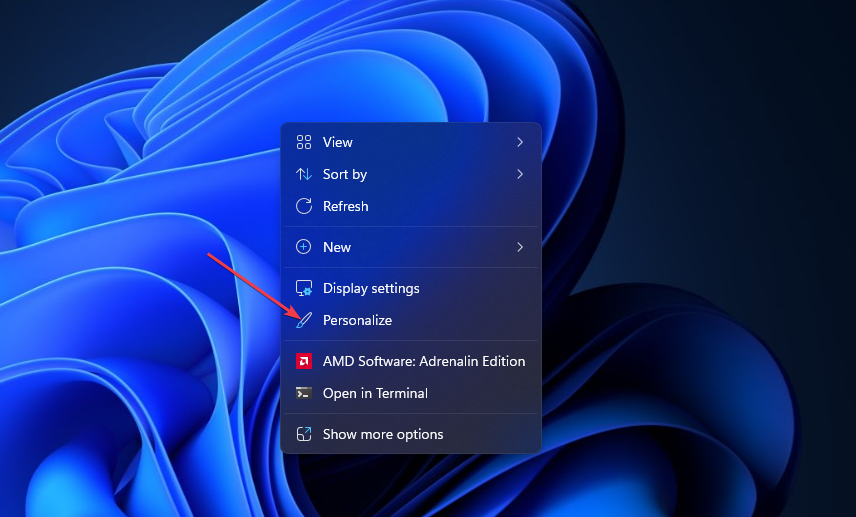
- Right-click on the desktop and select Personalize from the options.
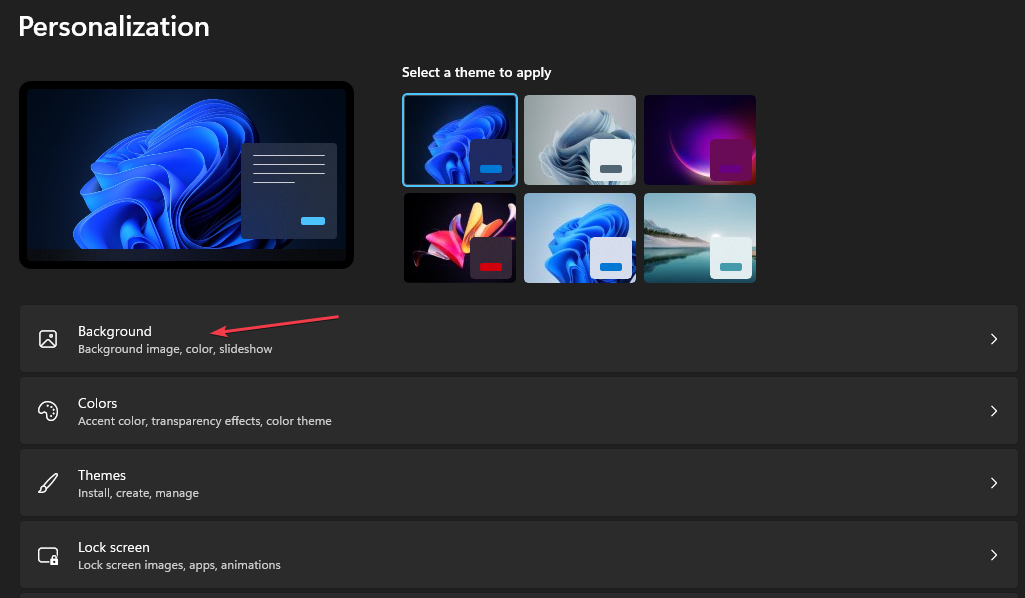
- Navigate to the Background tab in the Personalization settings window.
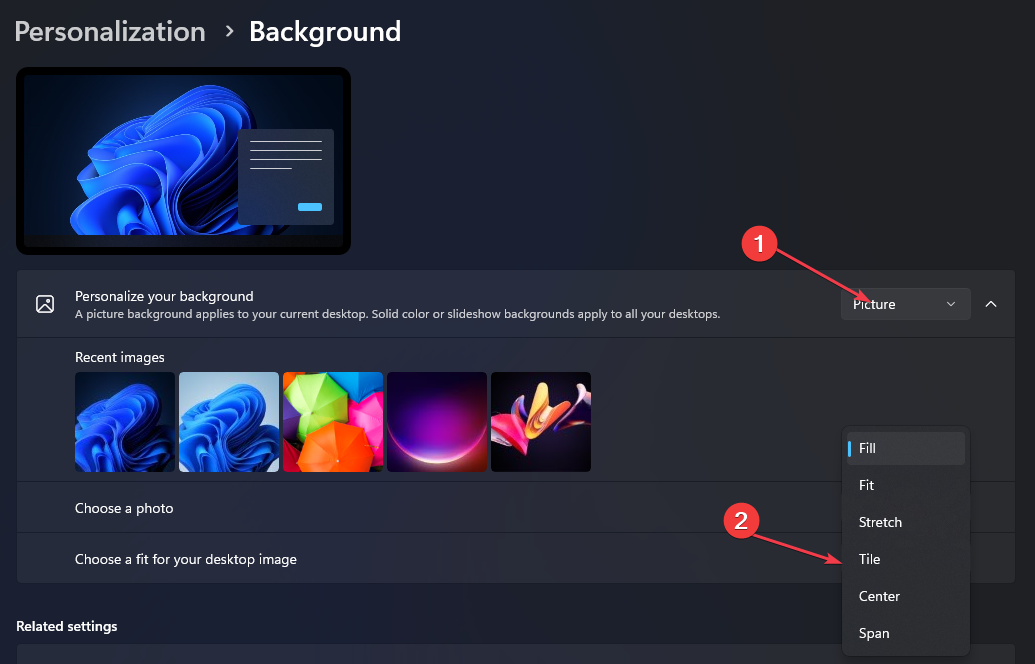
- Now, change the Personalize your background option to Picture option and select one of the default images provided by Windows.
- Next, select the Tile option.
Having used the default images provided by Windows as desktop background, if it works, then the issue is with your image. However, if the problem persists, try the next fix.
2. Change the format of the image
- Press the Windows + E keys to open the File Explorer.
- Now, locate the image file on your computer.
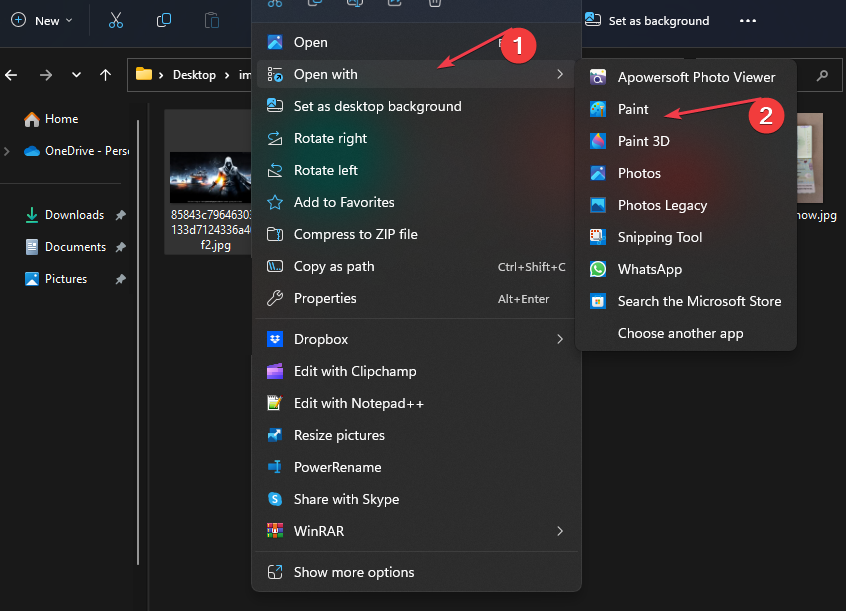
- Right-click on the image, select Open with and choose Paint from the list of available applications.
- Click on the File option in the Paint window’s top-left corner.
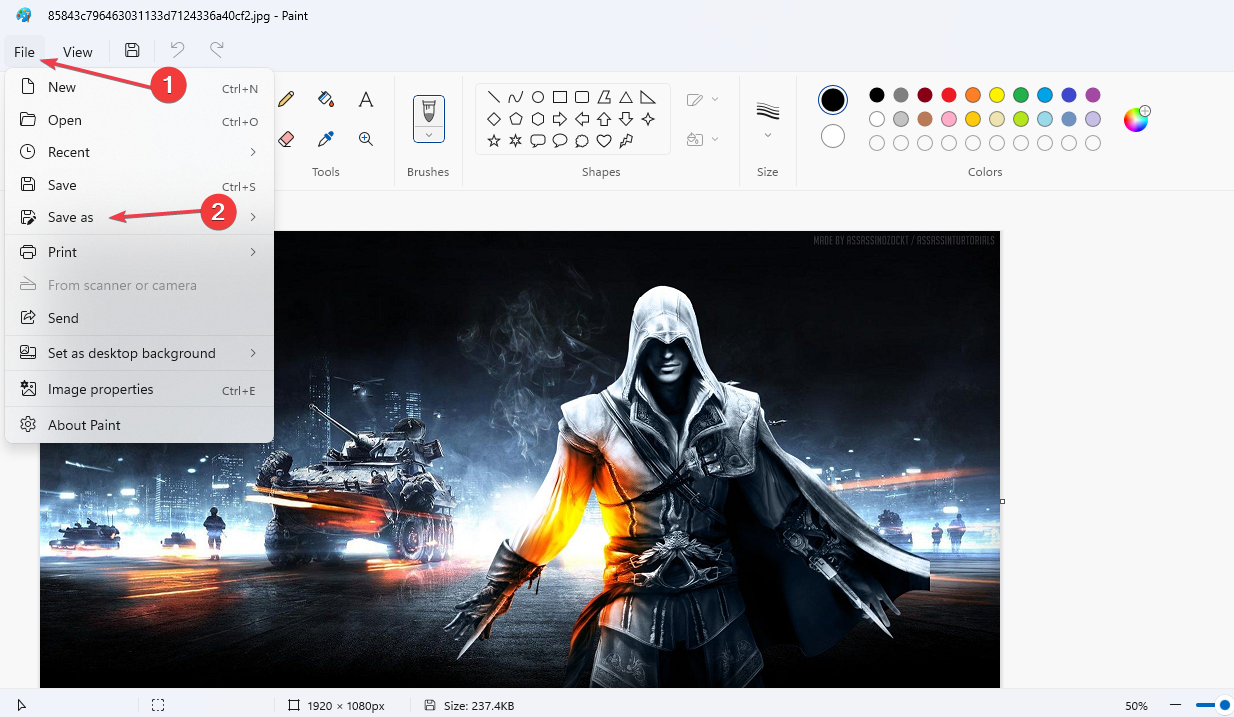
- Next, select Save as. Choose a destination folder to save the modified image.
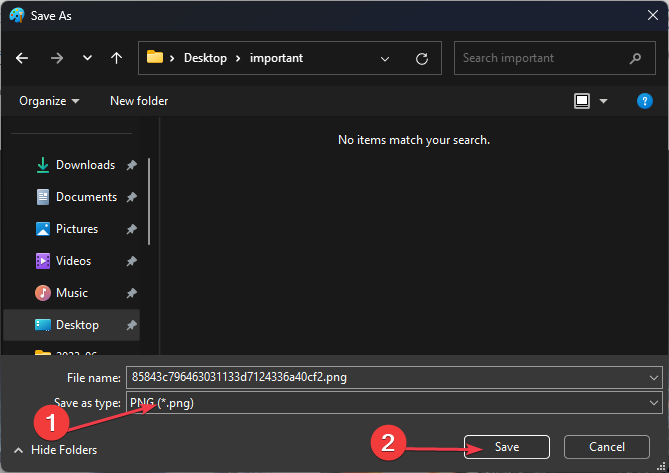
- In the Save as type field, select the format you want to save the image in, such as JPEG, PNG, or BMP. Then, click on the Save button.
Alternatively, you can explore our detailed guide for the best image compression software, enabling you to format the image seamlessly and use it as your desktop background.
3. Set the wallpaper in Clean Boot
- Press the Windows + R keys to open the Run dialog box. Type msconfig in the dialog box and press Enter to open the System Configuration window.
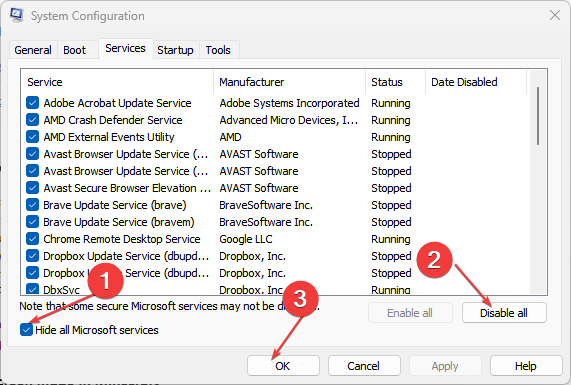
- Now, go to the Services tab. Check the box next to Hide all Microsoft services, and click on Disable all.
- Navigate to the Startup tab and click on the Open Task Manager link to open the Task Manager.
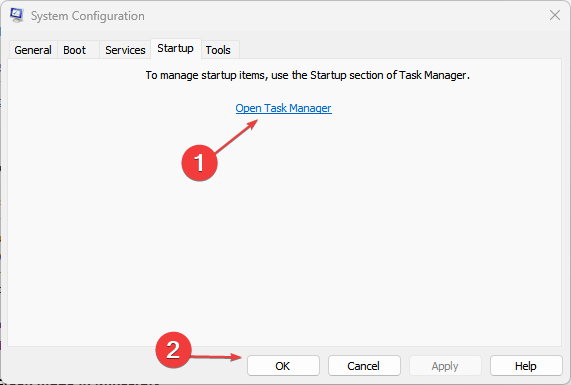
- Go to the Startup tab in the Task Manager, right-click on each entry and selecting Disable.
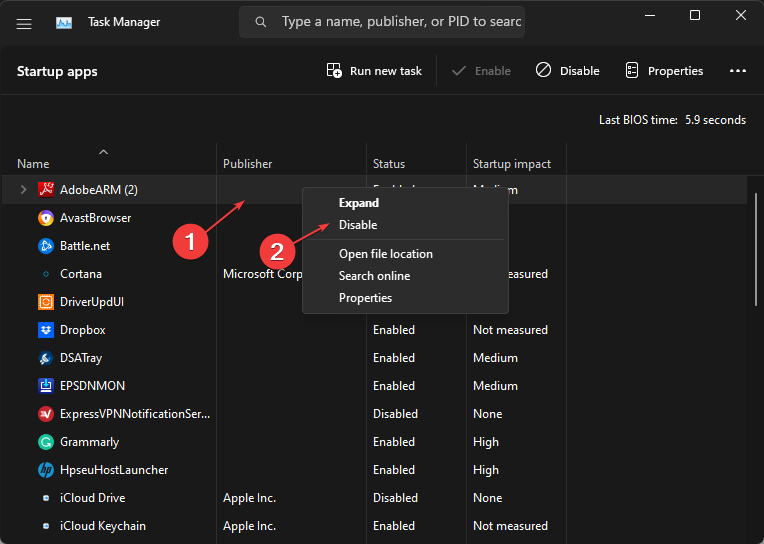
- Close the Task Manager, click Apply, and then OK in the System Configuration window to save the changes.
- Restart your PC to start in a clean boot state. Then, set the wallpaper now.
After restarting your computer in the Clean Boot state, you can try to use the Fit Tile option to set your wallpaper and see if the problem is fixed. If the problem persists, please get in touch with Microsoft support for further assistance.
And that’s it on how to fix the Fit Tile option is not working error. Some users also claim that the Weather app live tile is not working in Windows 11. You can explore our dedicated guide to fix the issue.
Don’t forget to comment in the comments section below if you have any questions or suggestions.
Read our disclosure page to find out how can you help Windows Report sustain the editorial team. Read more


Improve this guide


User forum
0 messages