3 Quick Fixes for Microsoft IME high CPU usage
2 min. read
Updated on
Key notes
- The Microsoft IME high CPU can be triggered by a problematic KB update.
- The Surface Pro 4 users and the ones who installed the Chinese Simplified language pack are especially affected by the Microsoft IME high CPU usage.
- A solution to this problem is to restore the ownership of the Microsoft IME app.
- Another good solution is using specialized software to fix the Microsoft IME CPU issue.

All the Windows 10 users who installed KB3194496 are affected by high CPU usage issues, but it appears that Surface Pro 4 users are particularly plagued by this bug.
Moreover, the users who installed the Chinese Simplified language pack can have this problem.
The high CPU usage incapacitates your system so it’s imperative to solve this problem as soon as possible. Let’s see how we can get rid of this issue by using the solutions below.
How can I fix Microsoft IME high CPU issues?
1. Restore the original owner of the process

- Right-click the process ChsIME.exe in Task Manager and Open file location.
- Right-click the file ChsIME.exe, select Properties, and go to the Security tab.
- Click on Advanced at the bottom right.
- Beside Owner: TrustedInstaller, click Change.
- Type in Administrators, click on Check Names and make sure that the keywords you just typed in are underlined.
- Click OK to close the advanced dialog.
- Click the Edit… button above the Advanced.
- Under Group or user names: click SYSTEM.
- Under Permissions for SYSTEM check Deny on the Read & execute row. Click OK.
- Click Advanced at the bottom right again and repeat steps 4, 5, 6, but type NT SERVICETrustedInstaller in step 5 to restore the owner to the original.
- Click OK to finish everything.
- Restart your computer.
2. Use a specialized software
This is a classic problem where the system goes haywire because of a simple problem or file. Sometimes some problems are not so easy to resolve using classic tweaking.
Dedicated repair software can scan for and replace any missing system files with fresh ones from their own databases.
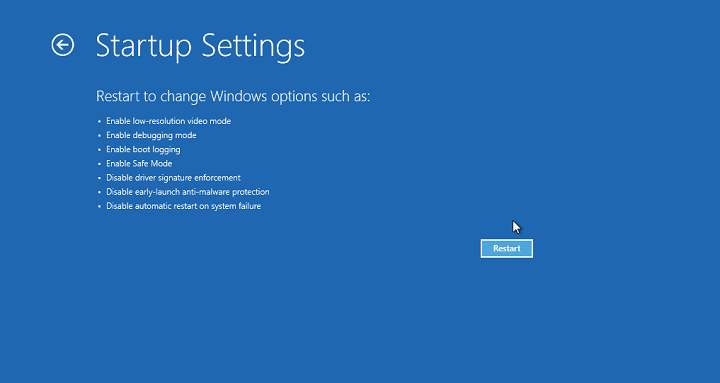
3. Rollback your system in Safe Mode
- Shut down your PC and turn it back on.
- Navigate to the Run in Safe Mode option and press Enter.
- Go to Start, type system restore, and then hit Enter.
- Follow the prompts to revert back to a certain restore point.
- Wait for the process to complete, and then reboot.
Note: System restore does not affect any of your files, documents, and personal data.
Rolling back Windows to a point before experiencing the IME problem can also fix the issue. Use the comment section below to tell us if these solutions solved the problem for you.






User forum
4 messages