FIX: NVidia driver error code 3 on Windows 10/11 [OpenGL]
5 min. read
Updated on
Read our disclosure page to find out how can you help Windows Report sustain the editorial team. Read more
Key notes
- Getting the NVidia driver error code 3 on your Windows 10 PC shouldn’t turn into a cause for alarm.
- Below you’ll find the quickest solutions to apply in this case. For example, you can choose to uninstall and reinstall the driver.
- You may also run the hardware troubleshooter. If you like this idea, feel free to check out these great Windows 10 troubleshooting tools.
- Lastly, most issues can be solved with the right tips. Therefore, just visit our Windows 10 Errors Hub.

Whenever you get error codes related to drivers, the first place you need to check is your computer’s Device Manager.
You basically need to use it to locate your error code and then click on the specific error to get more detailed information about it.
You can find the error code by going to Device Manager and double-clicking on the device type that has the problem.
Once you double click on the device, right-click, and select Properties, then you will find the error code in the Device Status area.
Error code 3, on Device Manager, usually reads The driver for this device might be corrupted, or your system may be running low on memory or other resources, but this shouldn’t be a cause for alarm.
If you get the NVidia driver error code 3 with a similar message description, you can use the solutions below to fix it.
How can I fix the NVidia driver error code 3?
- Update the driver
- Run a troubleshooter
- Close some open apps
- Uninstall and reinstall the driver
- Install additional RAM
1. Update the driver
There are different ways you can update the driver: from Device Manager, from Windows Update, from the manufacturer’s website, or by using a dedicated tool.
Update drivers from Device Manager
- Right-click Start.
- Select Device Manager.
- Click Display adapters to expand it.
- Right-click on the NVidia card driver.
- Select Update driver software.
If you don’t have any driver updates available, right-click on the graphics card driver and click Uninstall, then restart your computer.
Update drivers from Windows Update
- Click Start.
- Select Settings.
- Select Update & Security.
- Select Windows Update.
- Click Check for updates.
Update drivers from manufacturer’s website
- Right-click Start.
- Select Device Manager.
- Expand the Sound, Video, and game controllers option.
- Right-click on the NVidia card.
- Click Update driver software.
- Restart your computer.
You can also o to the NVidia manufacturer website, check for the latest Windows 10 drivers available, and then install it based on the instructions on the website.
Update drivers by using a dedicated tool
Sometimes, downloading and updating drivers on your own can damage your system by choosing and installing the wrong versions. On top of that, you might lack the time for such a task these days.
In order to prevent any unfortunate situation from the very start, we strongly suggest doing it automatically by using a specialized tool.
As imagined, it will help you avoid damaging your PC by downloading and installing the wrong driver versions.
2. Run the hardware troubleshooter
- Right-click Start.
- Select Control Panel.
- Go to the View by option on the top right corner.
- Click the drop-down arrow and select Large icons.
- Click Troubleshooting.
- Click Hardware and Sound.
- Click Configure a Device.
- Click Next to run the troubleshooter.
The Hardware and Devices troubleshooter checks for commonly occurring issues and ensures any new device or hardware is correctly installed on your computer.
Follow the instructions to run the Hardware and Devices troubleshooter. This will begin detecting any issues that may be causing the drag and drop problem.
3. Close some open applications
- Right-click Start.
- Select Task Manager.
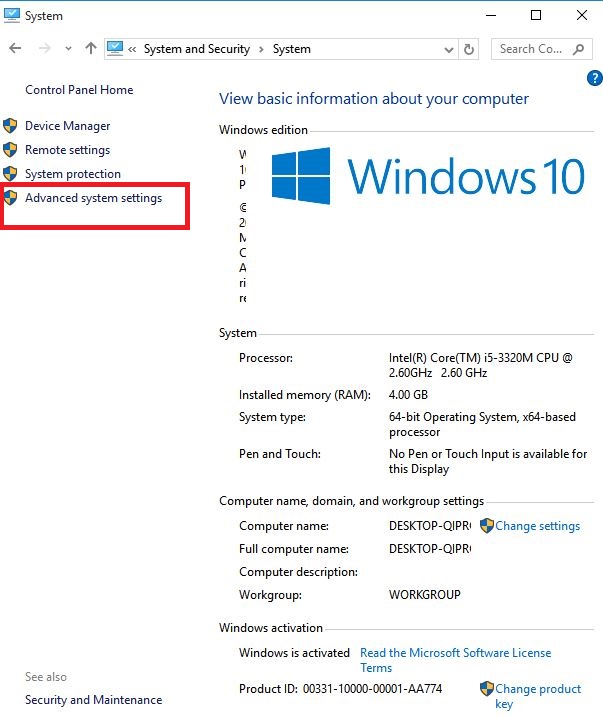
- To view virtual memory, right-click Start.
- Select Control Panel.
- Click System and Security.
- Select System.
- Click Advanced system settings.
- Open System Properties dialog box.
- Click the Advanced tab.
- Click Settings under the Performance area.
- Click the Advanced tab and check Virtual memory.
As mentioned earlier, NVidia driver error code 3 can be caused when your system is running low on memory or other resources.
If this is the case, or your computer has insufficient memory to run the device, close some apps to avail more memory.
You can also check memory and system resources, plus virtual memory settings by doing as described above.
Can’t open Task Manager? Don’t worry, we’ve got the right solution for you.
4. Uninstall and reinstall the driver
- Right-click Start.
- Select Device Manager.
- Go to Sound, Video, and Game controllers and click to expand the list.
- Right-click on the NVidia graphics card.
- Select Properties.
- Click the Driver tab.
- Select Uninstall and follow the prompts to uninstall the driver.
- Restart your computer.
- Right-click Start again.
- Select Device Manager.
- Right-click the Action tab on the menu.
- Select Scan for hardware changes and follow the instructions to complete the reinstall.
The device’s driver may have become corrupted so you may need to uninstall the driver from Device Manager and scan for new hardware so as to install the driver all over again.
You may be prompted to provide the path of the driver. Windows may have the driver built-in already or may have the driver files installed from the last time you set up the device.
Sometimes, however, it will open the New Hardware Wizard which may ask for the driver. If you are asked for the driver and you don’t have it, download the latest driver from the hardware vendor’s website.
5. Install additional RAM
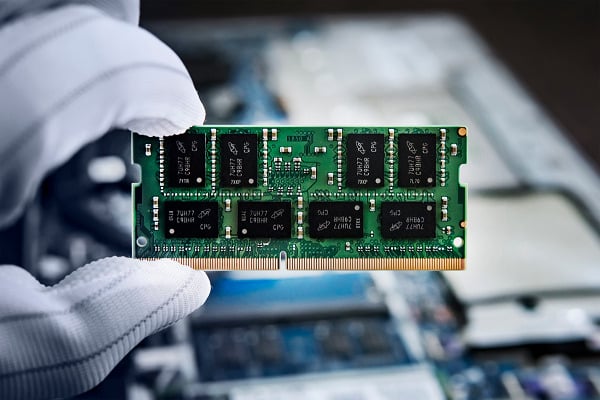
NVidia driver error code 3 may also be caused by insufficient memory so you can install additional Random Access Memory (RAM) on your computer.
Did any of these solutions help fix the NVidia driver error code 3 on your computer? Let us know by leaving a comment in the section below.


User forum
0 messages