Install & Run Google Play Store on Windows 11 [Quick Guide]
Key notes
- Developer ADeltaX unlocked Google Play Store support for Windows 11.
- This was done by making changes to Windows Subsystem for Android.
- This guide will show you how you can also get the same results on your PC.
- However, the process is not beginner-friendly so think twice before trying.
We already know that the Redmond tech giant has started testing the Android subsystem for Windows 11, and a limited number of insiders can now download it from the Amazon AppStore.
The availability of Android apps on Windows 11 would strongly depend on the items published in the Amazon AppStore, but you can still sideload APKs.
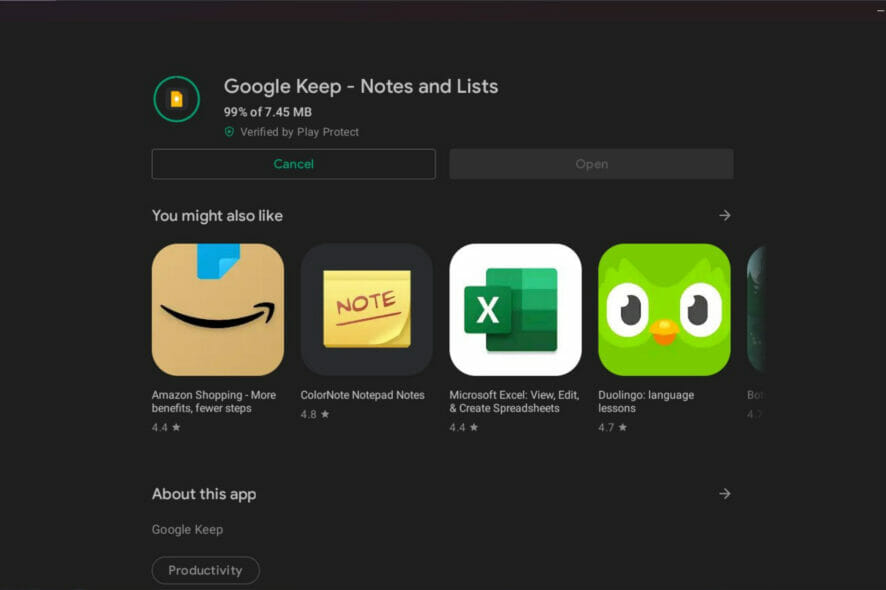
However, it’s been proven that you can also run the Google Play Store on Microsoft’s latest operating system.
Is it possible to run the Google Play Store on Windows 11?
A developer known as ADeltaX unlocked Google Play Store support by making changes to Windows Subsystem for Android.
This Play Store hack, which is not beginner-friendly, enables support for both Google Play services and the Google Play Store with sign-in support.
This method could actually pave the way for installing any Android app on Windows 11 and Google Play services, and based apps will also work.
The script mentioned above is hosted on Github, however, it’s currently not beginner-friendly and it’s better to stay away from the hack unless you know exactly what you are doing.
How do I run the Google Play Store on Windows 11?
Before you get started, please make sure you read the percent paragraph once more. To get started, you first need to download Windows Subsystem for Android.
After that, you need to install Windows Subsystem for Linux and download Ubuntu from the Microsoft Store.
Now run the following commands in the Ubuntu terminal:
sudo apt-get updatesudo apt install unzip lzipThe next step involves heading over to OpenGApps and creating a package that features the following configuration settings:
- Platform: x86_64.
- OS: Android: 11.
- Variant: Pico on OpenGApps
Now download 7Zip and extract the .msixbundle of Windows Subsystem for Android and locate the msixbundle compatible with your architecture/device language.
Proceed with extracting the second msixbundle to another folder and delete the appxblockmap, appxsignature, content_types, and appxmetadata files.
Moving on to the Ubuntu terminal, you have to run these commands:
git clone https://github.com/ADeltaX/WSAGAScript
cd WSAGAScript/\#IMAGES
mv /mnt/path-to-extracted-msix/*.img .
cd ../\#GAPPS
cp /mnt/path-to-downloaded-gapps/*.zip .
The command we’ve listed above will automatically download the necessary files to run the WSAGA script.
With this command, WSL would follow the same path as Windows after /mnt/, but make sure the drive letter is correct.
Now you need to run executable permission for the scripts.
cd..
sudo chmod +x extract_gapps_pico.sh
sudo chmod +x extend_and_mount_images.sh
sudo chmod +x apply.sh
sudo chmod +x unmount_images.sh
Proceed to change the root directory in VARIABLES.sh using the command pwd and note down the output. Run the following command where VARIABLES would be the output of the previous command:
nano VARIABLES.shWe’re almost done, so bear with us for just a few more seconds. Now, all you have to do is run these commands:
sudo ./extract_gapps_pico.sh
sudo ./extend_and_mount_images.sh
sudo ./apply.sh
sudo ./unmount_images.sh
You will want to copy the modified WSA image, and for that, you will need to run another command, which is:
cd \#IMAGES
cp *.img /mnt/path-to-extracted-msix/
Provided you followed the above steps correctly, you should be able to successfully register the modified image.
In order to do register, enable developer mode in WSA and run Add-AppxPackage -Register path-to-extracted-msix\AppxManifest.xml
Now, Windows Subsystem for Android will install the required apps and files for Play Store. As we said at the beginning of this article, this is no easy task.
To sign in with your Google account, copy the kernel file from GitHub and replace the kernel file inside the tools folder of the extracted mix.
 NOTE
NOTE
Once all the above is done, enter the ADB shell and run the following command:
su
setenforce 0
Although the instructions are available, they’re not for beginners, and it’s better to wait for a third-party tool to automate the entire process.
Some readers complained about the OR-RWE-O3 payment error on Google Play. If you’re also experiencing it, read the highlighted guide for fixes.
Also, if you are interested in learning how to fix the OR-CCSEH-26 error, we have a dedicated guide to help you with that.
Have you also managed to get the Google Play Store on your Windows 11 device? Share your process and experience with us in the comments section below.
Read our disclosure page to find out how can you help Windows Report sustain the editorial team. Read more


Improve this guide


User forum
0 messages