5 Ways to Fix Your AMD GPU If It's Not Being Fully Utilized
Your GPU can be used a lot more efficiently when set up correctly
Key notes
- Many Windows users have observed an unusual issue where the AMD GPU is not being fully utilized.
- This may be caused due to outdated chipset or graphics driver or heavy application running in the background.
- Updating the drivers or scanning the system for any corrupted files might help in fixing the issue.

When users upgrade their graphics card in their system for a better experience while playing games, they noticed that the GPU in the AMD system is not being fully utilized.
Due to this, they are facing quite a lag and problems while playing the games or using the system in general. A few users also faced no AMD graphics driver installed error in Windows 11 system.
Why is my GPU utilization so low?
There are certain reasons why GPU is not being fully utilized on the system and they are listed below.
- Corrupted system files – When any system files get corrupted, it will create problems like this
- Graphics settings – A game’s graphical settings may need to be changed if it is frequently producing this problem
- Heavy applications running in the background – There is an issue when several large apps that are not needed are operating in the background
Now that we know where the problems arise from, here is how we can fix the AMD GPU issue.
How do I force my AMD GPU usage?
1. Disable all startup programs
- Press the Ctrl + Shift + Esc keys together to open the Task Manager.
- Click the Startup tab on the left side and right-click on a startup app listed.
- Choose Disable from the context menu.

- Do the same to disable all the startup apps listed under the Startup apps tab.
2. Run the SFC scan
- Press the Windows key and type cmd.
- Right-click on the Command Prompt app and select Run as administrator from the context menu.
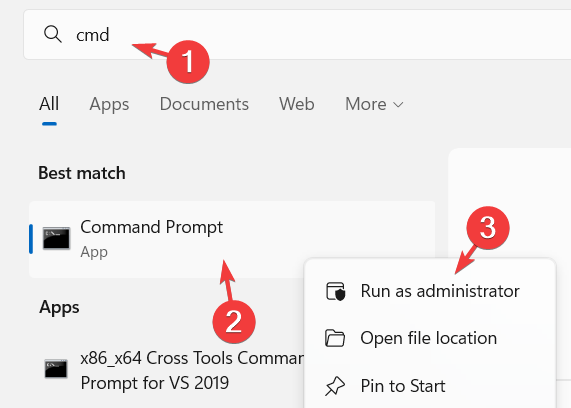
- Click Yes on the UAC prompt on the screen.
- Now type the below line in the command prompt window and press the Enter key:
sfc /scannow
- This will scan for all the corrupted files and then repair them.
3. Update the chipset driver
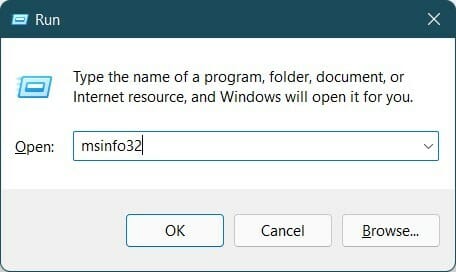
- Open the Run console by pressing the Windows and R keys together.
- Type msinfo32 in the run console and press Enter.
- In the System Information window, select the System Summary option on the left side.
- Then check for the BaseBoard Product option on the right side and note down its value, which is the chipset model.

- Now visit the AMD website and search for your chipset model and download its drivers.
- Finally, install the drivers on your system.
Alternatively, a fast and simple solution is to use a third-party tool to automatically scan for outdated drivers and update them safely.
You can prevent these problems by using an automatic tool that will search and install the correct drivers on your computer with just a few clicks. That's why we recommend you use Outbyte Driver Updater. Here's how to do it:
- Download and install the Outbyte Driver Updater app.
- Launch the software.
- Wait for the app to detect all incompatible drivers.

- Afterward, it will show you a list of the drivers found to select the ones to Update or Ignore.
- Click on Update & Apply Selected to download and install the newest versions.
- Restart your PC to ensure the applied changes.

Outbyte Driver Updater
Use this software and solve all driver-related issues from your PC.4. Change the graphics settings
- Press the Windows key and type graphics settings and press the Enter key.

- On the graphics page, select the application or game that is causing the GPU issue and click Options.

- In the Graphics preference window, choose High performance and click Save.

- This will change the graphics settings for that application on the system.
5. Update the graphics driver
- Press the Windows + X keys together and then press the M key to open the Device Manager app.
- Expand the Display adapters option by double-clicking on it.
- Right-click on the graphics driver and choose the Update driver option from the context menu.

- Click the Search automatically for drivers option to start updating.

- Once done updating, you can close the device manager window.
How do I know if my CPU is bottlenecking my GPU?
To determine whether your CPU is bottlenecking GPU, you will have to check both CPU and GPU usage under the Performance tab in the Task Manager app.
If the CPU is utilizing around 90% or more and probably higher than the GPU load, you can conclude that your CPU is bottlenecking your GPU. This can be improved by underclocking the GPU safely.
Did you manage to resolve the GPU usage problem on your Windows 11 PC? Let us know more about it in the comments area below.
Read our disclosure page to find out how can you help Windows Report sustain the editorial team. Read more


Improve this guide


User forum
0 messages