How to Easily Host Files on GitHub
Apply our detailed procedure right away
4 min. read
Updated on
Read our disclosure page to find out how can you help Windows Report sustain the editorial team. Read more

GitHub is an extremely popular website among software developers for sharing code, yet don’t think of it as an exclusive place for them. GitHub just launched its beta Android app at last and you may also use it as a free file hosting service. So, don’t postpone learning how to host files on GitHub.
If you’re undecided, let us remind you that it stores file changes more efficiently and ensures file integrity better than other systems available. If you and your team constantly make changes to Word documents, for example, you could use GitHub as your version control system.
Do keep in mind that GitHub has a limitation for individual files of no more than 25 MB each. It is more than enough when planning to upload a few lines of code. The limit could prove insufficient if you want to go far beyond that, but at least there are no known bandwidth limits to worry about.
Now that you know what GitHub is capable of, in the following sections, we will teach you the process of hosting files on it.
How can I host files on GitHub?
1. Create a new repository for your files
- To get started with GitHub, go to github.com and sign-up for a free account.
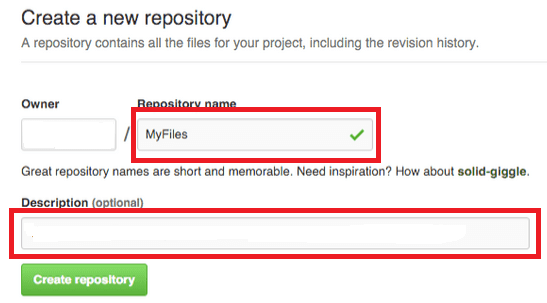
- Click the New Repository button as it’s time to create a new repository for hosting your files. See this as a location where all the files for a particular project are stored. Each project has its own repository, and you may easily access it with a unique URL.
- Up next, give your repository a name. You may also add a description if wanted.
- Then, click the Create button.
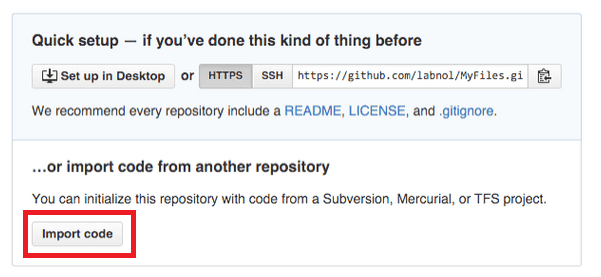
- Your repository will be empty at this point, so click the Import Code button on the next screen to initialize the repository.
- Paste the URL https://github.com/files.git into the repository field.
- Click Begin Import to create your very first GitHub repository for hosting files.
2. Upload your files to GitHub
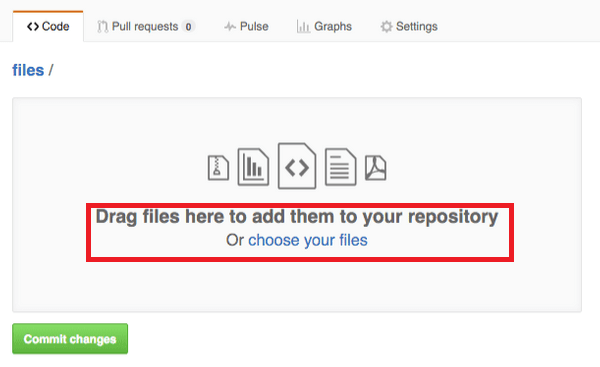
- Click the Upload Files button to begin uploading some of your files.
- Drag one or more files there or choose them directly from the computer.
- Then, click Commit Changes to publish them on the web.
3. Get a downloadable version
- With the file already uploaded to GitHub, all you need to do is click the filename in the list and you’ll get the file’s URL in the browser’s address.
- Finally, just attach ?raw=true to the URL in order to get a downloadable version.
- Alternately, if you go to a public codebase, click on the green button that says Clone or Download.
- Then, select Download ZIP.
- All files will begin downloading to your computer, usually in your Downloads folder.
- Up next, open your Downloads folder and find the ZIP file that contains the entire repository content.
- Right-click it and choose the option that says Unzip or Uncompress.
- Also, select a folder where you want the files to end up.
Most public repositories can be downloaded for free, without even having a user account. Therefore, unless the owner of the codebase decides to check a box otherwise, the files can be easily packed into a zipped file. Then, just grab them into your computer.
As you can see, hosting files on GitHub is actually quite easy, even for non-developers. In just a couple of minutes, you can create your first repository, or upload some of your files. Then, downloading files from GitHub is just as easy too.
In case you need help with other GitHub issues, such as the fatal not possible to fast-forward aborting error message; read this guide to learn the solutions.
If you have any questions about this procedure, let us know in the comments area below.




User forum
0 messages