How to Install a Network Adapter Driver on Windows 7
Use the Device Manager or a third-party downloader tool
Key notes
- Installing the network adapter driver is crucial to keeping your PC communication safe.
- It would be best if you considered using the computer’s internal options as an efficient way to run your wireless adapter driver.
- Taking advantage of the support offered by specialized software was extremely helpful.
A network adapter driver is a program that allows communication between your network connections and your PC. Thus, installing and updating it must be necessary to avoid digital conflicts.
You can perform these actions using several alternatives on all Windows versions. Here, in this guide, we will show you some of the best options to quickly install your network adapter driver on Windows 7.
How to install the network adapter driver on Windows 7?
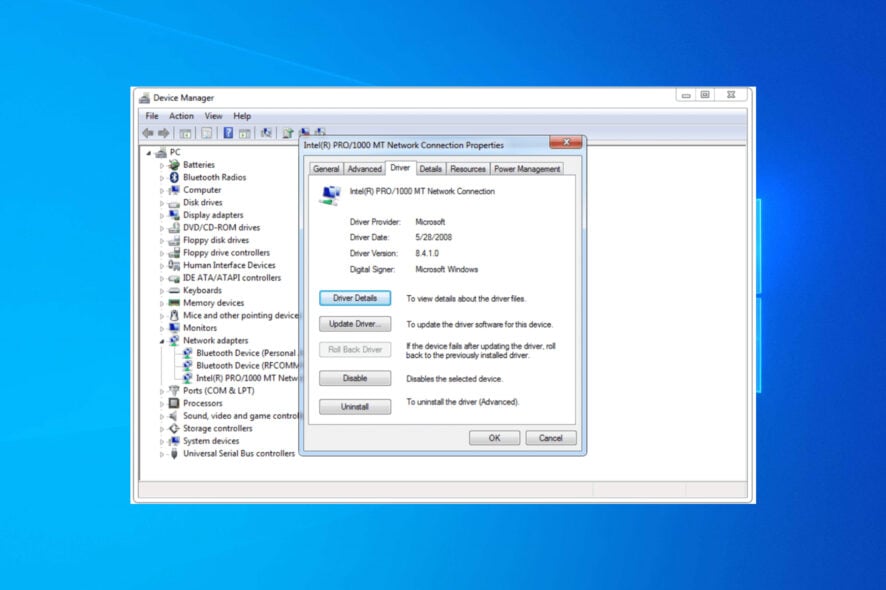
1. Use Device Manager
- Press the Windows key and open the Start menu.
- Type Device Manager and open it.
- Expand the Network adapters section.

- Right-click the adapter and select Update driver software.
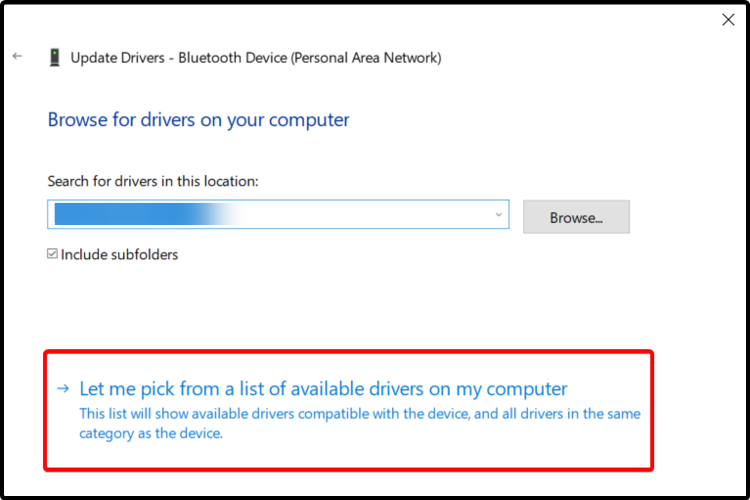
- Click on Browse my computer for driver software.

- Click on Let me pick from a list of device drivers on my computer.
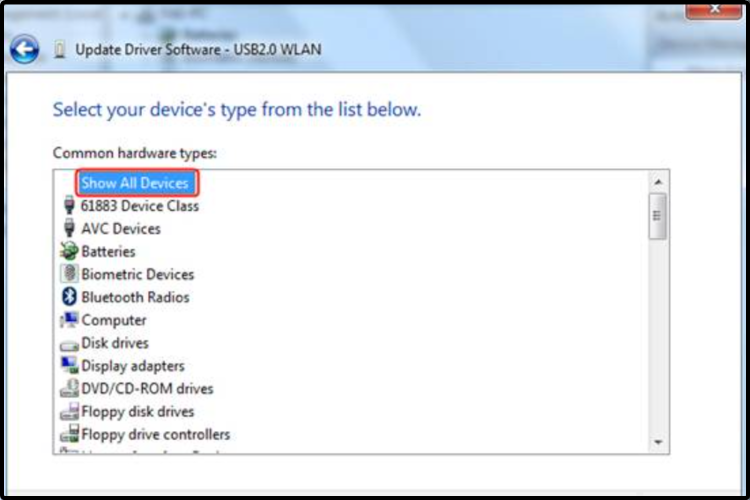
- Highlight Show All Devices and click on Next.
- Click on Have Disk.

- Click on Browse, point to the inf file in the driver folder, and click on Open.
- Select Next, and follow the instructions until the installation is complete.
After installing the driver, you may also need to set up your wireless connection. See our step-by-step guide on how to connect Windows 7 to WiFi to complete the process.
2. Go to the manufacturer’s website
- Open any web browser.
- Search for the manufacturer’s official support website.
- Search for the exact model of your network adapter driver.
- If available, download and follow the indicated steps to install the driver.

3. Try third-party software
We also recommend you use the support of third-party software. Thus, we can talk about driver updater software, which seems to be a precious option.
Once you let it run on your computer, it will automatically install the drivers. Also, it is easy to forget about it, and you’ll probably never use it again until the next PC update appears.
Moreover, with its help, you can set third-party software to run on your system startup and perform periodic PC scans.
Installing and using specialized software can save you time and be a long-term ally. Thus, you’ll not have to bother yourself again with the manual installation process.
You can prevent these problems by using an automatic tool that will search and install the correct drivers on your computer with just a few clicks. That's why we recommend you use Outbyte Driver Updater. Here's how to do it:
- Download and install the Outbyte Driver Updater app.
- Launch the software.
- Wait for the app to detect all incompatible drivers.

- Afterward, it will show you a list of the drivers found to select the ones to Update or Ignore.
- Click on Update & Apply Selected to download and install the newest versions.
- Restart your PC to ensure the applied changes.

Outbyte Driver Updater
Use this software and solve all driver-related issues from your PC.4. Use the support website
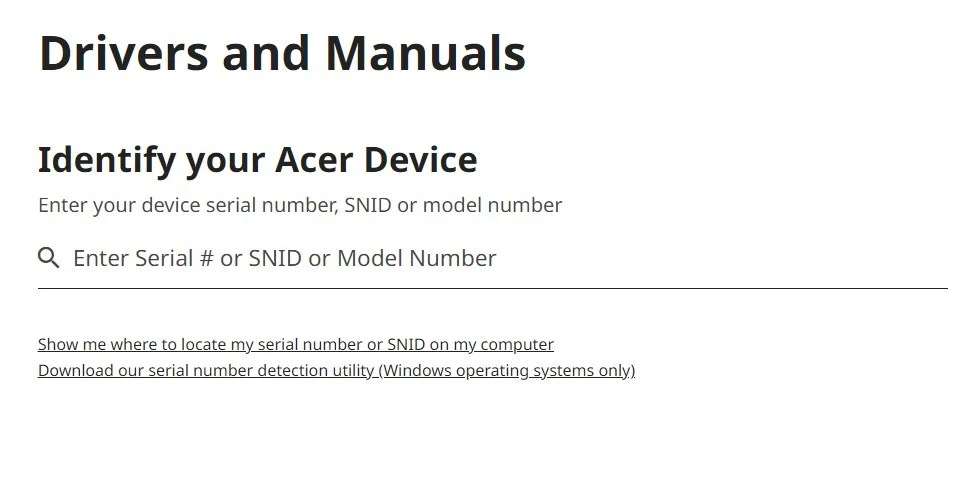
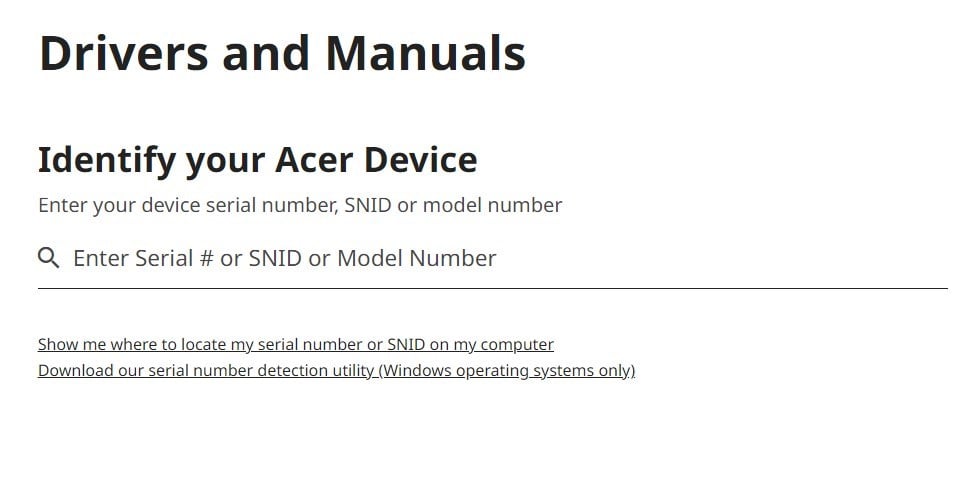
- Visit the Acer support website. Similarly, you can visit the support website for your laptop’s brand.
- Enter your device’s serial number, SNID, or model number, and press Enter.
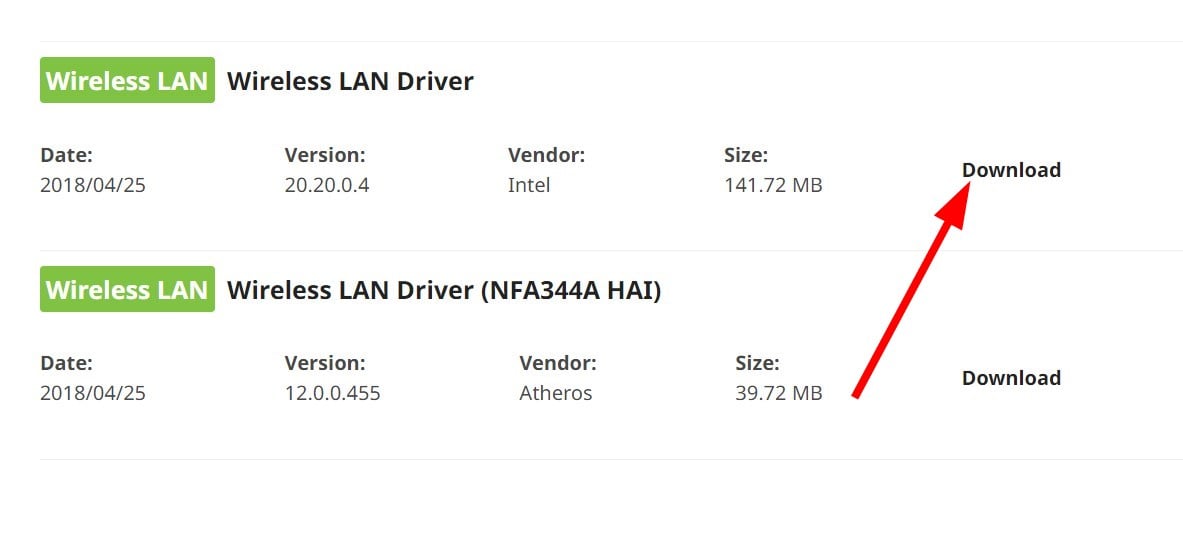
- Locate the network adapter.
- Select your network adapter driver and hit the Download button.
We have shown the above steps for an Acer laptop. Similarly, you can visit the Dell website, HP website, etc., and download the standard network adapter driver for your Windows 7 laptop or PC.
5. Use Intel Driver & Support Assistant
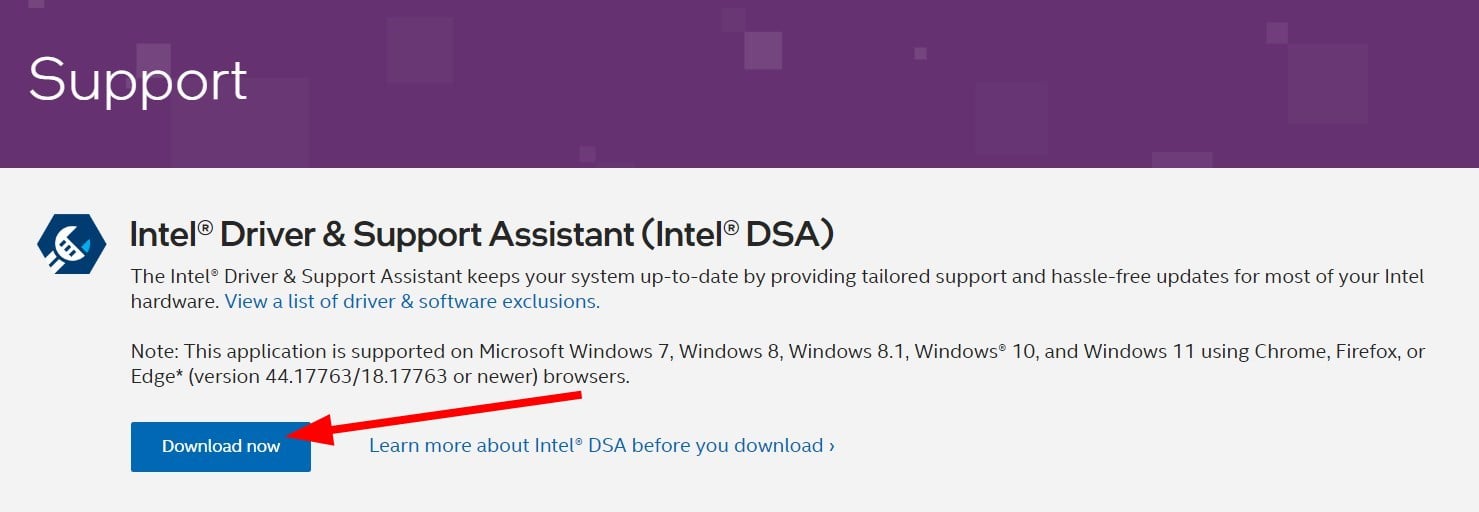
- Visit this website.
- Download the Intel Driver & Support Assistant.

- Install the program.
- Launch it.
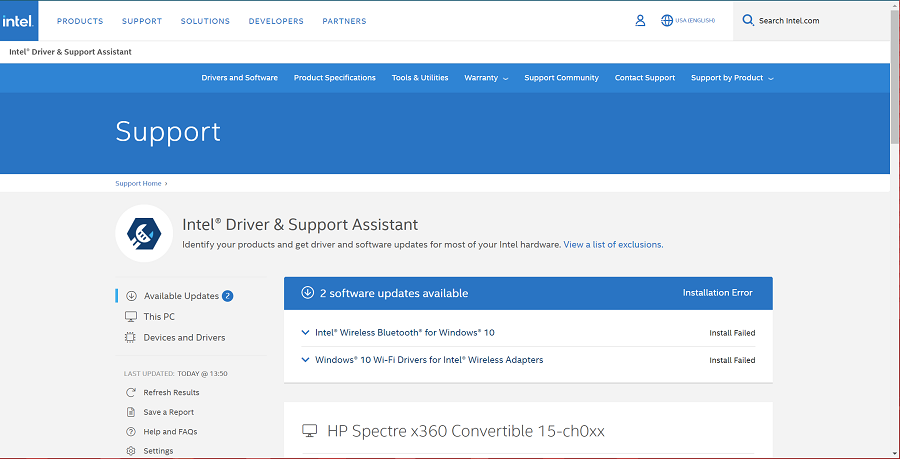
- It will open a web page and automatically scan your PC for updated or missing drivers.
- If it detects a missing network adapter driver, it will prompt you to install it.
- Install the latest network adapter driver.
- Reboot your PC.
These were our recommended suggestions; you can try to install your network adapter driver on Windows 7. Again, we made sure we selected the best you could find.
If you’re also wondering if you can make Windows 10 drivers work on Windows 7, then feel free to check a complete guide. In addition, our guide on the best browsers you can install on your Windows 7 PC lists some tested and tried browsers you can check out.
In addition, let us know which of the listed options suits you the best. So, don’t hesitate to leave your opinion in the comment section below.
Read our disclosure page to find out how can you help Windows Report sustain the editorial team. Read more


Improve this guide


User forum
0 messages