How to switch and rename audio output devices in Windows 10
![]() 2 min. read
2 min. read
![]() Published on
Published on
Share this article
Improve this guide
Read our disclosure page to find out how can you help Windows Report sustain the editorial team. Read more

Switching between audio devices is much simpler in Windows 10 than in prior versions. While the steps may not be immediately intuitive, it’s a quick process once you’ve done it.
Audio output options are now integrated into the modern volume control experience. You can open this by clicking the audio output icon (speaker icon) on the taskbar, down in the system tray area.
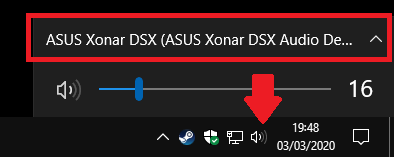
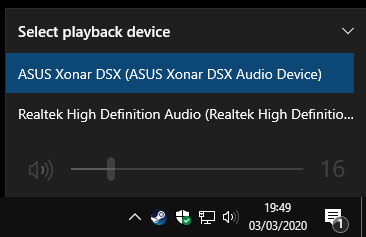
You’ll see a volume slider that will adjust the volume of the currently selected output source. Above that, click the device name to reveal all the output devices on your system. Next, click any of the devices to immediately set it as the selected output.
The volume slider will now update to reflect the new output’s levels. Volume settings are stored per-device, so you can make your headphones quiet while keeping your rear panel stereo system loud.
You can rename or remove devices to help organise the output list. You’ll need to use the old Control Panel for this. Launch Control Panel by searching for it in the Start menu. Click the Hardware and Sound category, followed by the Sound link.
You’ll see a list of the output devices on your system, which should be identical to that displayed in the taskbar volume control. Right-click any device and choose “Disable” to hide outputs which you don’t use.
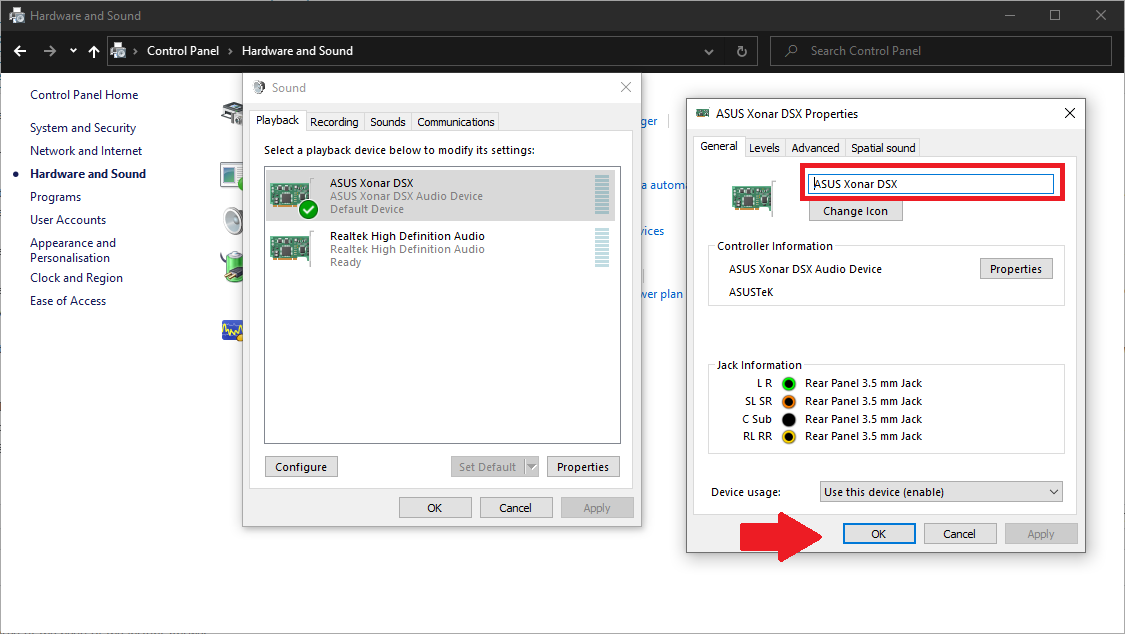
Outputs can be renamed by double-clicking and typing a new name into the Properties window which appears. You can also choose a new icon, although it’s only displayed within Control Panel. More usefully, the window lets you configure the output’s settings, such as audio quality and equaliser controls, using the tabs along the top. The available options will vary with each device. Click Apply and OK to save your changes once you’re done.


User forum
0 messages