iMessage for Windows 11: How to Get & Use
You may need to use a third-party app for iMessage on Windows
Key notes
- You need an Apple ID to access iMessage from a Windows computer.
- Accessing iMessage through the Remote Desktop connection requires two computers, i.e. a Mac and a PC.
- The Chrome Remote Desktop extension must be downloaded on your Mac and Windows PC for you to connect them successfully.
The Apple ecosystem comprises products and applications exclusive to Apple Devices like Mac or iPhone. This makes it virtually impossible to access Apple applications like iMessage from a non-apple device.
However, there are a few workarounds that you can attempt to help you access iMessage on Windows. This article provides you with the necessary steps on how to get and use iMessage on Windows.
Can MacOS apps work on Windows 11?
Traditionally, the Apple ecosystem was designed so that non-Apple devices like Android and Windows can’t access their products and applications. Apple created the ecosystem this way to help improve the security of their devices.
However, you can access macOS applications on a Windows computer. You should note that the steps involved are not straightforward, and it often takes quite a while to get familiar with the workaround.
In summary, macOS applications aren’t designed to work on Windows, but with a few tweaks, you should be able to get your desired app working on your Windows PC.
How can I get and use iMessage for Windows 11?
1. Access iMessage using Chrome Remote Desktop
1.1 Install Remote Desktop
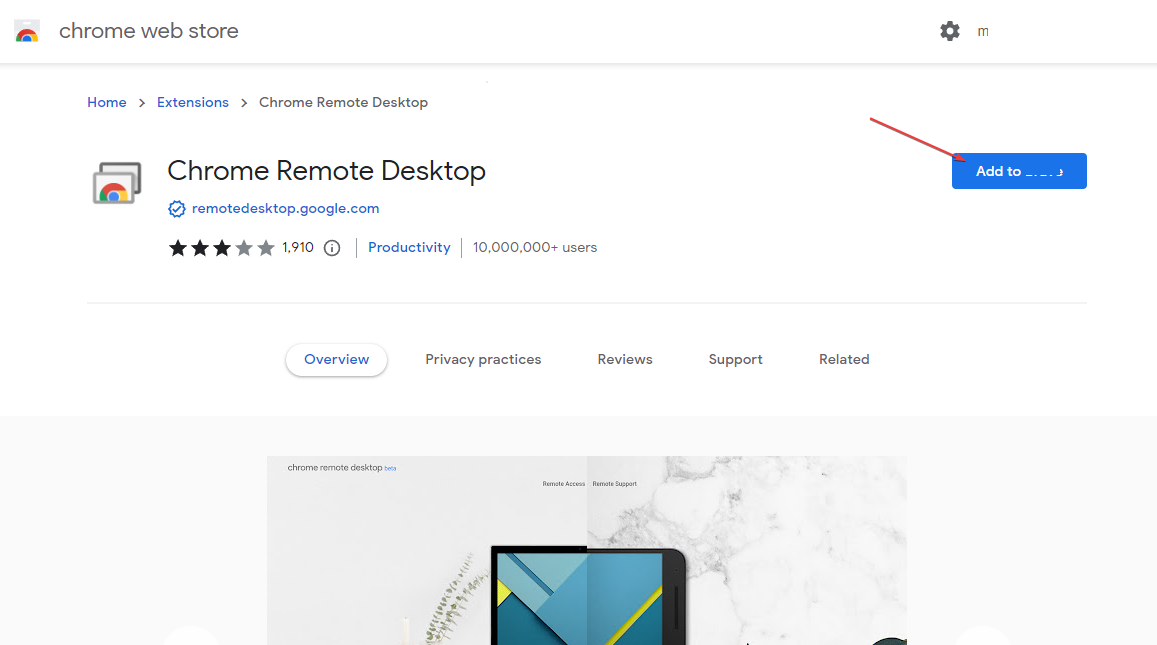
- Launch Chrome and navigate to the Chrome Remote Desktop extension page.
- On your Macbook, launch the Google Chrome browser, and navigate to the Chrome Remote Desktop extension page.
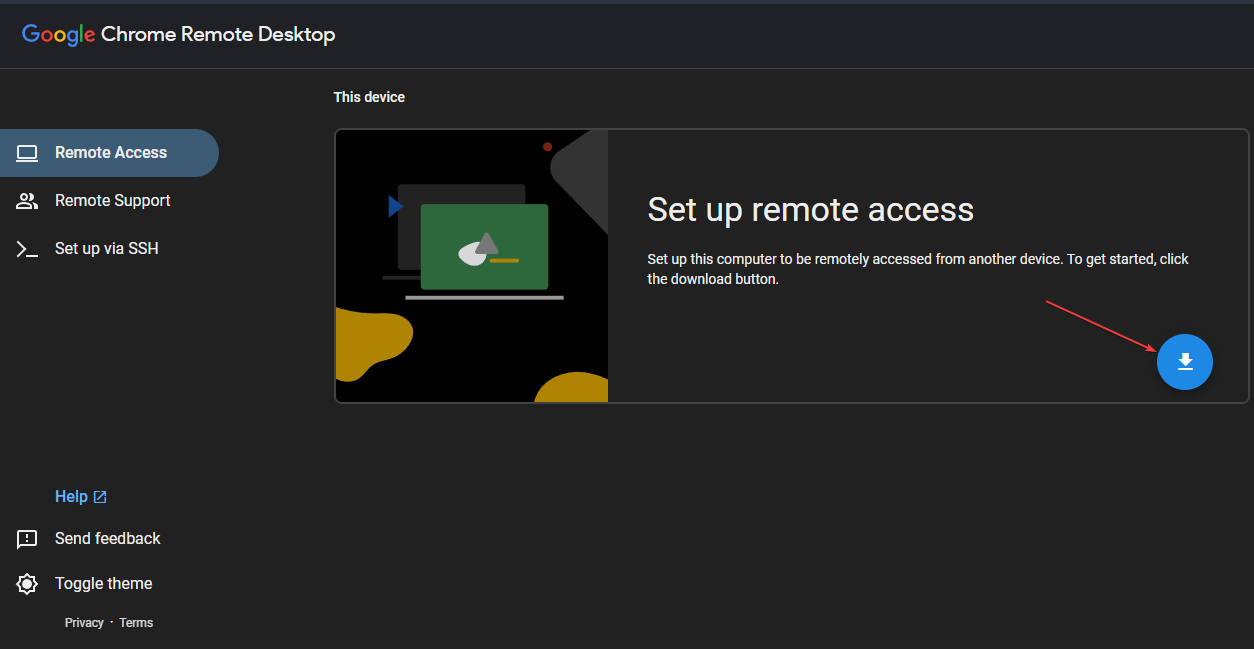
- Click the Download button on the right pane under the Set up remote access section.
- You’ll need to download the extension on both systems.
- In the next window, click the Add to Chrome button on the far-right corner and click on the Add Extension button.
- Wait until the installation is complete and close the Chrome Web Store.
1.2 Set up Remote Desktop for iMessage
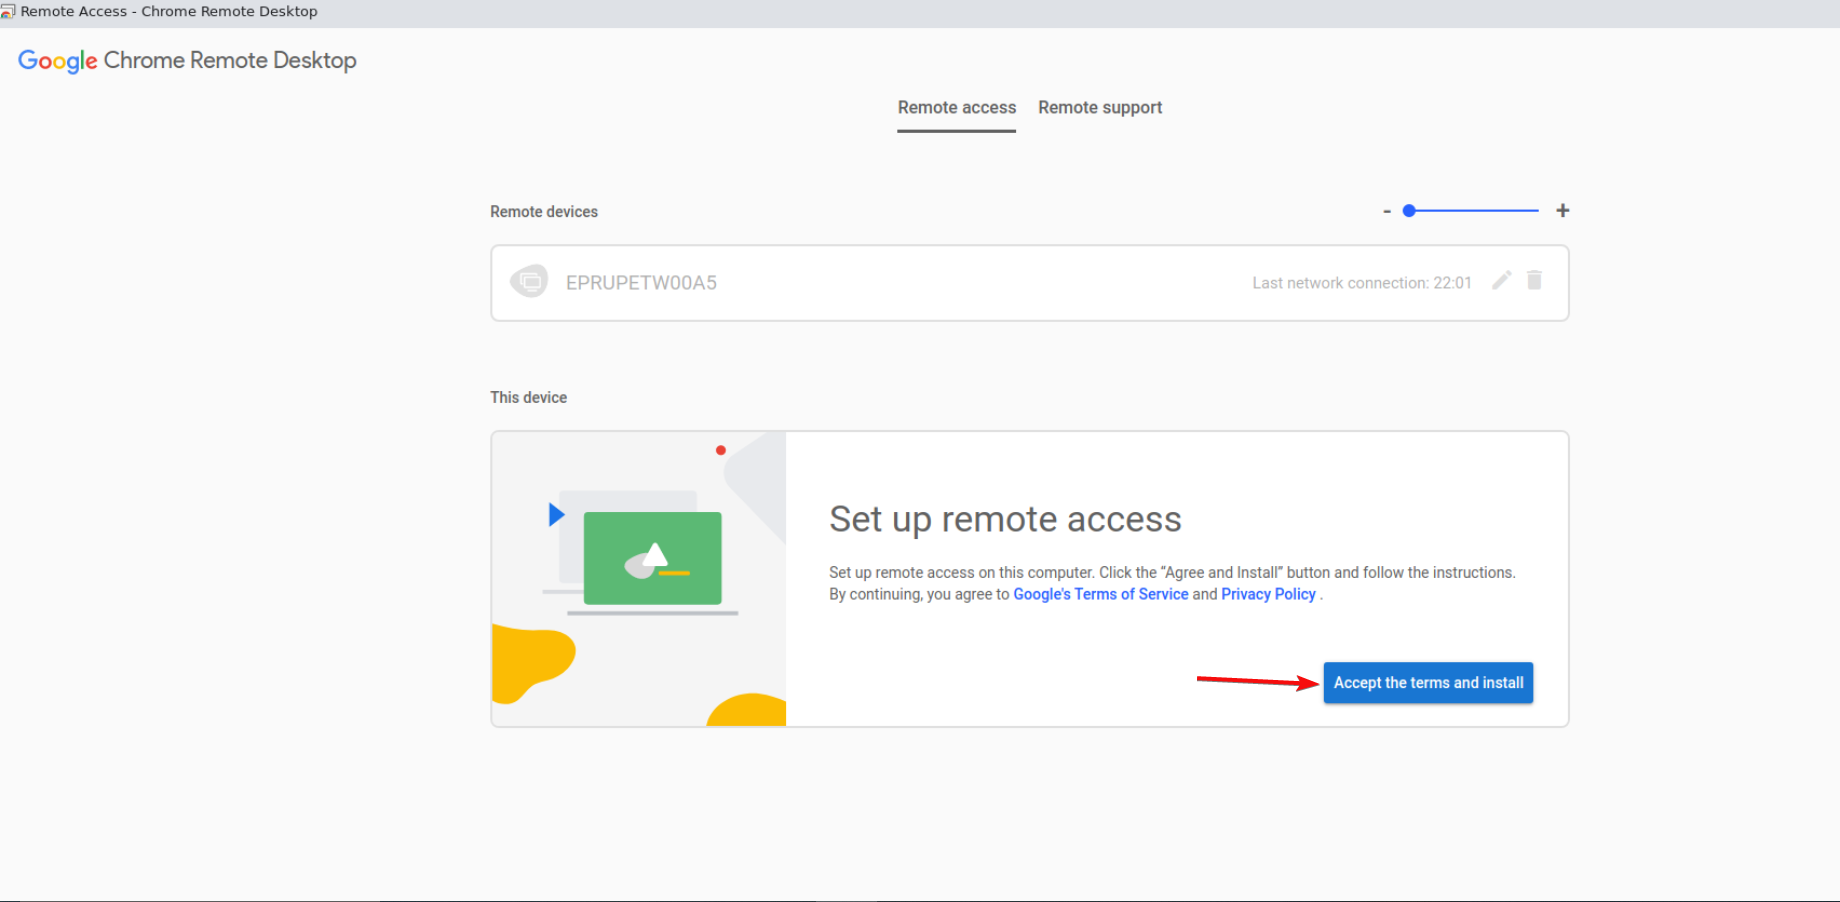
- Once the extension is downloaded, the Remote Desktop automatically downloads the host file for both Windows and Mac.
- While in your browser, navigate to the Chrome Remote Desktop page, and click the Accept and Install button on the right–pane.
- In the next popup window, select Yes to allow Chrome to open the downloaded.msi for Windows.
- Select Yes again in the User Account Control (UAC) window to allow Windows to set up remote access.
- In the next window, type in your preferred name for your PC or leave it at its default and click Next.
- Enter your preferred PIN to connect your PC remotely and click Start to complete the setup.
- Click Yes again in the next UAC window to allow your PC to set up a remote connection.
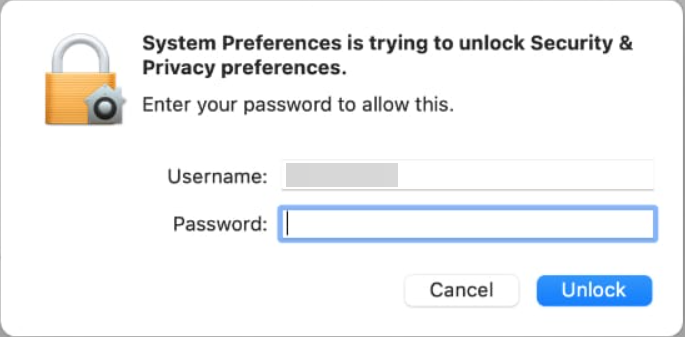
- Type in your Mac Administrator password to allow Chrome Remote Desktop Host permissions.
- The Chrome Remote Desktop setup will be complete on both Windows and Mac in a few seconds.
- Keep Chrome running on your Windows PC and return to the Chrome Desktop page on your Mac.
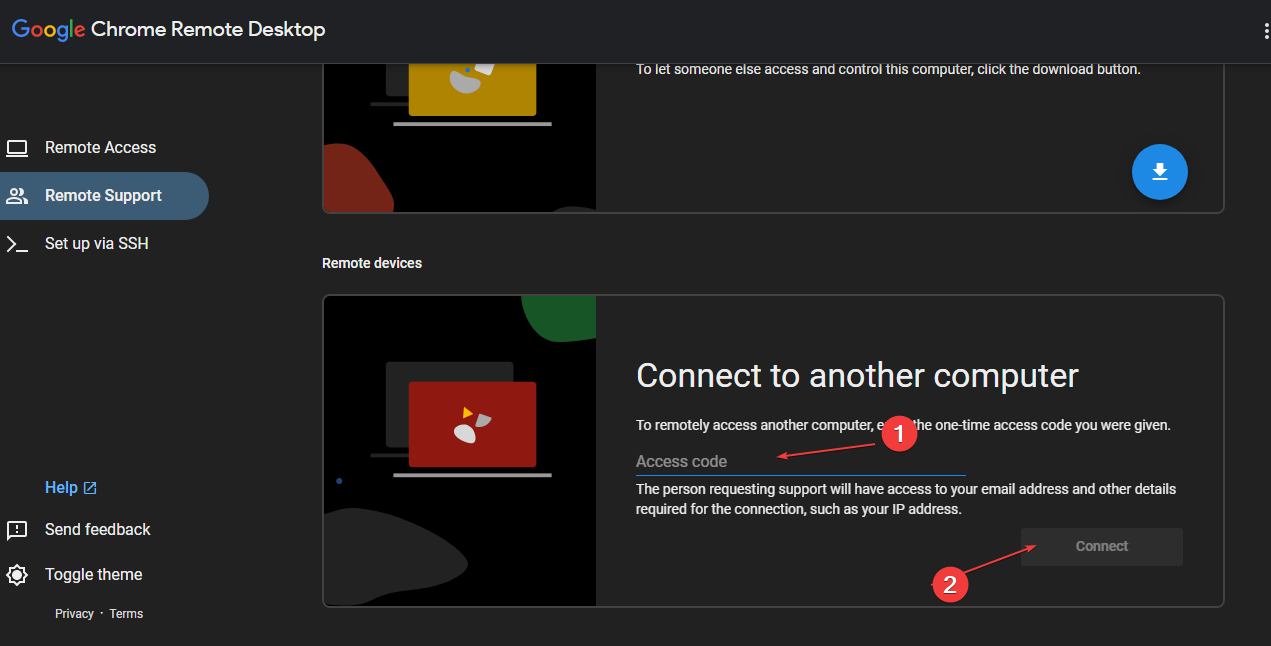
- Click on the Remote Support tab and Generate Code under the Share this screen section.
- On your Windows PC, navigate to your Chrome Remote Desktop window, select Remote Support, type in the code generated on your Mac, and click Connect.
- Open iMessage on your Mac to access the app from your Windows PC.
To keep the iMessage app running on your Windows PC, your Mac must be running and connected to the internet. You’ll also need a Mac with iMessage and a computer running Windows 11.
2. Use the iPadian Simulator
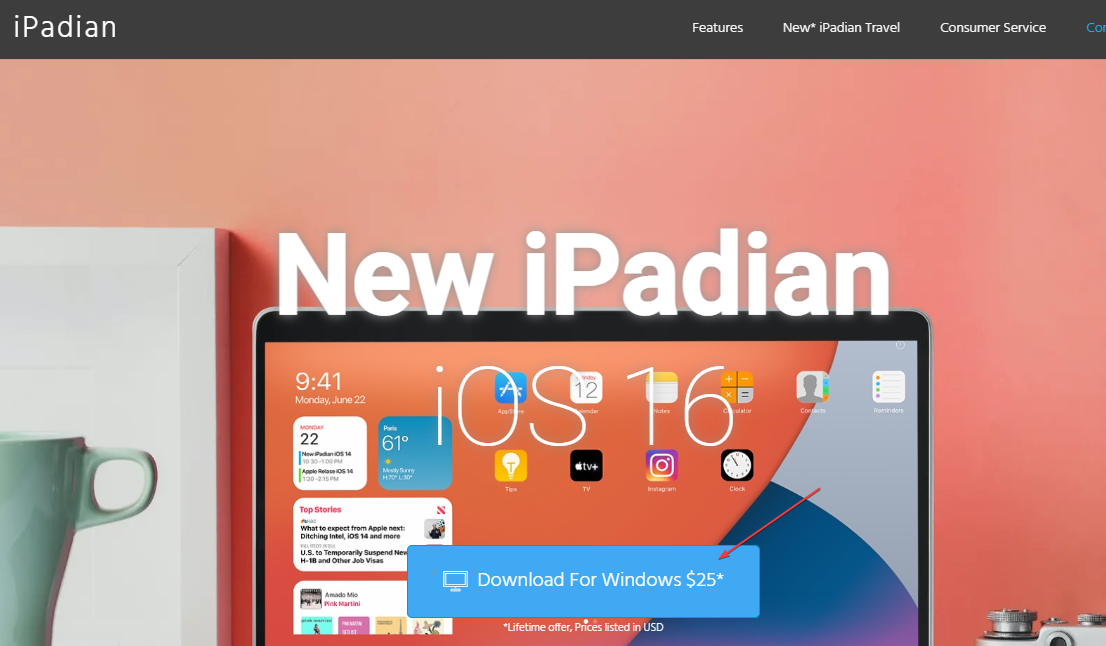
- Launch your preferred browser, navigate to the iPadian official website on your Windows PC, and click on the Download button.
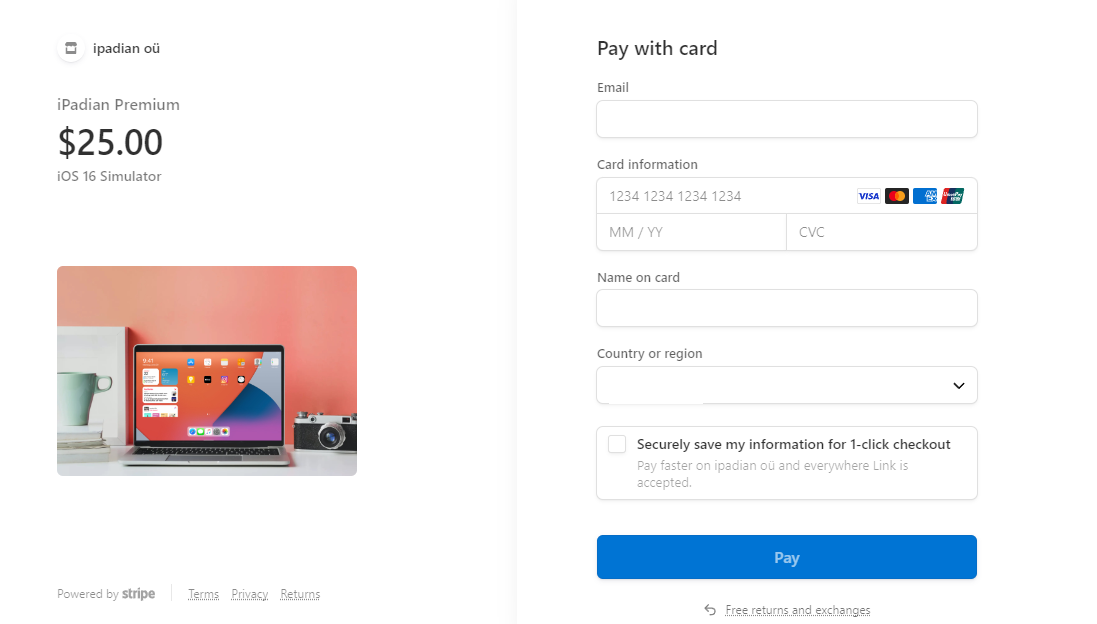
- You’ll need to complete the payment process to download the simulator. You can choose to pay with Paypal or a Credit/Debit card.
- Once you’ve purchased, press Windows + E to open File Explorer.
- Navigate to the Downloads folder, locate the just downloaded .exe file, and double-click on it to install the simulator.
- Follow the on-screen instructions to complete the installation process and close the installer window after completing the installation.
- Press the Windows key + S, type in iPadian simulator, and hit Enter.
- In the iPadian simulator window, locate the search bar, and type in iMessage.
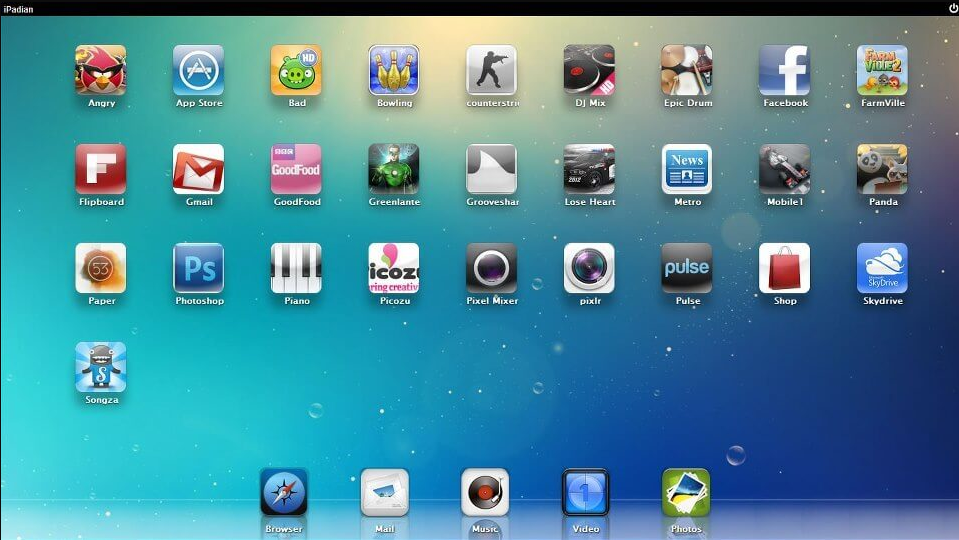
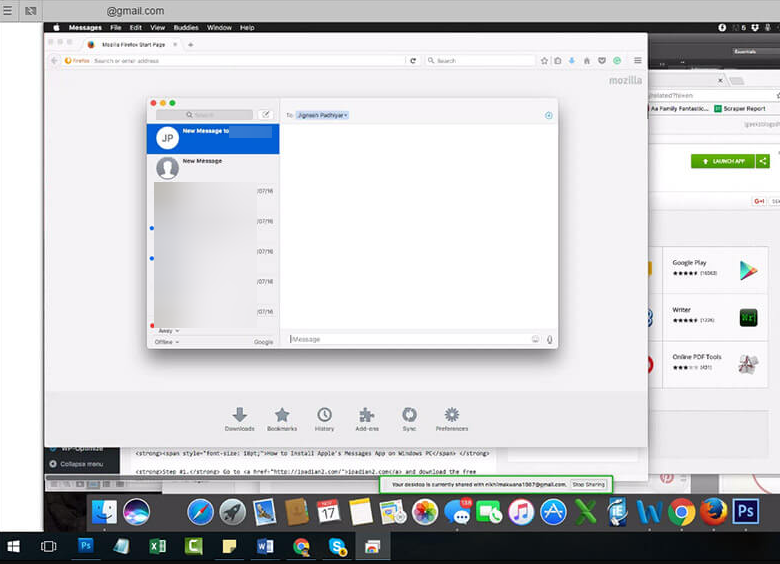
- Click on the iMessage app from the search results, and log in to your account with your correct Apple ID.
After successfully logging in, you can use the iMessage app on your Windows PC.
Accessing iMessage via the iPadian simulator is one of the most seamless processes requiring little to no technical know-how. The only downside is that you’ll need to pay for a subscription to get the software.
However, considering the intuitiveness and simplicity of accessing iMessage from the iPadian simulator, it’s most likely your best bet if you have the cash to spare.
How do I use the iMessage app?
Once you’ve successfully accessed iMessage on your Windows PC, it’s time to learn how to use it. Here are the steps you should follow to use the iMessage app on Windows 11:
- Launch the iMessage app on your Windows PC.
- In the iMessage app, navigate to Settings, and select the iMessage button.
- Then, log in with your Apple ID to gain access to the iMessage app.
- Click on the Compass button to write and send messages. You can also click the Attach button to attach files and documents to your messages.
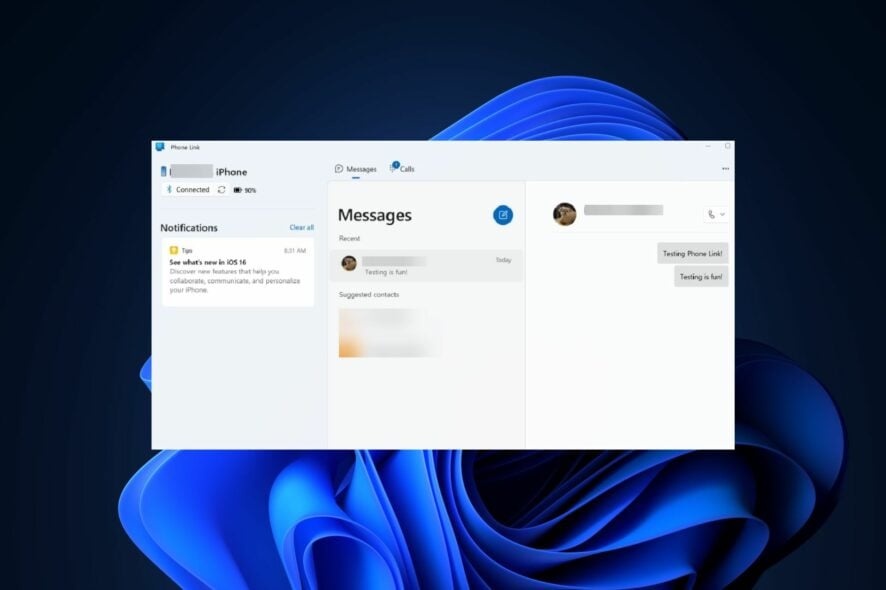
3. Use Windows’ built-in Phone Link app
1. Make sure to have Bluetooth activated and Link to Windows app installed on your phone.
2. Open the Phone Link app. Click iPhone.
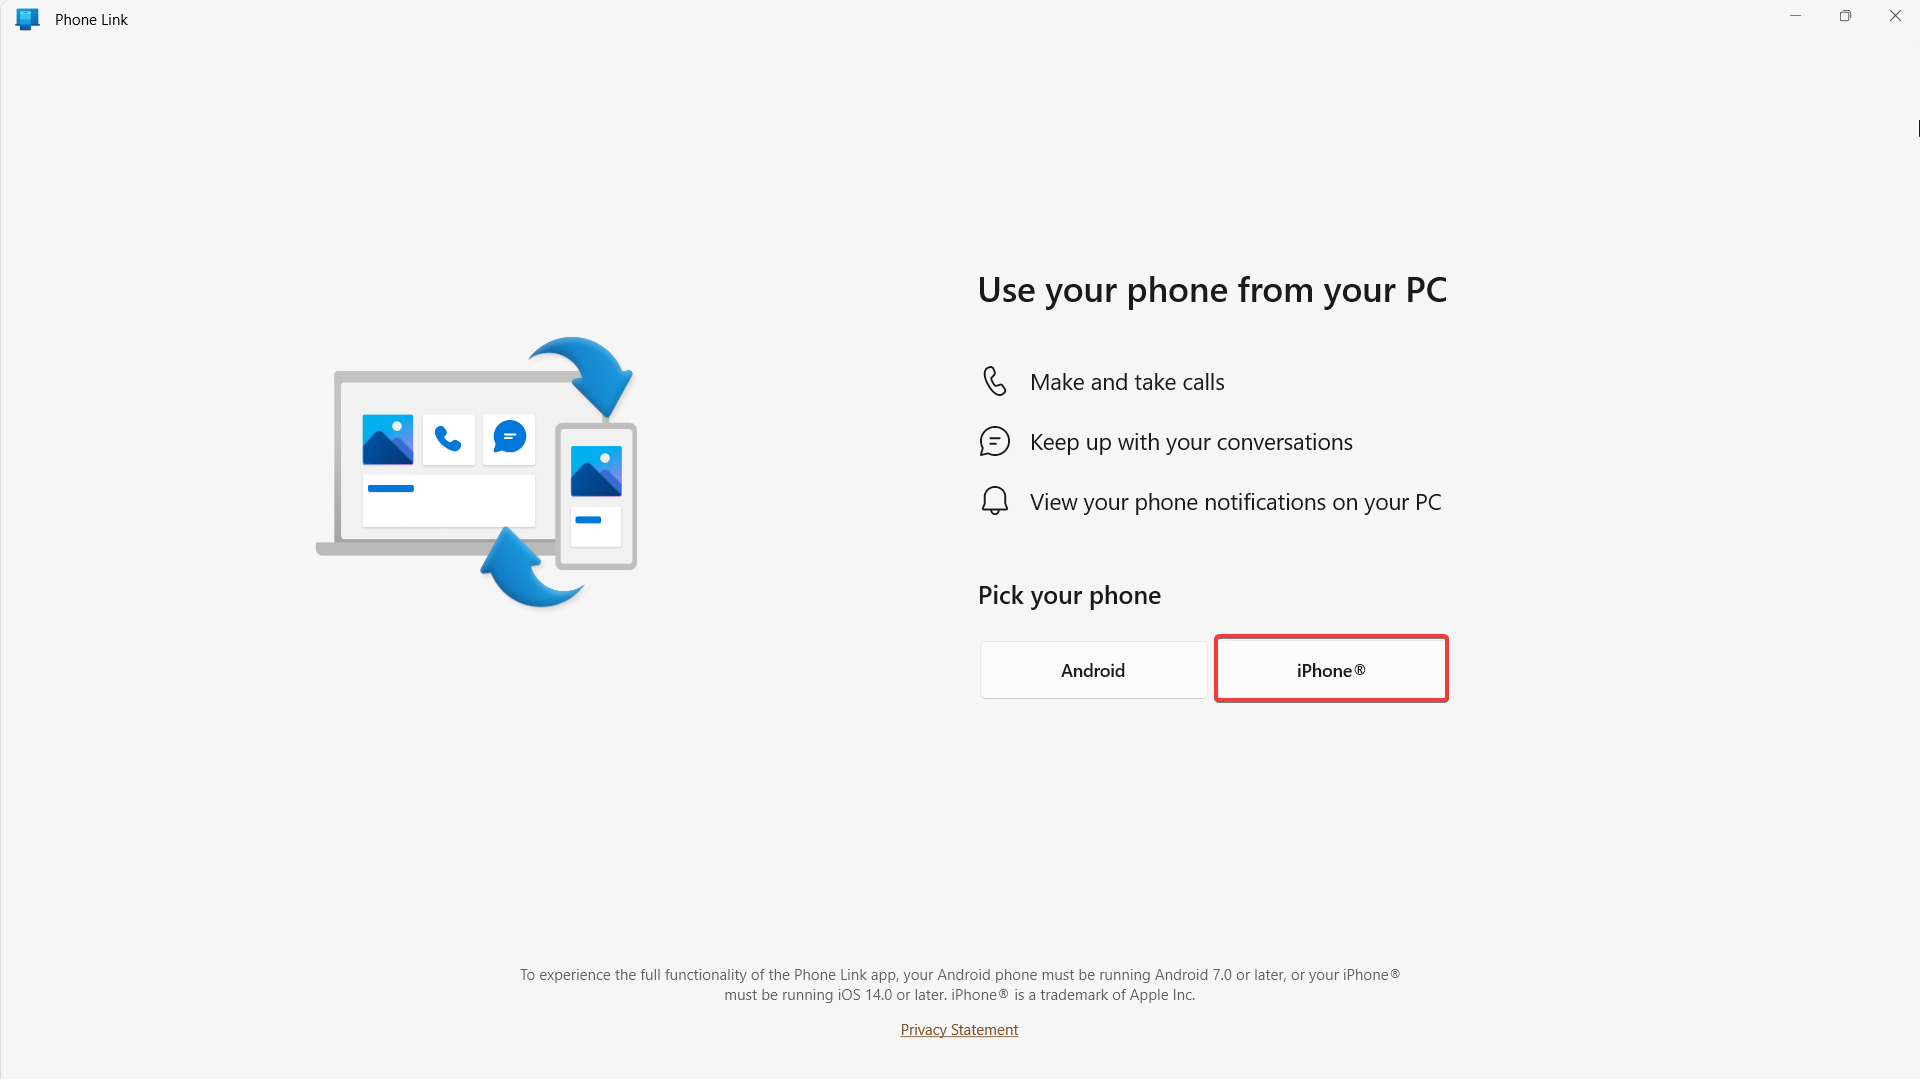
3. Open your iPhone’s camera and scan the QR code displayed.
4. Still on your phone, click Pair your devices, then Open.

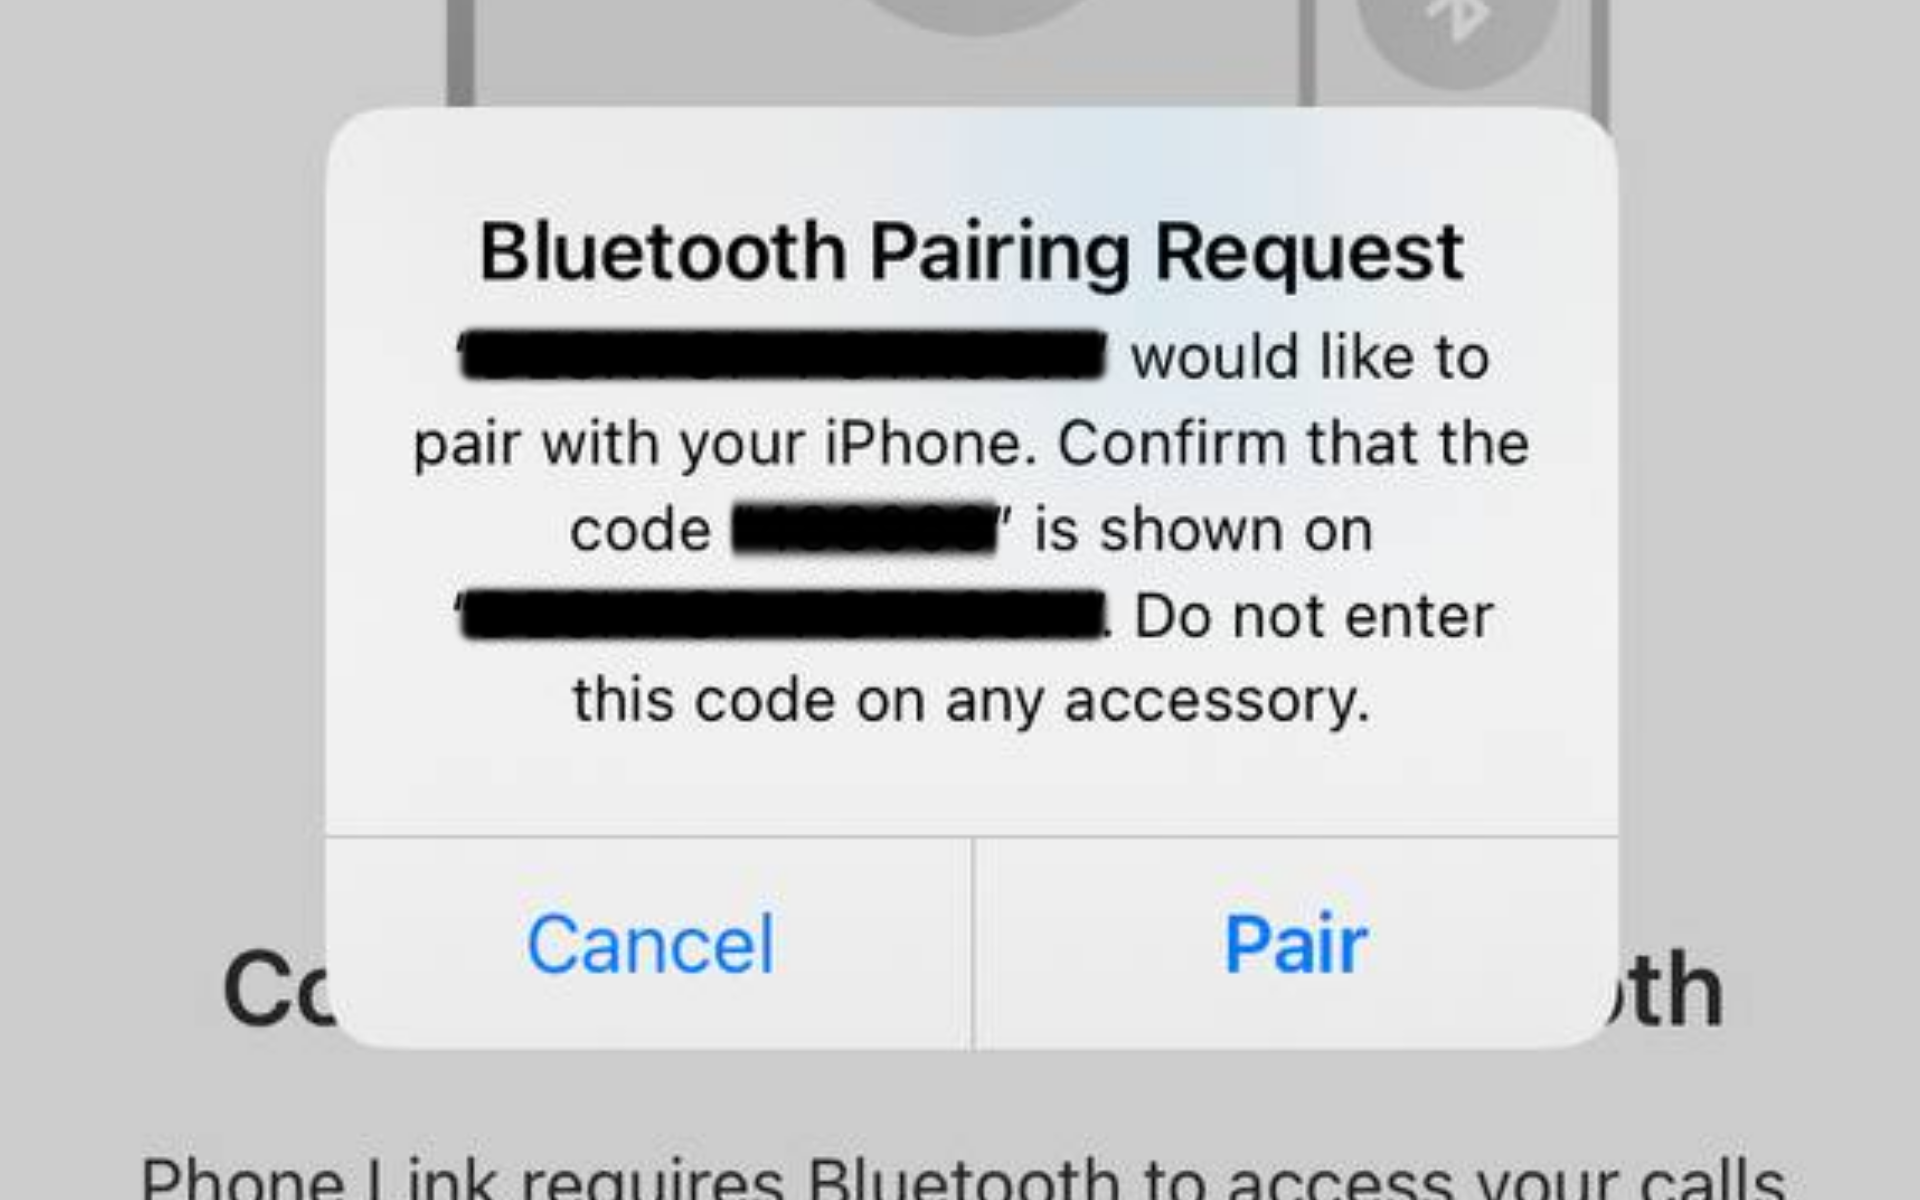
5. On Continue pairing with Bluetooth screen, click Continue.
6. Click Pair on both your PC and mobile and you’re set!
The Apple ecosystem is designed to prevent non-Apple devices from accessing its products and services. Applications like iMessage are built exclusively for iOS devices.
However, by following the above workarounds, you should be able to get iMessage running on your Windows 11 PC.
If you didn’t upgrade your OS yet, we also have a guide on how to get iMessage on Windows 10. To learn more about this software, be sure to check our guide on how to select multiple messages on Mac.
For any other questions, hit the comments section below and let us know what’s on your mind about the subject.
Read our disclosure page to find out how can you help Windows Report sustain the editorial team. Read more


Improve this guide


User forum
0 messages