Windows Update Error 0x800b0109: Solved
Learn to fix this on Windows 10 & Windows 11
Key notes
- If you encounter Installer encountered an error 0x800b0109 message, use built-in troubleshooters to fix it.
- Repairing your system files can help with all sorts of update problems and errors.
- Entering Safe Mode is a great way to troubleshoot this Windows Update error and many other PC issues.

Keeping your Windows up to date is important, especially if you want to ensure that your PC is running bug-free.
However, sometimes, issues with the update process can occur, and you’re unable to install updates.
Many users reported Installer encountered an error 0x800b0109 error when installing updates, and in today’s guide, we’re going to show you how to fix this issue.
Why does the update error 0x800b0109 occur?
In most cases, this and many other update errors occur because there’s an issue with the Windows Update component.
It’s also possible that your system files are damaged or that an application is interfering with the update process.
Is error code 0x800b0109 serious?
The error will prevent you from downloading updates, and if you can’t update your operating system, it will become vulnerable.
In addition to vulnerability, this error will prevent you from getting patches and new features, so it’s important to fix it.
How can I fix the 0x800b0109 error?
1. Run the Windows Update troubleshooter
- Press Windows key + I to open the Settings app.
- Now navigate to Troubleshoot.

- Click on Other troubleshooters.

- Now locate Windows Update and click on Run.

- Wait for the process to finish.
If the troubleshooter didn’t work for you, you might want to try using specialized repair software to fix this issue.
2. Disable or uninstall third-party antivirus
- Disable your antivirus software and check if that solves the issue. If not, move to the next step.
- Click on Start and select Settings.

- Go to Apps and select Installed apps.

- Locate your antivirus software, click the three dots next to it and choose Uninstall.
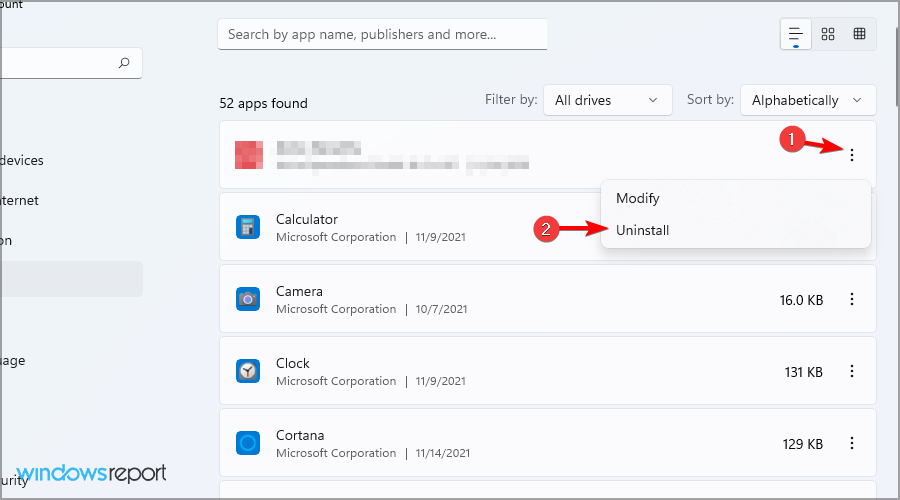
- Follow the instructions on the screen to complete the process.
After removing your antivirus, check if the problem is resolved. Alternatively, you might want to consider using antivirus software for Windows 11 to avoid such issues in the future.
3. Run SFC and DISM scans
- Press Windows key + X and select Windows Terminal (Admin).

- Now run the following command:
sfc /scannow
- Wait for the process to finish.
- Run this command:
DISM.exe/Online/Cleanup-Image/ Restorehealth
- Wait patiently for the process to finish.
4. Enter Safe Mode
- Click on Start and navigate to Settings.
- Select Recovery.
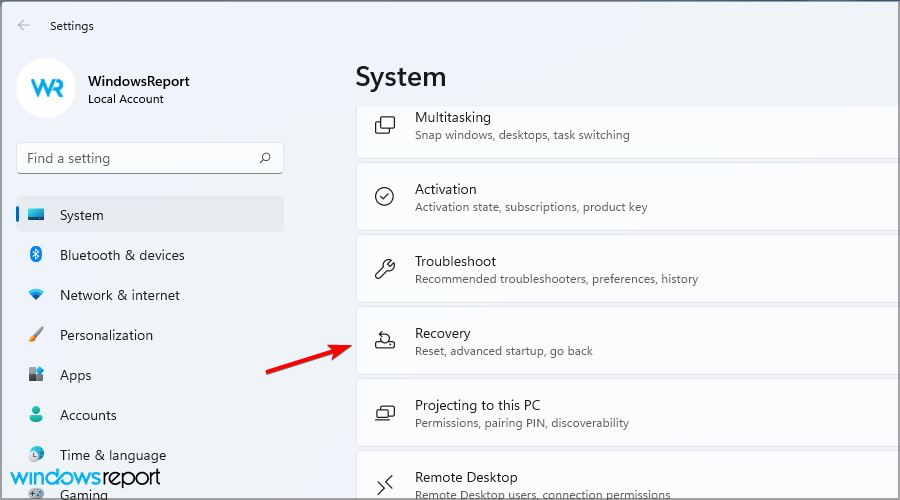
- Click the Restart now button in the Advanced startup section.

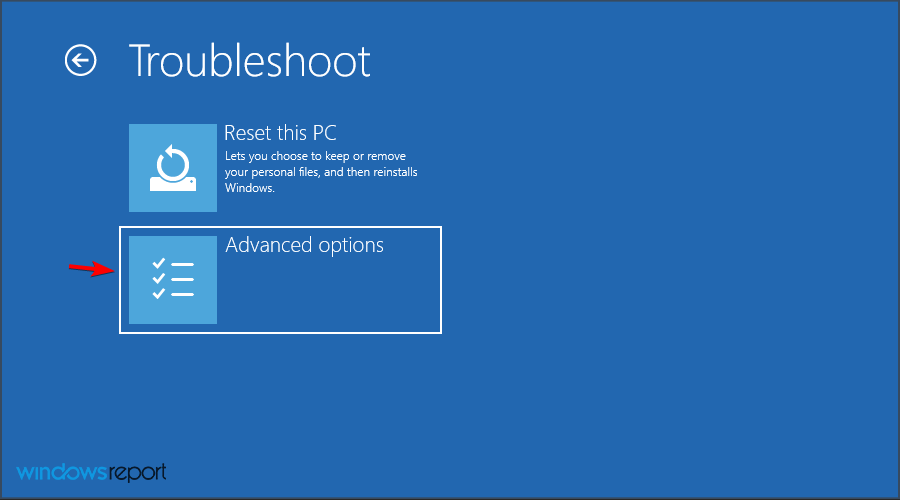
- Choose Troubleshoot from the list of options.
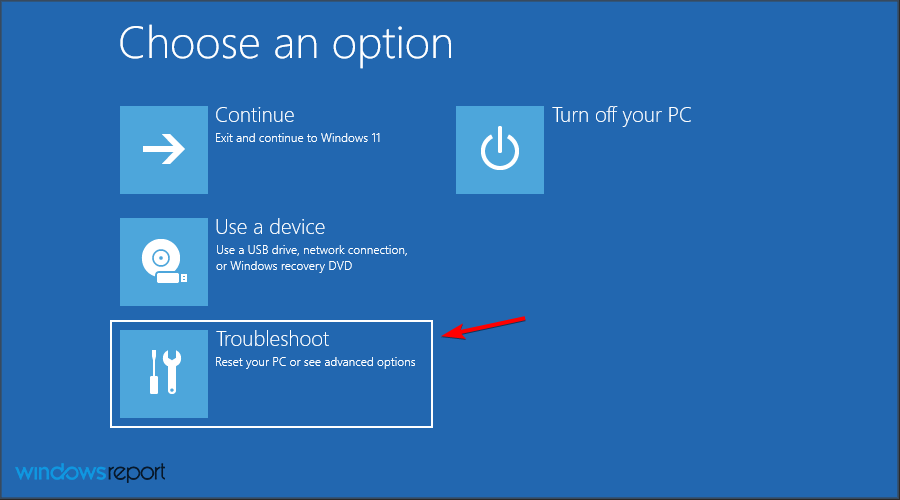
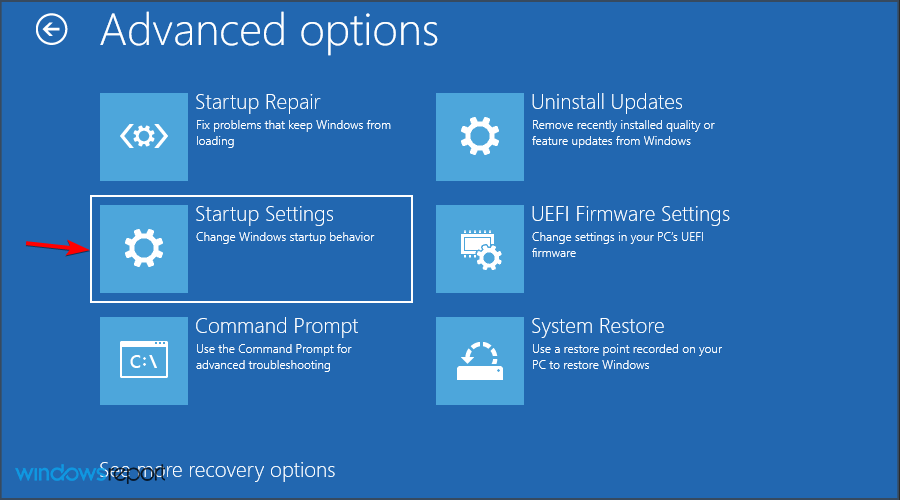
- Navigate to the Advanced options.
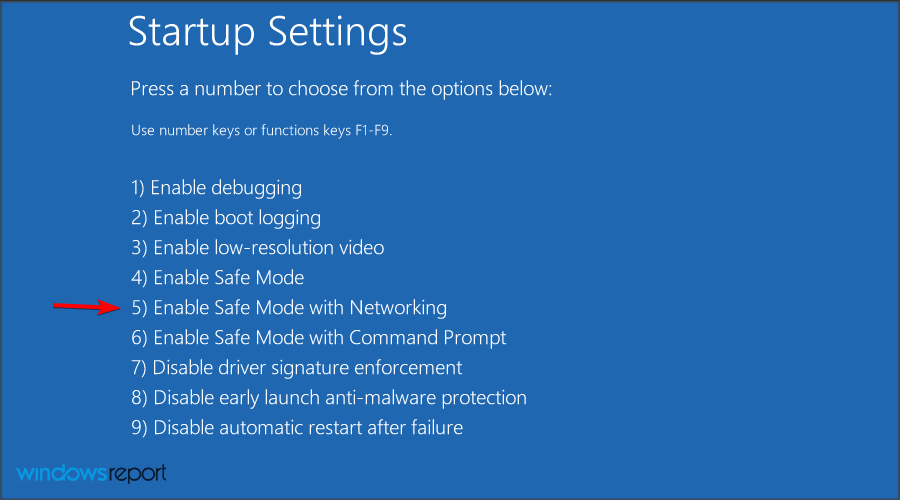
- Select Startup settings and click Restart.
- Now you just need to press F5 or 5 to select Safe Mode with Networking.
Once you enter Safe Mode, try to update your PC again. If you’re having issues performing these steps, we suggest reading our guide on how to access Safe Mode on Windows 11.
5. Perform an in-place upgrade
- Head to Windows 11 webpage.
- Select the desired version and click on Download.

- Choose the language you wish to use. Now click on Confirm.

- Select 64-bit download.

- Wait for the download to complete.
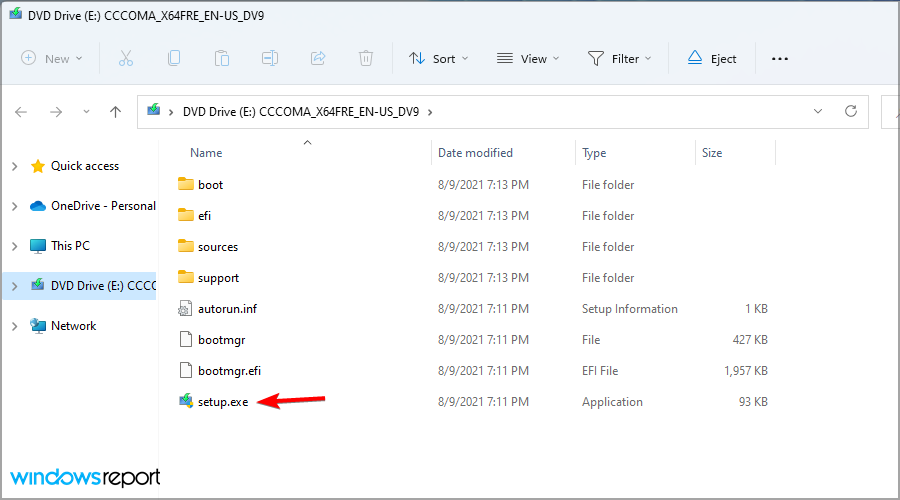
- Double-click the file that you downloaded.

- A new window will appear. Locate setup.exe and double-click it.
- Pick if you want to download the available updates and click Next.

- Select Keep personal files and apps if possible and click Next.

- Follow the instructions on the screen to finish the setup.
Only use the option to keep your personal files and apps or else this process will reinstall Windows instead of upgrading it.
6. Use System Restore
- Press Windows key + R to open the Run dialog. Type rstrui and press Enter.

- Choose a restore point and click Next.

- Now press Finish.

- Wait while the restoration process is finished.
To learn more about this feature, we suggest reading our guide on how to create Windows 11 restore points.
What to do if the Installer encountered an error 0x800b0109 on Windows 11?
Download the update manually
- Locate the KB number of the update. You can find it in the Windows Update section.
- Go to the Microsoft Update Catalog website.
- Enter the KB number and click on Search.

- Find the update that matches your system architecture and click on Download.

- Now click on the available link to download the update.

- Once the file is downloaded, run it to install the update.
Is it possible to download updates outside of Windows Update?
Yes, Microsoft Update Catalog allows you to download individual updates as files and install them on your PC.
The website is created by Microsoft, so you can rest assured that updates from it are completely safe to download and install.
How can I remove Windows updates?
- Open the Settings app using the Windows key + I shortcut.
- Head to the Windows Update section and select Update history.

- Select Uninstall updates.

- Double-click the update you want to uninstall.

- Follow the instructions on the screen.
Getting the Installer encountered an error 0x800b0109 message prevents you from installing updates, but hopefully, you should be able to fix it with these solutions.
In case you’re having additional problems, we suggest visiting our 0x800f0831 Windows 11 update error article for more solutions.
Did you find an alternative solution for this error? If so, feel free to share it with us in the comments section below.
Read our disclosure page to find out how can you help Windows Report sustain the editorial team. Read more


Improve this guide


User forum
0 messages