0x800f0831: How to Fix This Install/Update Error
Try the most effective solutions found on the web
Key notes
- Many users are getting error code 0x800f0831 while trying to install a cumulative update on Windows 11.
- To fix it, start by removing your existing VPN connection or the Proxy server, which could restrict your system from communicating with the updated servers.
- Built-in system tools on Windows 11 to scan and troubleshoot corrupted update files.

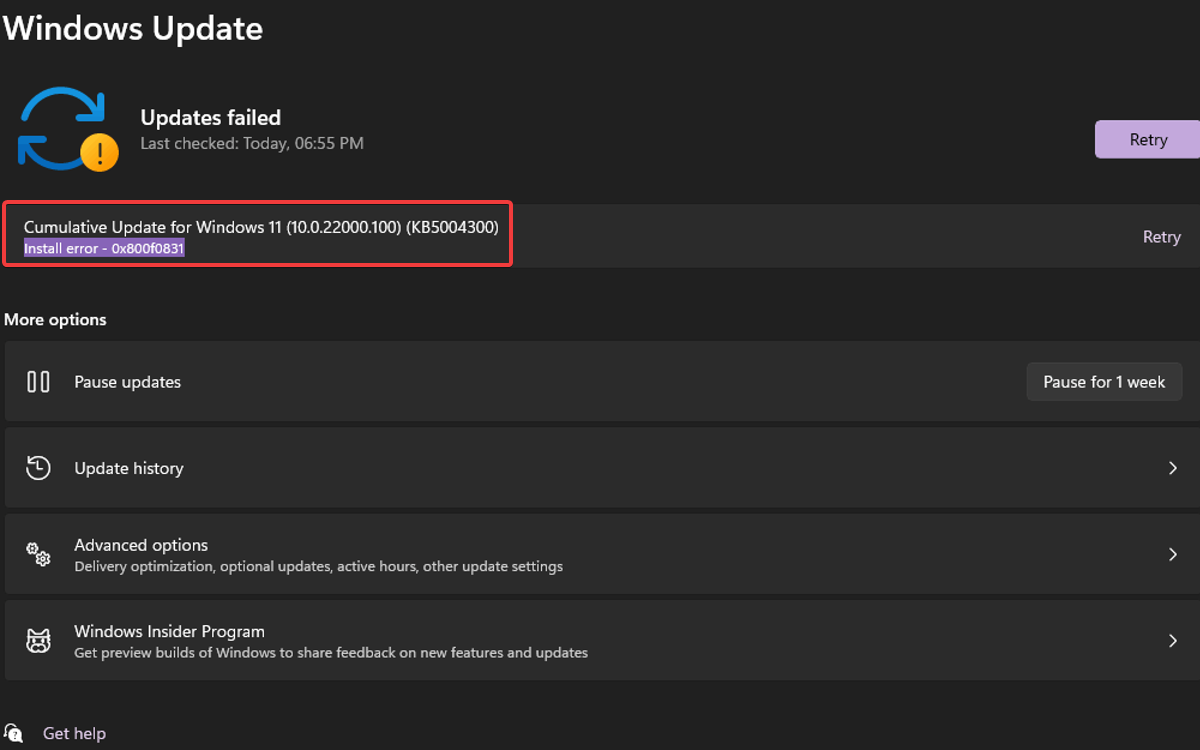
Error code 0x800f0831 is an update error that may occur in Windows 11. Whenever you get this error message in the Windows Update tab, it restricts you from updating your OS.
These alphanumeric characters indicate nothing, but there are problems while installing the updates. The reason can be why this error occurs, and your System halts the OS update for an infinite time. And it is not a pleasant scenario to come across.
Many Windows 11 users have reported not being able to install the update files even after downloading them. Unfortunately, this is a bug check that can’t be fixed yet with any official patch.
Also, many reported the 0x800f0831 update error while installing the 22H2 version for Windows 11.
However, nothing to worry about! There are different ways to fix the Windows Update error on Windows 11. But before that, know the actual causes to apply the proper troubleshooting method.
What causes the Install Error – 0x800f0831 on Windows 11?
The potential triggers are pretty similar to that of other Windows update errors. We’ve listed all significant aspects that may lead to a 0x800f0831 Windows 11 error.
- Conflict with another software: If the Windows update service is inaccessible due to conflict with an existing VPN, antivirus software, or a potentially unwanted program, you will see this error. You can remove any pre-installed software using AdwCleaner.
- Corrupted system files: Update file corruption can also be the trigger to show you this error code.
- Limited disk space: In case your disk drive is filled up with junk files and there is little to no storage left to save the Windows update files, error code 0x800f0831 will pop up. Remove junk files and free up space using CCleaner, one of the most-trusted PC cleaning tools.
- Damaged Windows update components: If the Windows update components are corrupted or damaged, your System can’t run the update service.
Many reported the 0x800f0831 error while installing KB5008212 or KB5005033 update, and in this guide, we’ll show you how to fix that.
 NOTE
NOTE
For example., error codes 0x80080005, 0x80072EE7, 0x800f0988, 0x800f0986, 0xc1900107, 0x80070652, 0x8024a10a, 0x8024200D, or the annoying error message There were some problems installing updates but we’ll try again later ,etc.
Troubleshooting these errors in Windows 11 is similar to the process in Windows 10.
How do I fix the 0x800f0831 Windows 11 update error?
1. Run the Windows Update troubleshooter
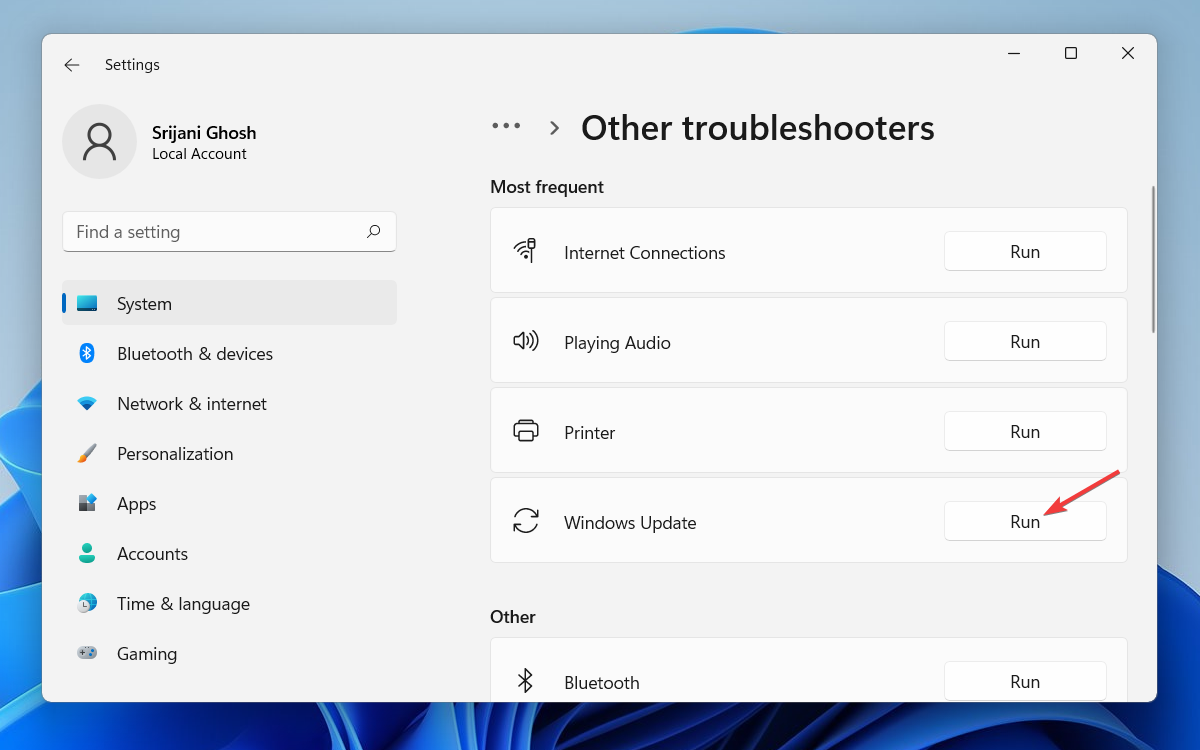
- Press Windows + I keys to open Settings, then select System from the left pane and click on Troubleshoot from the right side.

- In the next window, click on Other troubleshooters.

- Navigate to Windows Update and click on the Run button on the right.

- Finally, give the Windows Update troubleshooter a few minutes to scan and detect the problems in your system. Then, choose the necessary response when prompted.
Once the diagnostic results are displayed, you can manually view detailed information about the problems and resolve them. Then try to install the update again, and you shouldn’t face any issues anymore.
If nothing is found in the scan, close the troubleshooter and proceed to the following method to understand whether or not your system files are corrupted.
2. Run System File Checker
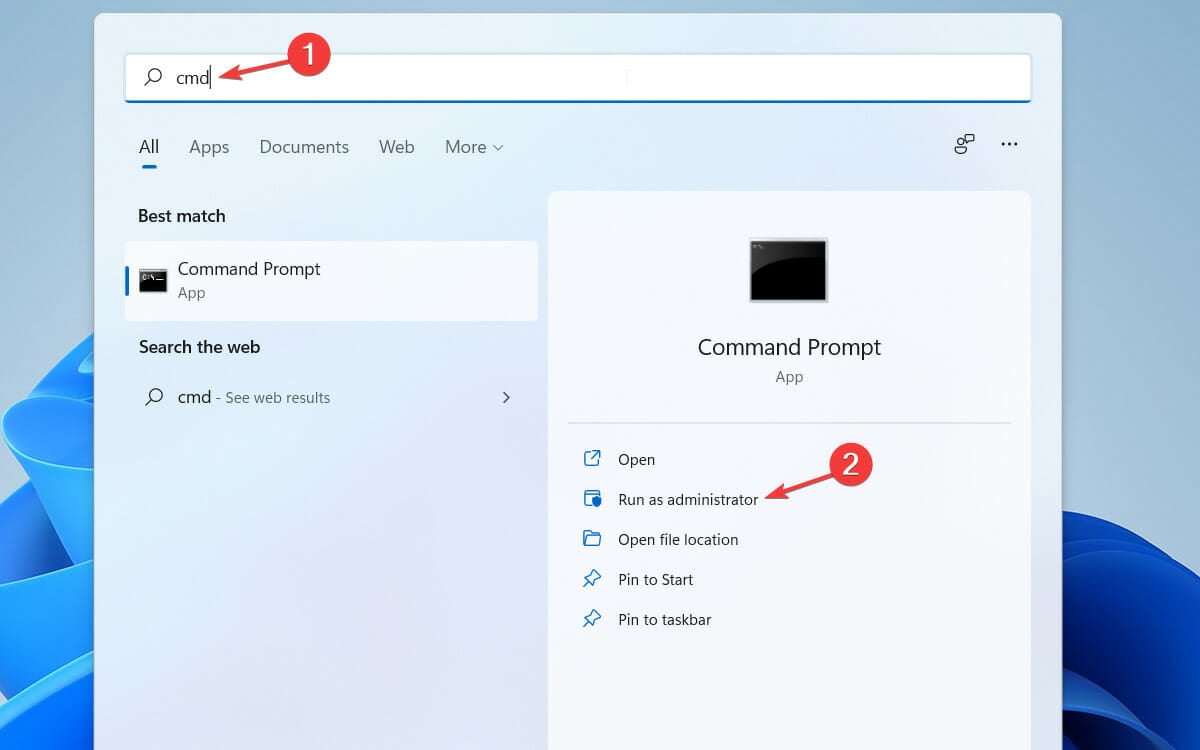
- Click the Start icon from the Taskbar.

- Type cmd in the search bar, and then click on Run as administrator on the right.

- In the Command Prompt window, type the command and press Enter to run it:
sfc/scannow
- Give it a few minutes to complete and restart your computer.
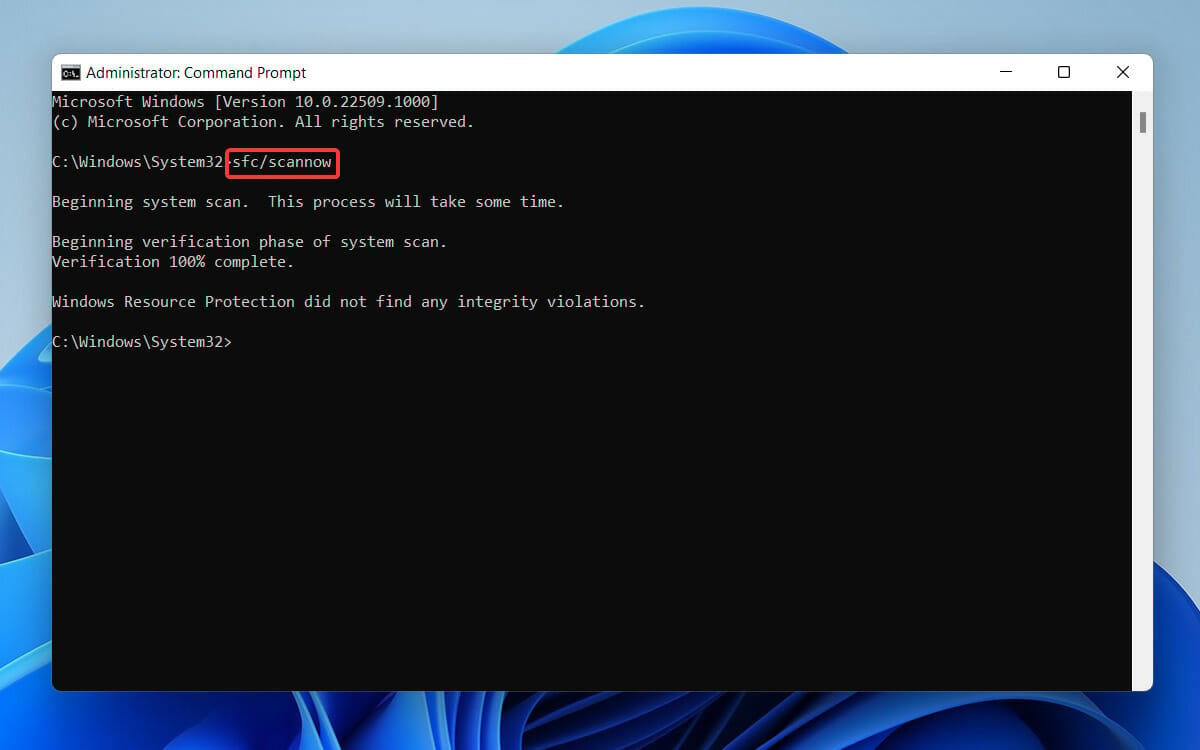
Now try to install the updated files again. If there was any system file corruption, it should be repaired. This is a simple method, and it will help you if you’re getting install error 0x800f0831 while installing the KB5012592 update in Windows 11.
If that does not help, we recommend using a dedicated repair program, which will automatically repair your PC after scanning it for any corrupted files or damaged registry entries.
3. Run the DISM command tool
- Click the Windows icon from the taskbar.
- Type cmd in the search bar and choose Command Prompt to Run as administrator.
- Type/paste the following commands individually and hit Enter after each command:
DISM.exe / Online / Cleanup-image / ScanhealthDISM.exe / Online/ Cleanup-image / Restorehealth
- Once done, close the Command Prompt and reboot the computer.
The DISM tool will take time to finish the scan and fix the damaged system files. It is mainly used to select different Windows corruption errors.
So, in this case, if your update files or service packs are not installed because of the corrupted system dependencies, and you were getting the CBS called Error with 0x800f0831, the issue will get resolved.
4. Perform a clean boot
NOTE
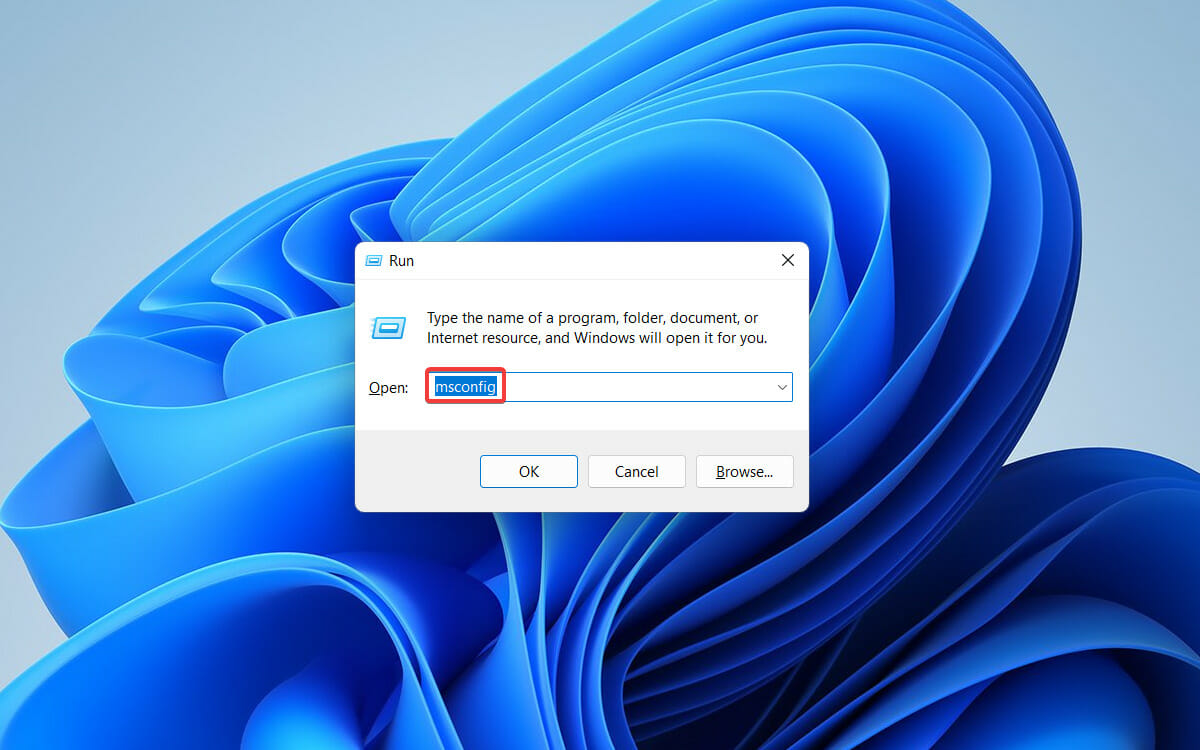
- Press Windows + R keys to open the Run dialog box, type in msconfig, and hit Enter.

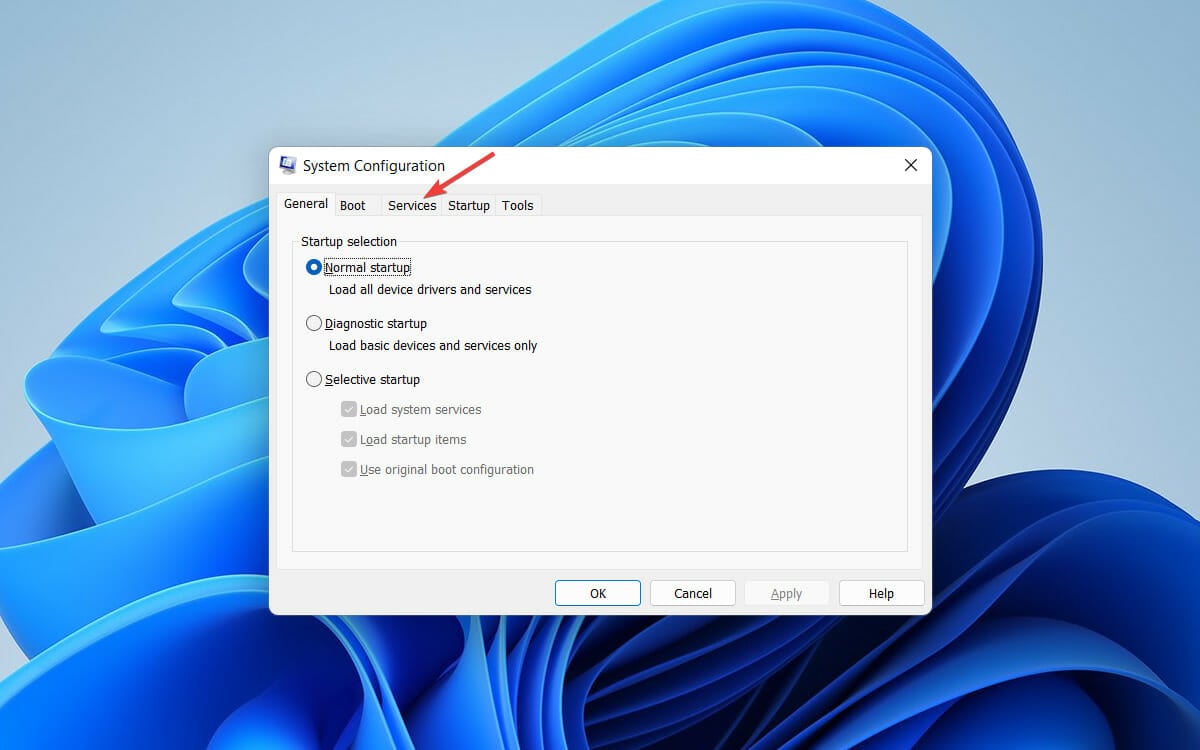
- In the System Configuration window, navigate to the Services tab.

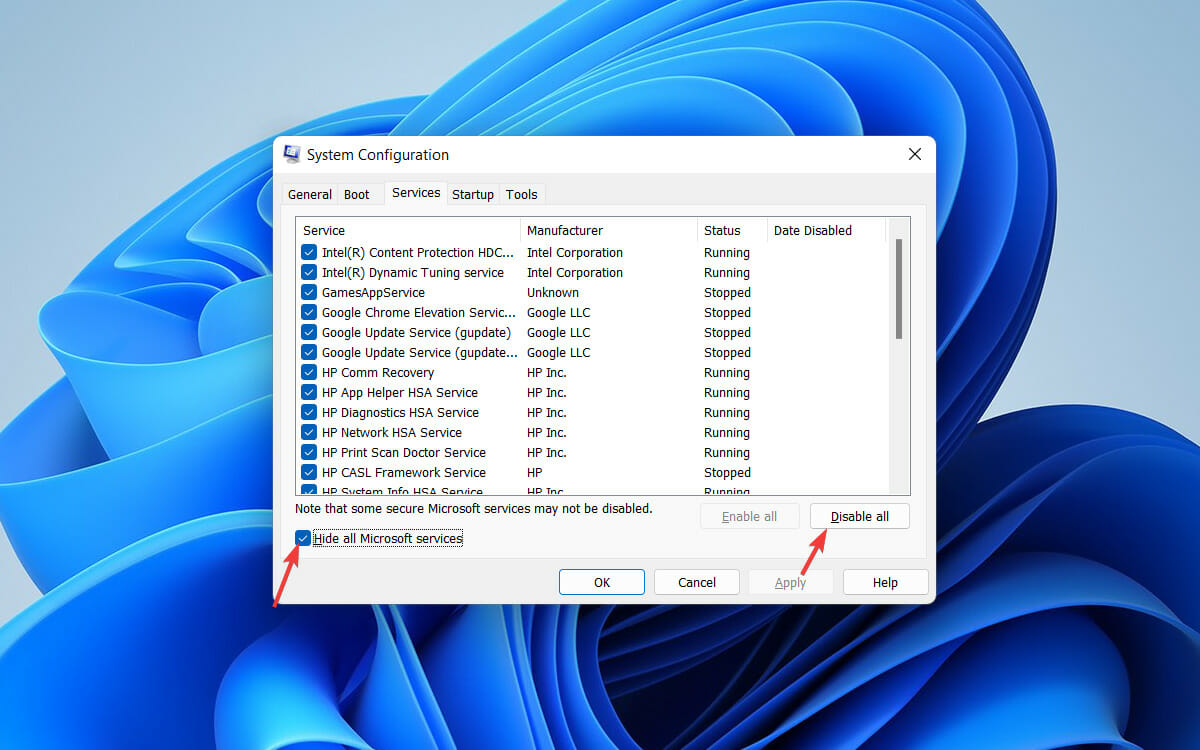
- Check the box next to Hide all Microsoft services and click Disable all from the bottom.

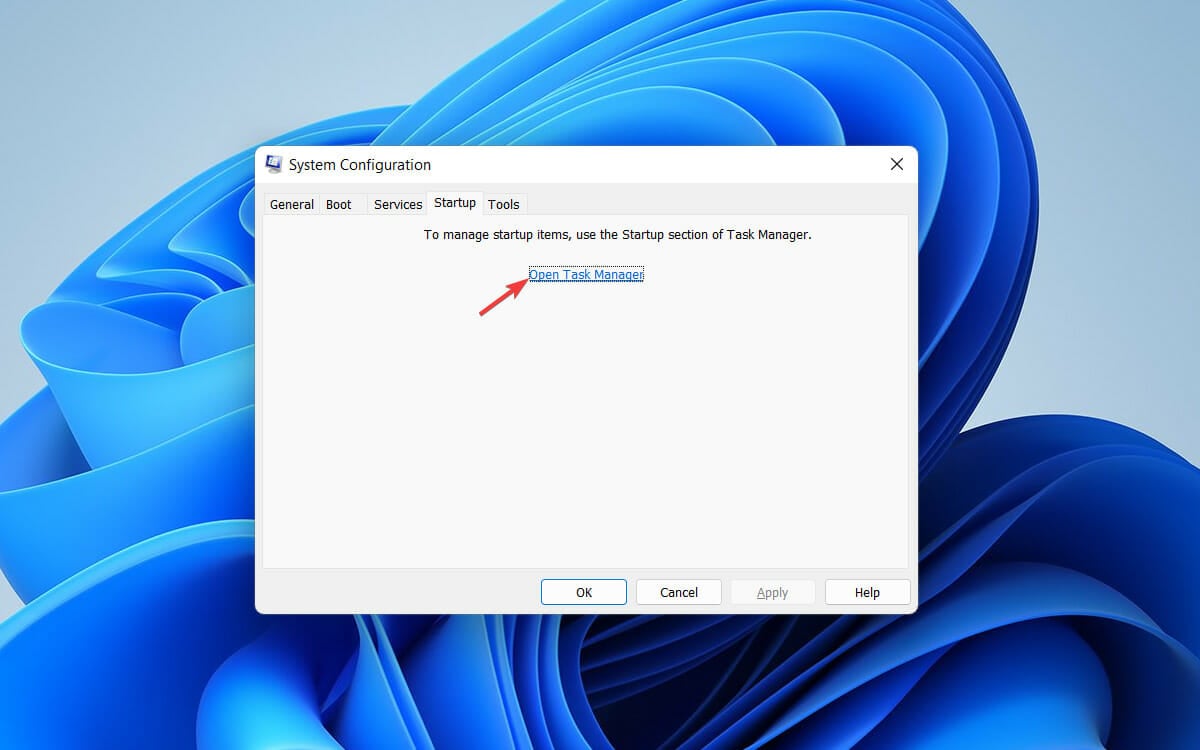
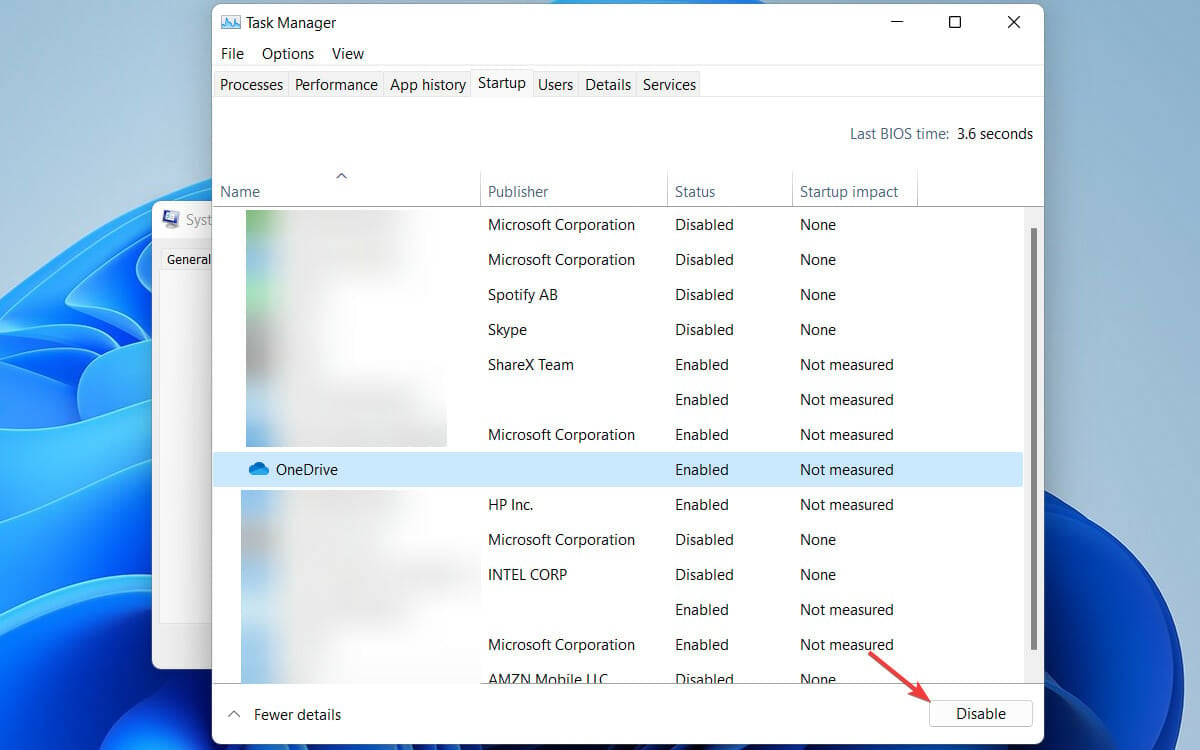
- Now move on to the Startup tab and click on Open Task Manager.

- In the Task Manager window, click each entry and Disable them individually.

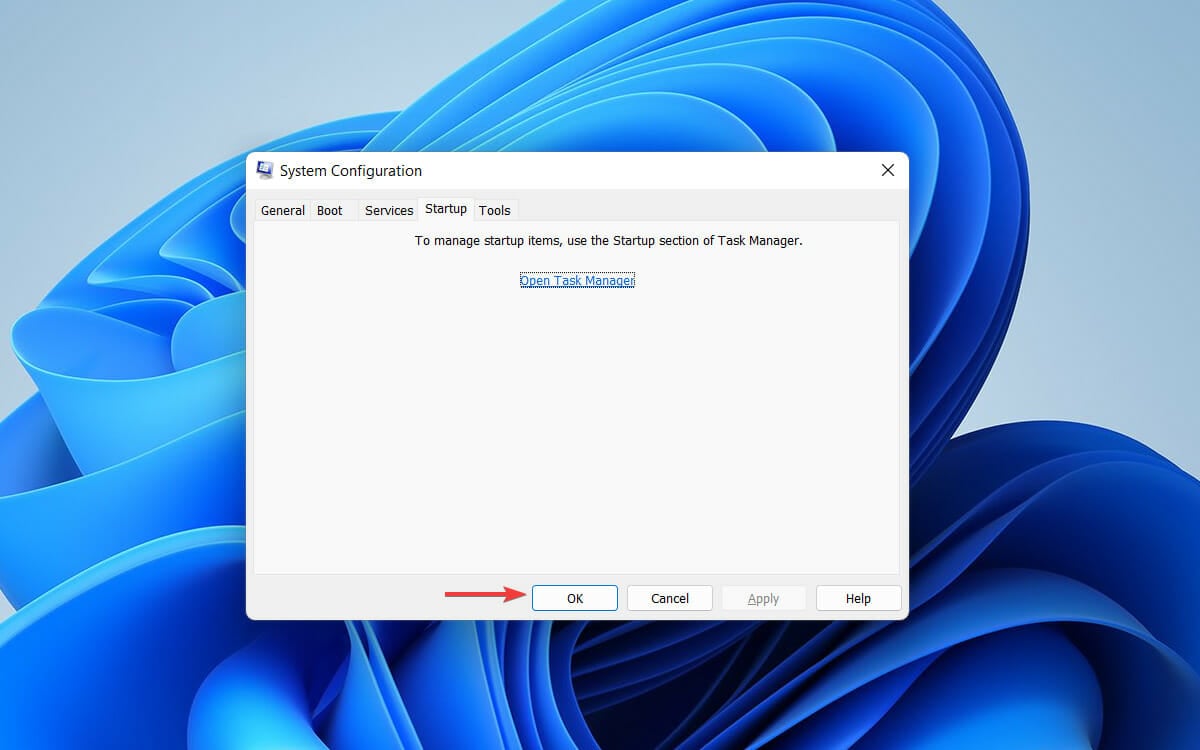
- Head back to the System Configuration window, and click OK.

- Finally, restart your computer.
Your System will restart in a clean boot environment. Now try to install the Windows update once again. Finally, try our following method if you still get the Install Error – 0x800f0831 in Windows 11.
5. Reset Windows Update components manually
- Click on the Windows icon from the taskbar first.
- Type in cmd in the search box and choose Run as administrator option for Command Prompt.
- In the Command Prompt window, type the following commands and hit Enter after each one:
net stop wuauservnet stop bitsnet stop cryptsvcnet start wuauservnet start bitsnet start cryptsvc%systemroot%SoftwareDistributionSoftwareDistribution.bak%systemroot%system32catroot2catroot2.bak
When done, go to Task Manager to check whether the Windows Update service, BITS service, and Cryptographic service got stopped or not.
All the mentioned services should be stopped, and you must not see the error code 0x800f0831 again on Windows 11.
What is the KB number?
KB stands for Knowledge Base and was previously designated to Microsoft articles used to fix issues with the OS. However, of late, Microsoft Started releasing updates with a KB number signifying the article or piece of information used here.
Except for the drivers, every update you see has a dedicated KB number, which can even be used to locate and update them.
How to manually download and install Windows 11 updates from Microsoft Catalog?
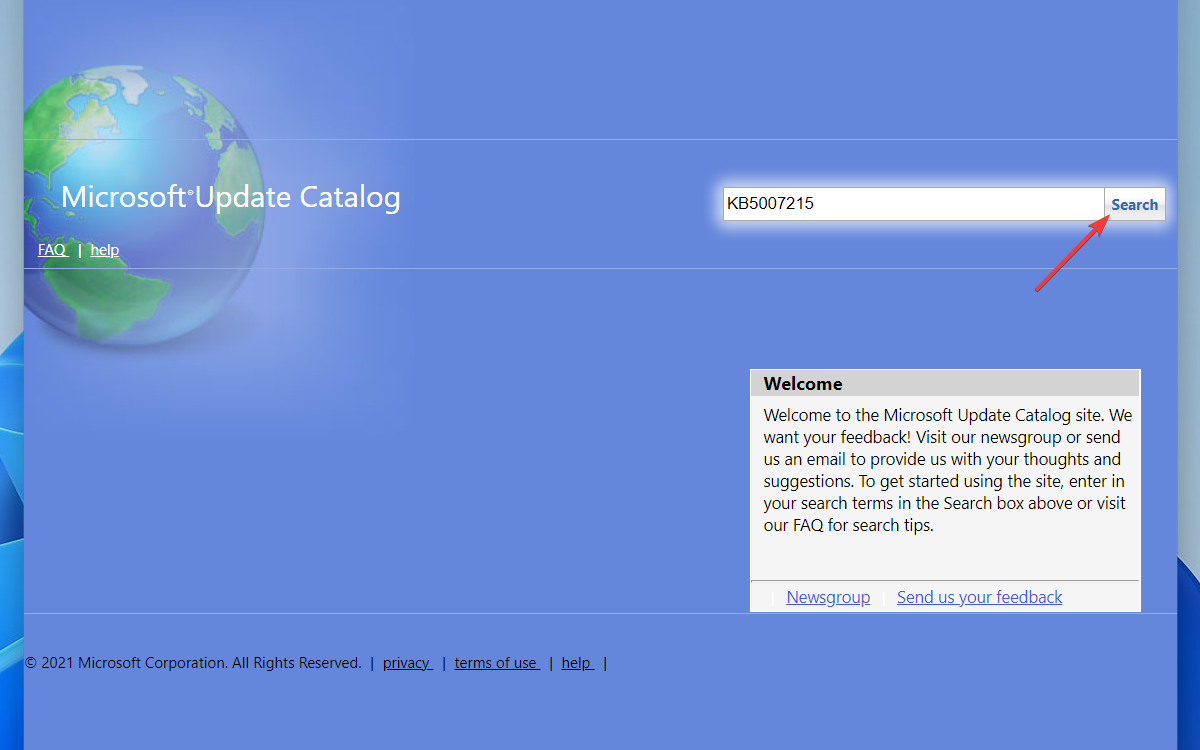
- First, access the Microsoft Update Catalog.
- Next, enter the KB number of the update you want to download in the Search box.

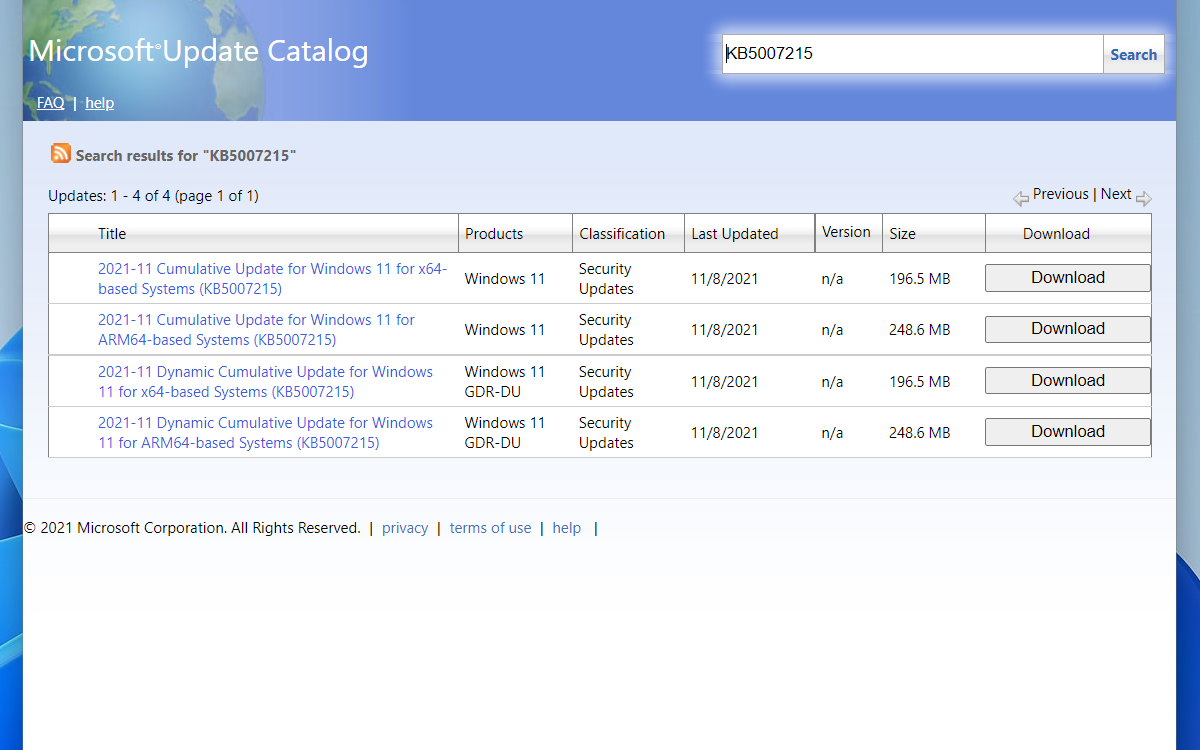
- Now, download the one that matches your Windows OS version and system architecture from the search results.

- Once downloaded, open the file and install Windows 11 update.
If your Windows Update service remains unresponsive even after trying all the solutions mentioned above, don’t worry. There is a way to download and install Windows 11 update files manually. This comes in handy when you are receiving 0x800f0831 due to a missing package.
Microsoft Update Catalog includes a repository of Windows updates where you can find and install timely updates on your System.
As you can see, you can use the Windows Update standalone installer to fix the Install Error – 0x800f0831 on Windows 11 on your PC with ease.
What to do if my PC doesn’t work as expected after an update?
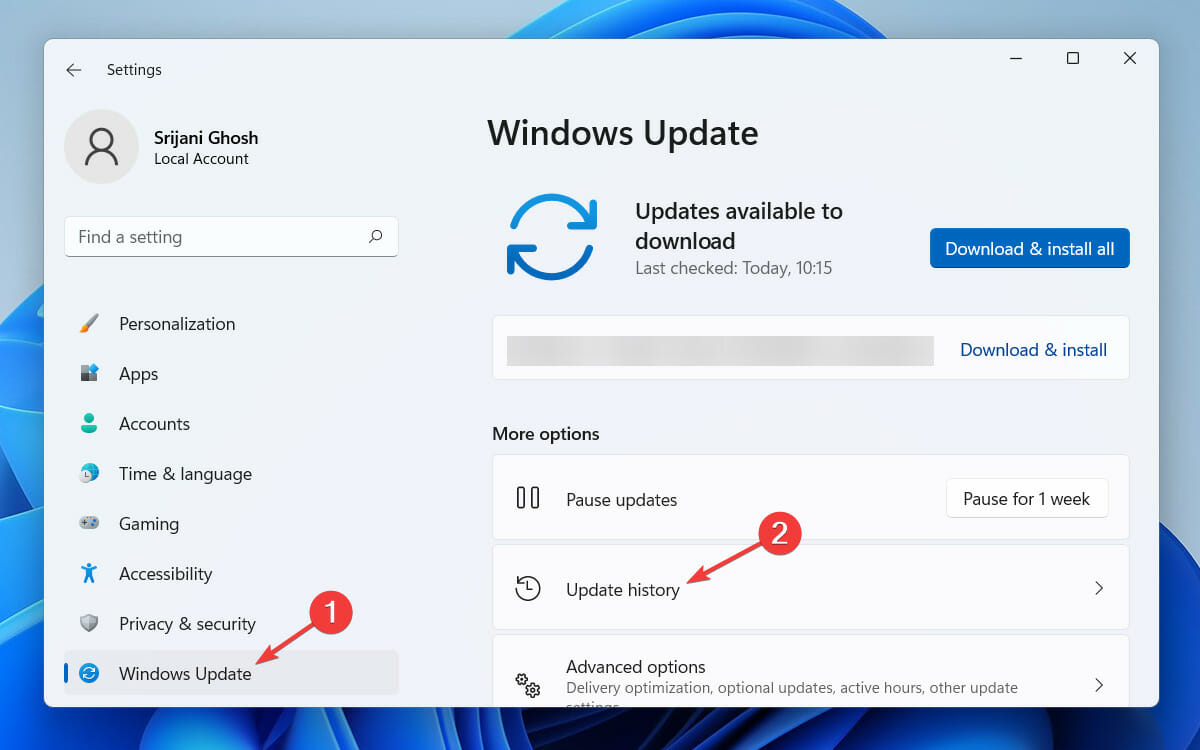
- Press the Windows + I buttons, select Windows Update, and navigate to Update History.

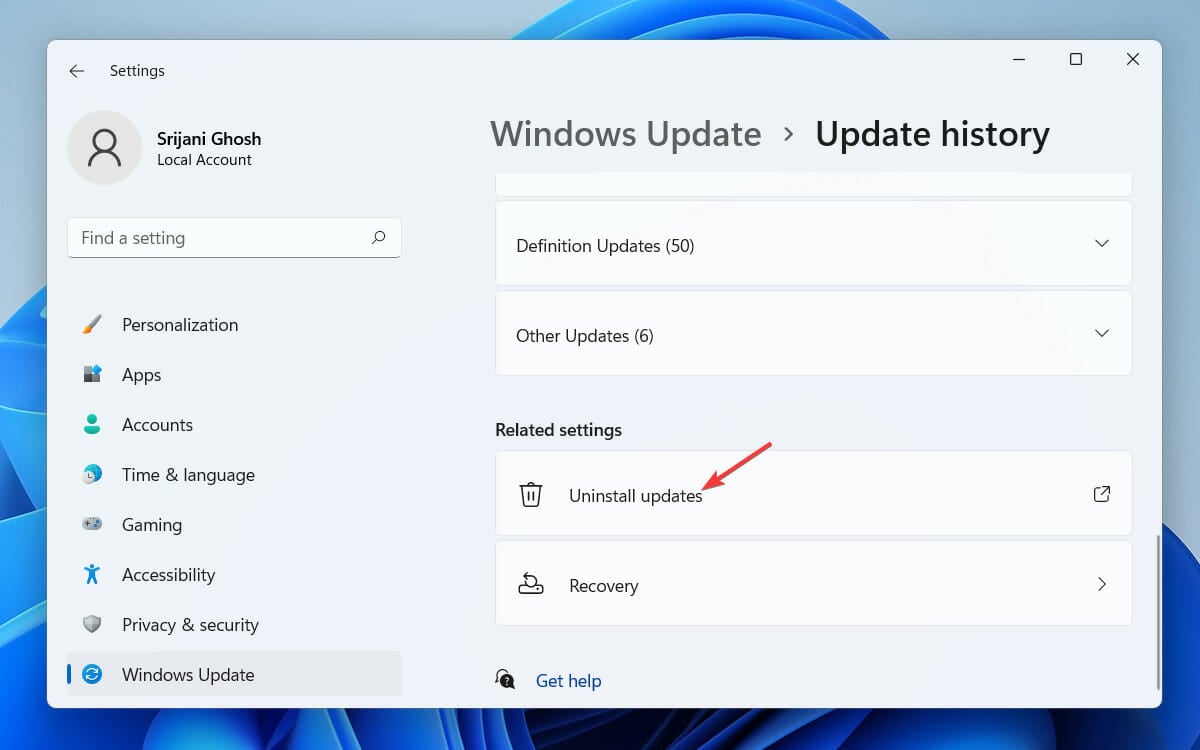
- On the next page, scroll down to find and click Uninstall updates.

- A new window will open now comprising all the updates, choose the one you want to remove, right-click on it, and select Uninstall.

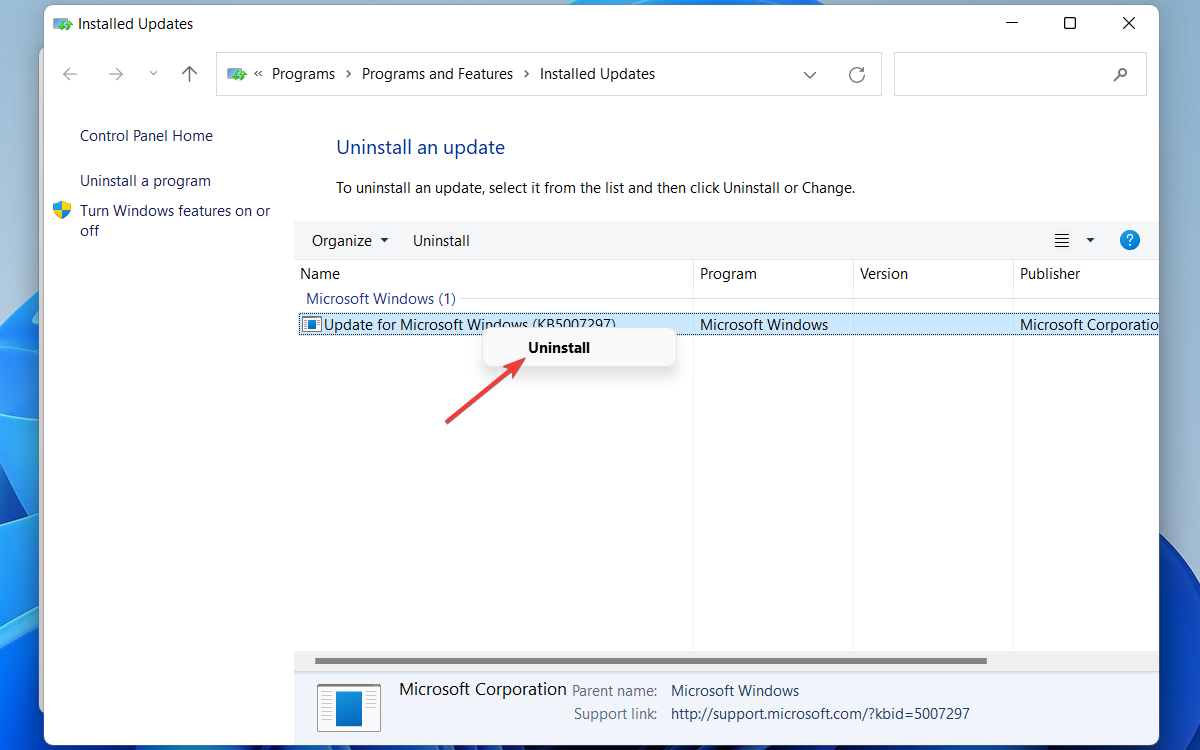
The latest Windows update version will get uninstalled now. However, you should always try a fresh installation of the latest OS version, as Windows updates are necessary for your PC to run smoothly.
That’s all! Our list of the five best methods to fix the 0x800f0831 Windows 11 update error ends here. Remember that the 0x800f0831 error was reported in Windows 10 while installing 21H1 or 20H2 and other updates.
Even if you’re on Windows 10, you can use the solutions from this guide to fix 0x800f0831 since they are universal for all iterations and versions of Windows.
Let us know which method worked for you to fix the Install Error – 0x800f0831 on Windows 11. And, if you have anything else to add to this list, let us know through the comments box below.
Read our disclosure page to find out how can you help Windows Report sustain the editorial team. Read more


Improve this guide


User forum
0 messages