Intel Driver Support Assistant Not Working: 3 Ways to Fix it
Full reinstall usually fixes this problem
![]() 3 min. read
3 min. read
![]() Updated on
Updated on
Share this article
Improve this guide
Read our disclosure page to find out how can you help Windows Report sustain the editorial team. Read more
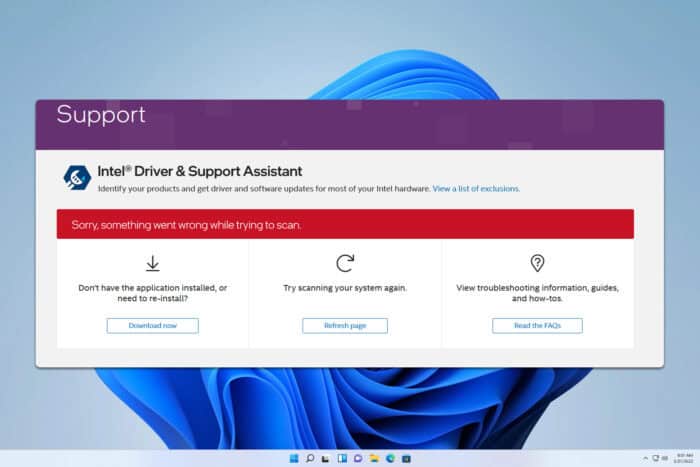
Facing issues with the Intel Driver & Support Assistant (DSA) not working can be incredibly frustrating, especially when you rely on it to keep your drivers up-to-date. Here are some practical solutions to get your Intel DSA back on track.
Why is the Intel driver and Support Assistant not working?
This issue occurs if the software installation is damaged or if the necessary services aren’t running.
What can I do if the Intel Driver and Support Assistant is not working?
Before we start, if you get this issue in Vivaldi, disable Shields and check if that helps. Also, ensure that Windows is up to date.
1. Check and restart Intel DSA services
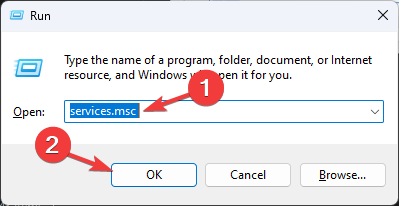
- Press Win + R to open the Run dialog. Type services.msc and press Enter.

- Scroll down to find Intel® Driver & Support Assistant and Intel® DSA Updater.
- Ensure both services show the status as Running.
- If either service is not running, right-click on it and select Start.

- If the services are running, right-click on each and select Restart.
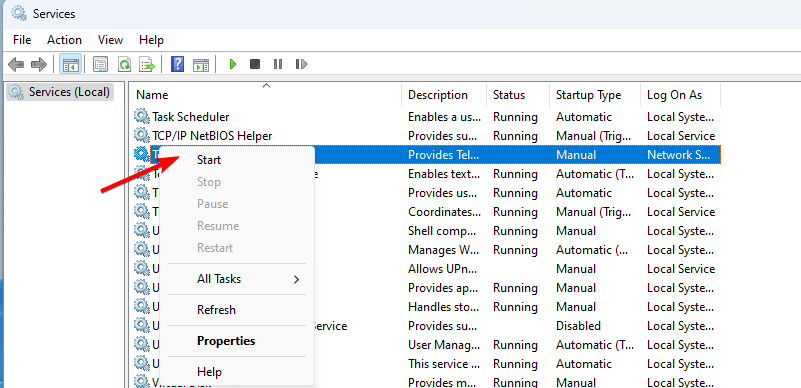
By ensuring these services are running, and your system is updated, you can resolve many common issues with Intel DSA.
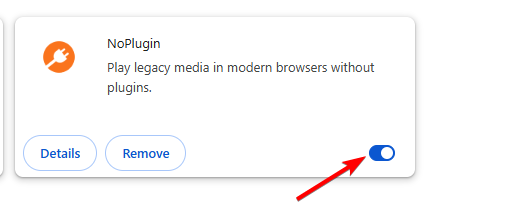
2. Clear browser cache and disable extensions
- Open your browser (Chrome, Firefox, or Edge).
- Press Ctrl + Shift + Delete to open the Clear Browsing Data window.
- Select All time and check the boxes for Browsing history, Cookies and other site data, and Cached images and files. Click Clear data.

- Open the browser menu (three dots).
- Go to More tools > Extensions.
- Disable Adblocker and privacy-related extensions by toggling them off.

- Reopen Intel Driver & Support Assistant and initiate a scan.

3. Uninstall and reinstall Intel DSA
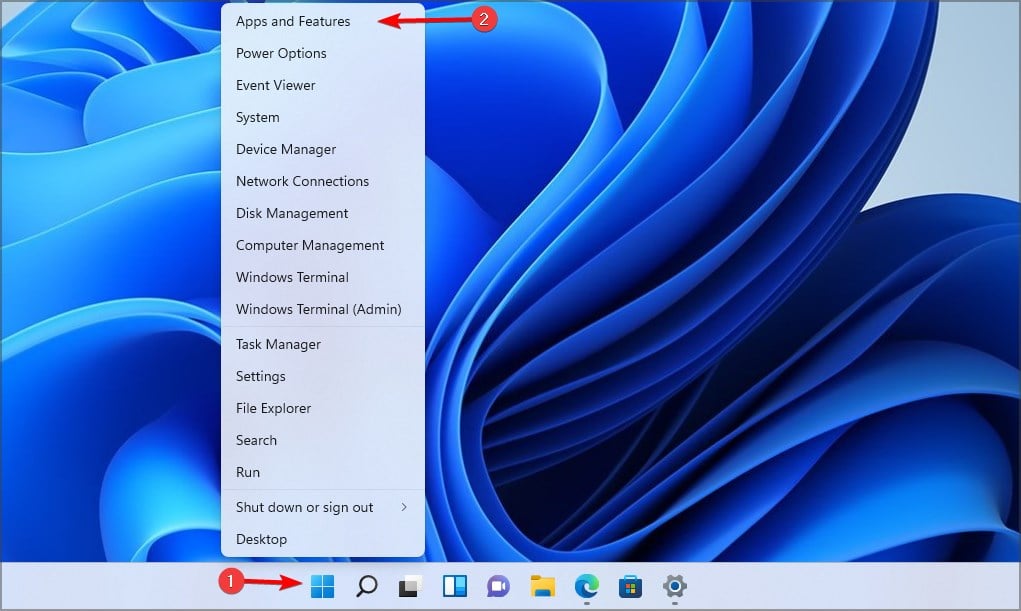
- Press the Windows key + X and choose Apps and Features.

- Find Intel® Driver & Support Assistant, click the three dots next to it, and select Uninstall.

- Visit the Intel DSA download page.
- Download and install the latest version of Intel® DSA.
- Right-click the downloaded installer, select Run as administrator, and complete the installation.
- Optional: Some users are suggesting using Intel Driver & Support Assistant Uninstaller to completely remove the software, so try that as well.

To learn more, we have a great guide on how to download Intel Driver & Support Assistant, so don’t miss it.
Keep in mind that sometimes Intel Driver Support Assistant is not downloading, but this issue can be easily fixed. Moreover, if you encounter a scan failure, we can help you out.
By following these detailed steps, you should be able to resolve the most common issues with the Intel Driver & Support Assistant not working as expected.
To learn more about Intel drivers, don’t miss our guides on how to install Intel network drivers and what to do if Windows 11 keeps installing old Intel graphics drivers.


User forum
0 messages