Fix: Logitech G HUB not Auto-Switching Profiles
G HUB allows you to switch from one game profile to another
Key notes
- Logitech G HUB is an app that allows you to customize gaming profiles with Logitech gaming peripherals.
- One of the features is to create profiles for certain layouts and then automatically switch them when you change games.
- Some have complained about problems plaguing this auto-switching feature and this guide will show you how to fix them.
Logitech G HUB is a software that allows you to customize Logitech gaming peripherals like mice and keyboards. One of the features of G HUB is the ability to create profiles for individual games. And that’s where auto-switching profiles come in, but the feature may fail sometimes.
What causes problems with auto-switching profiles?
Auto-switching profiles are a feature that automatically changes a G HUB profile from your Logitech gaming keyboard to fit the game that you’re playing.
Instead of manually changing configurations every time you want to play a different game, G HUB will do it for you. This is great so you won’t have to waste time figuring things out on your keyboard.
But sometimes problems arise with G HUB not switching profiles. These include:
- Windows and software updates – If G HUB or Windows are not updated frequently, you will encounter such bugs.
- Faulty drivers – When your hardware is not installed properly you may expect G HUB issues in recognizing it.
- Hardware problems – Although it’s improbable, if one or more keys malfunction, you may have issues with switching profiles.
Now that we know where the problems may arise, let’s fix this issue with our solutions below.
How do I fix the auto-switching profiles in G HUB?
There are a few things that you can do right off the bat to fix this problem:
- Restart your computer.
- Choose the right profile for your game.
- Run the troubleshooter like you would do if a microphone isn’t working.
- Close the G HUB app via Task Manager and then open it again.
The solutions to this problem are more complex and we need to get into more detail about them.
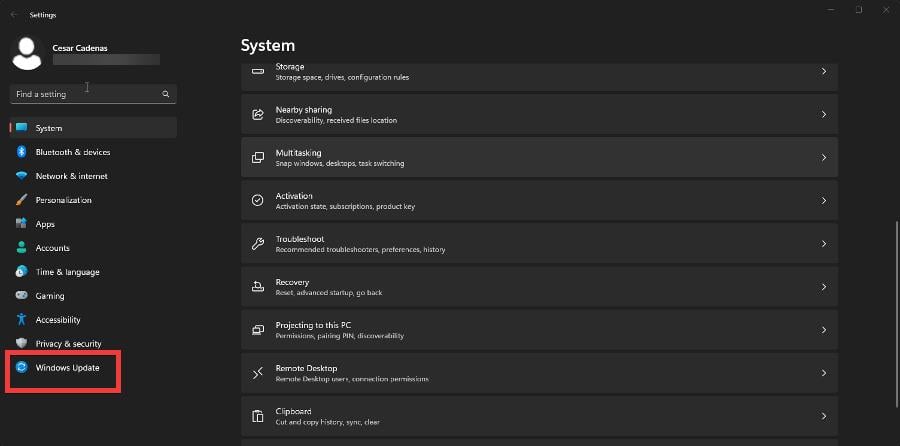
1. Update Windows 11 and the firmware
- There are two things to update on Windows 11 if G HUB isn’t working: the drivers and the OS itself.
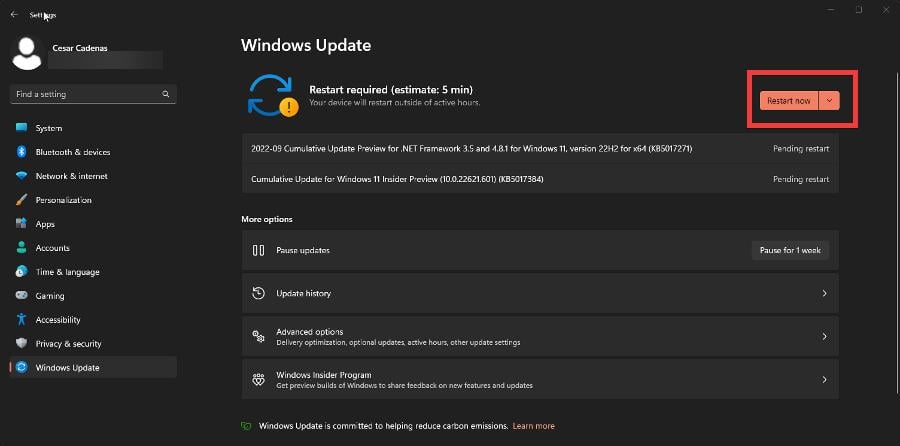
- Starting with updating the operating system, open the Settings app and select Windows Update on the left-hand menu.
- See if there are any updates that you can download onto your computer. Download them and then click Restart now.
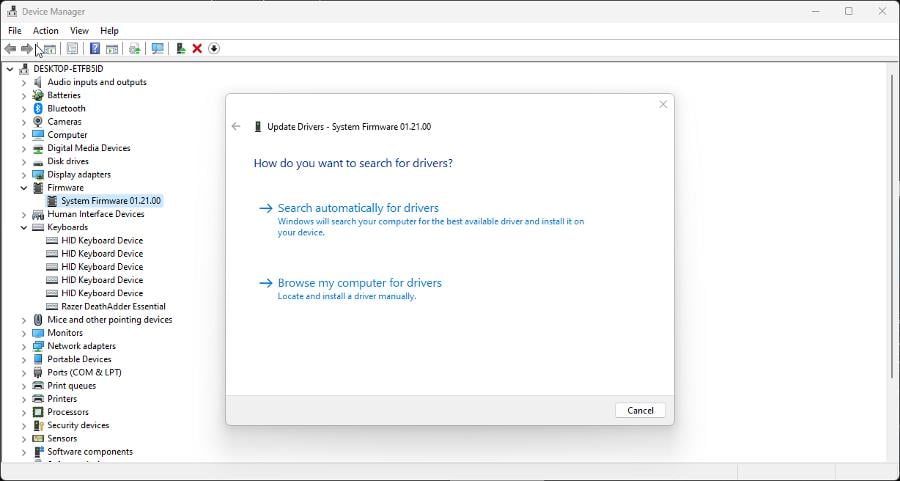
- As for drivers, open the Device Manager on your computer.
- Click Firmware and then right-click the entry that appears.
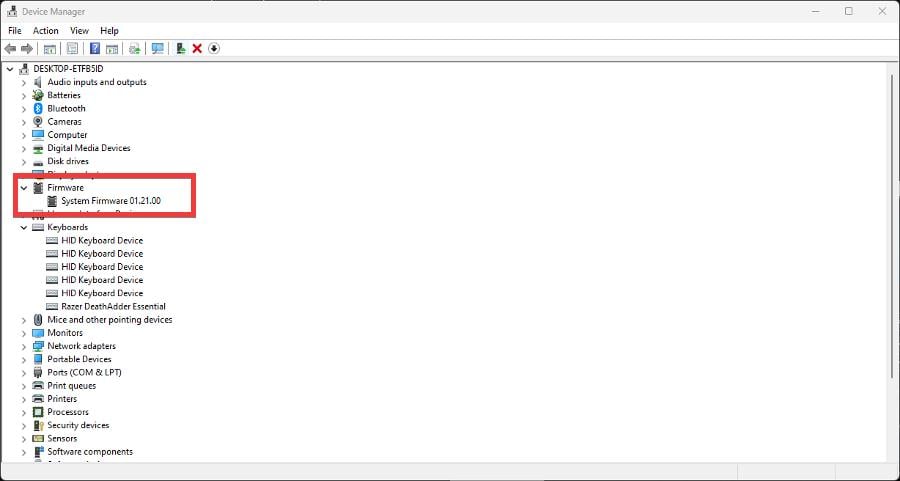
- Select Update drivers in the menu that appears.
- Then, click Search automatically for drivers. Windows 11 will automatically download and install any new drivers.
If you need additional help with this, we have a complete guide on how to update drivers in Windows 11.
A quicker and safer way to update your drivers is by using a dedicated software. Outbyte Driver Updater is the most suitable option because it scans your device for any outdated or missing drivers.
After it finds the drivers that slow down your PC performance, it automatically updates them with the latest version.

Outbyte Driver Updater
Prevent errors and performance matters and keep your drivers up-to-date with this great program.2. Turn off the Persistent Profile feature
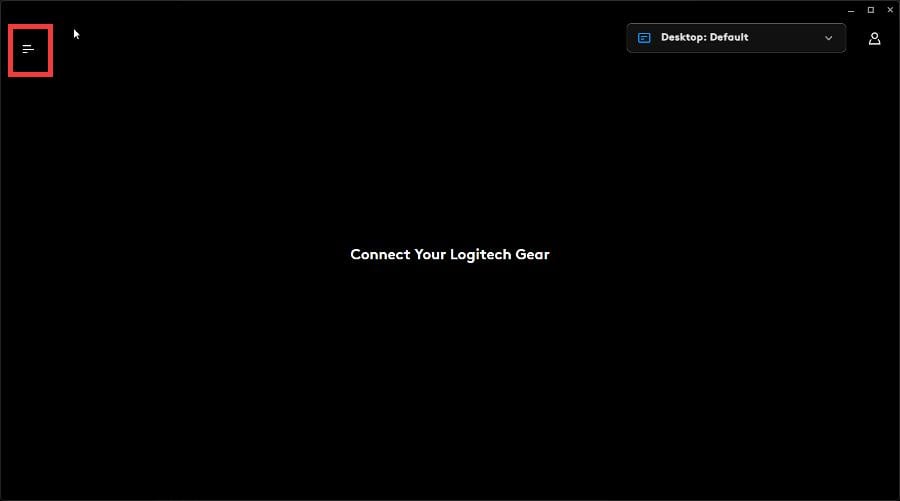
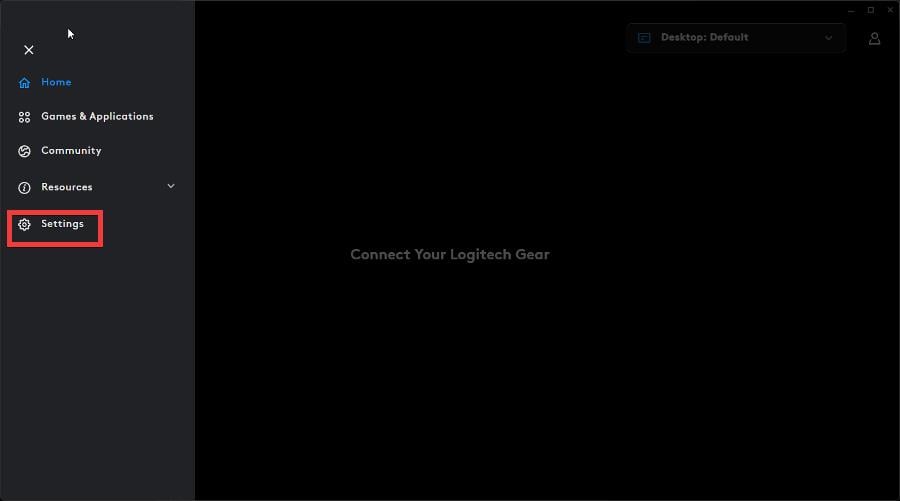
- Start G HUB and click the three lines in the upper left corner.
- Click Settings in the new menu that appears.
- Under Persistent Profile, click the name of a game on your PC.
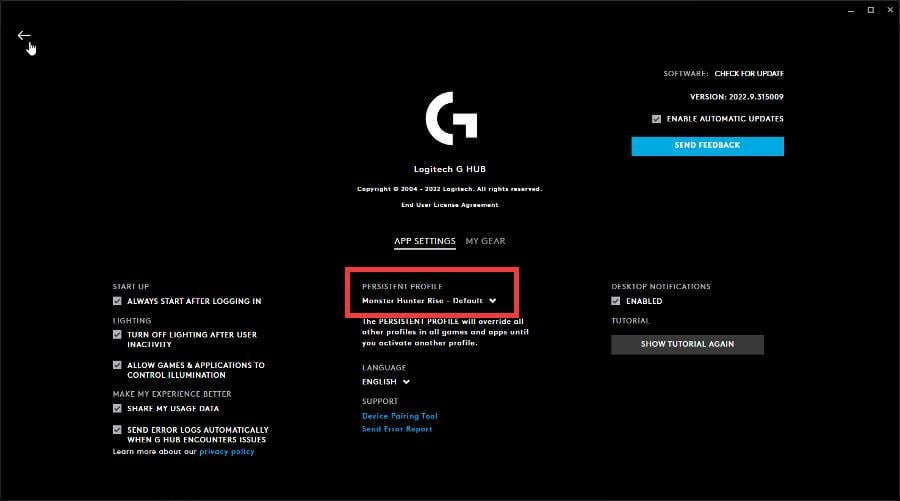
- Click None.
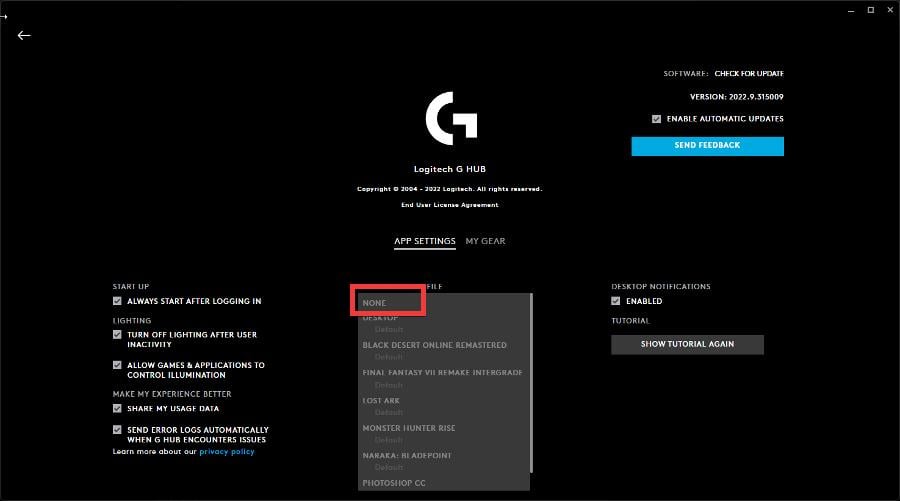
- Close G HUB and the auto-switching problem should be solved.
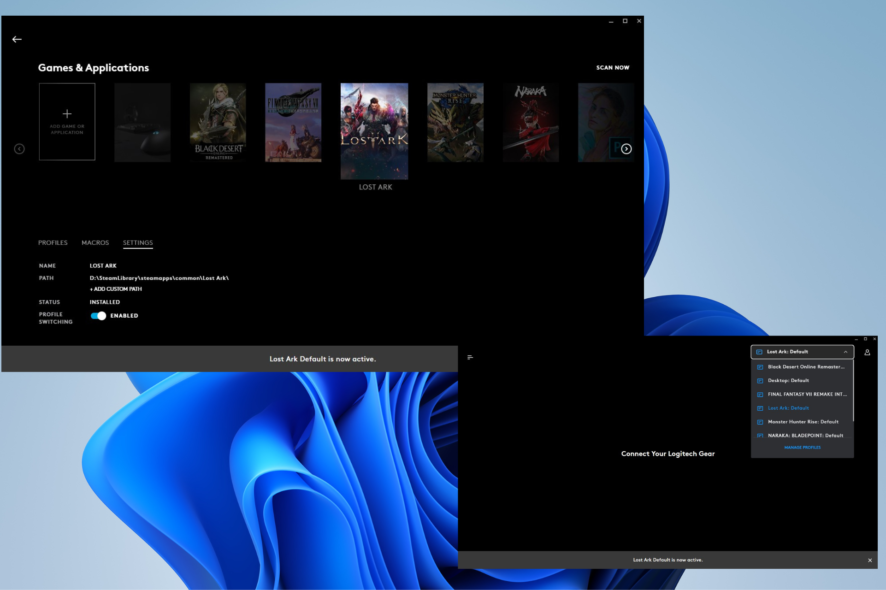
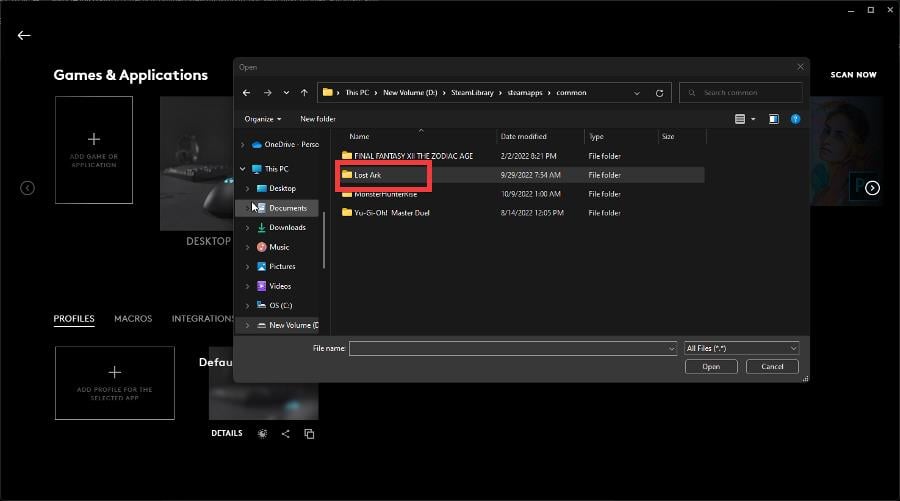
3. Double-check the path of the game
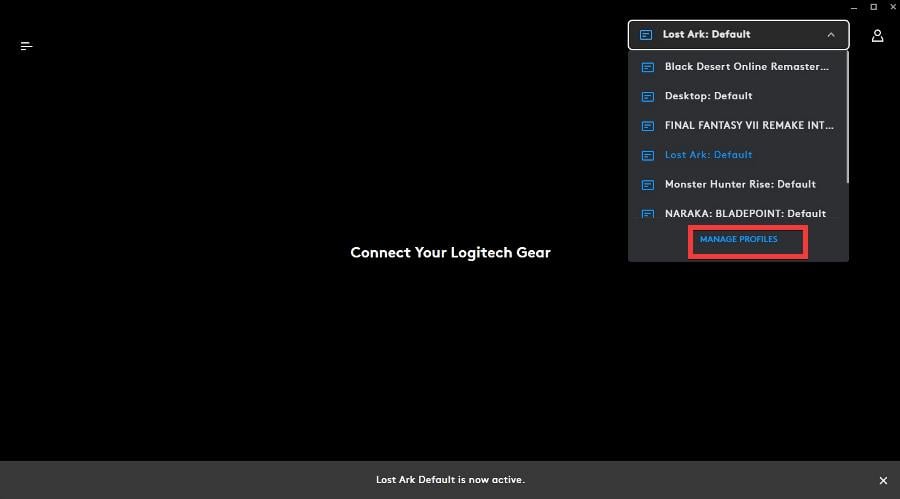
- Open Logitech G HUB.
- Select your game, click the profile drop-down menu and select Manage Profiles.
- With the game highlighted in Games & Applications, select Settings.
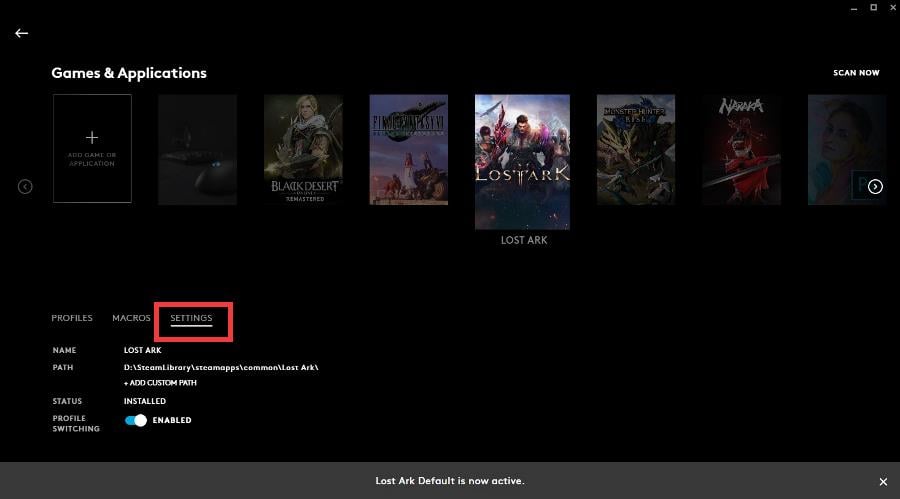
- Ensure that G HUB is connected to the game’s files on your computer like it is in the previous image.
- If not, click Add Custom Path.
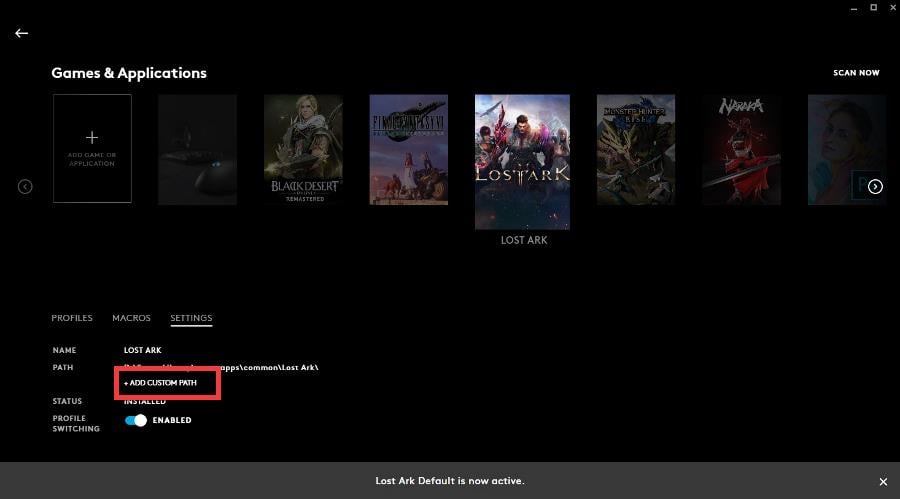
- Search for the game’s location in your computer’s files and then click Open to connect it to G HUB.
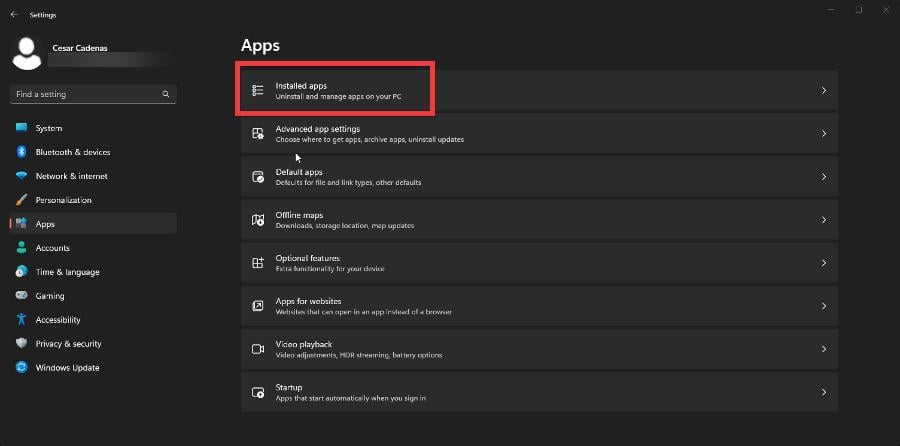
4. Reinstall G HUB
- Click the Windows Start button and select Settings.
- Click the Apps entry on the left-hand menu and then select Installed apps.
- Scroll down until you find Logitech G HUB, click the three dots to the side and select Uninstall.
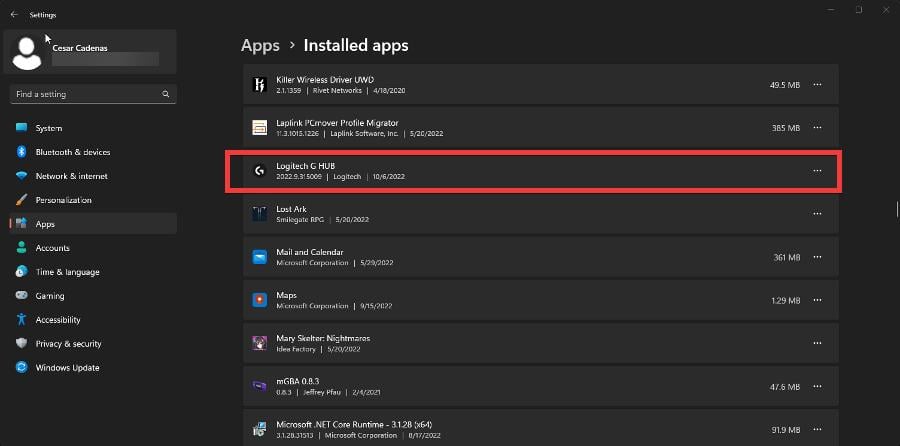
- After uninstalling, go back to the G HUB installation webpage and reinstall the app.
We hope that the solutions we provided helped you fix the auto-switching problem in G HUB.
For any other issues, be sure to check out the guide on fixing general problems for Logitech G HUB for Windows 11.
You’ll find similar solutions like updating Windows 11 to checking if the LGHUB Updater is enabled or running the program as an administrator. If you have G HUB, there’s a pretty good chance you have Steam installed.
People have complained in the past about Steam games suddenly not launching. We recommend checking your antivirus software and updating your GPU drivers to solve that problem.
Feel free to comment below if you have any questions regarding the above processes. Also, do not hesitate to comment about guides you’d like to see or information about any other gaming app.
Read our disclosure page to find out how can you help Windows Report sustain the editorial team. Read more


Improve this guide


User forum
0 messages