Logitech Unifying Software for Windows 11: Download & Tips
Get the software up and running within minutes

With a single receiver, you can connect up to 6 different Logitech-compatible devices without needing USB ports. That’s all possible if you use the Logitech Connection Utility.
However, all these are not possible without the Logitech Unifying software. And with users already comfortable using this software in later OSs, it is no surprise they are now looking for ways to incorporate it into the new Windows 11.
This guide will take you through downloading the software on Windows 11. It also contains a fix to one of the common Logitech receiver problems, among other info.
Table of contents
How to download and install Logitech Connection Utility Windows 11?
➡ Download software from the official website
- Go to the Logitech support website and click the Unifying icon.

- Click the Download Now button.
- Double-click the downloaded setup file and select the I accept the terms of the License Agreement button in the next window.

- Now, click the Install button to continue.
- Click the Finish button to complete the installation and start adding your Logitech Unifying devices.
➡ How to fix Logitech Unifying receiver not detected?
1. Download Mouse and Keyboard drivers
Sometimes, the reason for an undetected receiver is not down to the receiver itself. It could be due to outdated keyboard and mouse drivers, making it hard for the receiver to establish a connection.
In this case, you only need to update the drivers.
- Update driver manually: This requires you to go to the manufacturer’s website to search for recent updates. Just make sure you download only drivers compatible with your Windows 11 model.
- Update drivers automatically: This is the easiest way to update your mouse and keyboard drivers. It requires you to use third-party software with little effort from you.
2. Use the SetPoint Software
Go to Logitech’s support website and download the Setpoint software. Click the downloaded .exe file and follow the onscreen instructions to install the software.
Upon installation, you will hear a sound as if it has detected new hardware.
After that, you will be prompted to turn the mouse off and back on. Do this, and your receiver should be detected afterward.
3. Run the Logitech Unifying software as an Administrator
- Press the Windows key + R to open the run window.
- Type devmgmt.msc and click the Ok button.

- Click on the Mice and other pointing devices option in the Device Manager window to expand it.
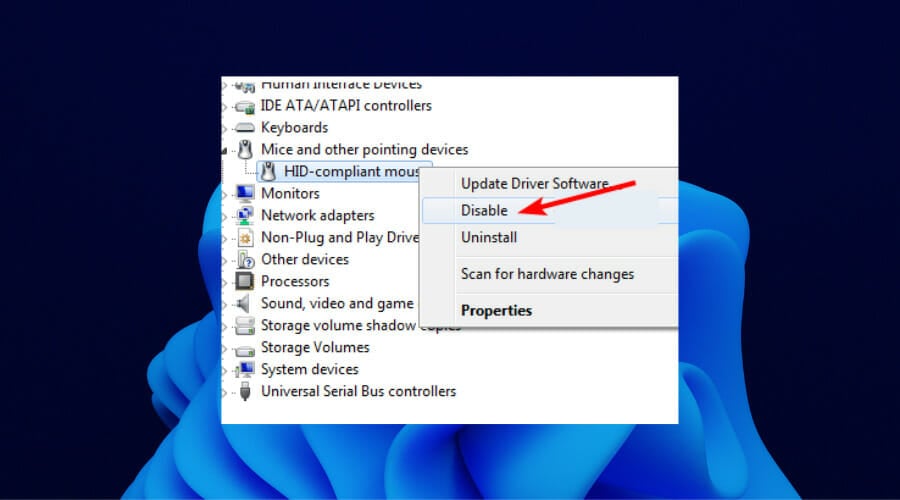
- From here, right-click the HID-compliant mouse and select the Disable option.
- Now, press the Start button and search for the Logitech Unifying Software.

- Select the Run as administrator option.
Your PC should detect the Logitech Unifying receiver when the software starts up.
Can I connect my Logitech Unifying devices to more than one receiver?
No, you cannot connect a single Logitech-compatible device to multiple receivers. Logitech only allows you to connect multiple devices to a single receiver at a time and not the other way around.
Hence, to use a connected device with another Logitech Unifying receiver, you must disconnect it from its present connection on the unifying software.
The Logitech Unifying software is a big part of this, which is the bridge between your receiver and the external devices. Without it, there is no way you can connect devices to your Logitech receiver.
The Logitech Unifying software can be downloaded on Windows 11, as shown above. You only need to follow the steps, and the process will be effortless. After downloading the tool, you can pair Logitech keyboard with your PC.
Drop a comment below for any queries, and we will respond as soon as possible.
Read our disclosure page to find out how can you help Windows Report sustain the editorial team. Read more


Improve this guide


User forum
0 messages