5 Great Tips to Make your Steam VR Games Run Better
Multiple ways to improve performance for your favorite games
6 min. read
Updated on
Read our disclosure page to find out how can you help Windows Report sustain the editorial team Read more
Key notes
- Even if your computer meets the necessary system requirements to run virtual games through Steam VR, you may still run into problems.
- You may experience sudden lag or graphical dips in quality on your VR headset.
- Fortunately, there are many ways to solve this from a simple computer restart to defragmenting your hard drive.
Steam VR is an app from the Steam gaming platform that allows you to play virtual reality games from your computer on various headsets like the Oculus Rift.
As high-tech as virtual reality platforms may be, games in this space do run into some performance issues. This guide will show you different ways to ensure your game run smoothly on Steam VR.
What Steam games can you play in VR?
Before you download any of these games, you should check if your PC can handle them. The Oculus Rift, for example, requires certain system requirements to run.
Steam has a page on its website listing every single one of its virtual reality titles on its platform. Not every game is made equally as some are better than others. Below are a few highlights:
- Keep Talking and Nobody Explodes: This game involves defusing a bomb in a pretty intense scenario while another player gives you instructions on how to disarm it safely.
- Raw Data: You have to survive wave after wave of robots coming after you with various weapons at your disposal. An intense shooter; definitely for the hardcore audience.
- Tilt Brush: If intense gameplay isn’t your style, Tilt Brush allows you to create gorgeous pieces of art in a variety of styles from sketching pens, oil paintings, and watercolor.
How do I get better performance at Steam VR?
There are some solutions you can do pretty quickly, while the ones detailed below require a bit more extra work:
- Restart both your computer and VR headset. This is the tried and true method of fixing any software. Rebooting should work the majority of the time.
- Try changing the refresh rate on your VR headset. You can do this by going into the settings menu of your headset and making the adjustments. There isn’t much you can do from the side of Steam VR.
- Double-check your wires and cables. Perhaps you’re using a faulty cable on your VR headset that’s malfunctioning. Also, make sure you’re using USB3.0 or higher
- Close any extra windows or apps you have running in the background. Having too many apps open can take up CPU resources or RAM leading to poor-performing VR games.
- Reinstall Steam VR. It’s possible something went wrong during the installation process
1. Underclock your GPU
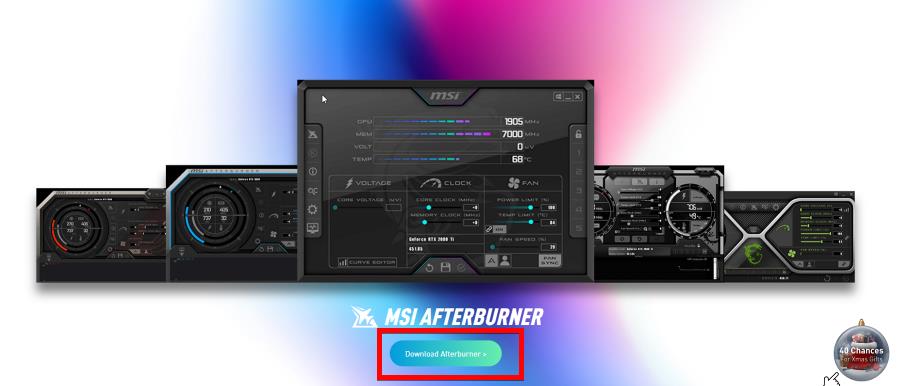
- Go to the MSI Afterburner website and download the app.
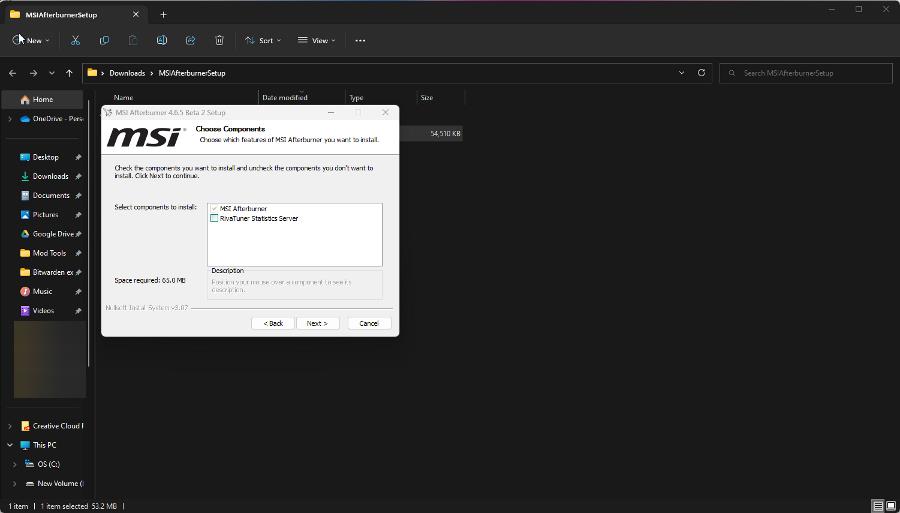
- Go to the downloaded file’s location on your computer and double-click it to run the installation wizard.
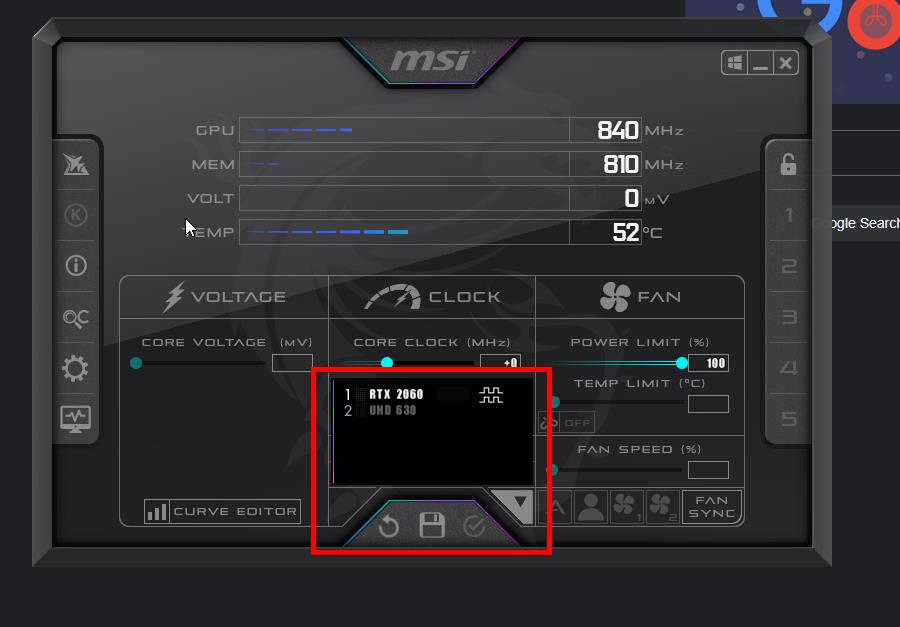
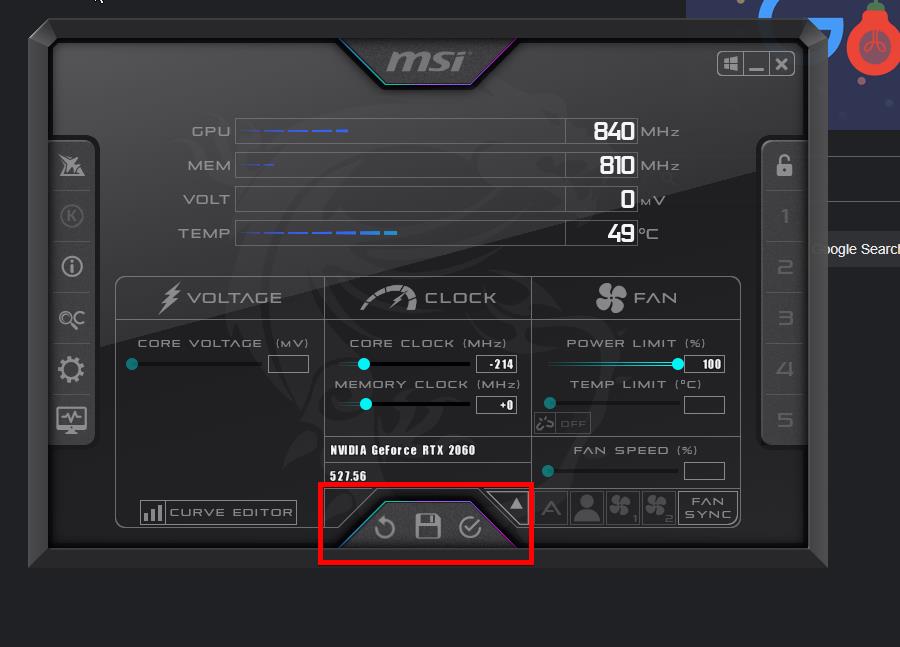
- Check if MSI Afterburner is detecting the graphics card you want to underclock. If it isn’t, click the arrow under the Clock section and choose the correct GPU.
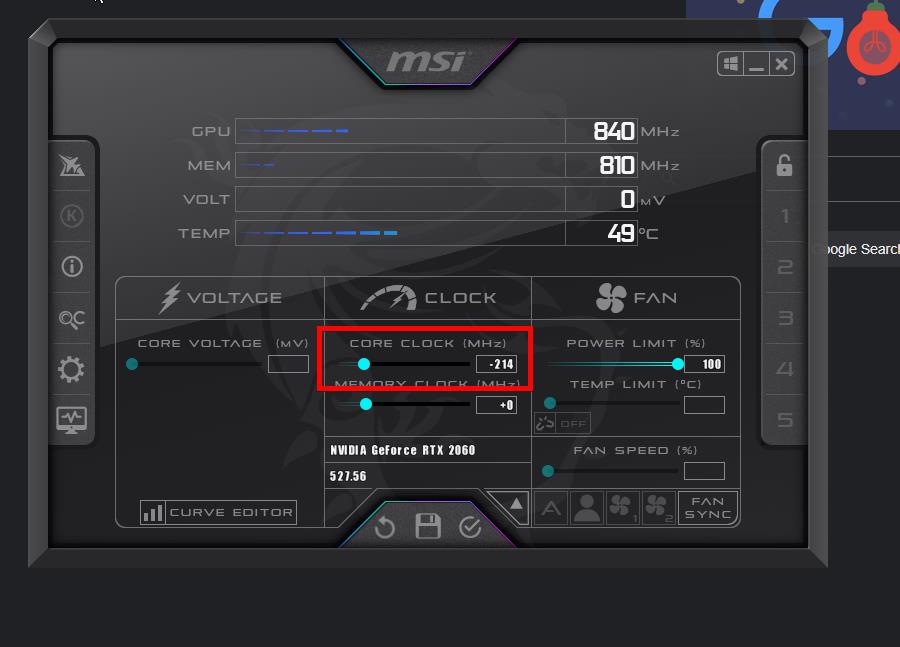
- To underclock, drag the knob in Core Clock to a lower quantity. This will slow down the GPU’s clock speed.
- Click the checkmark at the bottom to apply the settings.
Underclocking your GPU will reduce the amount of work it has to do to render Steam VR on your headset allowing them to run better. There are other ways to underclock which we recommend learning about.
You can try undervolting, but that comes with a greater performance cost. Undervolting is best used to reduce internal temperatures.
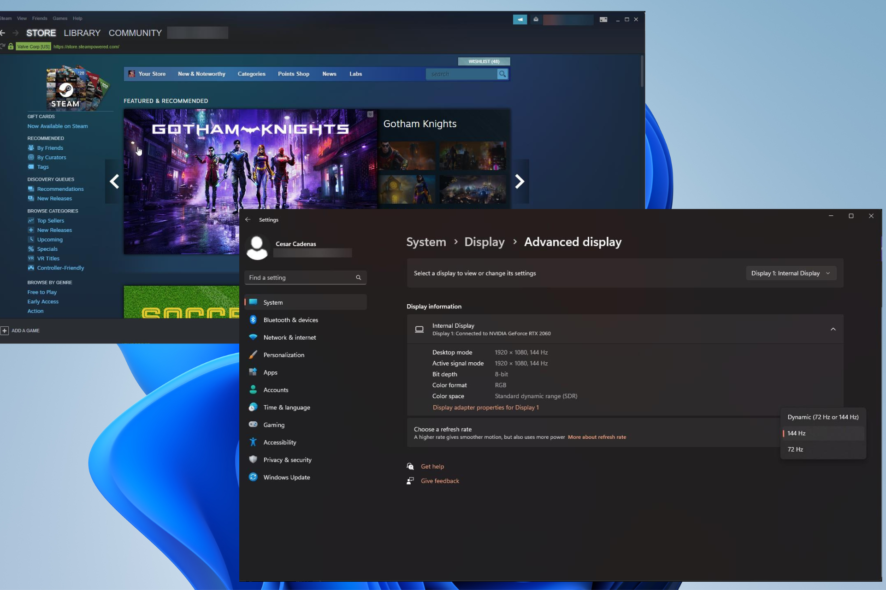
2. Change the computer refresh rate
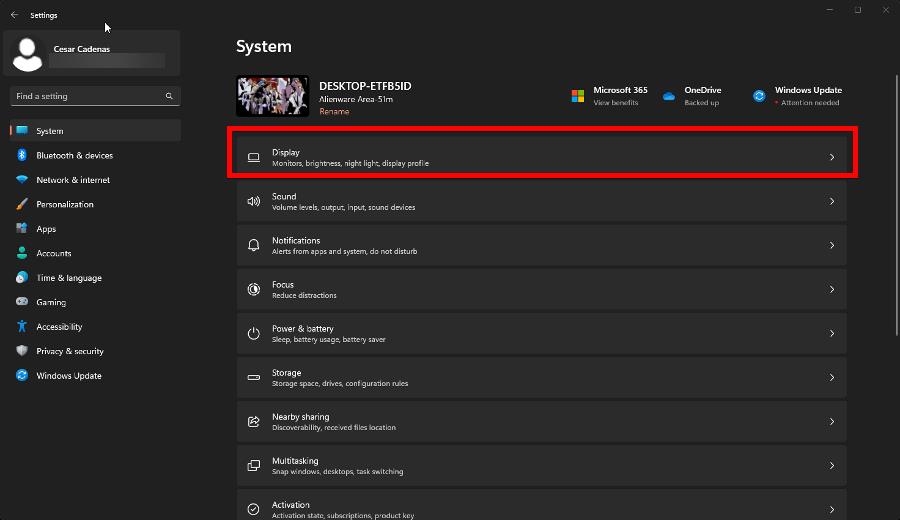
- Open the Settings menu, stay on the System tab, and select Display.
- Scroll down and click Advanced display under Related settings.
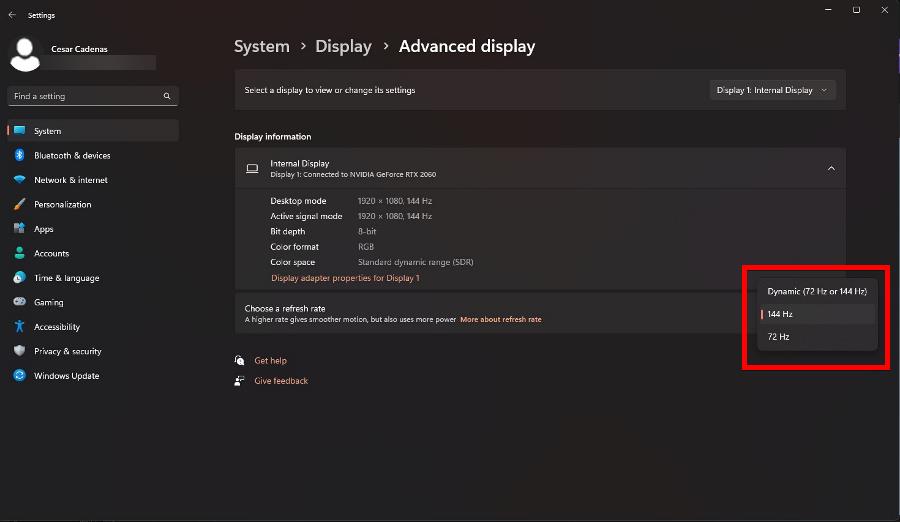
- Expand the menu next to Choose a refresh rate and select a different rate.
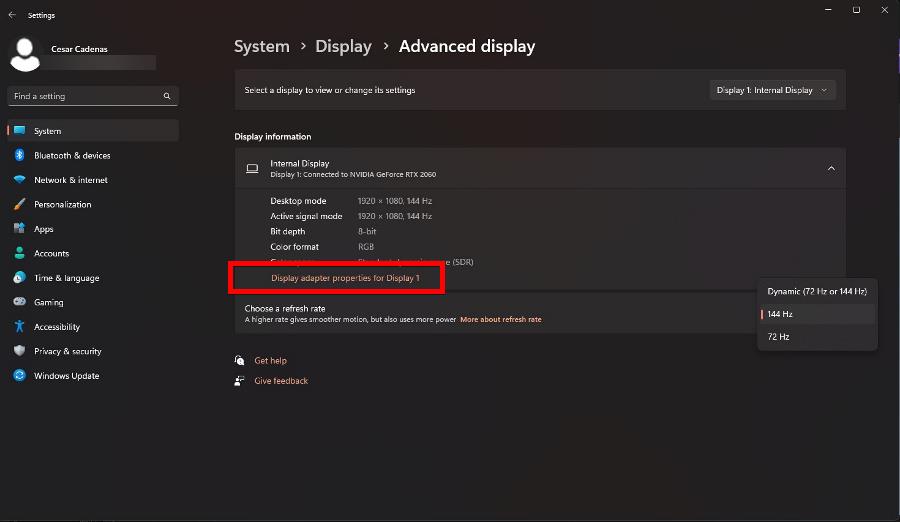
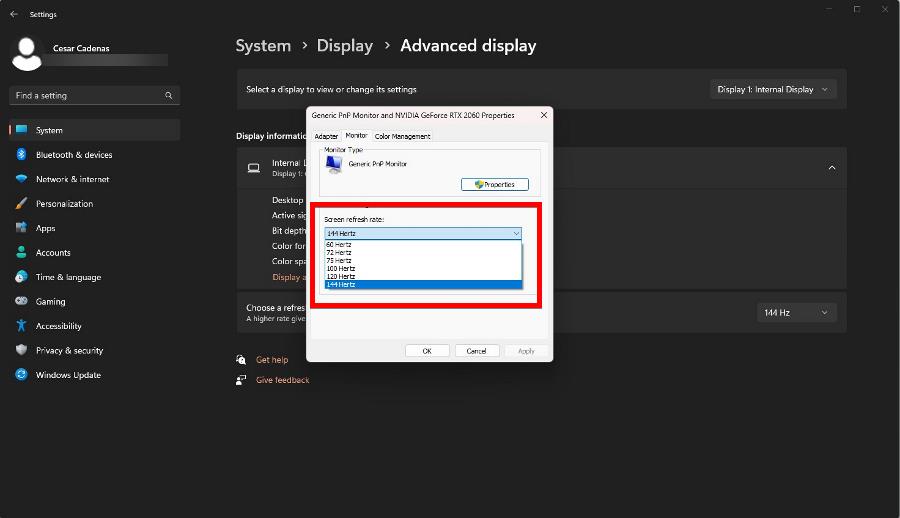
- If you want choices, click Display adapter properties for Display 1.
- Go to the Monitor tab in this new window.
- Expand the menu under Screen refresh rate and choose a different quantity.
- Click Apply then OK to finish up.
3. Disable GeForce Experience Overlay
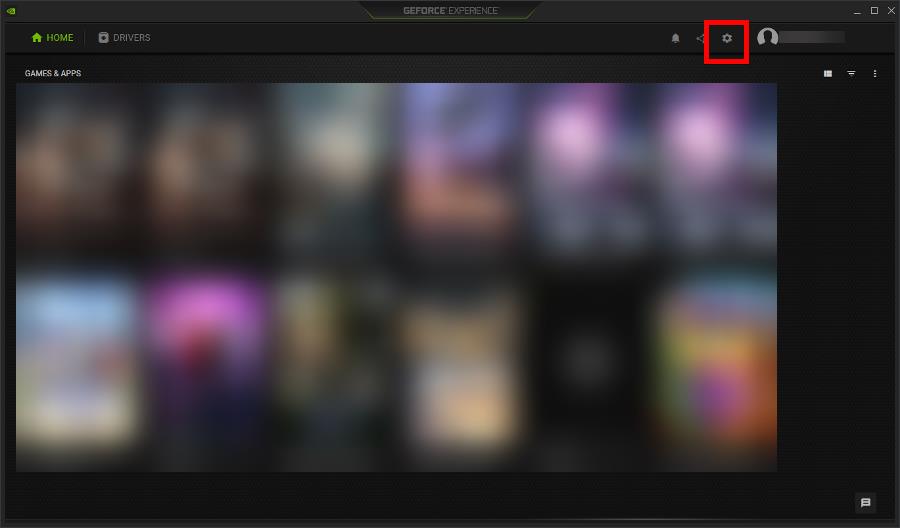
- Bring up the GeForce Experience app if you have it on your computer and click the cog icon in the upper right corner.
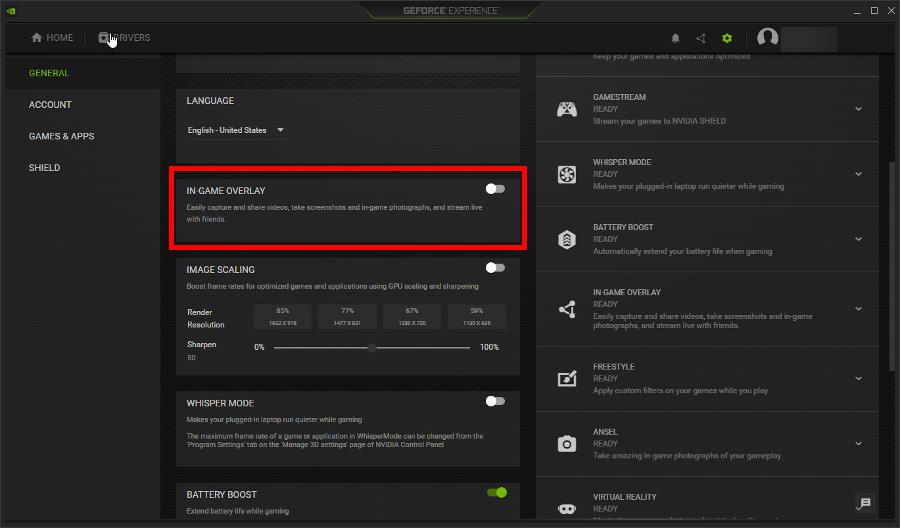
- Scroll down to In Game Overlay and click the toggle switch to turn off the feature.
4. Update GPU drivers
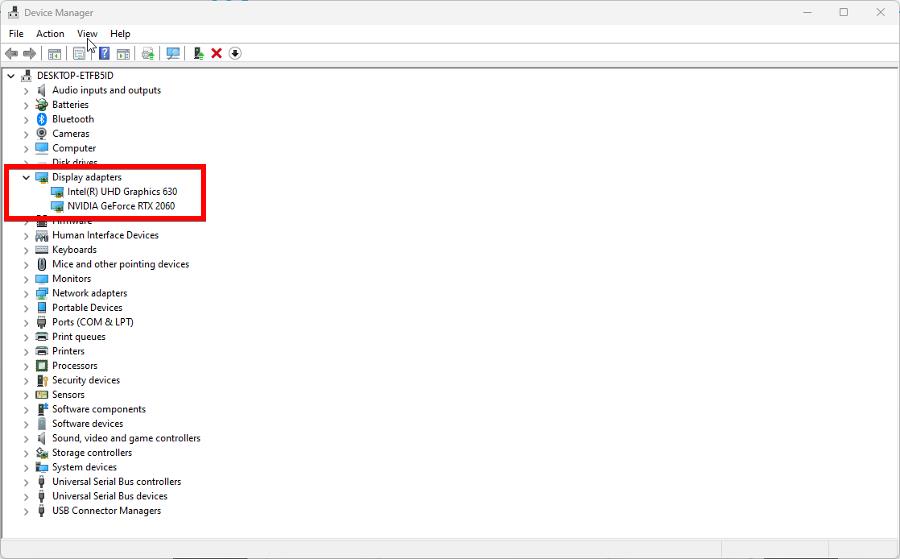
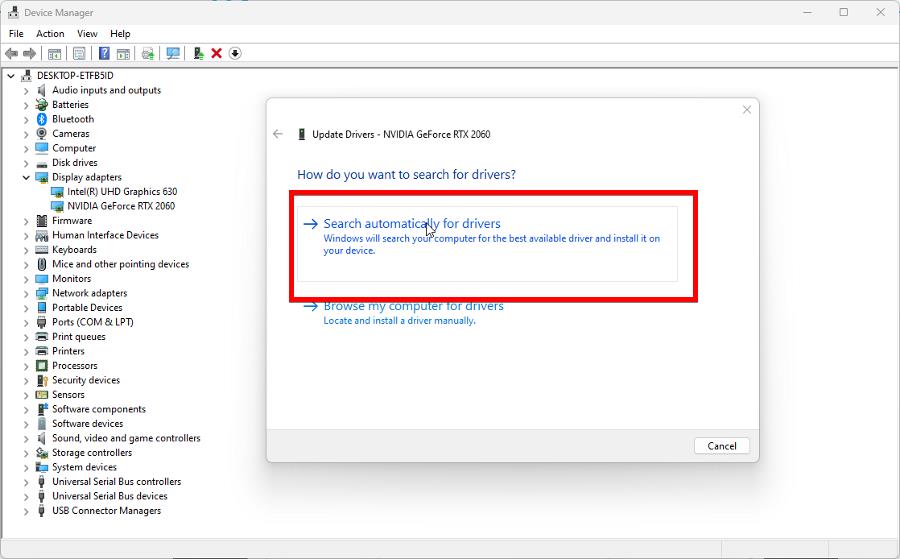
- On the Windows Search bar, bring up the Device Manager and expand the Display adapters entry.
- Right-click the entry and select Update drivers.
- Select Search automatically for drivers and the update will instantly be installed. Do the same for other GPUs if you have them on your computer.
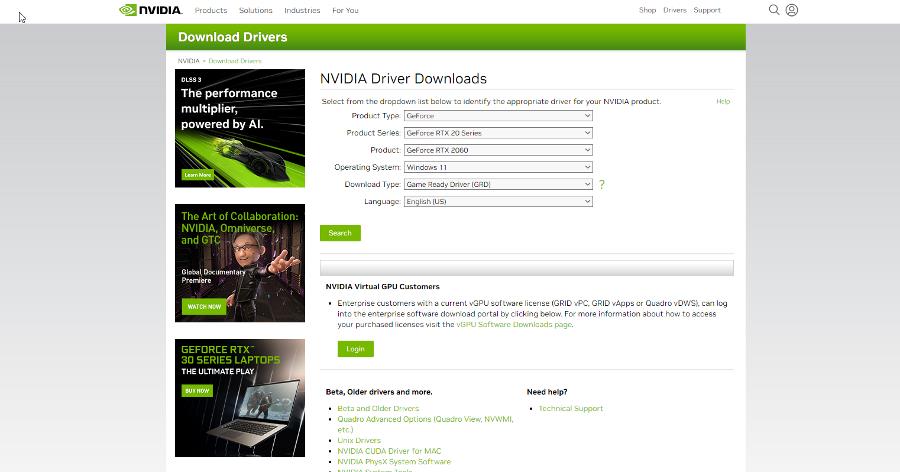
- Conversely, you can update manually by going to the website of your GPU’s manufacturer (like NVIDIA or AMD) and downloading the drivers from there.
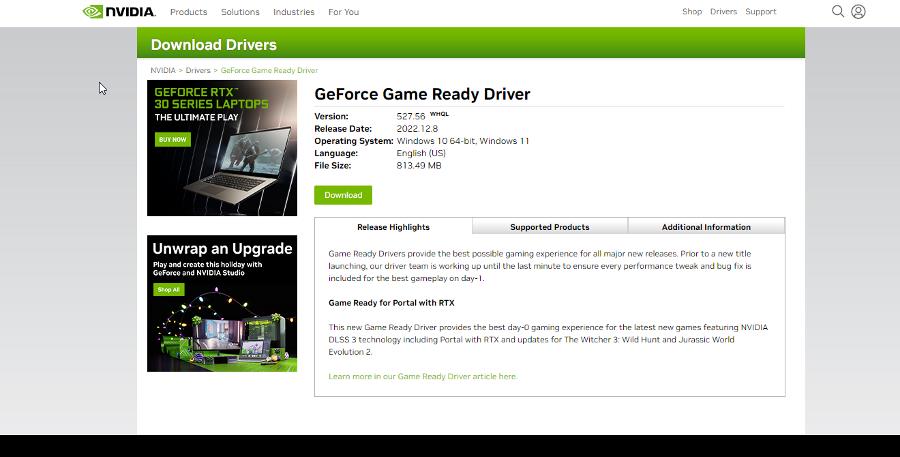
- Enter the information NVIDIA is asking you, click Search, and then download the drivers.
- Go to the location of the newly downloaded drivers and double-click it to begin the installation process.
5. Defragment your disk drive
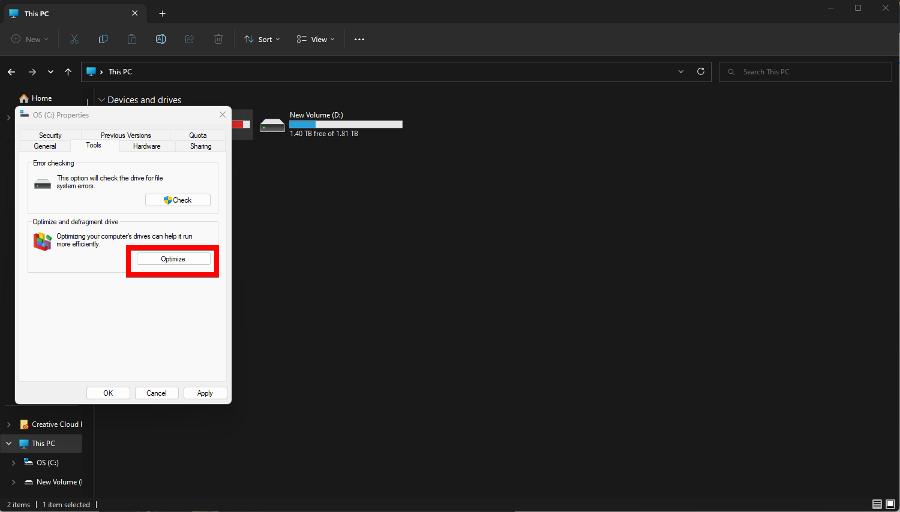
- Open the File Explorer and go to This PC.
- Right-click your main drive, then select Properties in the context menu.
- Select the Tools tab and click the Optimize button under Optimize and defragment drive.
- Highlight the drive you want to optimize and click the Optimize button. Give your computer time to finish up.
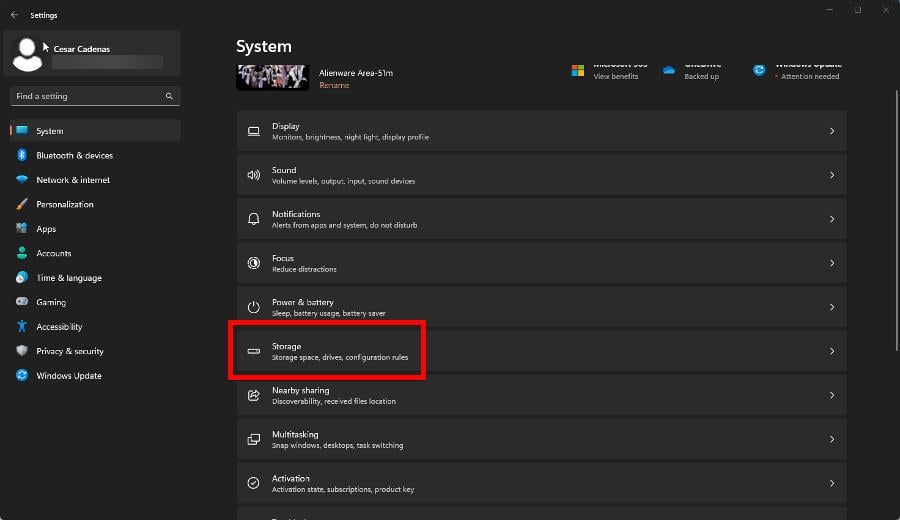
- Next, bring up the Settings menu and select Storage in the System tab.
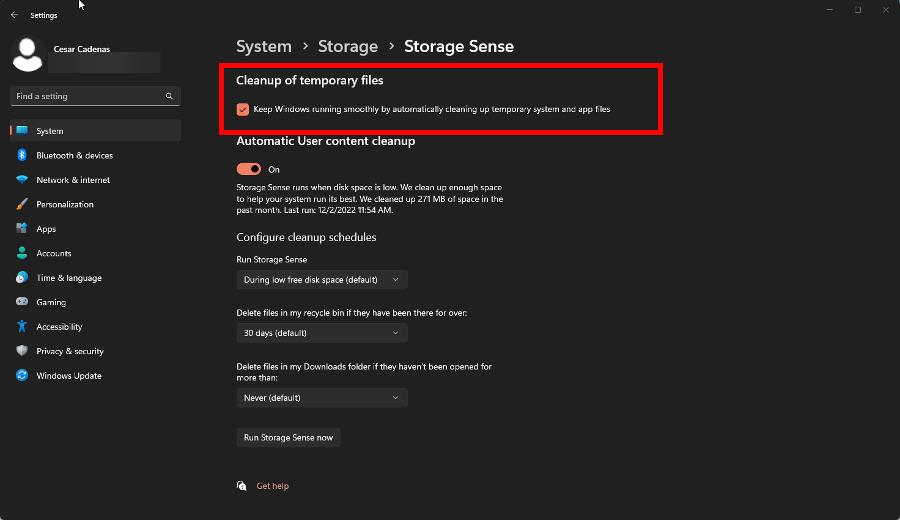
- Select Storage Sense.
- Click the box next to Keep Windows running smoothly by automatically cleaning up temporary system and app files.
- Then toggle the switch under Automatic User content cleanup.
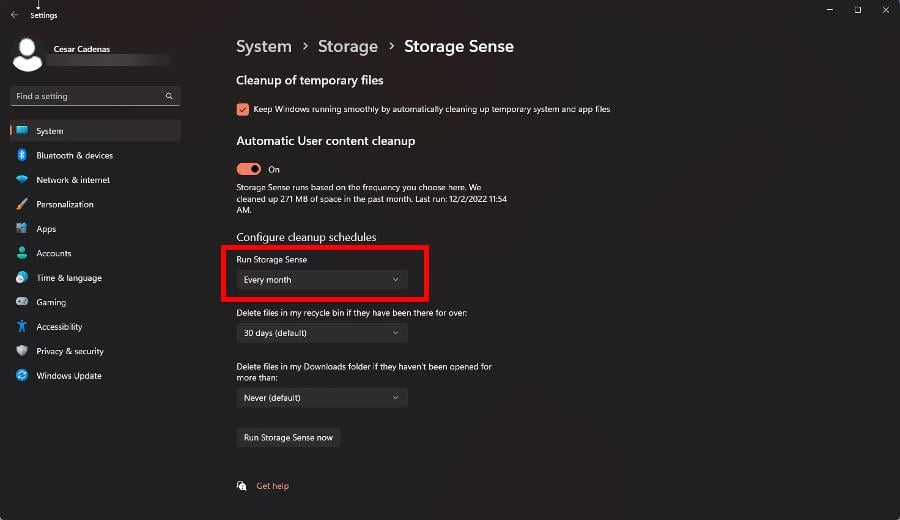
- You can set a time for how often Storage Sense will run. It’s recommended you set it to Every Month.
There are multiple ways to clean up your disk drive, so check out Windows Report’s guide on other hard drive cleaning methods.
Why is Steam VR so laggy?
There are multiple reasons why Steam VR (or any game from the platform, for that matter) would lag. It’s possible your browser cache is full, and you’ll need to clear it out.
Or perhaps the game’s settings are too high for your computer. As a result of being unable to handle the workload, Steam VR subsequently runs terribly.
If this is the reason, we recommend lowering the graphical settings, like the resolution, on whatever title you’re playing via Steam VR.
How to add Steam VR to Oculus Library?
In order to connect Steam VR to your Oculus headset, you have to go into your Oculus account’s settings. From there, you allow third-party apps to connect to your Oculus library and install Steam VR immediately. Be aware there have been reports of Steam VR not working right with the Oculus Quest.
To fix this problem, it’s recommended that you first update Steam to see if that works. If not, add an exception to it on Windows Firewall.
Feel free to comment below if you have questions about other Steam games or apps. Also, leave comments about guides you’d like to see information on other gaming software.

