Microsoft provides detailed steps to fix KB5034765 installation issues
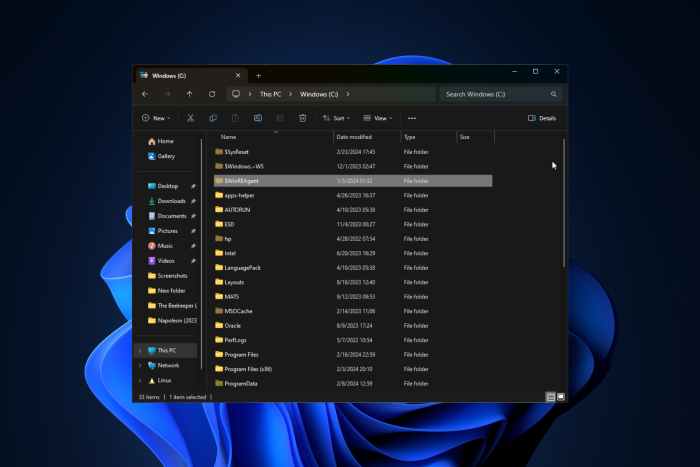
Delete the $WinREAgent folder
Many users reported having issues installing the February 2024 security update, which was released on February 13, 2024. The problem mainly affected Windows 11, version 23H2, and Windows 11, version 22H2.
Recently, Microsoft acknowledged that the February Patch Tuesday update was indeed causing problems during the process, and the installation might roll back at 96%.
The Redmond tech giant also specified the message user might see at the time of error:
Something didn’t go as planned. No need to worry – undoing changes. Please keep your computer on.
You can see this error in Windows Event Viewer with error code 0x800F0922. To fix this, you need to delete the hidden folder C:\$WinREAgent, then restart your computer. Don’t forget to replace C with your system drive letter.
One of the users on Reddit suggested this step, and now, Microsoft has mentioned detailed steps on its Learn website. Here is what you have to do:
Below are two possible ways to delete the C:\$WinREAgent folder.
1) Manually delete the folder: To delete a hidden folder in Windows 11, you need to first make the folder visible and then delete it.
- Open File Explorer from the Taskbar, or by pressing Windows key + E.
- Click on the three-dotted icon and select Options.
- Go to the View tab and select the Show hidden files, folders, and drives option. Click the OK button to save the change.
- Now, you should be able to see the hidden folder C:\$WinREAgent in File Explorer. Right-click the hidden folder C:\$WinREAgent and select Delete.
2) Run a script to delete the folder:
- Open the start menu and type command prompt.
- From the results displayed at the right side of the start menu, select ‘Run as administrator’.
- On the command prompt, type the command rd /s /q “C:\$WinREAgent” and press enter.
- If no message is displayed, it means the command has succeeded, and the folder has been deleted. You can proceed to close the command prompt window.
Note that a message is only displayed if an error was encountered. In this case, we recommend deleting the folder manually.
Microsoft also mentioned that this is a temporary fix, and they’re working on a resolution for the problem and will provide an update in the next release.
Did this workaround help you fix the KB5034765 installation issues? If yes, share your thoughts in the comments section below.
Read our disclosure page to find out how can you help Windows Report sustain the editorial team. Read more


Improve this guide


User forum
0 messages