Microsoft Word Business Card Template - How To Get It For Free
5 min. read
Updated on
Read our disclosure page to find out how can you help Windows Report sustain the editorial team. Read more
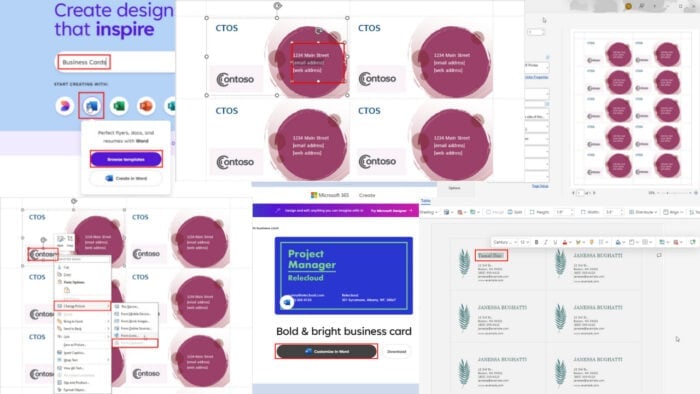
A Microsoft Word business card template can help you create professional contact cards that drive online engagement and business inquiries.
However, creating one from scratch is time-consuming if you don’t possess the technical and creative skills. Contrarily, if you go to a professional corporate card maker, they’ll charge you heavily for the concept, design, and final product.
That’s where the Microsoft 365 templates library steps in at your rescue. You simply need to select a style you like, type in your content, and print. I’ll show you how!
How To Get a Microsoft Word Business Card Template
Now, let me guide you through various ways to source the right contact card for free from Microsoft’s template library:
Using the Microsoft Word Desktop App
If you’re using Word on a PC or Mac and have access to the internet, follow these steps:
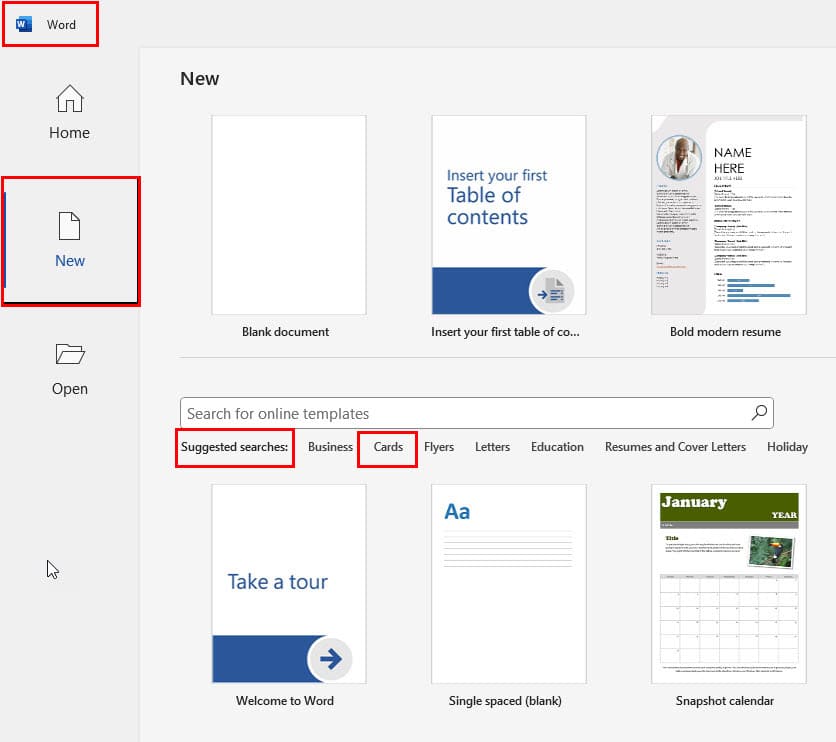
- Launch the Word desktop app to see the Home or the Backstage view.
- Click New on the left-side navigation panel.
- Select the Cards menu in the Suggested searches: toolbar.
- You’ll see all freely available card designs.
- This library usually contains all sorts of cards, from greetings to business. So, choose a design that resembles contact cards.
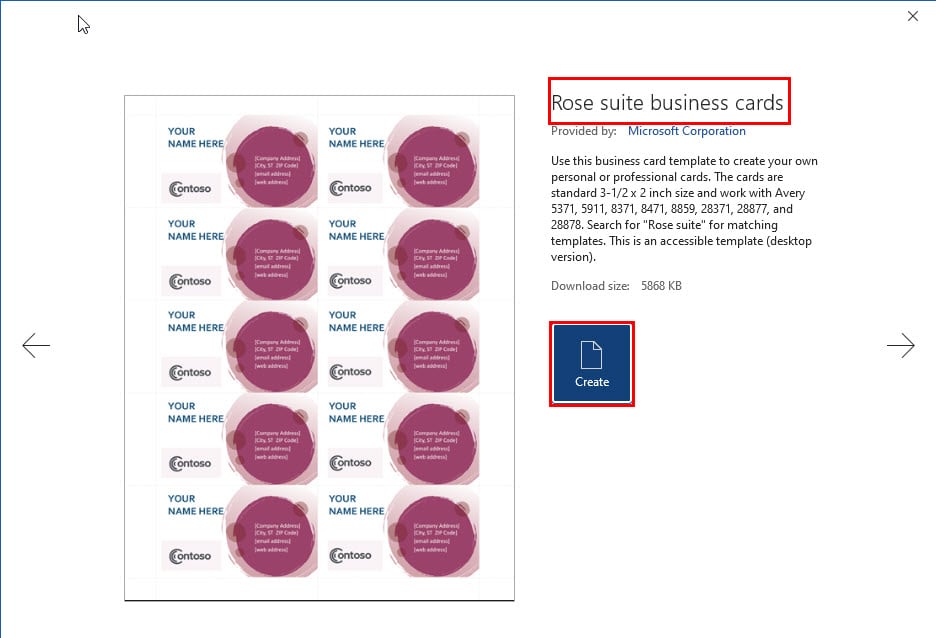
- A preview of the card document will open along with technical details, like printable sizes, related card designs, and more.
- Click on the Create button if you’re ready to import the document to the Word app.
- The imported document should open instantly.
- It should automatically import your name from the Windows Local Account or Mac’s Apple ID.
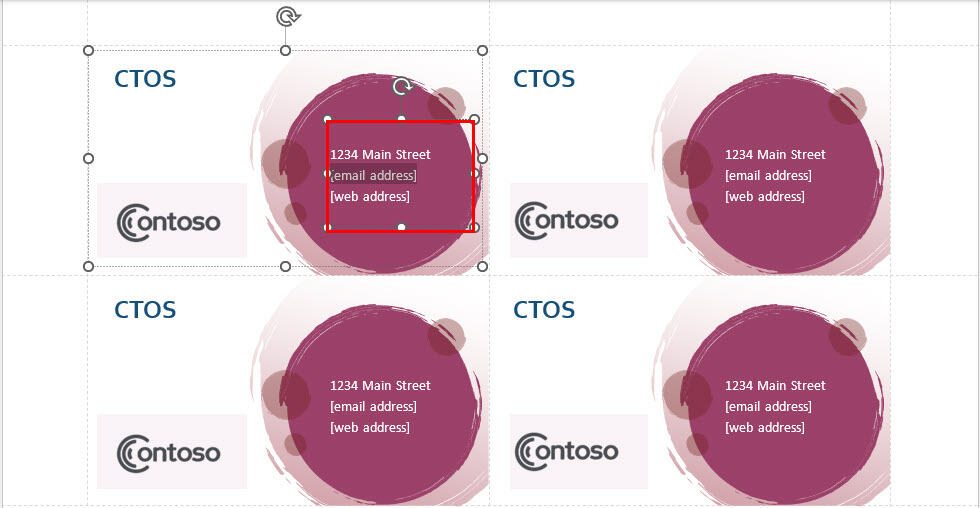
- Click on the [Company Address] [City, ST ZIP Code] placeholder text and start typing your business’s address.
- Once done, press the Down Arrow key on the keyboard. This will update the [Company Address] [City, ST ZIP Code] texts on all the copies.
- Follow the same steps for the text placeholders, like [email address] and [web address].
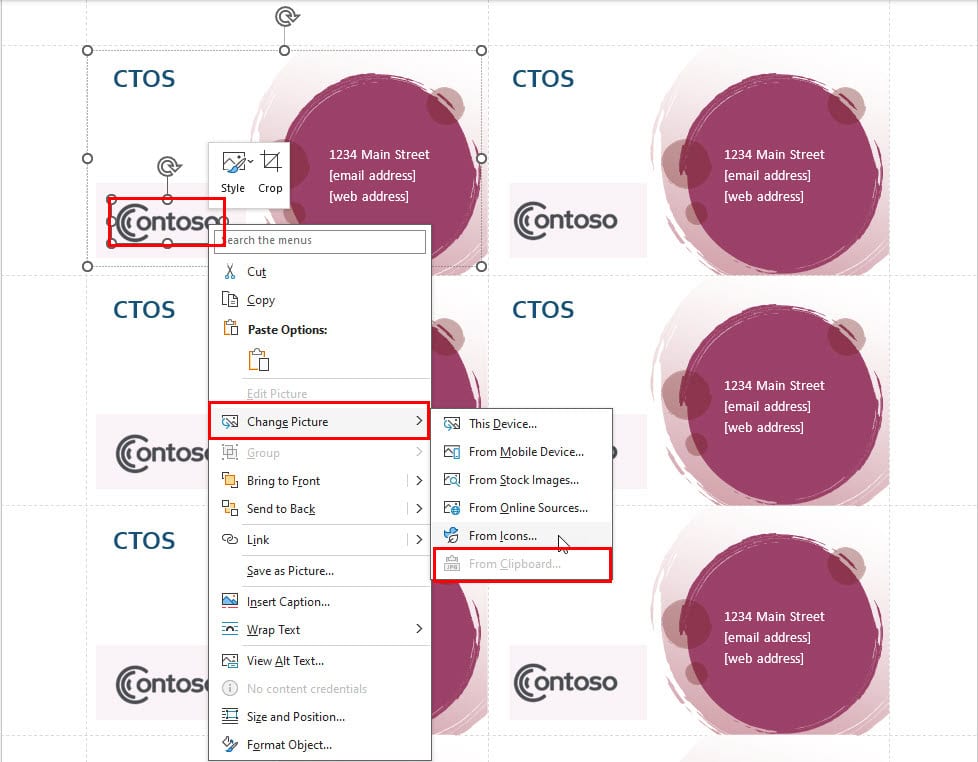
- The business name at the bottom left corner is a picture object which you can change by right-clicking on it and choosing Change Picture.
- Depending on the Microsoft Word edition you’re using, you should get a mix of the following image sources:
- This Device
- From Mobile Device
- From Stock Images
- From Online Sources
- From Icons
- From Clipboard.
- Select any option and follow on-screen instructions to replace the brand logo.
- You must repeat these steps for the rest of the logos.
- Once done, press Ctrl + P to enter the Print Preview mode.
- You can print them without further editing since Microsoft has formatted them according to standard USA business card configuration.
Using the Microsoft Word Web App
Do you prefer to create a contact card from a Microsoft Word business card template on the web app? You can follow along with these steps:
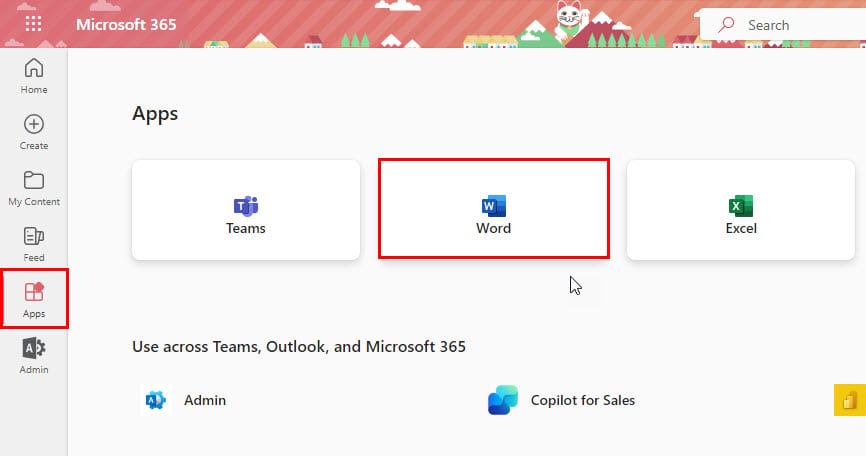
- Go to the Microsoft 365 portal using a Microsoft Account.
- Click on the Apps icon in the left-side navigation panel.
- Select Word from the right-side menu that opens.
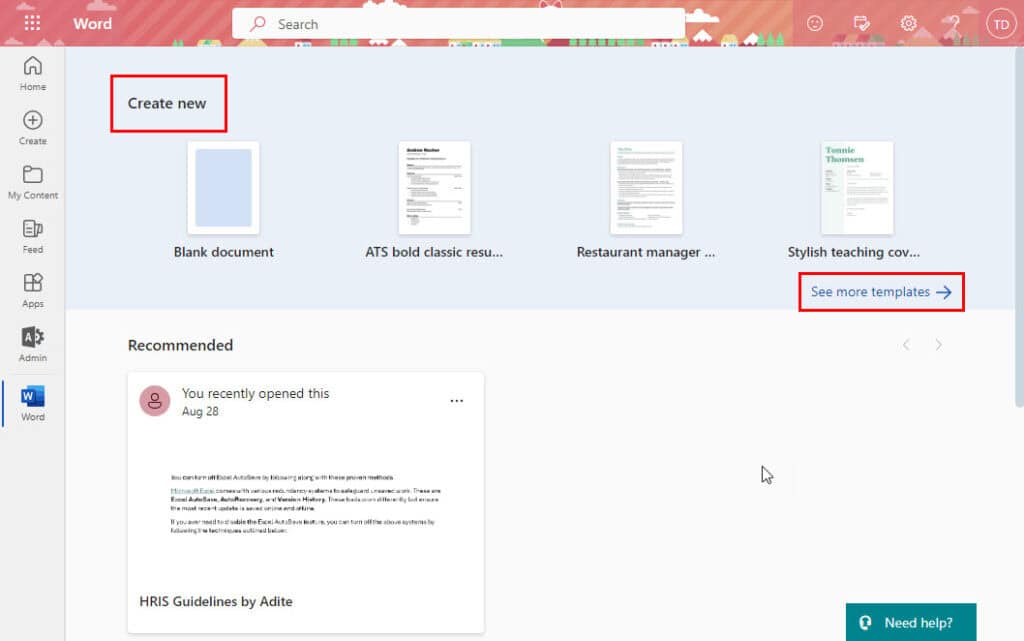
- You should see the Create new window. Hit the See more templates link on the right edge of the screen.
- A Microsoft 365 template library will open.
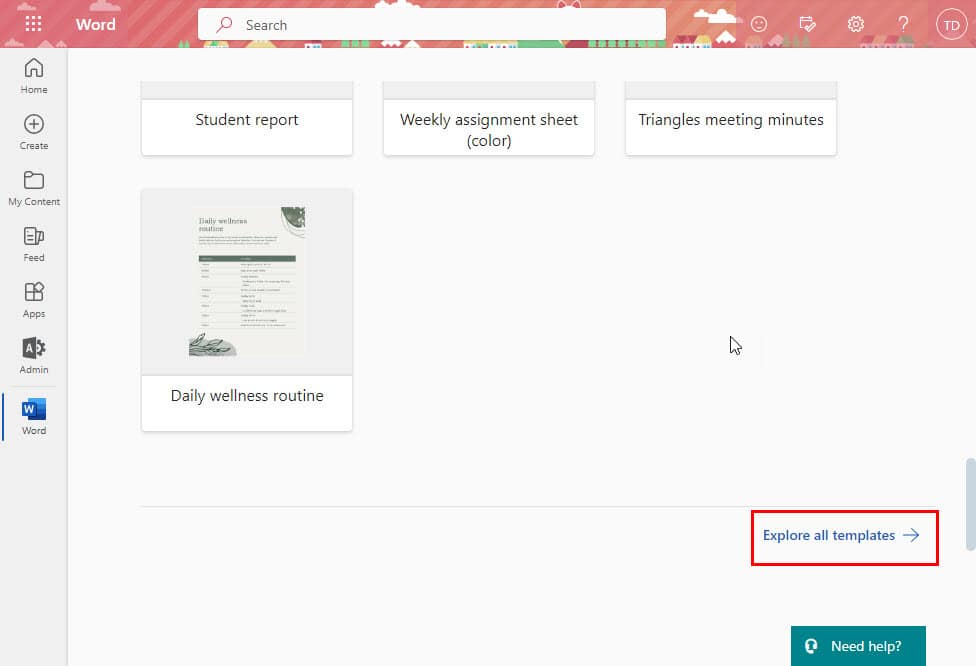
- Scroll down to the bottom and click on the Explore all templates hyperlink.
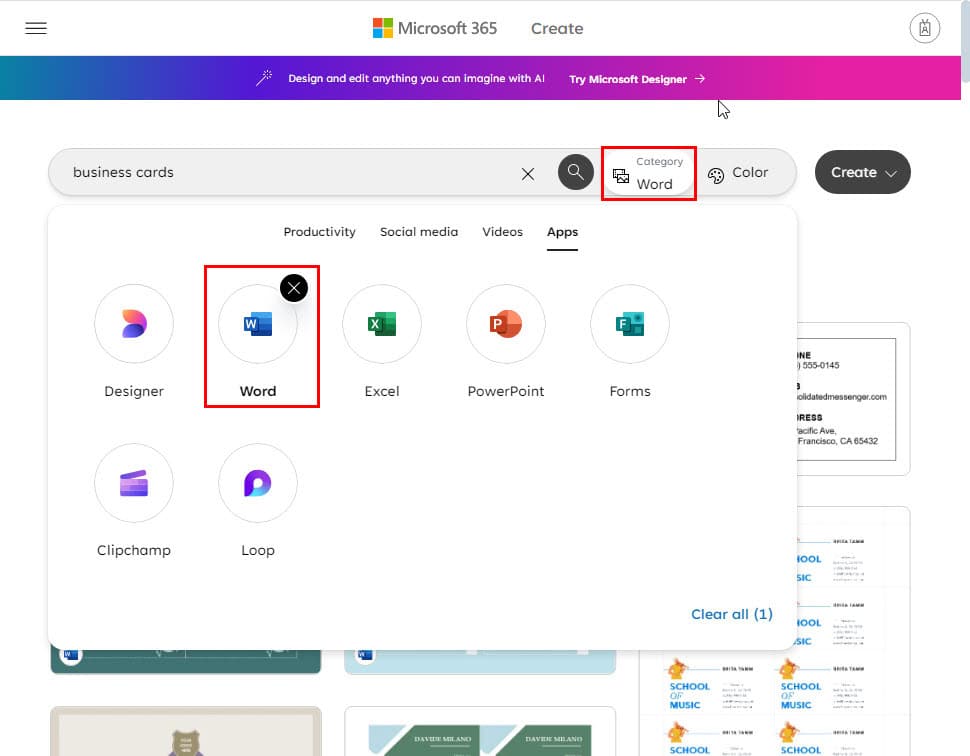
- Type in Business Cards in the Search Word Templates field and hit Enter.
- Click on the Category menu in the search bar and switch to Word.
- Now, you’ll see professional cards only for the Word web app.
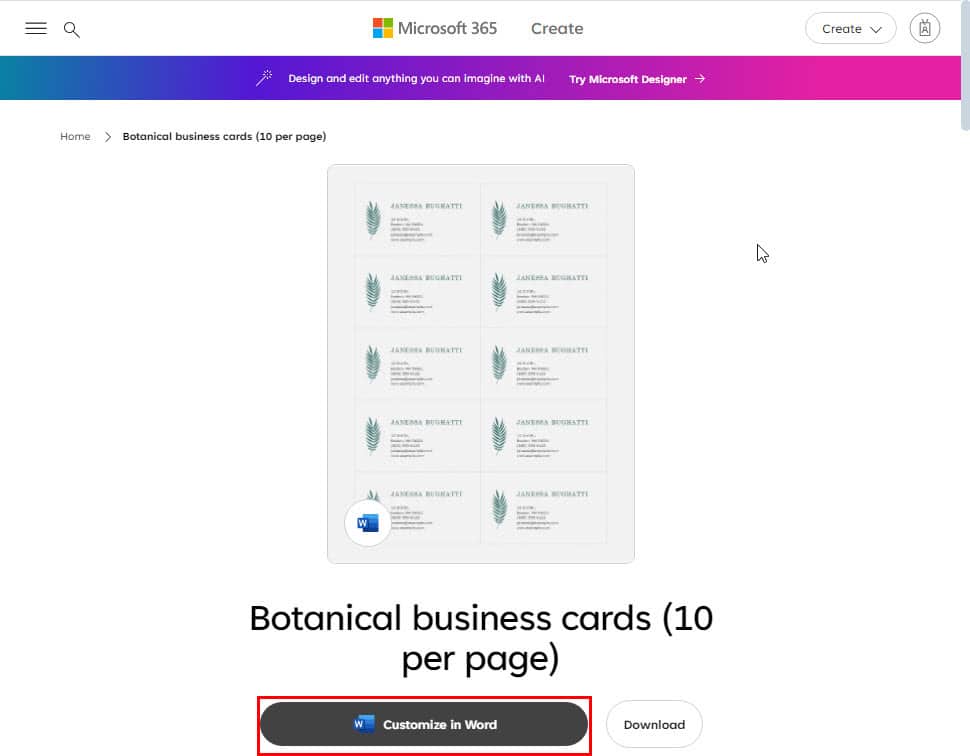
- Click on a business card design to open its details page.
- Hit the Customize in Word button.
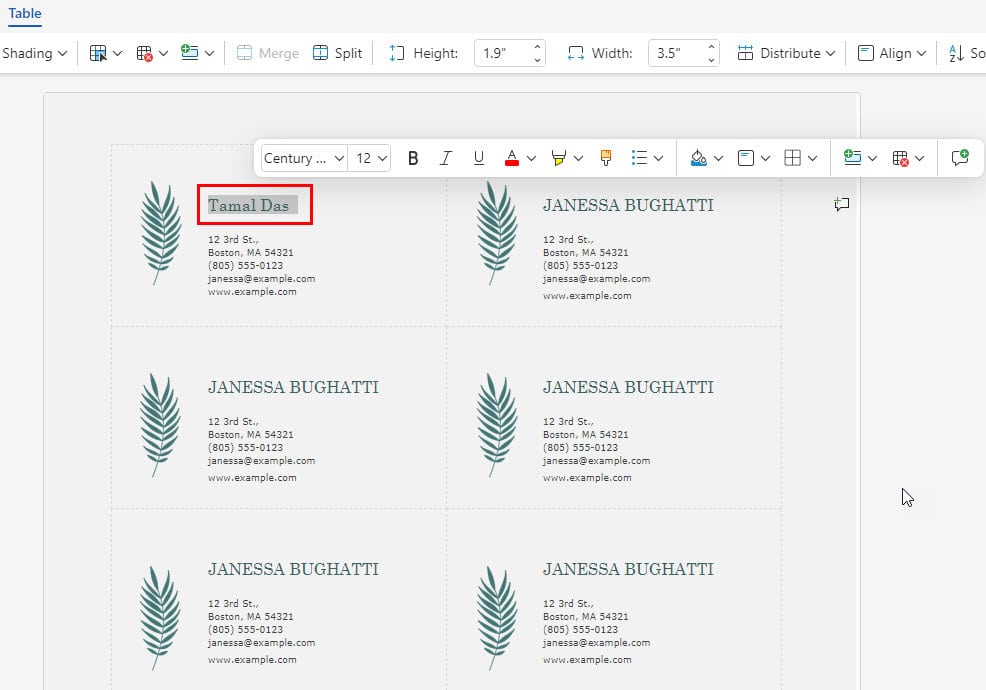
- The Word web app will open a new document in the next tab of your browser.
- Click on the name text and change it according to your requirements.
- Do the same for the rest of the content.
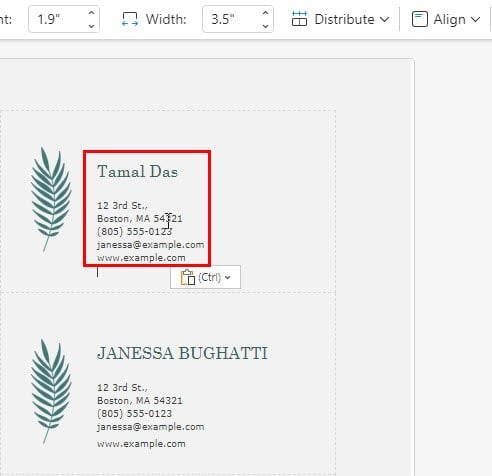
- Now, copy the details from the first card and paste them on the rest.
- Once you’re done personalizing the business cards, press Ctrl + P to print a hard copy.
Using Microsoft 365 Create
You can also explore the Microsoft Create portal to choose a business card template. Here’s how:
- Visit the Microsoft Create website.
- Log in with your free or paid Microsoft Account to conveniently save the chosen template to a supported Microsoft 365 web or desktop app.
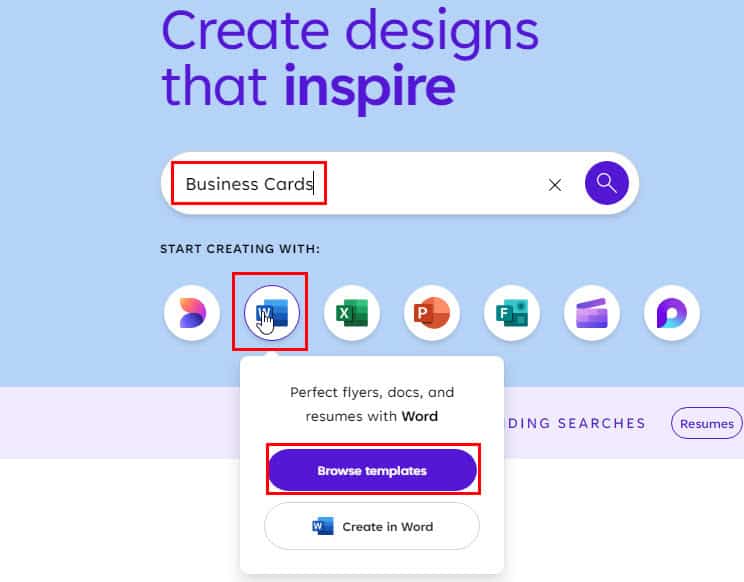
- Now, click on the Search template field and type Business Cards.
- Hover the cursor over the preferred app below the search field, like Designer, Word, Excel, PowerPoint, and more.
- First, click on the Browse templates button on the floating context menu.
- You’ll enter the template library.
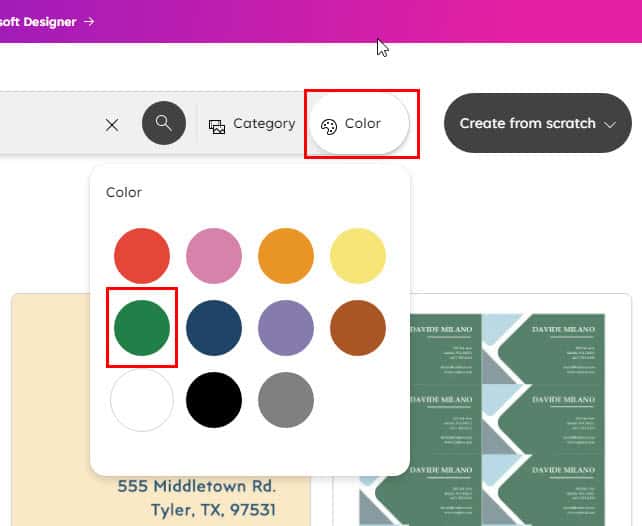
- Click on the Color button in the Search bar.
- Scroll through the list to select a design.
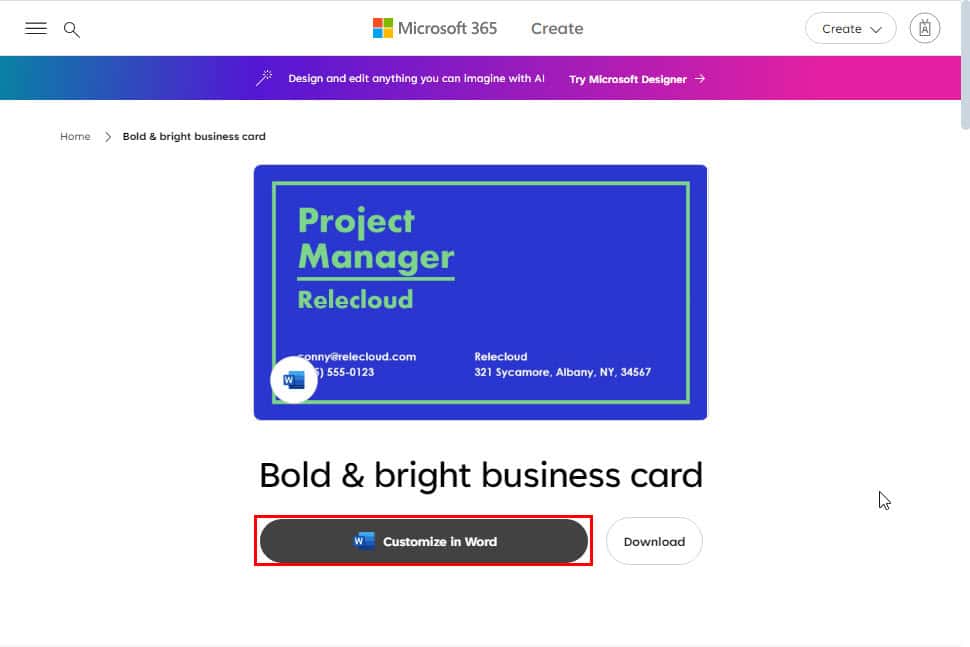
- When the document details page opens, click on the Customize in Word button.
Now, follow the editing steps mentioned in the previous section to personalize and print your contact cards.
Summary
So far, you’ve gone through the tried and tested methods to import and edit a Microsoft Word business card template.
You’ve also seen how you can do so in the Word desktop and web app. Furthermore, you’ve learned how to navigate the Microsoft Create portal to browse and create professional contact cards. You can also learn how to make index cards and create different headers.
If you’ve got any suggestions for improvements, feel free to comment below.
Are you struggling with various technical issues with Microsoft Office? We can help you fix Office 365 and Outlook.
If you’re interested in more templates, don’t miss our guides on Microsoft Word brochure templates and calendar templates for 2024 in Word.




User forum
0 messages