How to Fix NordVPN Kill Switch Not Working [6 Quick Methods]
Repair NordVPN kill switch issues with effective guides here
Key notes
- If NordVPN's kill switch is suddenly not working on your PC, you need to fix it quickly.
- A VPN's kill switch can help prevent accidental data leaks by blocking Internet access at key points.
- More often than not, simply reinstalling the VPN or restarting the PC can solve the issue.
- Rarely, the issue can be caused by defective hardware on your PC that needs to be replaced.

World-class 24/7 support with 82% for a 2 years plan and 2 months free
70% of our readers choose Private Internet Access
70% of our readers choose ExpressVPN
Amazing connection speed with 61% off and 4 months free for the 2-years plan.
Best security protocols with 83% off and 2 months free for a 2-year plan.
NordVPN’s kill switch is kind of a big deal, so if you notice that it’s not working, you need to act immediately.
A VPN’s kill switch is a nifty feature that blocks Internet traffic if no VPN traffic is detected.
To put it in simple terms, if your VPN connection suddenly drops without your knowledge, your PC won’t be able to revert to your default, insecure Internet connection.
You can probably see why it’s important to have this feature on at all times.
NordVPN is one of the most popular VPN services on the market, and we wouldn’t expect its kill switch to stop working.
However, these things happen and there’s no way to prevent them. However, you may be able to do something about restoring it.
Does NordVPN’s kill switch work?
Yes, this VPN kill switch should work fine on your device. In any case, this functionality may have errors for specific devices or operating systems.
For instance, the users complained about this VPN kill switch crashing on platforms such as Linux or macOS.
How can I fix NordVPN’s kill switch?
Before proceeding to our troubleshooting guide, you should perform the following actions on your device:
- Restart your modem/router
- Try using NordVPN’s kill switch on another device (to rule out provider-side issues)
- Use a wired connection instead of Wi-Fi
- Make sure you’re not connected to multiple networks (disable your Wi-Fi when using Ethernet and vice-versa)
- Perform a clean install of your Windows 10 OS
- Try using an external network adapter
After checking all these quick fixes, you’re ready to go for our detailed solutions below to fix the NordVPN kill switch.
1. Switch protocols
- Launch the NordVPN client.
- Click the gear-shaped button.
- Go to the Auto-connect category.
- Locate the auto protocol & server selection option.
- Toggle it off.
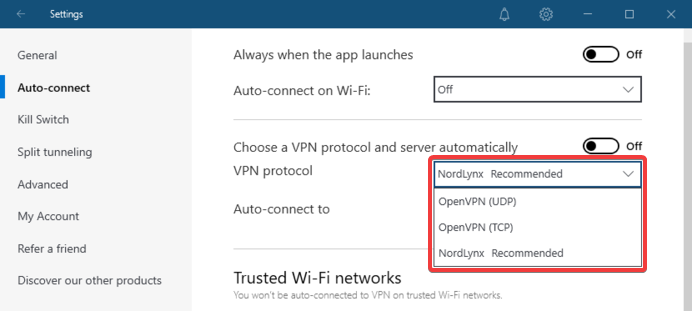
- Choose a different option in the VPN protocol combo menu.
- Check if NordVPN’s kill switch started working as intended.
It may sound a bit counter-intuitive, but choosing certain protocols may affect NordVPN’s functionality.
We haven’t been able to replicate the kill switch issue with any of NordVPN’s protocols.
However, some users have been able to fix the issue by simply switching from NordLynx to OpenVPN.
Currently, NordVPN automatically chooses the NordLynx protocol for you, and changing it is also a bit confusing.
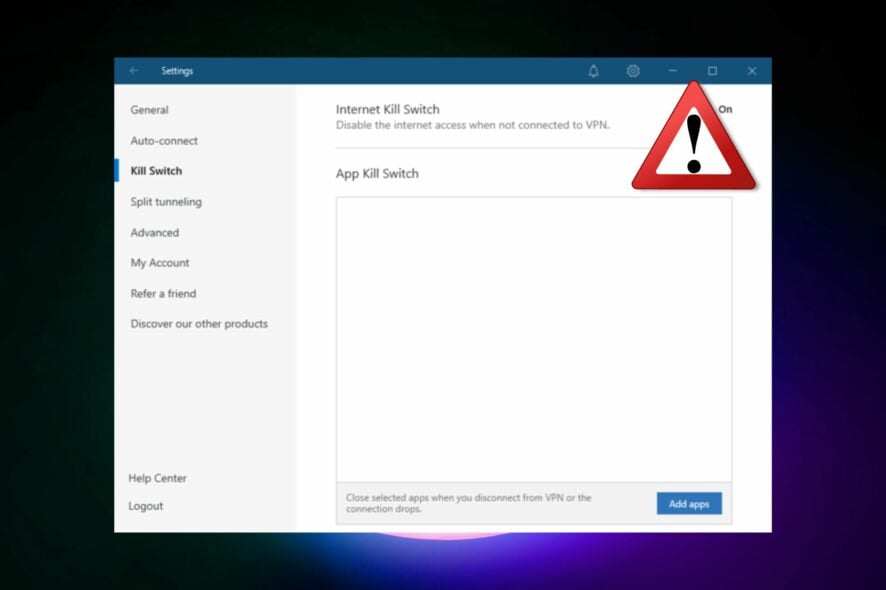
2. Change the kill switch mode
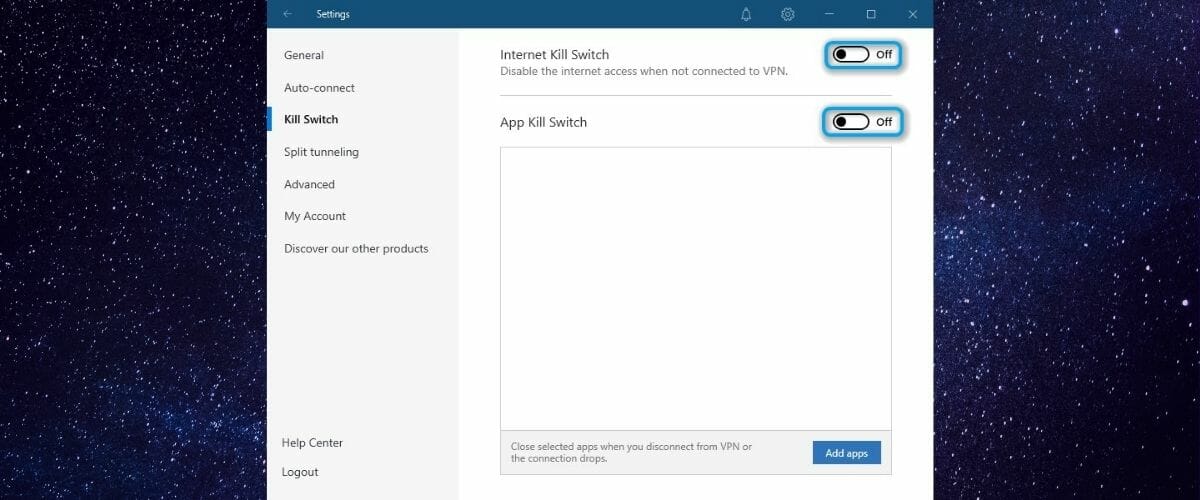
Instead of using the global VPN kill switch, you should give a try to the app kill switch.
It does the exact same thing as the Internet kill switch, but only for specific apps.
So, for instance, you could enable the app kill switch for your torrenting client, or web browser.
In case the VPN connection suddenly drops, your PC will still have Internet access, but those specific apps won’t be able to get back online without the VPN.
You can also toggle the global kill switch if you notice that the app kill switch doesn’t do a great job and fails frequently.
3. Check your antivirus/firewall
Sometimes, security software on your PC can do more harm than good if not configured properly.
For instance, your firewall or antivirus software can block or restrict certain apps or services, either completely or partially.
Check your firewall for any connection rule that may block or restrict NordVPN in any way. Modify them so NordVPN isn’t blocked.
Then do the same with your antivirus/antimalware, if necessary.
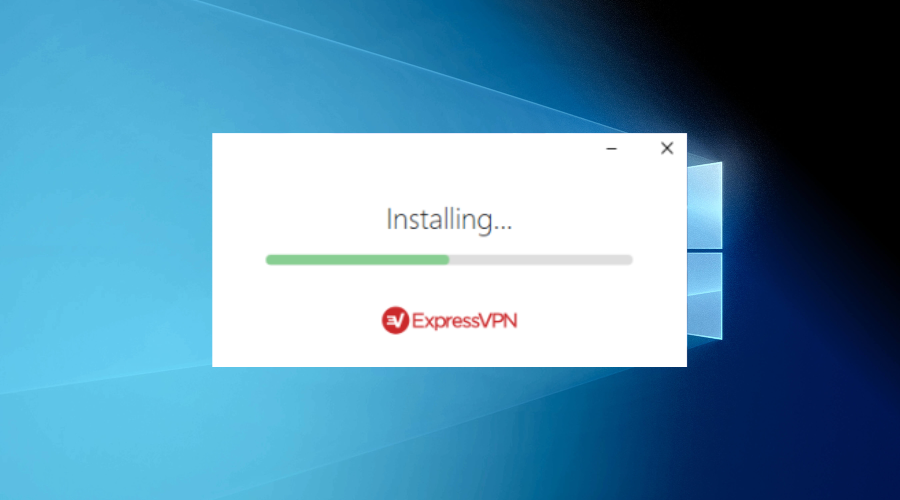
4. Use an enhanced VPN
- Get an ExpressVPN subscription plan (we tested it and worked).
- Download and install the new VPN on your PC.
- Launch the VPN client.
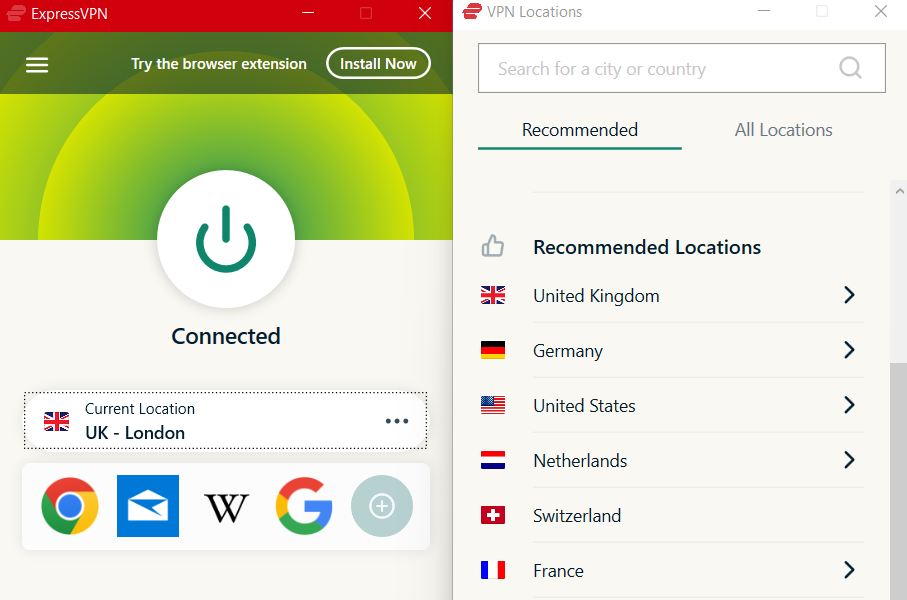
- Log in to your account.
- Access the VPN’s configuration screen.
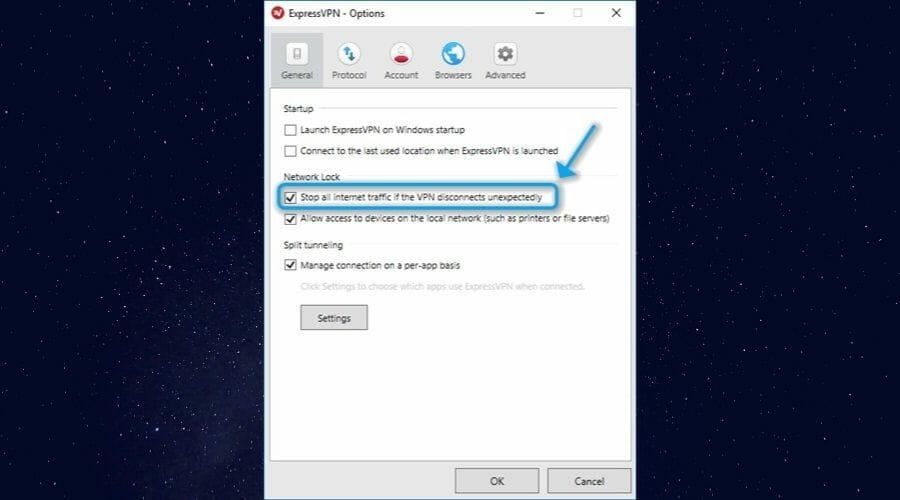
- Make sure that the VPN kill switch feature is enabled.
- Connect to any server.
- Check if the new VPN’s kill switch works.
This VPN comes with advanced tools that can increase your privacy and digital safety when navigating online.
Plus, ExpressVPN comes with a built-in kill switch that you can toggle on and off to your heart’s choice. You can give it a try using its 30-day free trial in order to see if it suits your privacy needs.
If it doesn’t work in your case, the issue may be hardware-related, and you might need to replace your network card.
Besides that, there are other VPN tools with a kill switch feature you can consider to replace the NordVPN service.
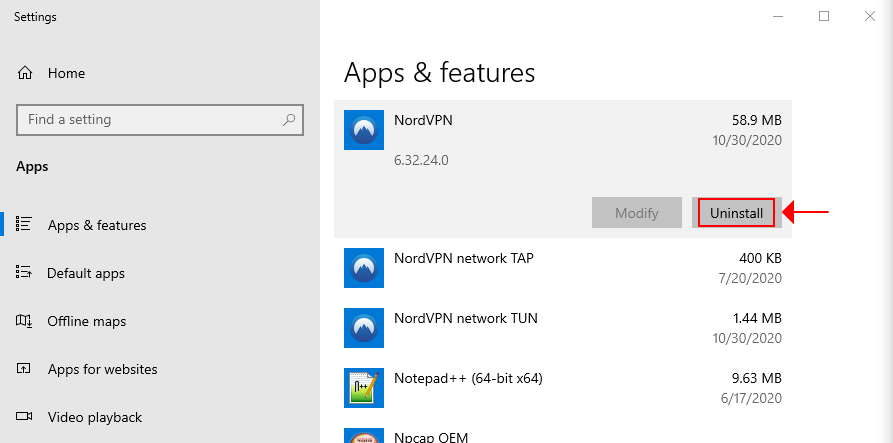
5. Install/run NordVPN as Administrator
- Make sure to uninstall NordVPN from your PC.
- Download the latest version of NordVPN.
- Right-click the installer executable.
- Select Run as administrator.
- Go through the installation steps.
- At the end of the setup, right-click NordVPN’s tray icon.
- Select Quit App.
- Locate NordVPN’s executable (not the shortcut) on your PC.
- Right-click it and select Properties.
- Go to the Compatibility tab.
- Enable the Run this program as an administrator option.

- Click Apply, then OK.
- Launch NordVPN.
- Check if the kill switch is now working properly.
Certain services on your PC need to make some important changes to your system and need proper privileges.
Since NordVPN cutting your Internet access with its kill switch is quite important, you’ll need to elevate its privileges.
Therefore, installing and running NordVPN as an administrator might just do the trick.
6. Restart the NordVPN service
- Disconnect from NordVPN’s server.
- Right-click NordVPN’s tray icon.
- Select Quit App.
- Press the Win key on your keyboard.
- Type services.
- Select the Services app.
- Locate nordvpn-service in the right section of the window.
- Right-click it and select Properties.
- Make sure its Startup type parameter is set to Automatic.
- If it is, close the Properties window.
- Make sure that nordvpn-service is selected.
- Click the Restart hyperlink to the upper left.
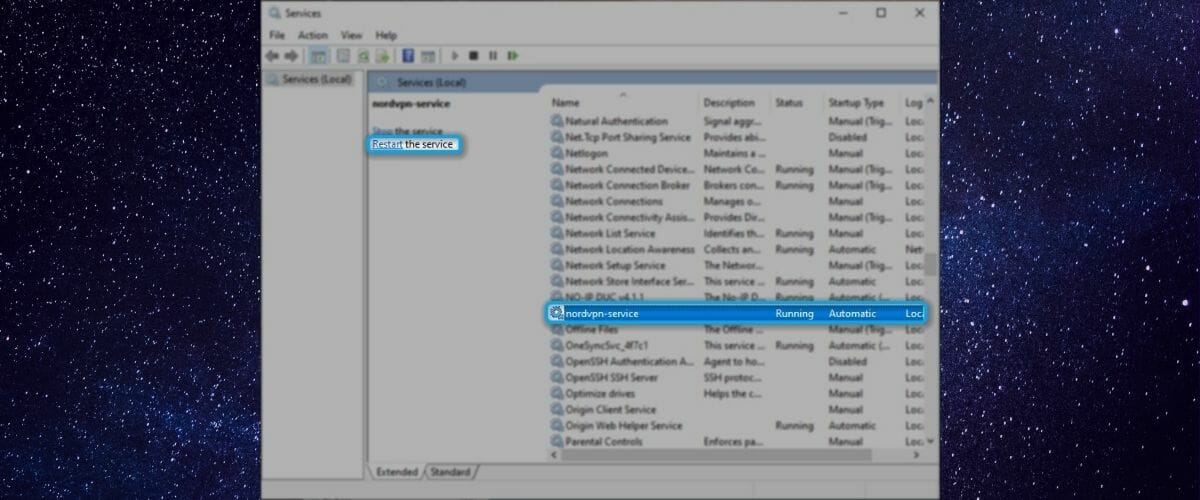
- Launch NordVPN.
- Check if the kill switch works as it should.
Much like many other VPNs, NordVPN has a proprietary service that needs to be running so it can function.
We need to make sure that the service is running properly, so we’ll simply restart the service. Don’t worry, we’ll tell you how to do it.
NordVPN kill switch not working on Mac
The kill switch functionality on NordVPN should work for Mac in the same way as for Windows devices. Be aware that the kill switch feature for macOS should be enabled by default in the VPN app’s settings.
In case it’s not working from the beginning, you can try applying the same methods described in this guide.
Conclusion
All in all, not being able to benefit from NordVPN can be a huge drawback.
Thankfully, this isn’t a common issue on Windows 10 computers, so you might not even stumble upon it.
However, if it happens, we recommend you go through all of our suggested fixes.
You may just find the one that does the trick quickly and without significant effort.
Read our disclosure page to find out how can you help Windows Report sustain the editorial team. Read more


Improve this guide
User forum
0 messages