Fix: Operation Did Not Complete Successfully [Virus, PUP]
Check simple solutions that work for all users
5 min. read
Updated on
Read our disclosure page to find out how can you help Windows Report sustain the editorial team. Read more
Key notes
- The Operation did not complete successfully error can affect a wide range of files and prevent them from opening.
- This usually happens when a similar file has been found to act as a malware on other PCs.
- To fix things, you can add an exclusion, run the SFC scan, or disable Windows Defender, amongst other solutions.
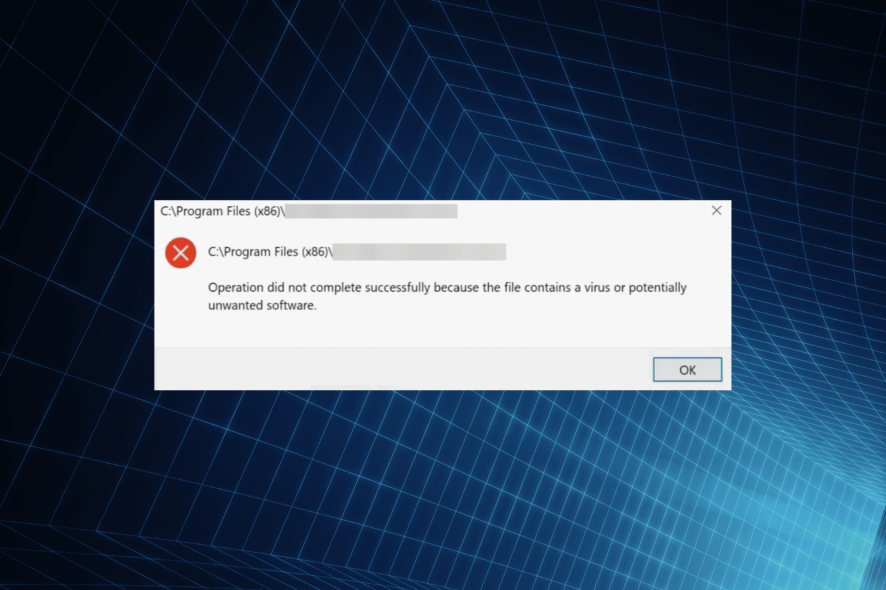
An average home computer stores many files, sometimes in millions. Some are a part of Windows, while others are manually added. And when trying to run the latter, users often come across the Operation did not complete successfully error.
The complete error message reads Operation did not complete successfully because the file contains a virus or potentially unwanted software.
While the error does put you in a fix, there’s a high chance that the concerned file is completely safe and has been incorrectly identified as a virus or PUS by the built-in Windows Defender. So, let’s find out all about the problem and the solutions that work.

Secure your devices with award-winning cybersecurity technology.

Maximize your PC's security and performance with top-notch digital threat detection.

Keep secure with groundbreaking AI detection and prevention technology.

Browse the web securely for up to 3 devices across Windows, Mac, iOS or Android systems.

Best security tool for intense browsing activity.
Why does Windows say Operation did not complete successfully?
Here are a few reasons you might be getting the error:
- File behavior matches a known malware: You often get the error when a file similar to the one you are trying to run is malware.
- File downloaded from an unreliable source: If the file has been downloaded from an unreliable source, it could rightly be flagged, and you should not run it without verifying the same.
- Issues with Windows Defender: Often, the problem arises due to corrupt system files, which leads to issues with Windows Defender and, thus, the error.
How do I fix the Operation did not complete successfully error?
Before we head to the slightly complex solutions, try these:
- Your primary approach, when faced with the error, should be to verify if the file is indeed safe. A quick way would be to scan it using a reliable third-party antivirus or check the Internet.
- If there are any Windows updates available, install them. Maybe Microsoft Defender has a bug and needs a patch.
- If the error appears only when running files of a particular program, update it.
- Disable all third-party antivirus installed on the PC and, for a while, just rely on Windows Defender. If you don’t get the Operation did not complete successfully error anymore, your antivirus was responsible for it.
If these don’t work, head to the fixes listed next.
1. Add an exclusion
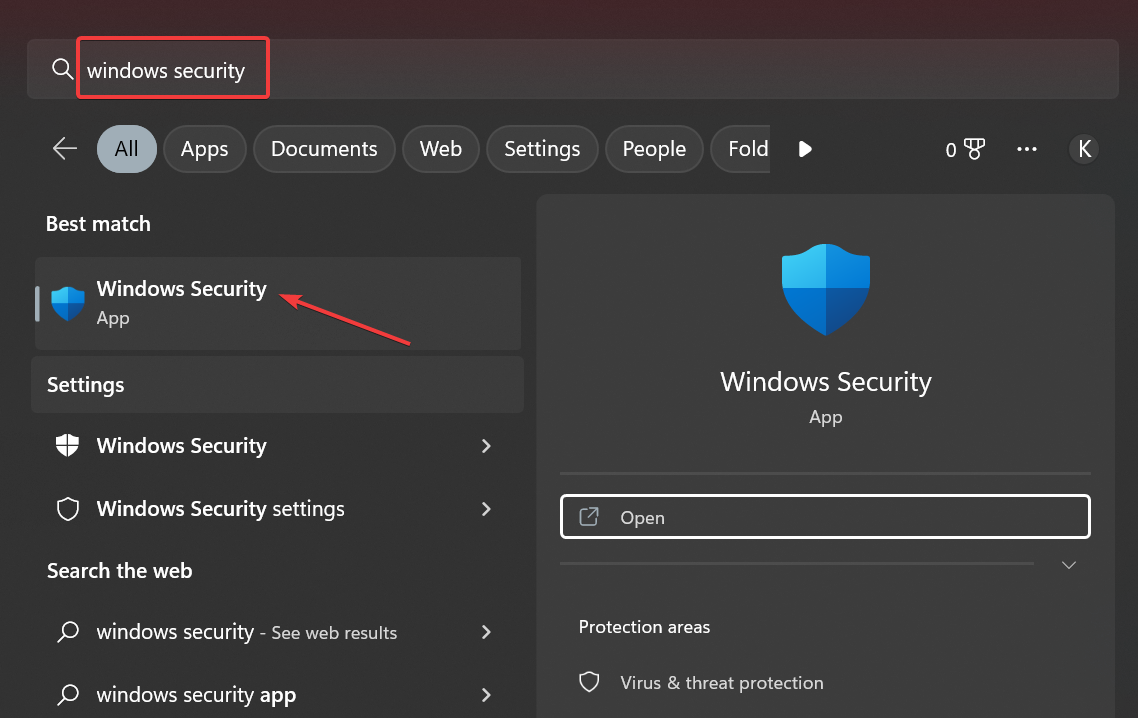
- Press Windows + S to open Search, type Windows Security in the text field, and then click on the relevant search result.
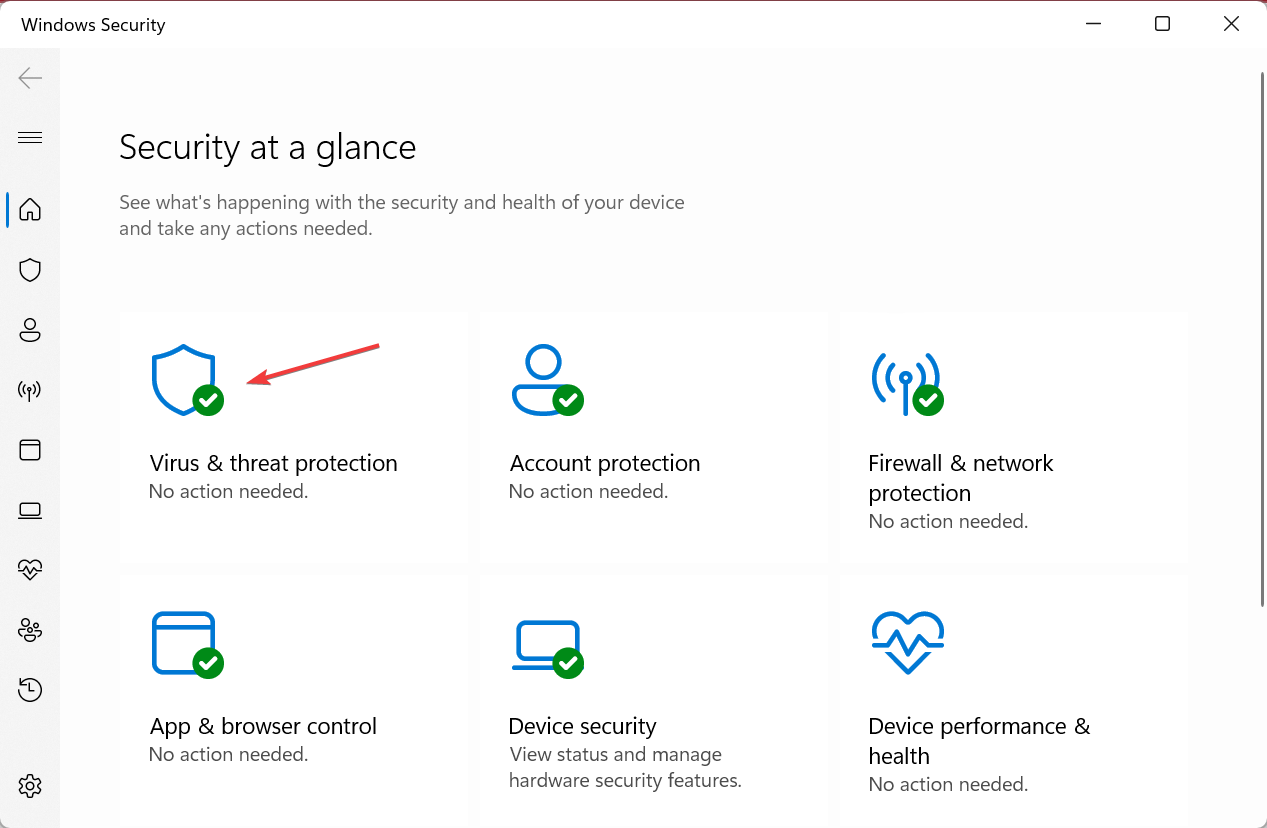
- Click on Virus & threat protection.
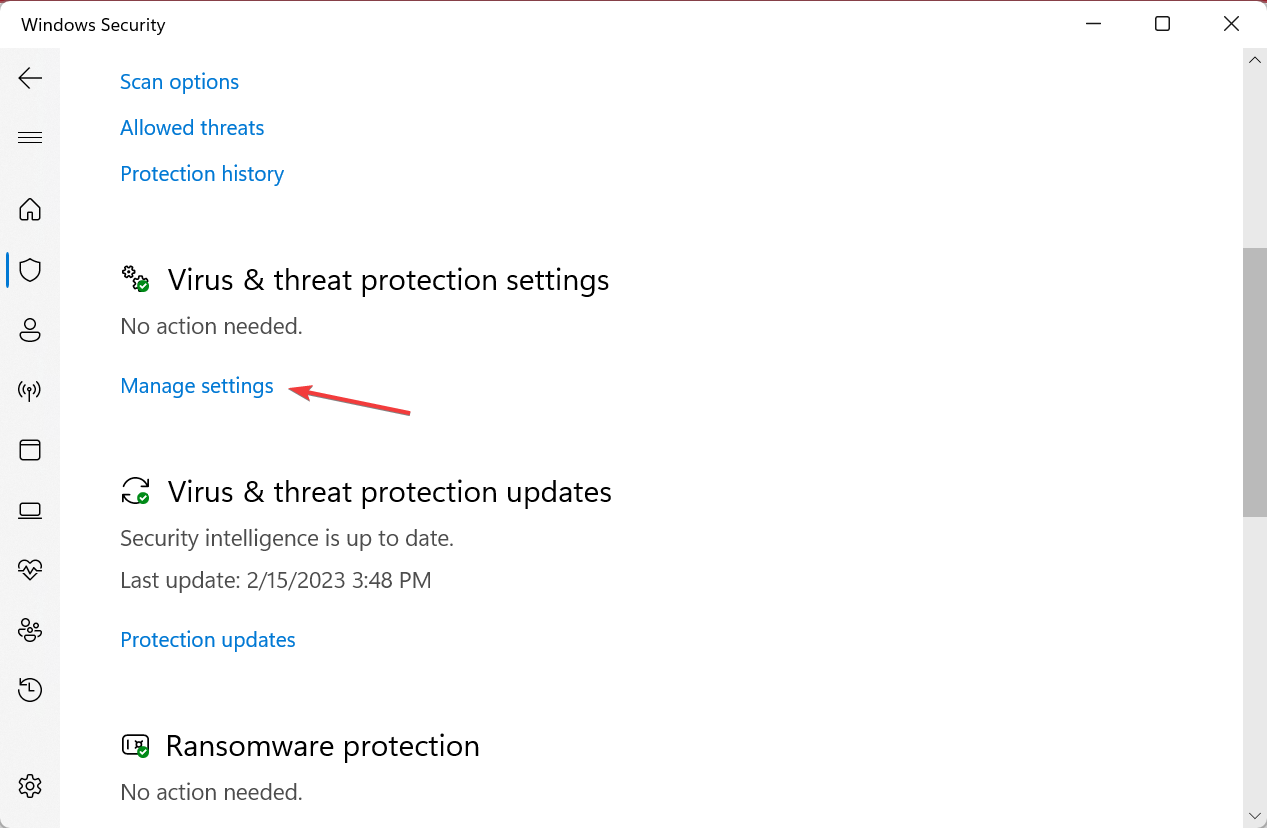
- Now, click on Manage settings under Virus & threat protection settings.
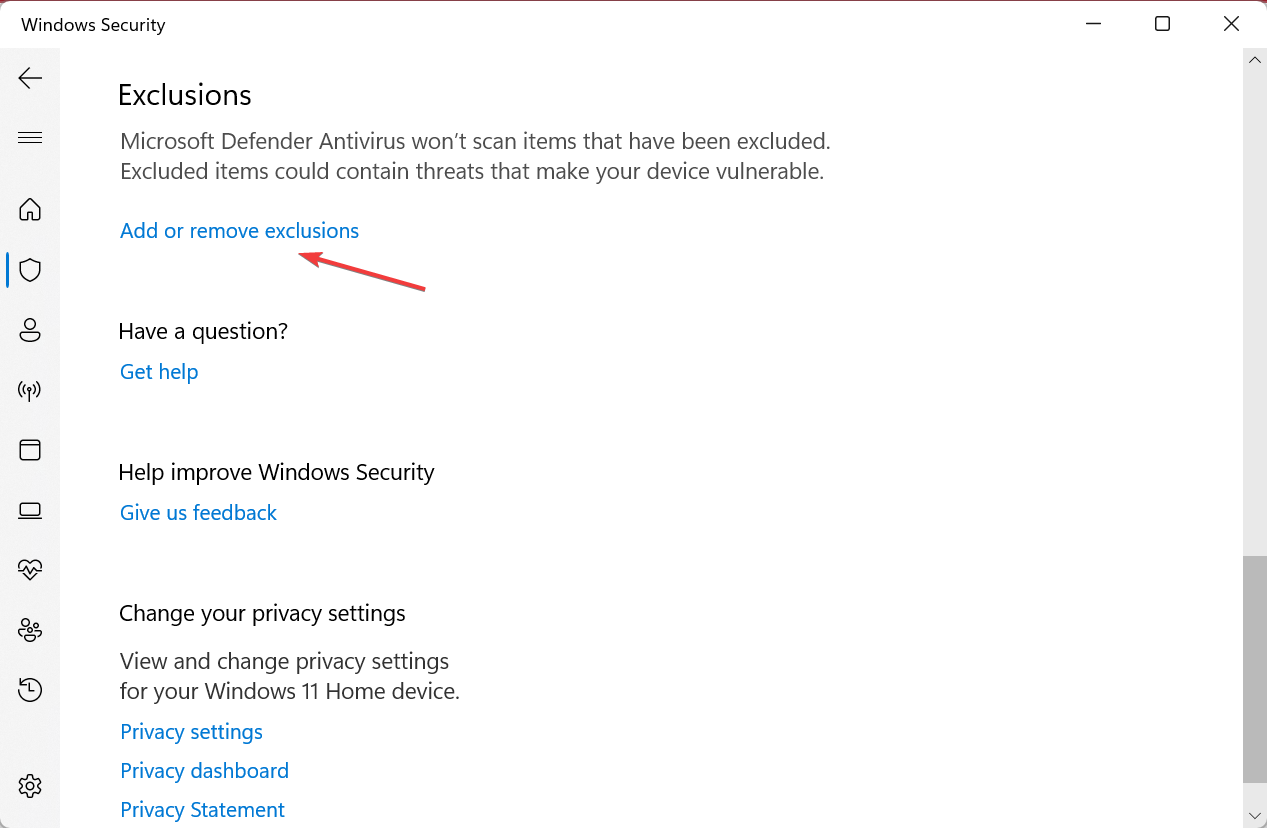
- Scroll down and click on Add or remove exclusions under Exclusions.
- Click Yes in the UAC prompt that appears.
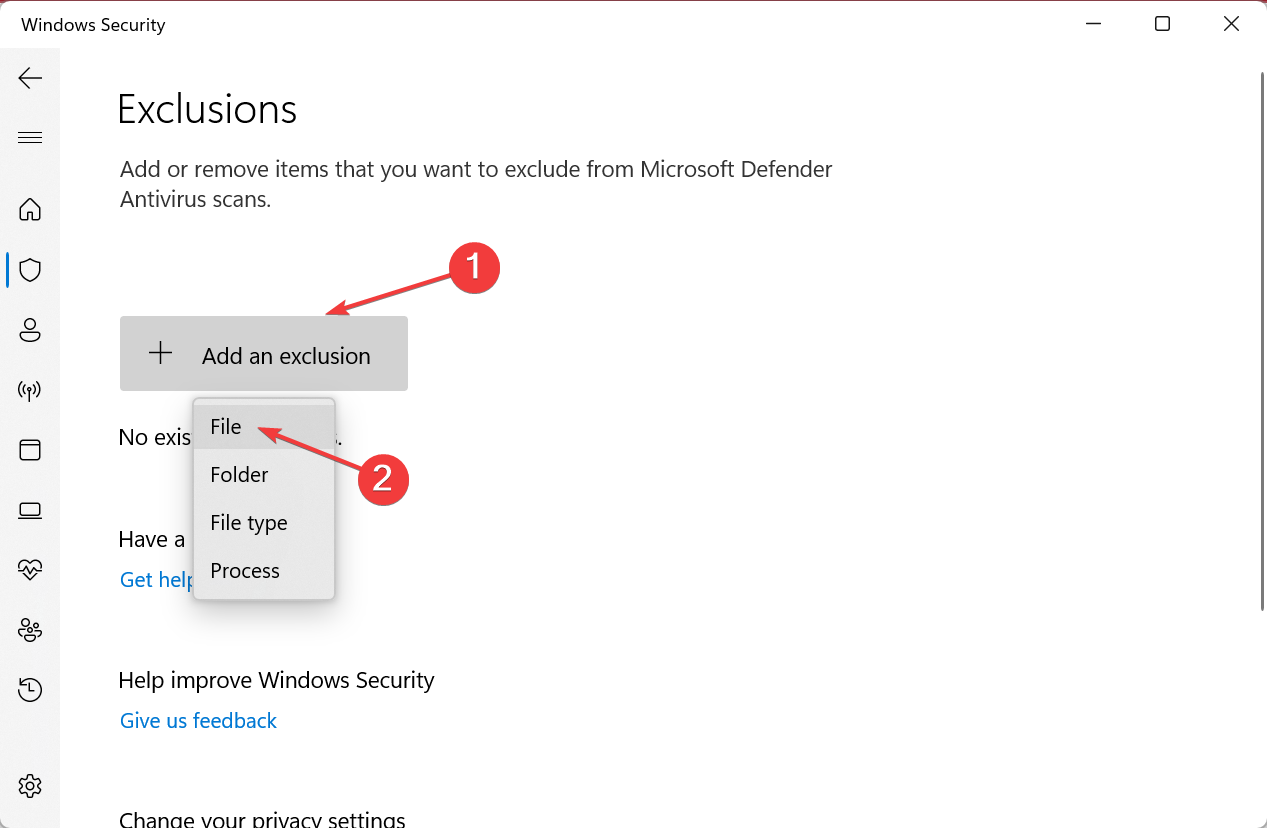
- Click on the Add an exclusion button, and choose File from the menu.
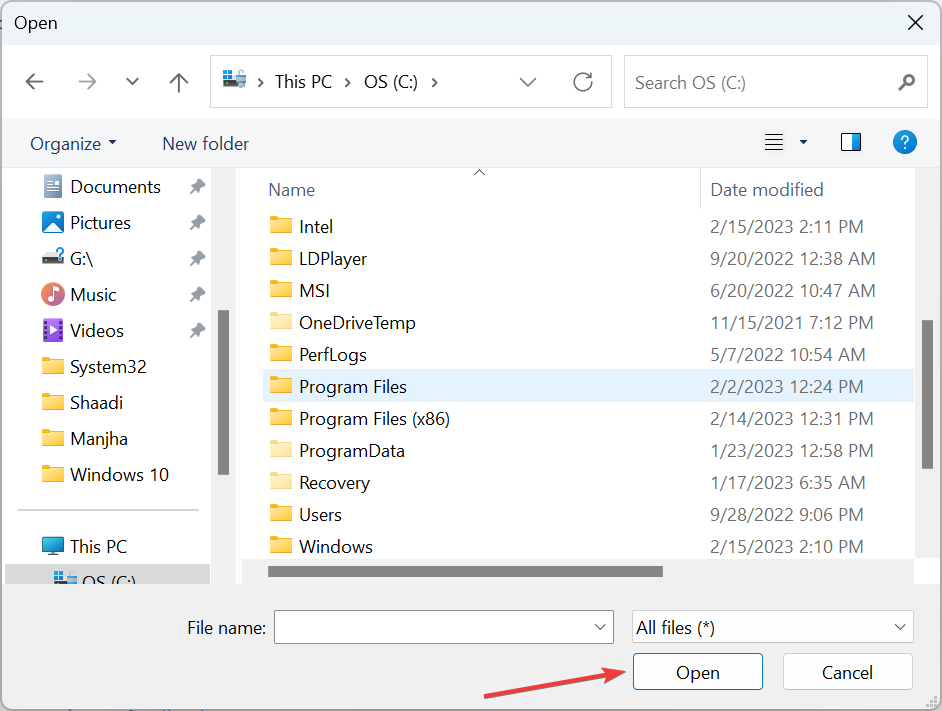
- Browse to locate the file, select it, and click on Open.
That’s it! After the file has been added as an exclusion, you shouldn’t see the Operation did not complete successfully error message again for it.
2. Disable Windows Defender
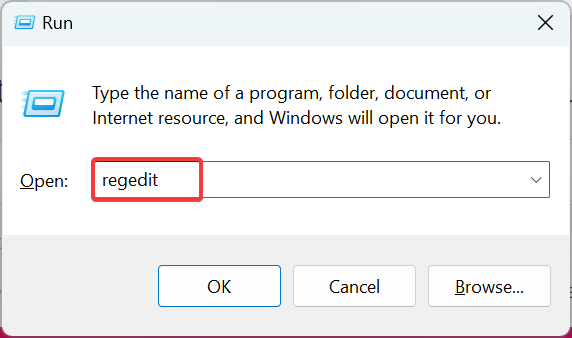
- Press Windows + R to open Run, type regedit in the text field, and hit Enter.
- Click Yes in the UAC prompt.
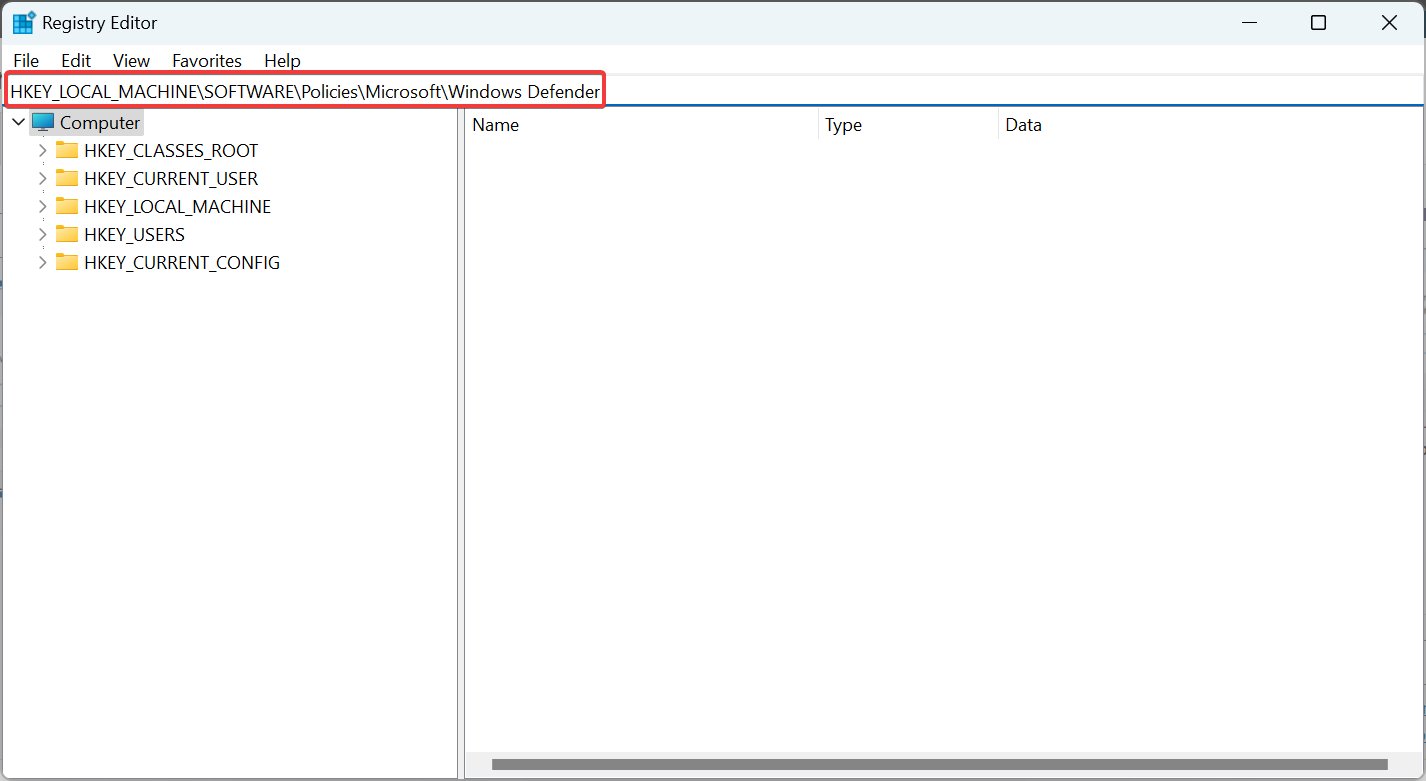
- Paste the following path in the address bar and hit Enter:
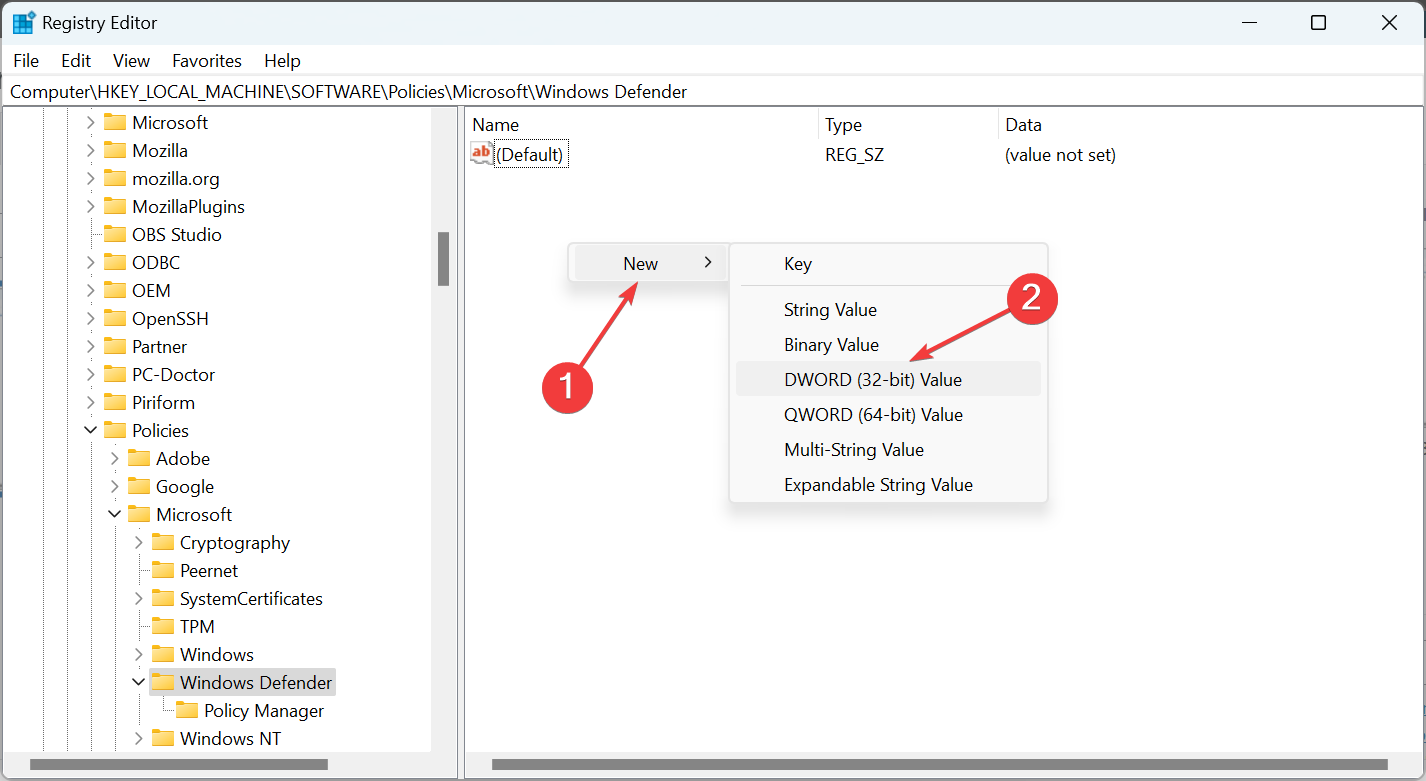
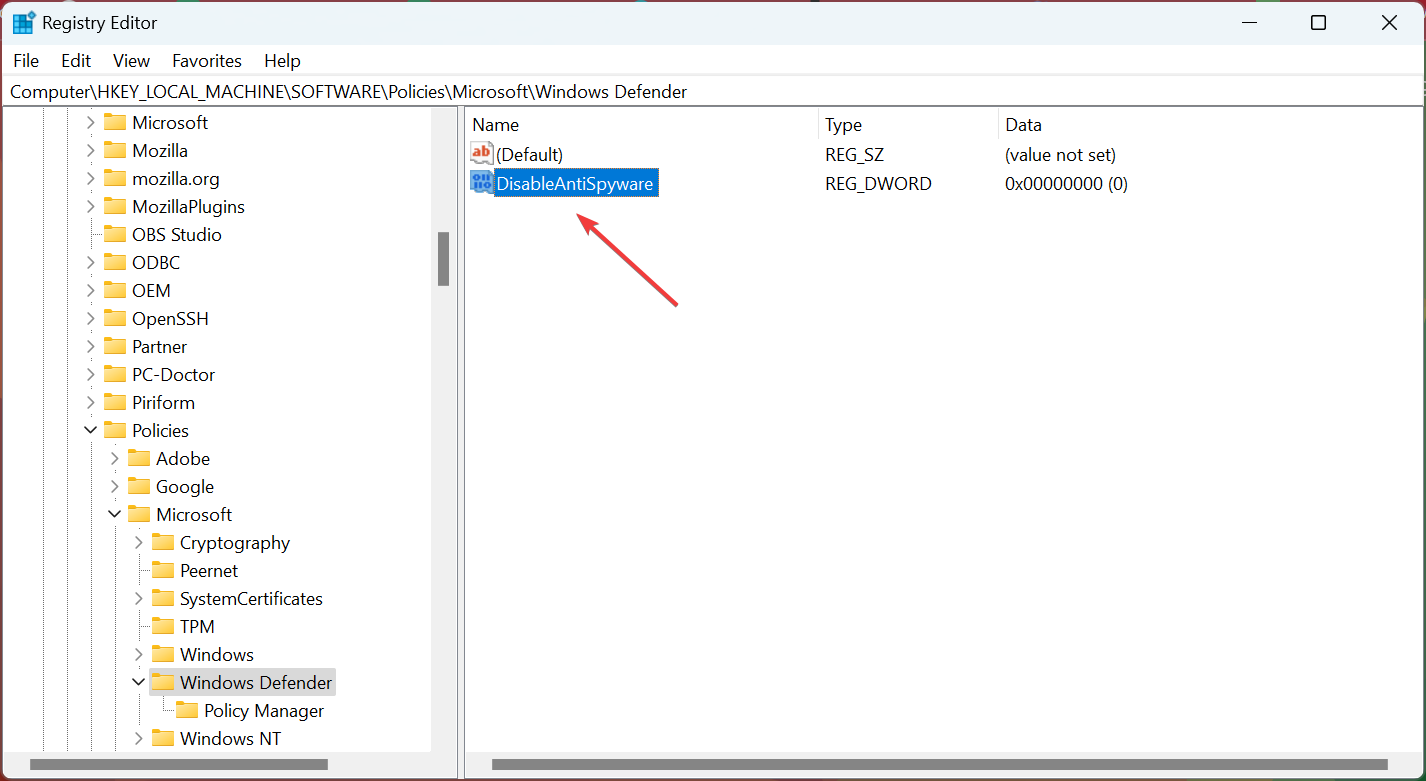
HKEY_LOCAL_MACHINE\SOFTWARE\Policies\Microsoft\Windows Defender - Right-click on the empty portion, hover the cursor over new, select DWORD (32-bit) Value, and name it DisableAntiSpyware.
- Now, double-click on the newly created entry.
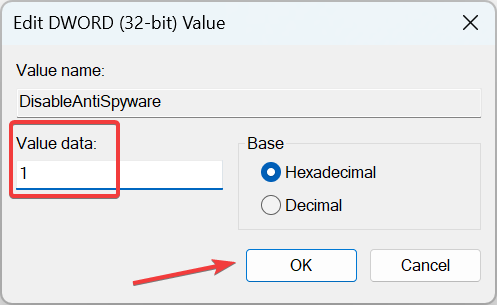
- Enter 1 under Value data and click on OK.
- Once done, restart the computer for the changes to come into effect.
If you are facing the Operation did not complete successfully error with several files, manually adding exclusions would be time-consuming. Instead, an easier option is to temporarily disable Windows Defender. Just make sure not to download any files in the meanwhile.
3. Run the SFC scan
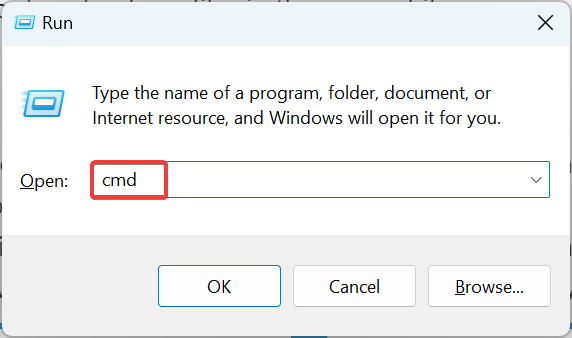
- Press Windows + R to open Run, type cmd, and hit Ctrl + Shift + Enter.
- Click Yes in the prompt.
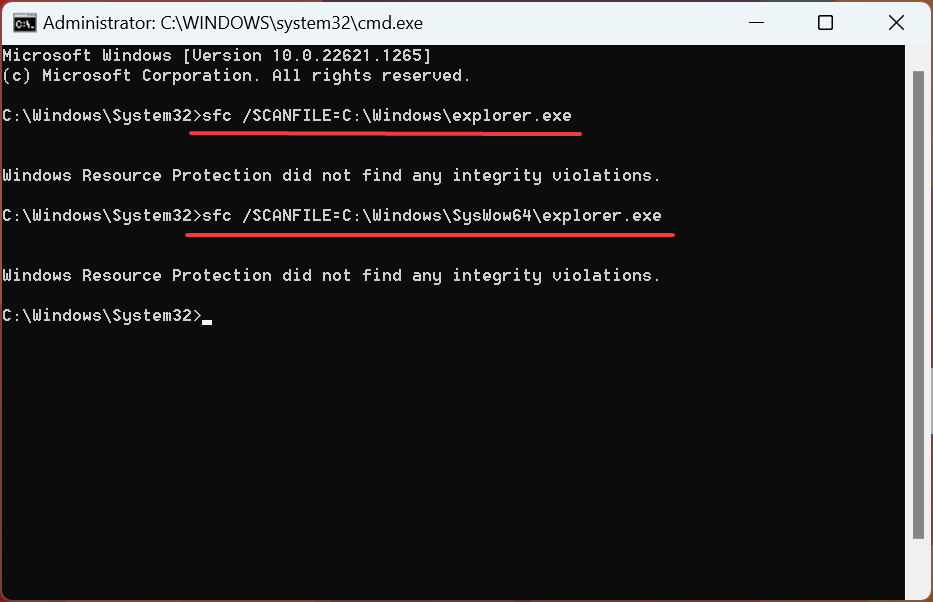
- Now, paste the following commands individually and hit Enter after each:
sfc /SCANFILE=C:windowsexplorer.exesfc /SCANFILE=C:WindowsSysWow64explorer.exe
If this scanning method doesn’t seem to solve the issue, you should consider an advanced antivirus like ESET HOME Security Essential.
It has an advanced machine learning AI feature that continuously scans for signatures and blocks them the moment they look suspicious, besides providing security over the network.
⇒ Get ESET HOME Security Essential
4. Use Disk Cleanup
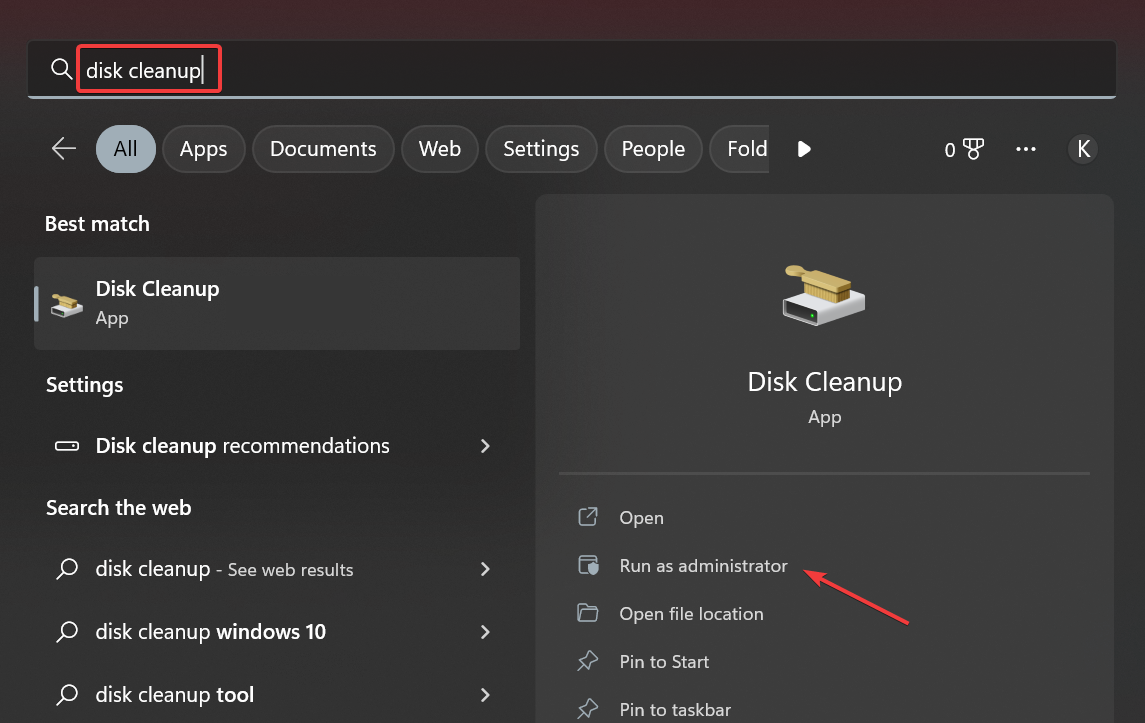
- Press Windows + S to open Search, type Disk Cleanup, and click on Run as administrator.
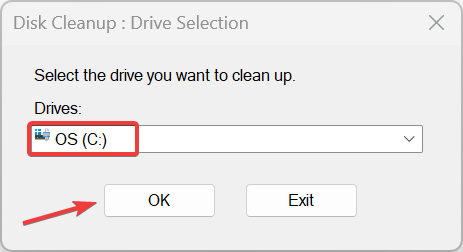
- Select C: from the Drives dropdown menu, and click on OK to proceed.
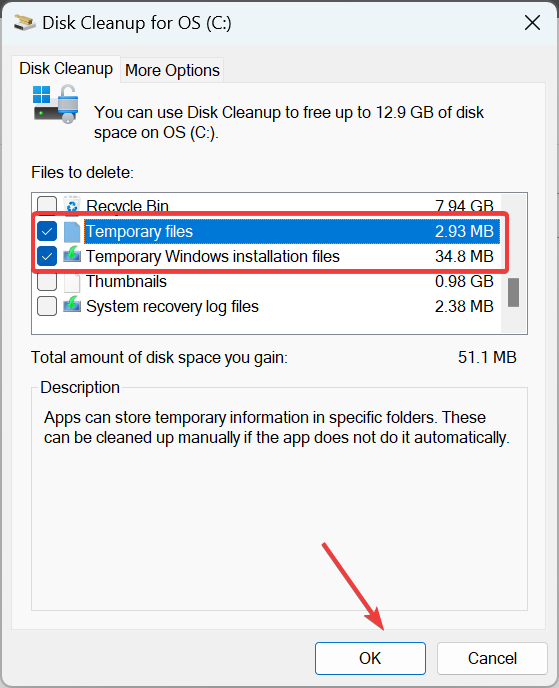
- Now, tick the checkboxes for all the temporary files here, and click OK.
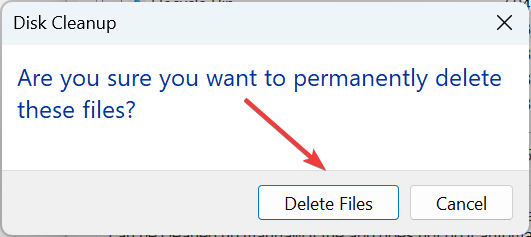
- Finally, click Delete Files in the confirmation prompt and wait for the process to complete.
In many cases, the Operation did not complete successfully error appeared due to problematic temporary files on the PC, so clear them to fix things. And make sure to delete the Temporary Windows installation files.
5. Perform an in-place upgrade
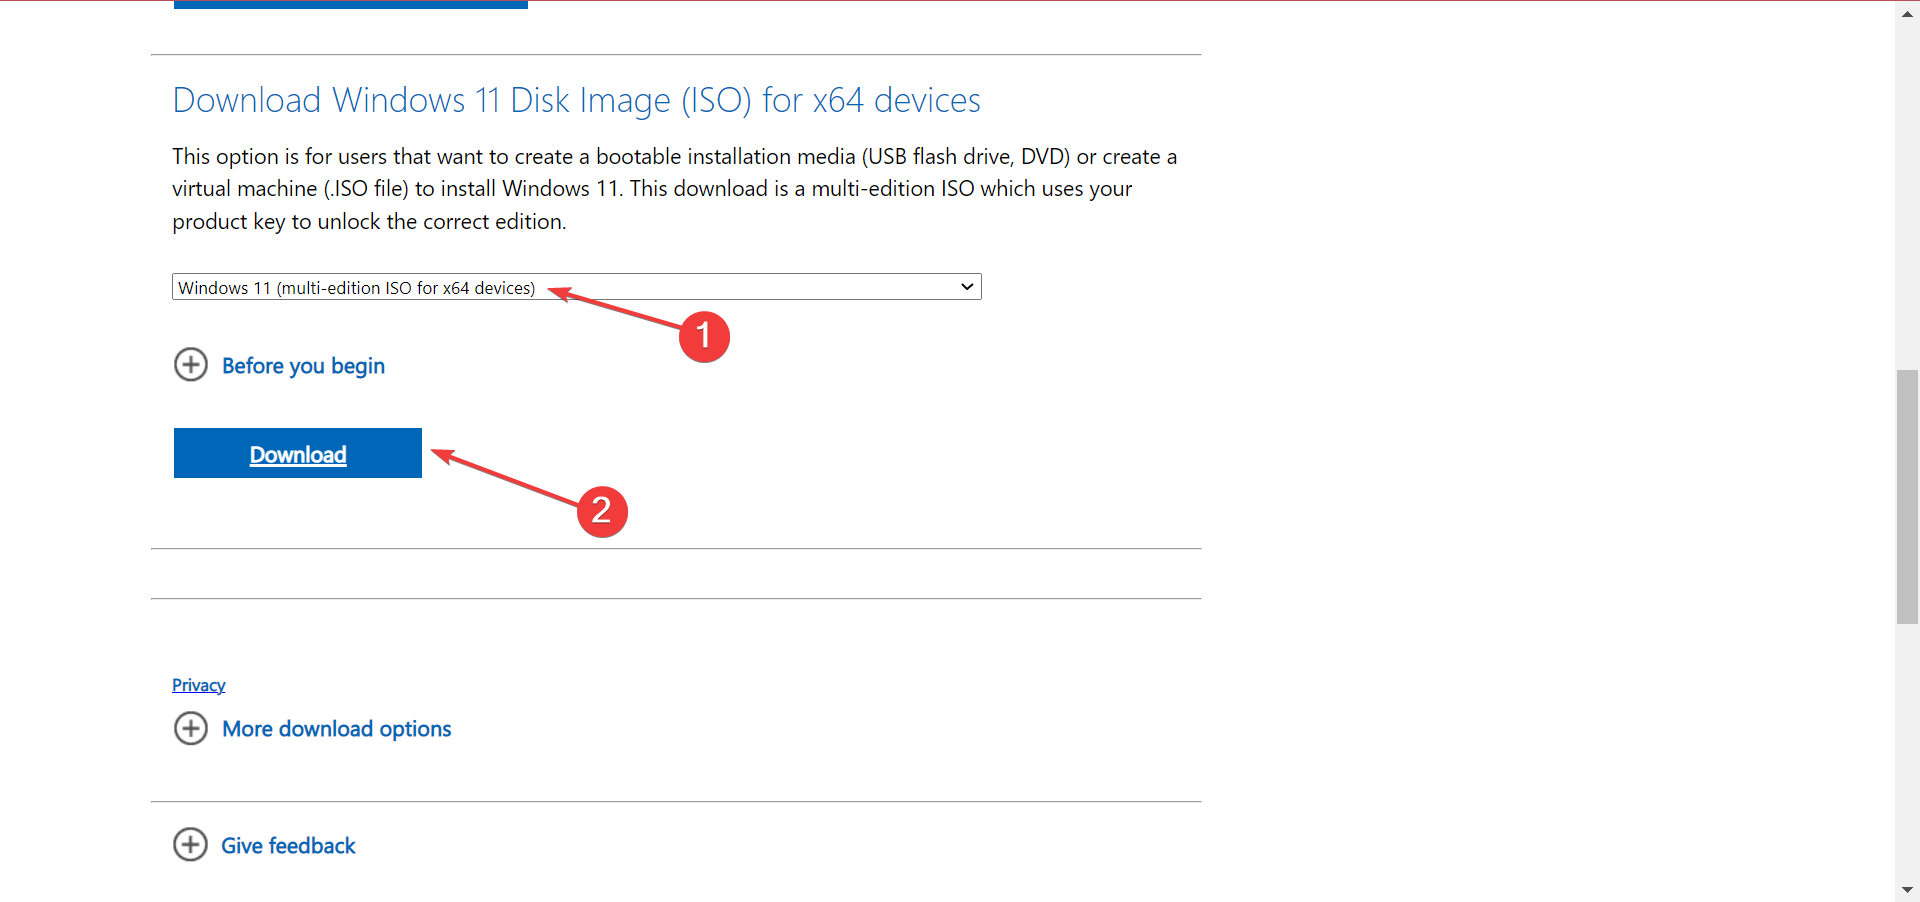
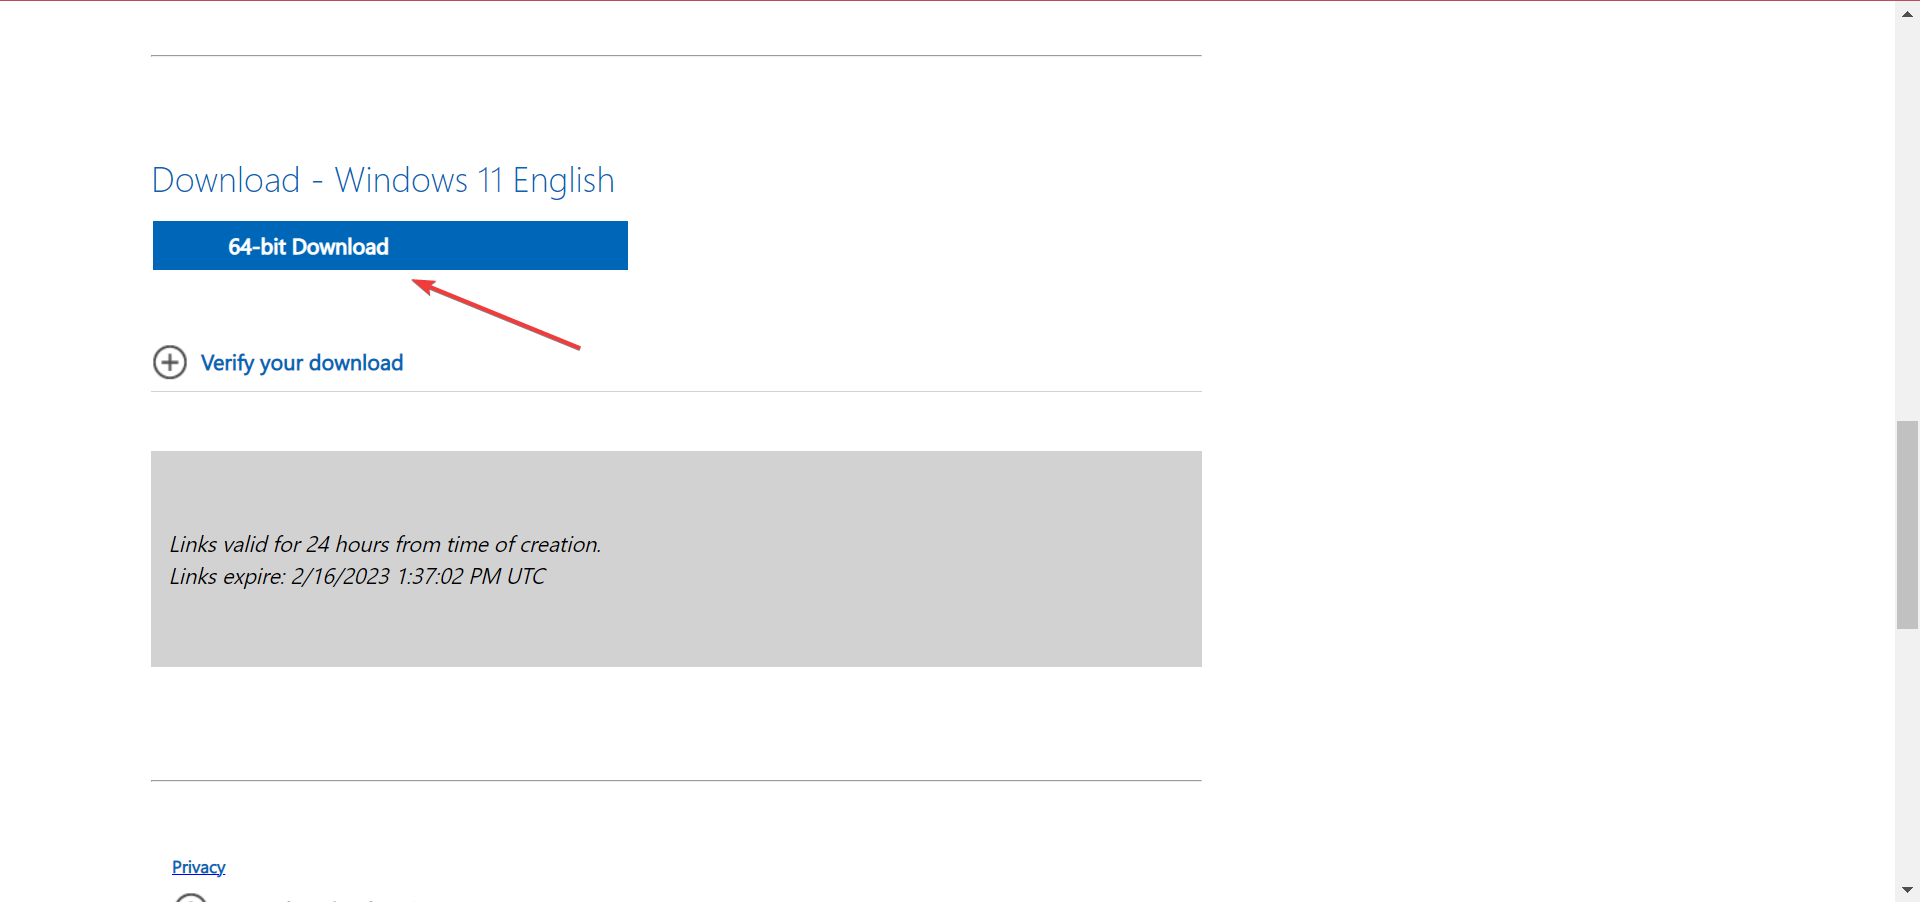
- Go to Microsoft’s official website, select Windows 11 (multi-edition ISO for x64 devices) under Download Windows 11 Disk Image (ISO) for x64 devices, and click Download.
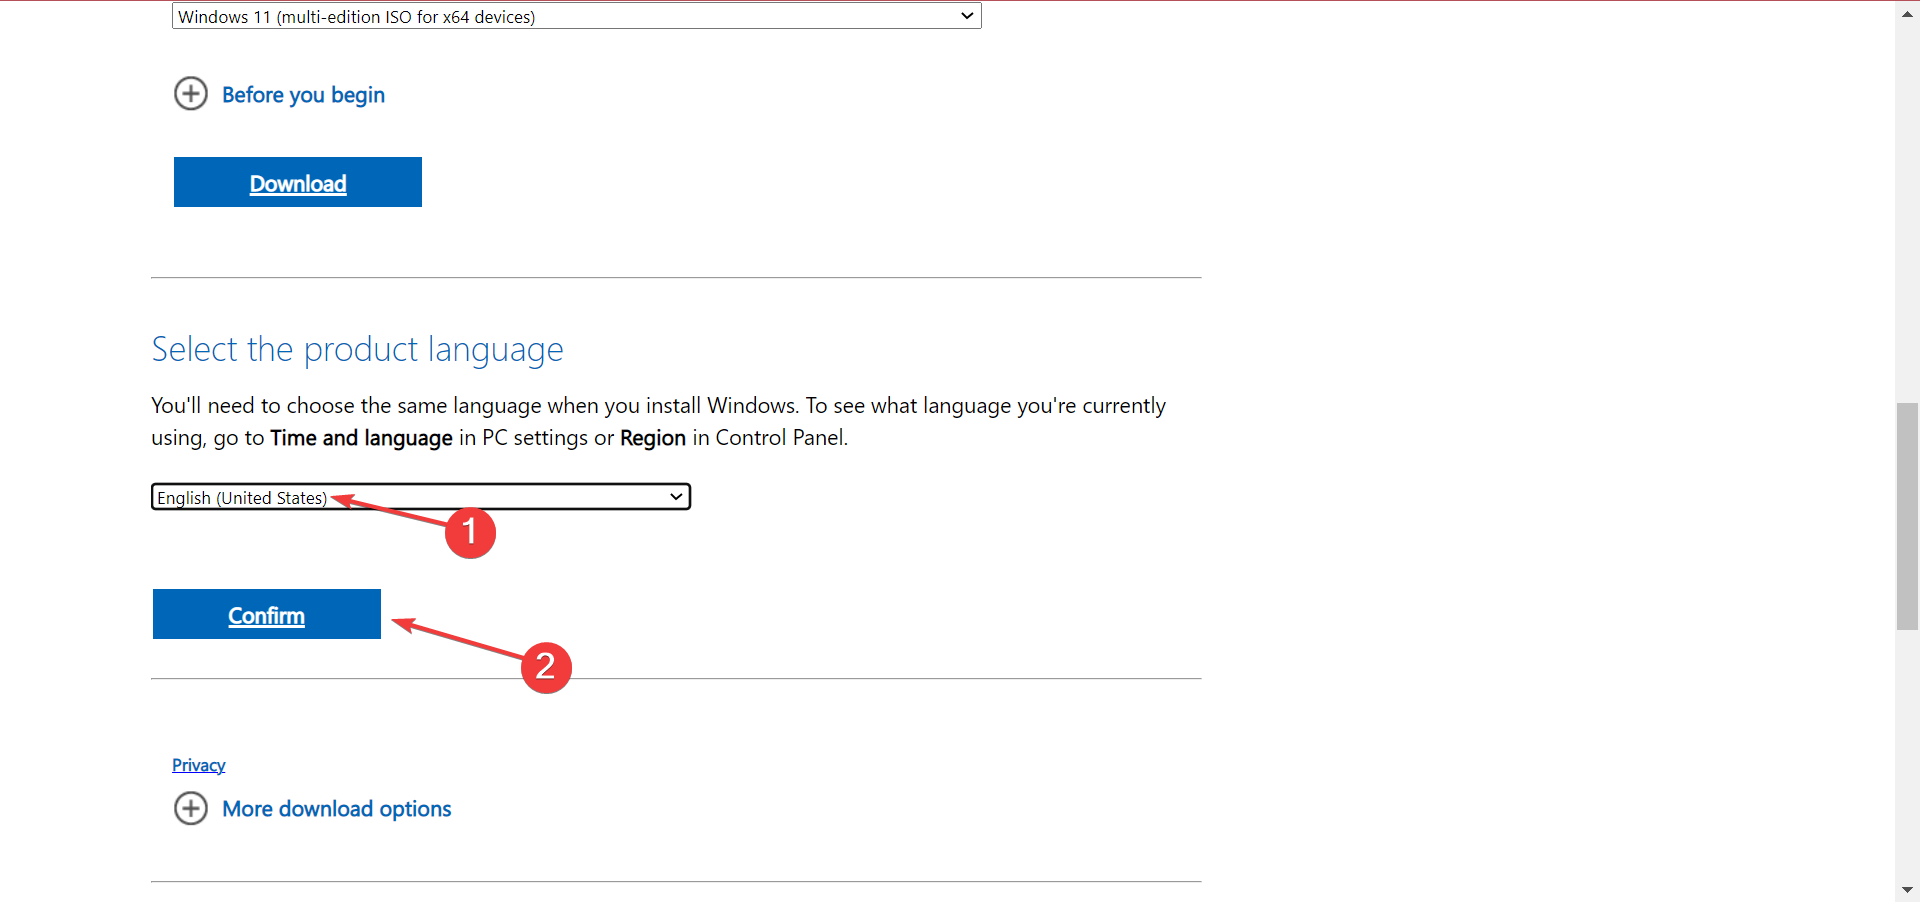
- Choose English from the dropdown menu, and click Confirm.
- Click on the link presented here.
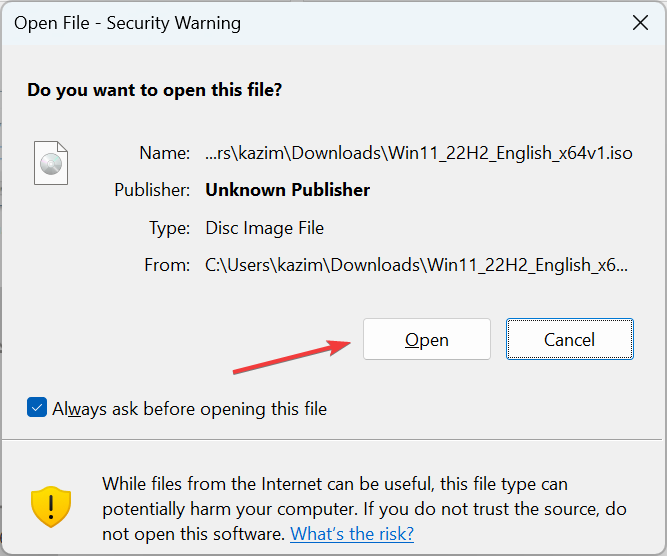
- After the ISO file is downloaded, double-click on it, and choose Open.
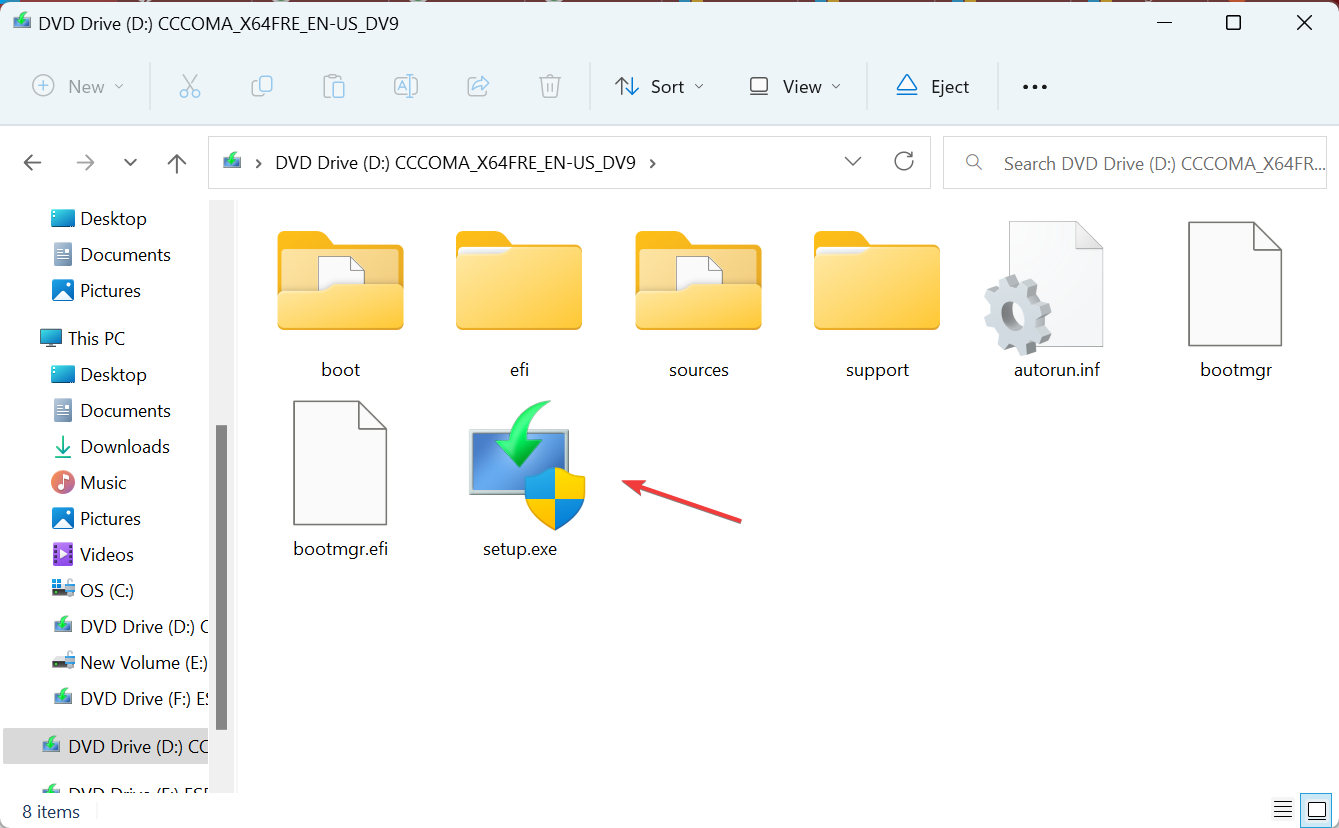
- Now, run the setup.exe file.
- Click Yes in the UAC prompt.
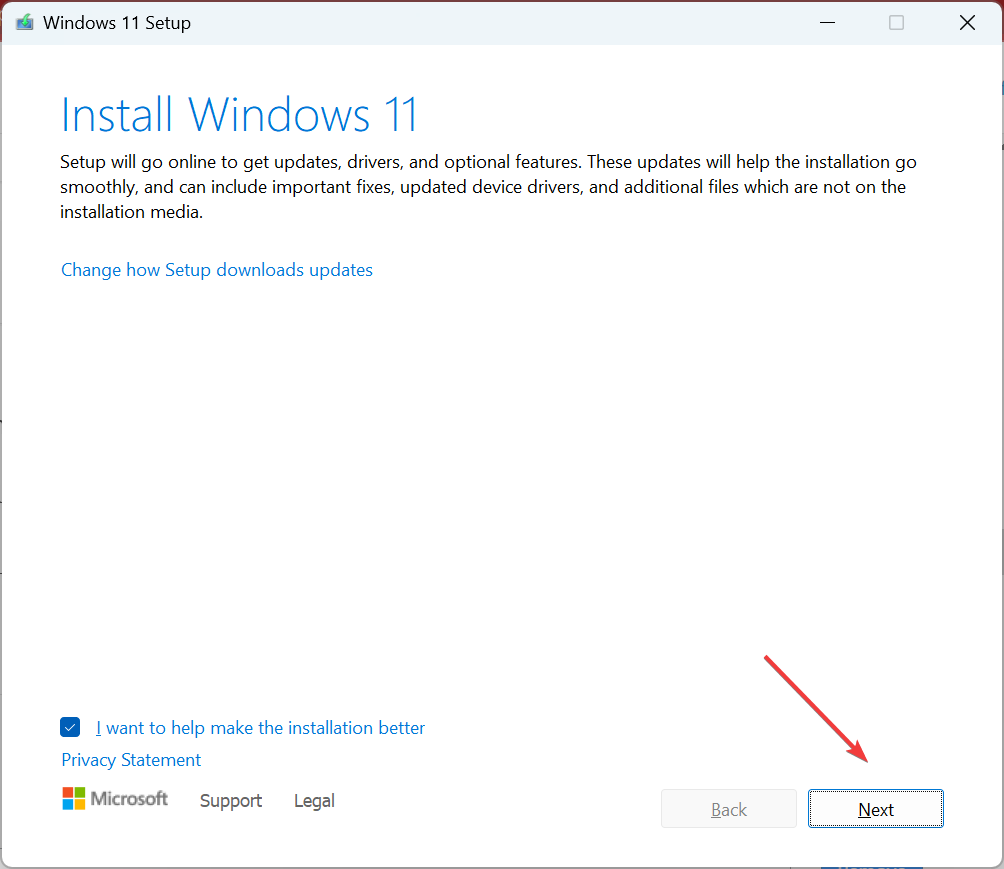
- On the Install Windows 11 page, click Next to proceed.
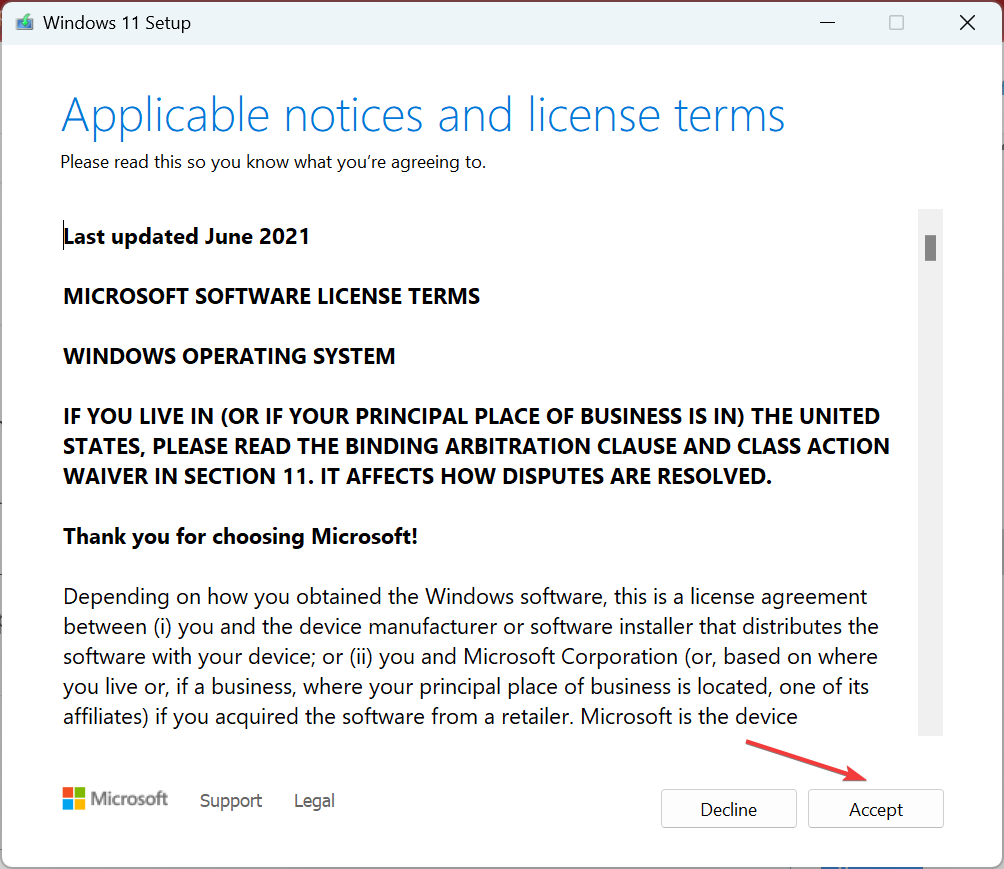
- Click Accept to agree to the notices and license terms.
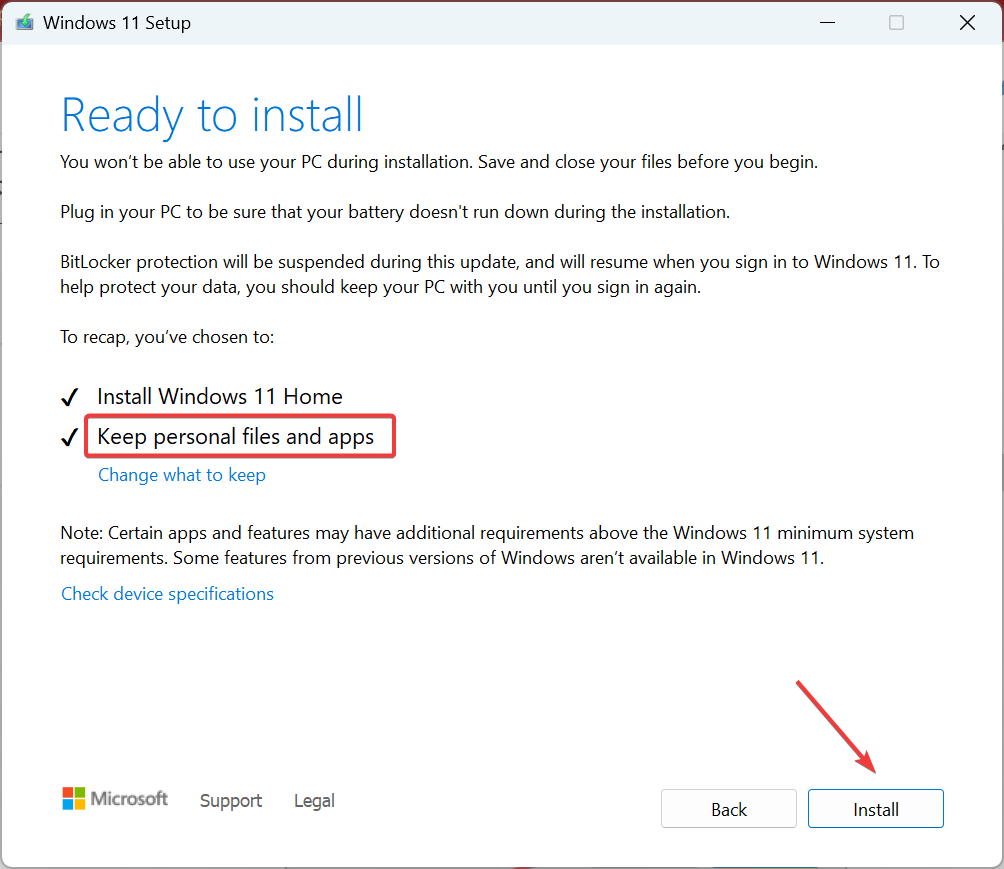
- Verify that the setup reads Keep personal files and apps, and click on Install.
That’s it! An in-place upgrade should help you fix the Operation did not complete successfully error for good. But how do you ensure that it doesn’t appear again?
Also, before you leave, find out how to make Windows 11 faster and get the best performance. And if you happen to encounter the Windows error code 0x800700E1: Virus Detected, our guide will help you too.
If you have any queries or want to share a solution not listed here, drop a comment below.






User forum
1 messages