PC Health Check Is Not Installed: What to Do When It's Missing
Give a try to these tested solutions right away
4 min. read
Updated on
Read our disclosure page to find out how can you help Windows Report sustain the editorial team Read more
Key notes
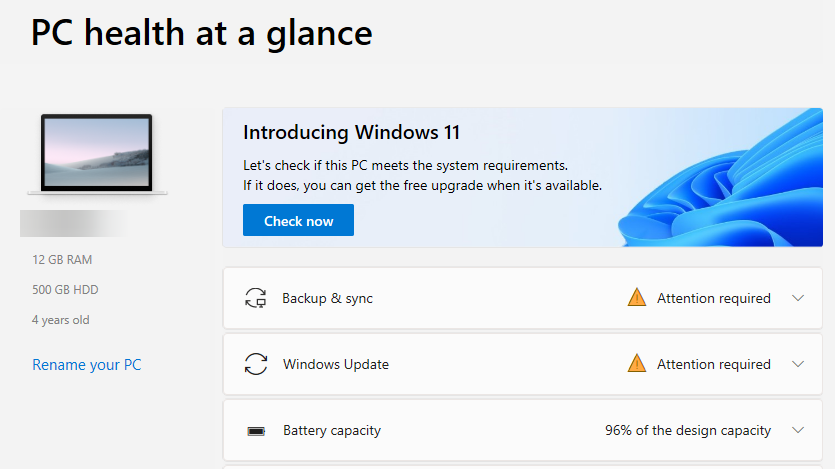
- The PC Health Check app is more than just a compatibility-checking tool. You can use it for backups and identifying potential threats to your computer.
- Unfortunately, some users can't find the app on their PC after updating to the latest OS because of missing system files or some other reasons.
- Reinstalling the app is the best solution to this problem. There are also other fixes you can try.
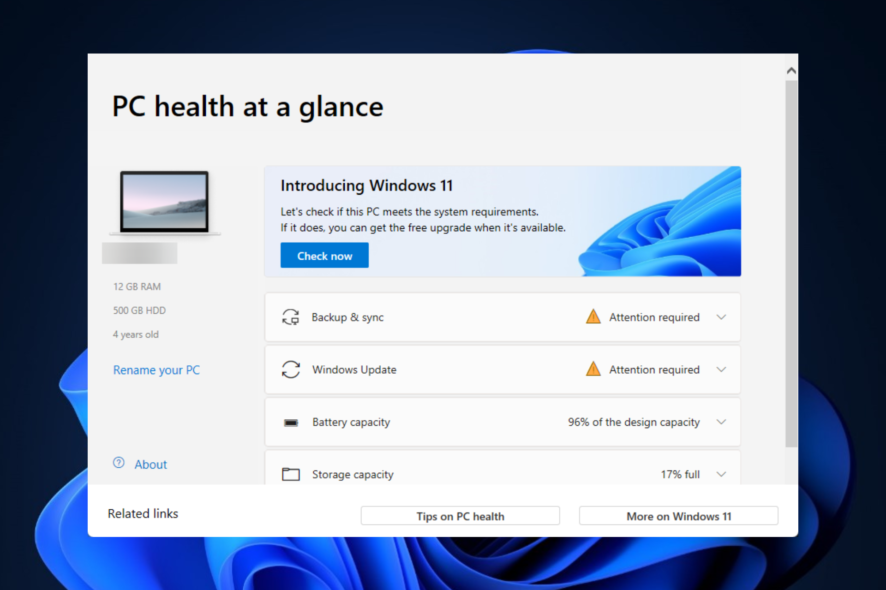
PC Health Check app not installed on Windows 11 is one of the many problems users encounter after upgrading their computers to the latest version of Windows.
In the past, users have complained that the PC Health Check app crashes. But now, many could not even find the app on their device at all.
Why is the PC Health Check not installed on Windows 11?
There can be several reasons why PC Health Check is missing on Windows 11. The most culpable ones include:
- Update error – With some Windows update errors that need your immediate attention, your PC can churn out problems like this.
- Incomplete or incorrect installation – Sometimes, the app might have been installed on your computer. But if it’s not properly done, it will not be installed.
- Malware infection – Virus attacks can be responsible for multiple issues on Windows 11. Making the PC Health Check disappear on your PC is one of them.
- Corrupt or missing system files – System file errors on your computer can be the underlying cause.
Let’s find out how can make the PC Health Check app appear on your PC again.
What can I do if PC Health Check is not installed?
You can fix this PC Health Check problem with the methods explained below. But before you start using them, ensure you take these initial steps:
- Scan your computer for malware infections with a good third-party antivirus or use Window Defender Firewall to get rid of viruses.
- Make sure that your Windows OS has the latest updates installed.
In case, you still can’t find the PC Health Check app after doing all these, then you can proceed to the following solutions.
1. Download and Install the PC Health Check app manually
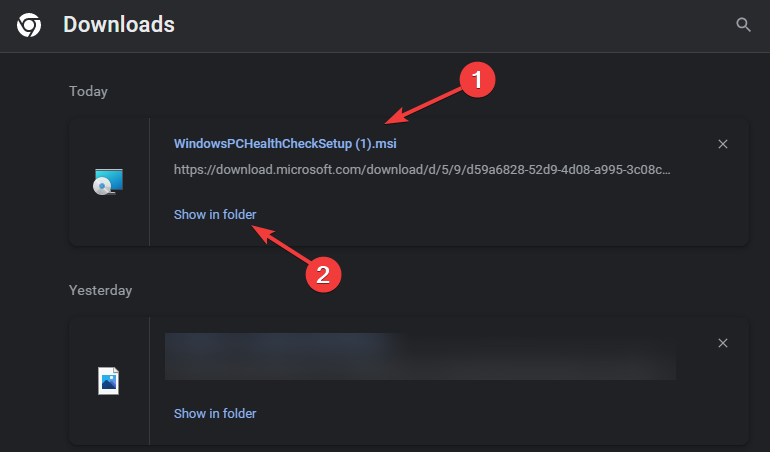
- Click on this link to download the PC Health Check app to your Windows 11 PC then click on Show in folder once the download is complete.
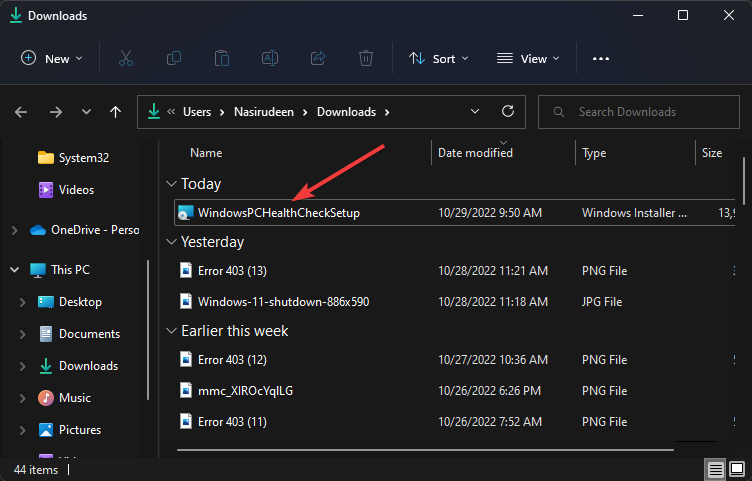
- Once the folder opens, double-click on the setup file, WindowsPCHealthCheckSetup.exe.
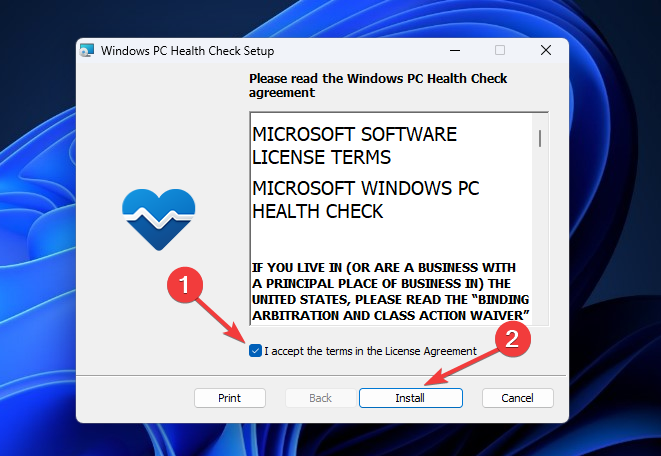
- Check the box next to I accept the terms in the License Agreement and click the Install button.
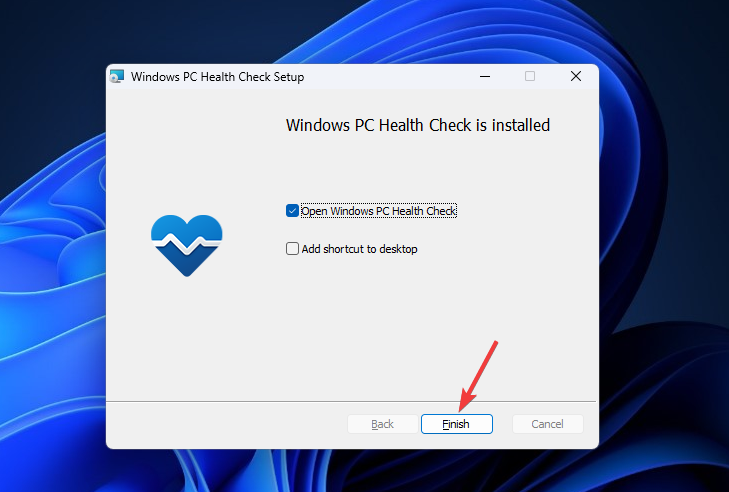
- Wait for the installation to be complete then click the Finish button.
- Now you can start using PC Health Check on your Windows 11 PC.
2. Uninstall updates
- Press Windows + I keys on your keyboard to open Settings.
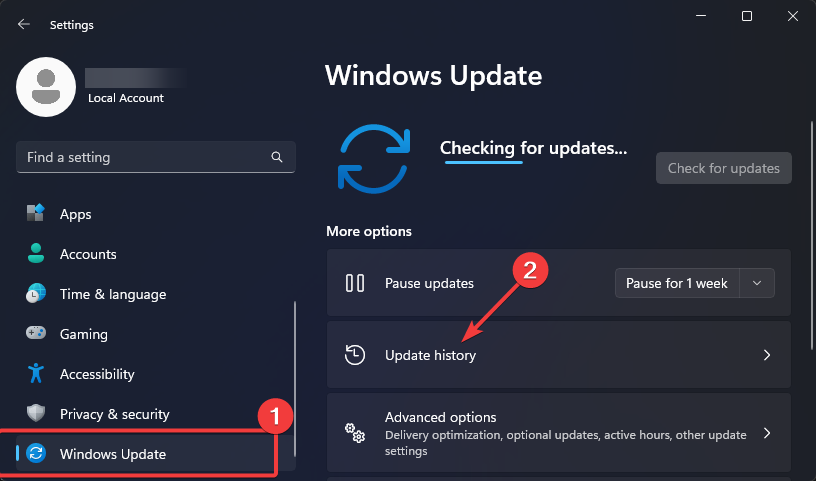
- On the left tile, scroll down to click on Windows update and select Updates history.
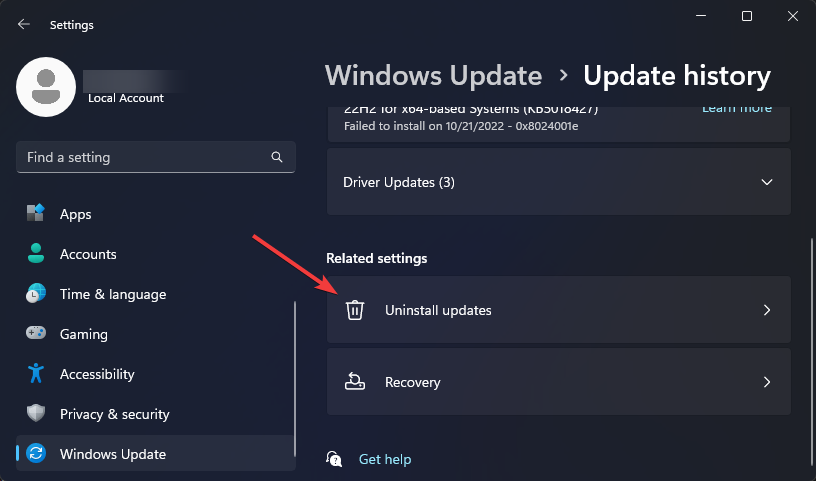
- Click on Uninstall updates under Related settings
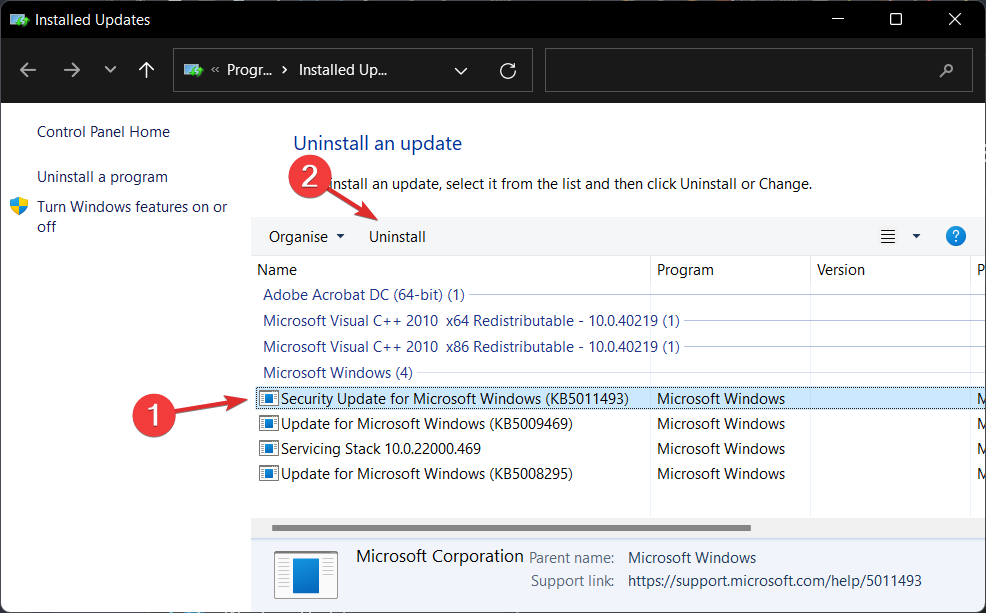
- Next, locate the latest update under Microsoft Windows and click on Uninstall.
- Click the Yes button on the dialogue that pops up and wait until the removal process is complete.
- Restart your computer and check if the PC Health Check app has been installed.
3. Perform a system restore
 Tip
Tip
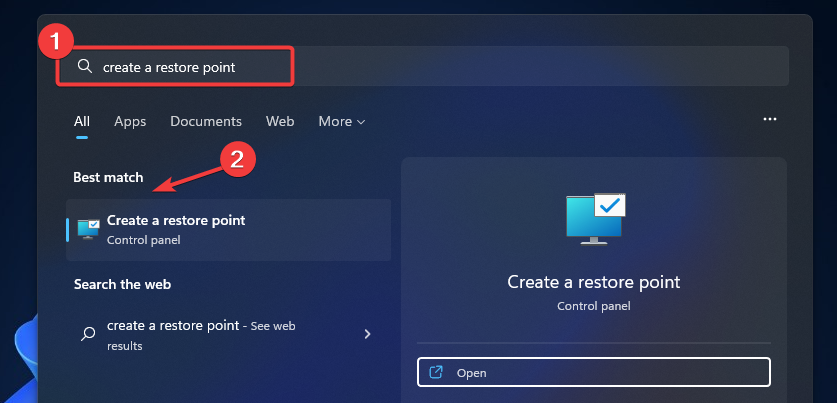
- Click on the Search icon on your taskbar, enter Create a restore point into the Search box, and select the Best match result.
- Next, click on the System Restore… button on the System Properties window that pops up.
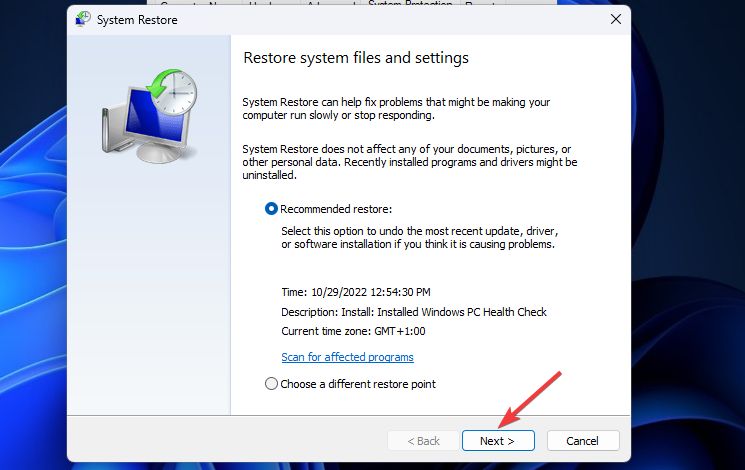
- Click the Next button to proceed with the system restore.
- Select the system restore point you want to use and click the Next button.
- Click the Finish button to confirm the system restore.
- Your PC will automatically restart to effect the changes. Wait until the process is complete then check if the PC Health Check app is now on your PC.
If you follow the solutions in this guide, you should be able to get the PC Health Check app back on your computer to benefit from its useful insights.
The PC Health Check app provides you with up-to-date information on the condition of your computer, enabling you to take proactive measures to improve Windows performance.
On top of system compatibility checks, this tool also helps with regular Windows updates. It will notify you if your device requires maintenance or an update.
Are you able to install the app with these solutions? Let us know in the comments section below.

