How to Get Rid of Razer Cortex If It is Not Uninstalling
Repair the app to restore critical uninstall files
![]() 5 min. read
5 min. read
![]() Published on
Published on
Share this article
Improve this guide
Read our disclosure page to find out how can you help Windows Report sustain the editorial team. Read more

Razer Cortex can be a great performance booster for your device but unfortunately, not everyone experiences the same. The issue arises when you want to get rid of it but find out that Razer Cortex is not uninstalling.
From issues of the program crashing your PC to high CPU usage, you may be forced to uninstall Razer Cortex. If you are stuck with the program, it could be that you’re trying to uninstall it without administrative privileges, or that the installation was faulty from the beginning.
Some users also got a prompt that some setup files were missing when they attempted to uninstall Razer Cortex. These files are normally a prerequisite for the uninstallation to be successful.
How do I completely Uninstall Razer Cortex?
1. End the Razer Cortex process and run the uninstaller as admin
1.1 End razer Cortex process
- Right-click the Windows icon on the desktop and choose Task Manager from the quick links menu.
- Switch to the Process tab and look for Razer Cortex in the list of background services.
- Right-click the process and select End task from the context menu.

- Exit the Task Manager window and reboot your computer.

1.2 Run Razer Cortex with admin privileges
- Open File Explorer and navigate to:
C:\Program Files (x86)\Razer\Razer Cortex Dir Installation - Right-click on the uninstaller exe file and open Properties.
- Choose the Compatibility tab. Check the Run this program as an administrator and click Apply and OK to save changes.

- Now try uninstalling Razer Cortex again and see if it is working.

2. Restart the Windows Installer service
- Press the Windows key + R to start Run, type services.msc, and press Enter or click OK.

- Scroll down, find Windows Installer, and double-click on it.

- Look at the Service status and if it reads Running, just click the Stop button below.
- Then, wait for a few seconds and press the Start button again.
- Close the Services window and check if the problem is resolved.
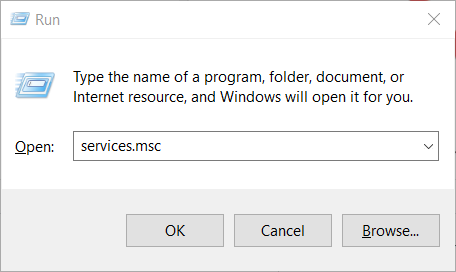


The Windows Installer service is responsible for installations and uninstallation so if a program is stuck and won’t uninstall, restarting this service can clear these issues.
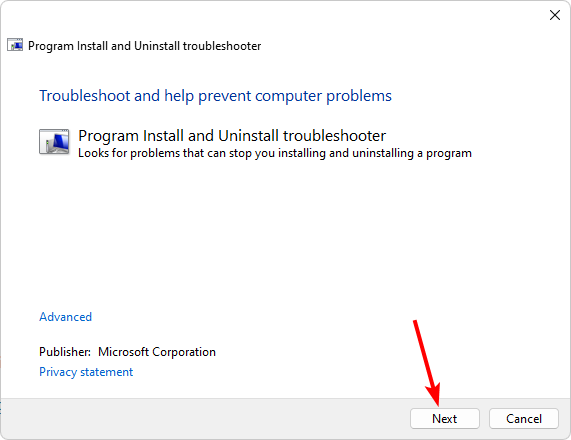
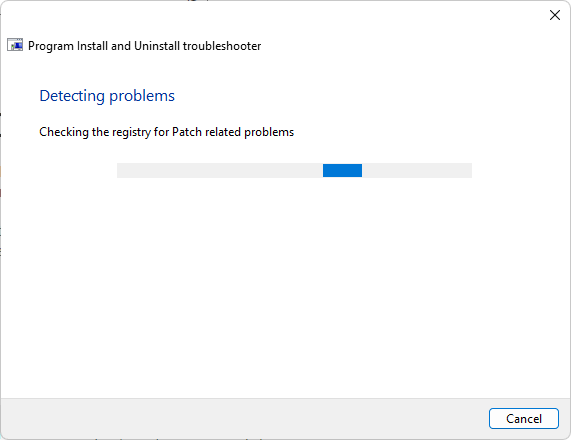
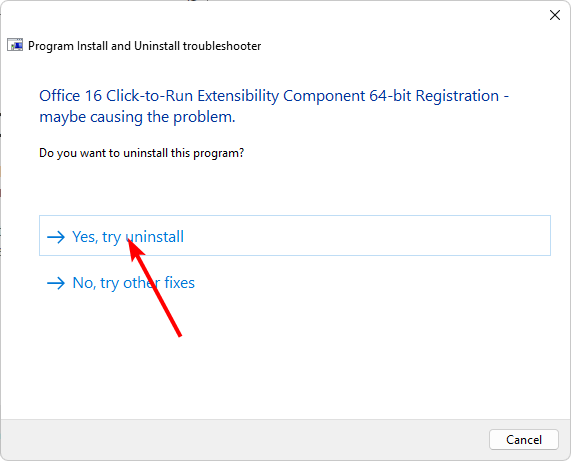
3. Run the Program Install and Uninstall troubleshooter
- Download the Program Install and Uninstall troubleshooter and install it.
- Open it and click on Next.

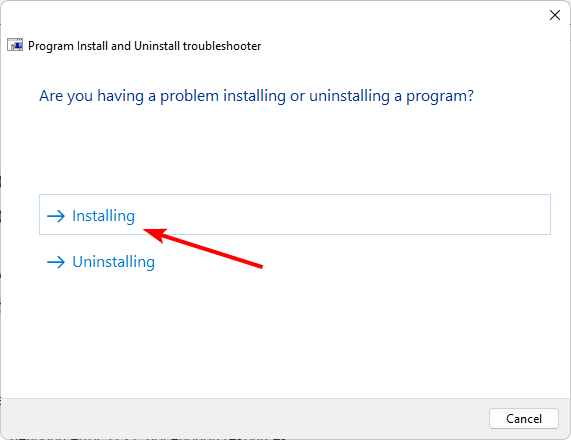
- You’ll be asked whether you have a problem installing or uninstalling a program. Select Uninstalling.
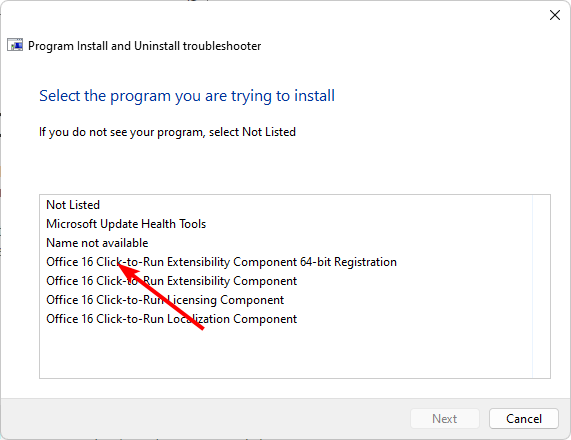
- Next, you’ll be asked to select the program that is not uninstalling. Pick Razer Cortex from the list.
- The troubleshooter will start scanning for problems.
- Once it completes, you’ll be presented with two options. Pick either and wait for the troubleshooter to recommend fixes.

4. Repair/reset the Razer Cortex app
- Hit the Windows key and click on Settings.

- Click on Apps on the left pane then Apps & features on the right pane.

- Locate the Razer Cortex app.
- Click on Repair.

- Go back and click on Reset if the repair option failed.

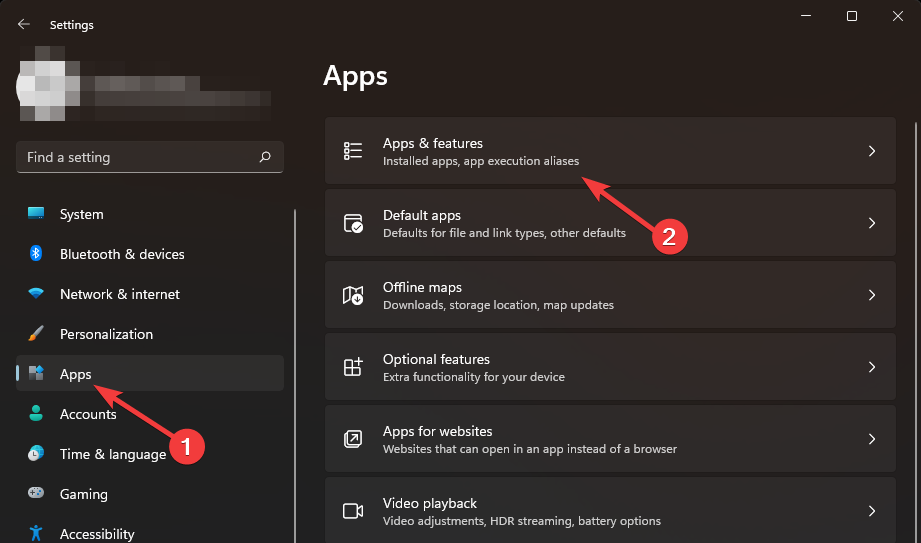
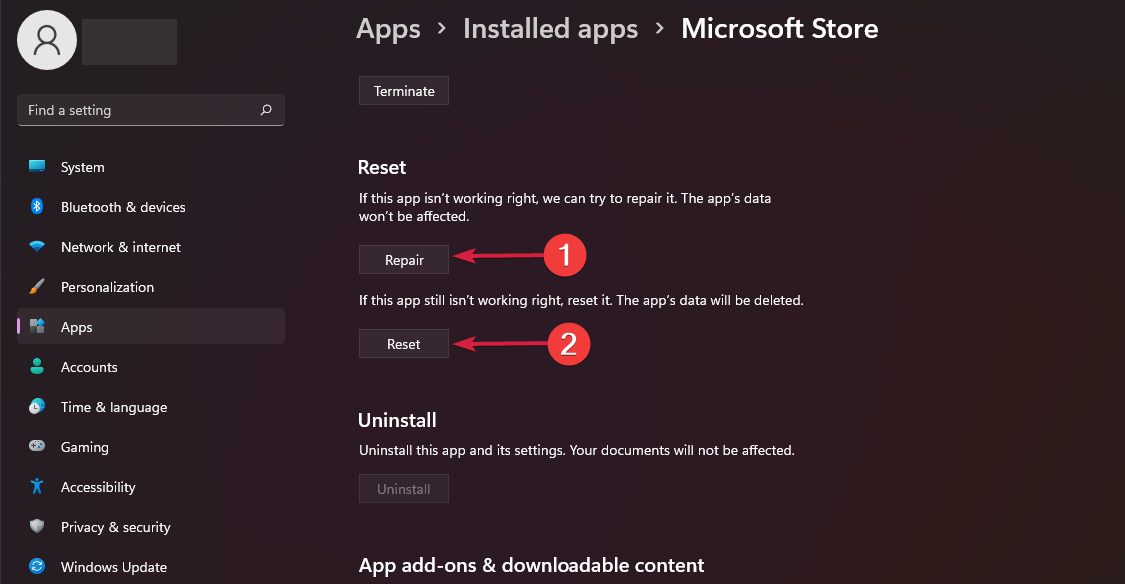
If Razer Cortex is not uninstalling because of some missing or corrupt files, repairing or resetting the app could repair and restore these files and you will be able to uninstall it.
5. Uninstall Razer Cortex in Safe Mode
- Press the Power button at the Windows login screen or in the Settings window, then press and hold the Shift key and click Restart.
- Select Troubleshoot > Advanced options > Startup Settings > Restart.
- Press F4 to enable Safe Mode.
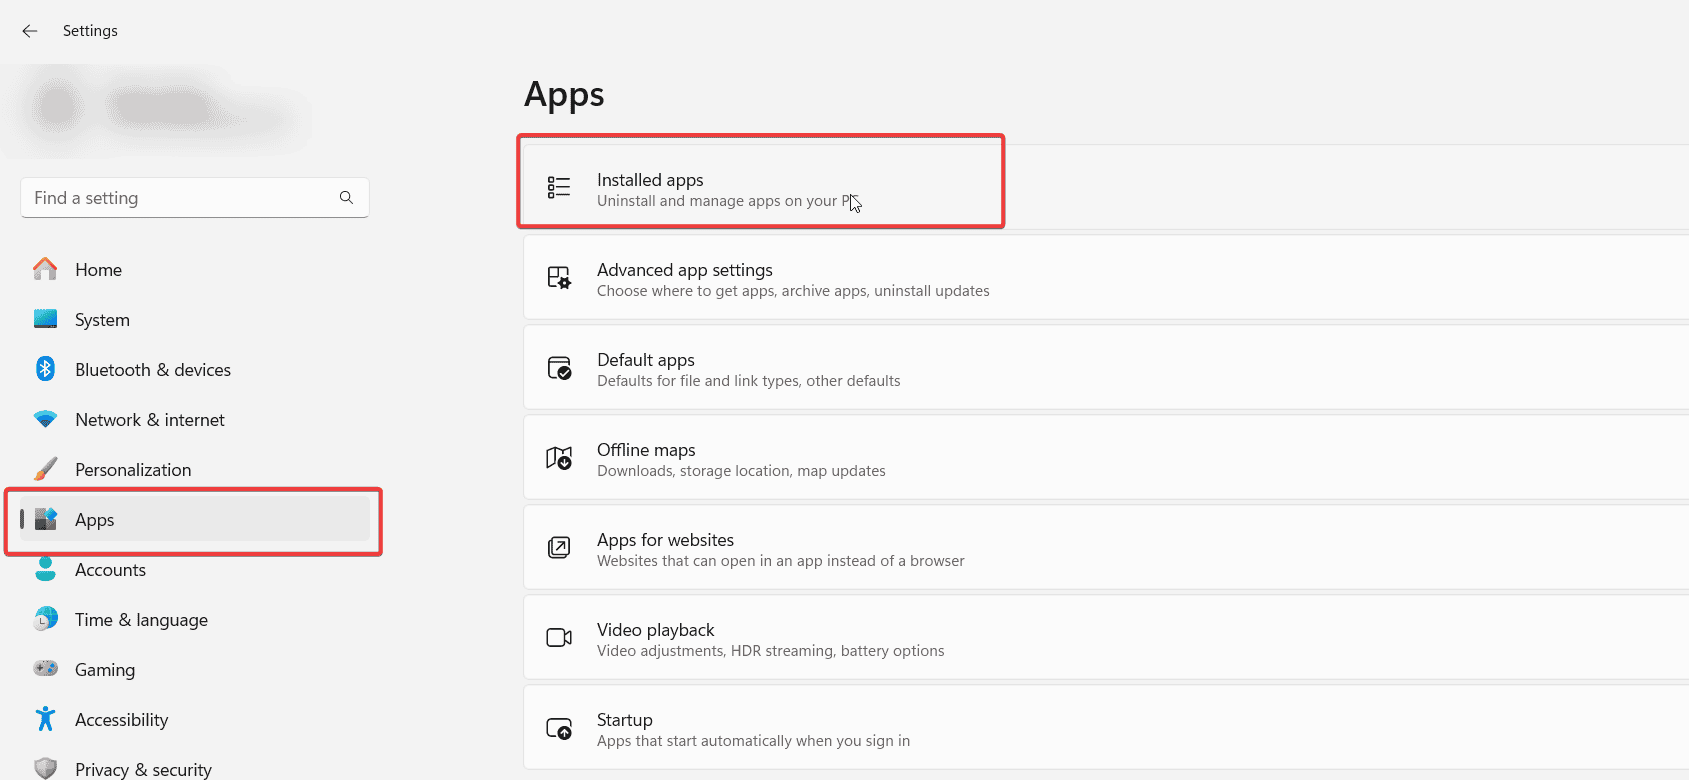
- Click on the Start button and choose Settings.

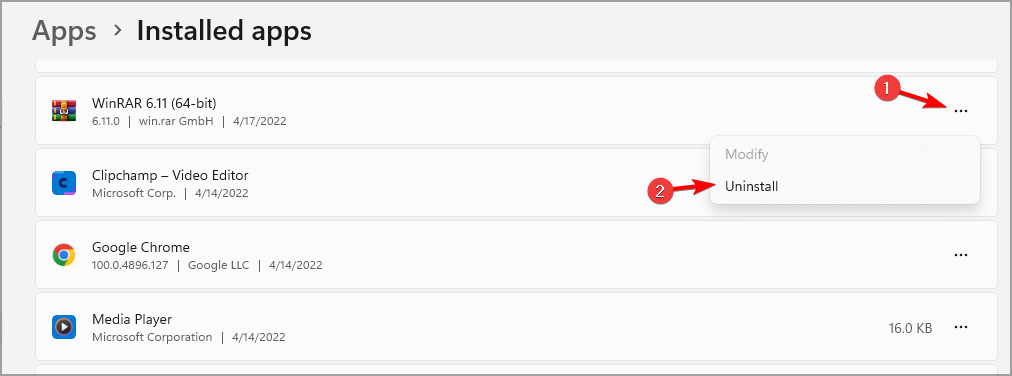
- Navigate to Apps and select Installed apps.

- Locate Razer Cortex, click the three dots next to it, and choose Uninstall.

- Follow the instructions on the screen to complete the process.

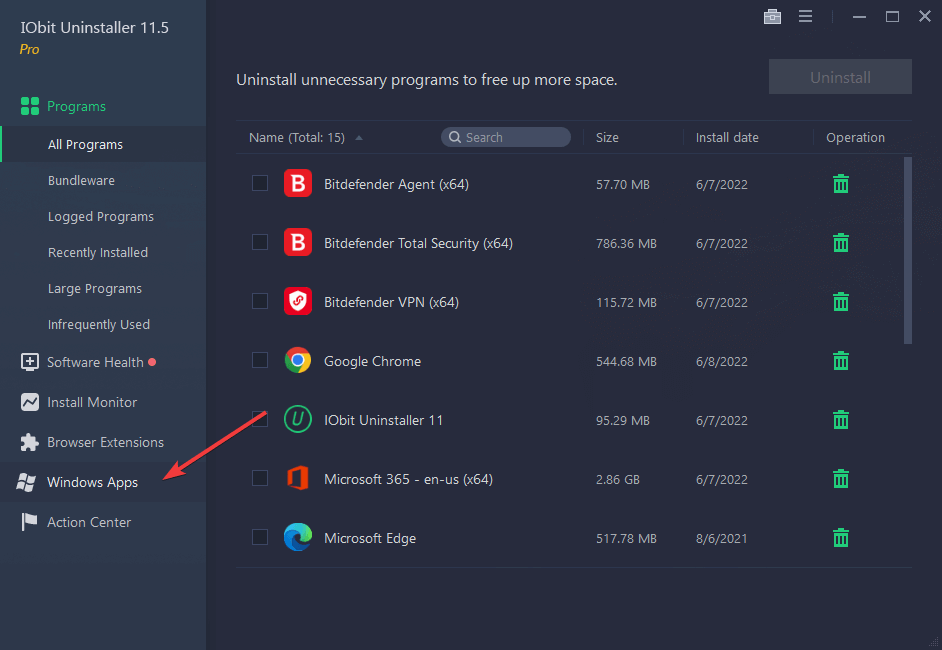
6. Use an Uninstaller program
- Launch the IObit Uninstaller application from your desktop or via Windows search.

- Go to Programs and select the preferred subcategory.
- Browse the list to find the Razer Cortex app.
- Select it and click on the trash icon. Wait for the process to complete.
7. Use Registry Editor
- Before you edit the registry, ensure you have a backup or create a restore point to cushion your device from any catastrophic failures.
- Hit the Windows + R keys simultaneously to open the Run command.
- There type regedit and press OK.

- From Registry Editor go to:
HKEY_LOCAL_MACHINESOFTWAREMicrosoftWindowsCurrentVersionUninstall - Now if you click on each key from that path you will be able to access each program from your device, thus you will be able to uninstall the same.
- Now, select Razer Cortex software and on the right panel of the Registry Editor, double-click on UninstallString to open its properties.

- When the Properties window opens, copy the following path in the Value data field:
C:\Program Files (86)\Razer Cortex
- Up next, on your device open a command prompt window – right-click on your Start Button, or press Windows + X keyboard keys and select Command Prompt (Admin).

- Now right-click inside the Command Prompt window to paste the path and press Enter:
C:\\Program Files (86)\\Razer Cortex


If you’re unsuccessful in uninstalling Razer Cortex, get in touch with the support team and see if they’ll offer additional assistance. And if you’re successful in uninstalling it, try other Razer Cortex alternatives.
We wrap up here but keep the conversation going in the comment section with other tips that helped you uninstall a problematic app.


User forum
0 messages