4 Ways to Recover Data From Virtual Disk [Quick Steps]
You can use a dedicated data recover tool to get all of your lost files
![]() 4 min. read
4 min. read
![]() Updated on
Updated on
Share this article

Improve this guide
Read our disclosure page to find out how can you help Windows Report sustain the editorial team Read more
Key notes
- Virtual machines have virtual disk that store data of yours safely.
- However, when they get damaged, there are only a few ways to recover the successfully.
- You can create a new virtual server and then try to recover the data using a new virtual disk.
Modern PCs are so powerful that you can multiple operating systems on them. However, this also enhances the risk of losing important data in case one OS gets faulty. In this guide, we will help you with how you can recover data from a virtual disk.
We have prepared a list of solutions that will help you recover data from virtual disks quickly and easily. Let us get right into it.
When can I recover data from a virtual disk?
Before going ahead with the solutions, let us first understand the common scenarios where you can apply the solutions mentioned below to recover data from a virtual disk.
- The entire data of the virtual disk is lost because of some issues with the virtual OS.
- A virtual disk has gone corrupt and you cannot open the virtualization software.
- The storage device where you saved the virtual disk is corrupt or not responding.
- You want to recover files from a working virtual disk.
Let us now go through the different methods that will help you recover data from a virtual disk quickly.
How can I recover data from a virtual disk?
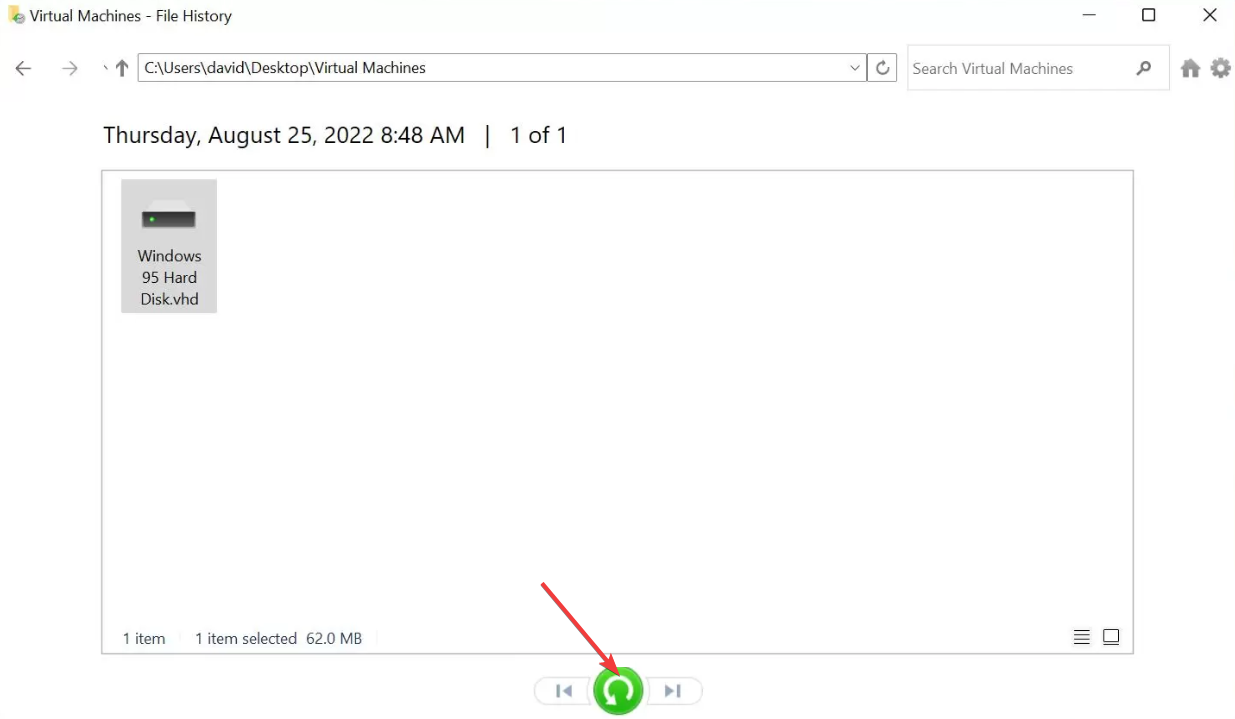
1. Use File History Backup
- Press the Win key to open the Start menu.
- Open Control Panel.

- Click on File History.

- Select the Restore personal files option from the left pane.
- Go to the folder where the virtual machine disk image was stored and select a previous version of that folder.
- Hit the green Restore button.


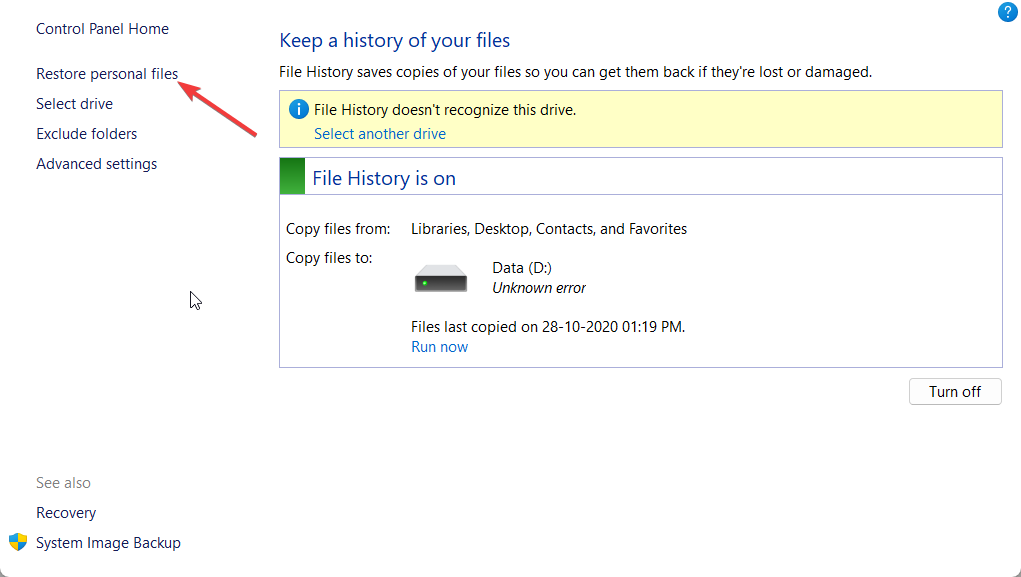
File History, by default, backs up your Libraries, Desktop, Contacts, and Favorites folder. However, you can recover all of your files to an external location using the File History option.
One drawback is that with Windows 11, you need to add the files that you wish to back up to the already created default folders, as the File History has now been redesigned to back up only those folders.
We have a guide that explains how you can enable File History on Windows 11, as well as a guide that will give you details on how to add folder for backup.
2. Use a dedicated data recovery software
When you have forgotten to take manual backups of the important files on your PC and the files are lost, the best thing that you can do is to use dedicated data recovery software.
Now, there are a plethora of data recovery tools promising you features that look too good to be true. However, most often, they are locked behind a paywall, which is pretty hefty for your pocket.
To avoid the hassle of searching, we have created a guide that lists down some of the best data recovery software that you can download on your Windows PC and get back your data without much fuss.
Most of the tools listed in the guide come with a free trial option as well. Moreover, one of the popular ones, Disk Drill has a free variant that is quite effective.
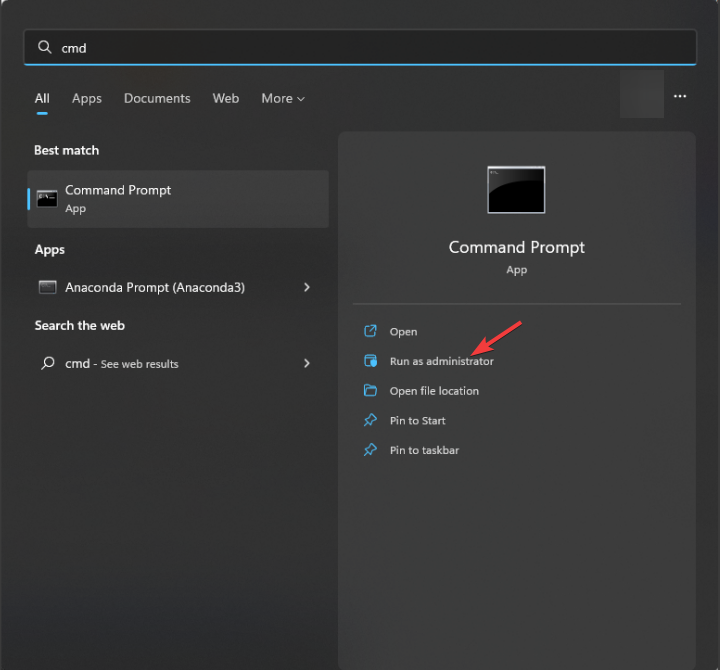
3. Use the CHKDSK command
- Open the Start menu by pressing the Win key.
- Type command prompt and run it as an admin.

- Type the below command and press Enter. chkdsk /f /r /x

- Press Y to schedule the scan the next time your PC restarts.
- Restart your virtual operating system and wait for the process to complete.
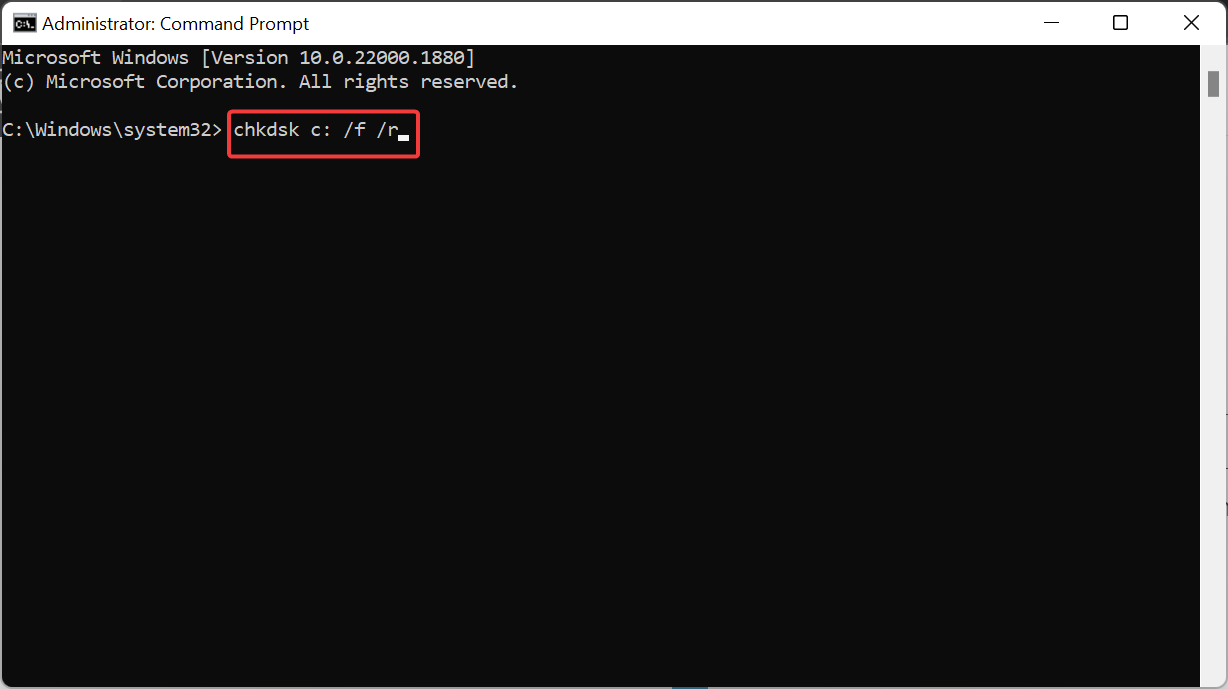
When you run the CHKDSK command, it basically helps fix the corrupt virtual image. Now, you can run any third-party data recovery software on the virtual machine and get back all of your files.
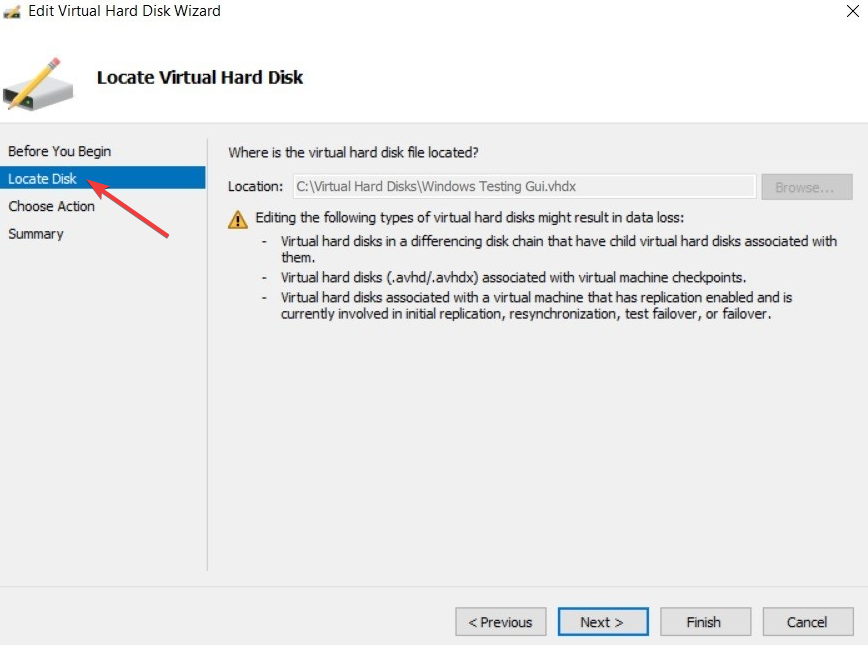
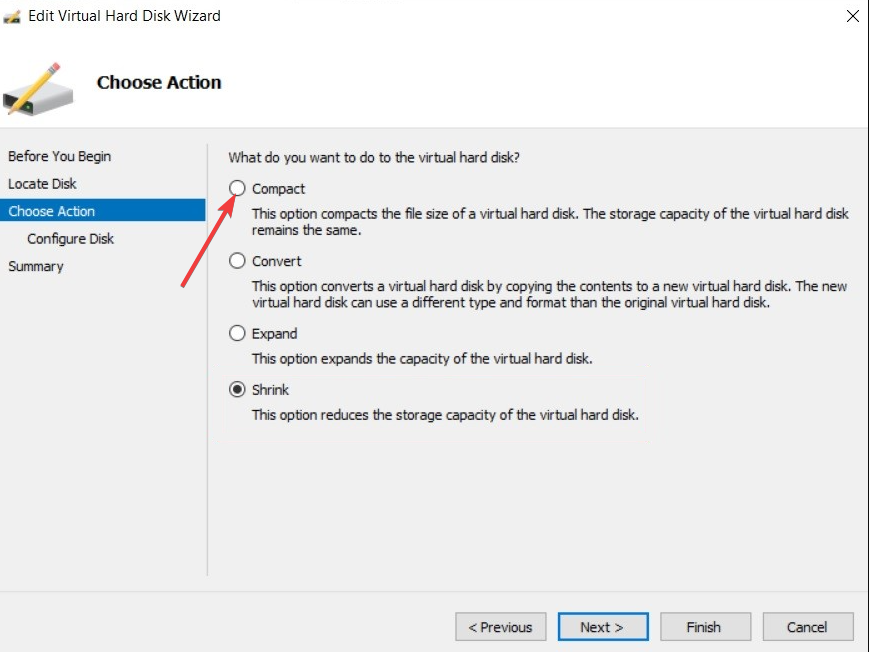
4. Create a new Virtual Server
- Create a new virtual server.
- Add a new hard drive to the newly created virtual server.
- Click on Settings and select added hard drive.
- Locate the corrupted VHD file.

- Click on the Virtual Disk wizard.
- Select the Compact option.

- Give a name to the VHD file.
- After the file compression is complete, copy the VHD file to the original server location.
- Mount the VHD file to the original server and search for the lost data to recover it.
The above steps are the manual way of recovering lost data from a virtual disk. However, the success rate isn’t that tremendous, but you can give this a try.
That is it from us in this guide. Feel free to drop a comment below, which one of the above solutions helped you recover data from the virtual disk.