How to Reinstall Audio Drivers on Windows 11: Step-by-Step
Uninstall and Reinstall Audio Drivers to Resolve Sound Problems

Reinstalling audio drivers on Windows 11 can help you troubleshoot sound problems on your PC such as the There might be a problem with your audio device error.
While a simple driver update often fixes these problems, you sometimes have to start from scratch. In this guide, we’ll show you how to uninstall and reinstall the audio driver on your Windows 11 and fix audio problems for good.
How to reinstall the audio drivers in Windows 11?
1. Via Device Manager
1. Press Windows + S to launch the Search menu.
2. Enter Device Manager in the text field at the top, and click on the relevant search result.
3. Double-click on the Sound, video and game controllers entry to view the devices under it.

4. Right-click on the audio device, and select Uninstall device from the context menu.

5. Tick the checkbox for Attempt to remove the driver for this device, and click on Uninstall.

6. After uninstalling the driver, restart the computer.
7. Windows will now look for the best available driver for the audio device and automatically install it.
The easiest and recommended method to reinstall your Windows 11 audio drivers is via Device Manager. Basically, you need to uninstall the existing drivers and then restart your PC.
As soon as your PC reboots, it will automatically install the latest driver for your device.
2. Via Control Panel
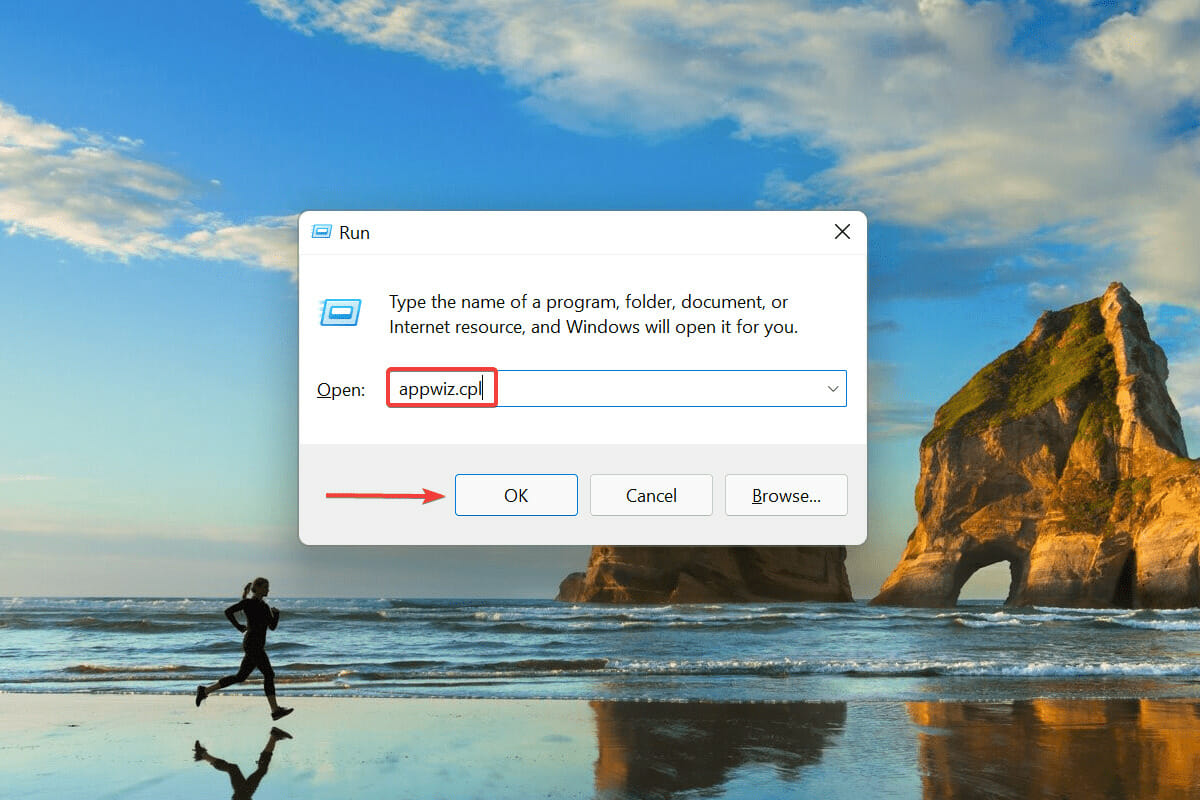
- Press Windows + R to launch the Run command.
- Enter appwiz.cpl in the text field, and either click on OK or hit Enter to launch the Programs and features window.
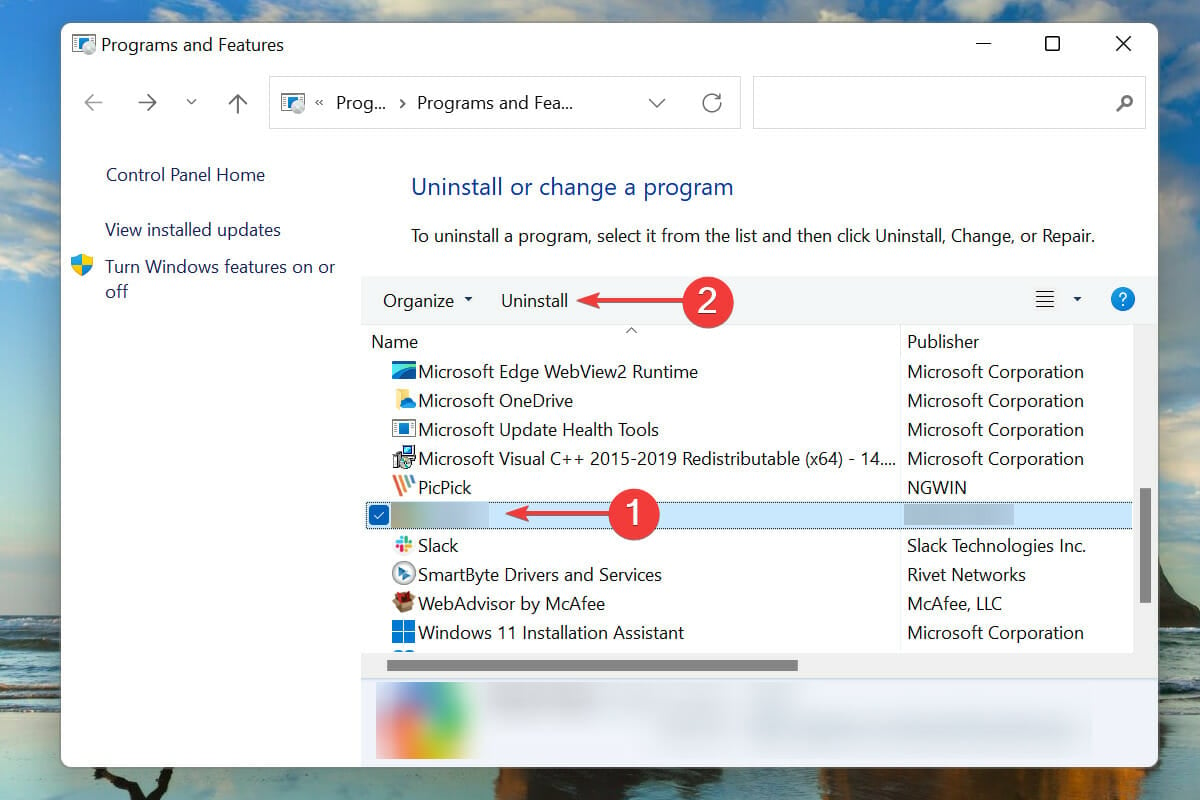
- Locate and select the audio driver, and click Uninstall at the top.

- Click Yes on the confirmation box if any pops up.
- Now, restart the computer, and Windows will automatically install the best available driver for the audio device.

Another way to reinstall the audio driver is first to remove it from the Programs and Features window and then restart the PC to let the OS automatically install it.
If you are using external audio interfaces, such as the Focusrite Scarlett Solo, reinstalling the driver directly from the manufacturer often works best. You can follow this step-by-step guide for the Scarlett Solo driver to make sure it installs correctly on Windows.
3. Use specialized software to reinstall audio drivers
You can always rely on a third-party utility if both methods sound too complex or time-consuming. Hence, we recommend using a dedicated tool that automatically scans for any available newer versions and updates the installed drivers.
⇒ Get PC HelpSoft Driver Updater
These are all the ways you can reinstall the audio driver in Windows 11. Both methods are equally simple, and it’s up to the users to choose one or use a dedicated third-party tool.
These methods will work on most drivers, including Realtek Audio driver and AMD Audio driver in Windows 11 devices.
You can manually install the drivers in Windows 11 if the automatic update doesn’t work. Before you go, you can also check our guides on AMD High Definition Audio Device driver and Intel High Definition Audio Driver.
Reinstalling the audio drivers can also fix the sttray64.exe Application error, so don’t hesitate to try it.
Lastly, in the comments section below, let us know which method to reinstall the audio driver. Again, we’re eager to hear from you.
Read our disclosure page to find out how can you help Windows Report sustain the editorial team. Read more


Improve this guide


User forum
1 messages