How to Remove Duplicate Drive Letters on Windows 11
Use the Registry Editor for quick removal
Key notes
- Drive letters are often duplicated in Windows 11, and it's usually due to misconfiguration or a bug in the OS.
- Read this guide to find out how to get rid of duplicate drive letters in Windows 11!
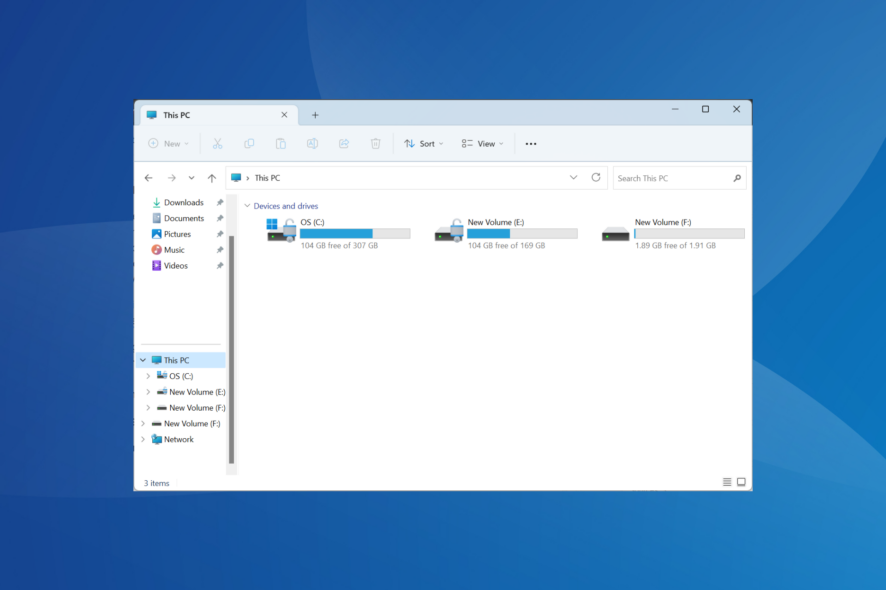
While Windows 11 remains a major upgrade over the previous iteration, some of the issues seem not to have been polished by Microsoft. A common problem is duplicate drive letters in Windows 11, i.e., the same drive is listed twice, and you need to remove the excess entries.
For instance, it will be listed under This PC and then again as a removable drive in the navigation pane. While this doesn’t translate to increased storage space consumption, this will certainly clutter Windows Explorer.
Why is my drive showing up twice in Windows 11?
Windows, by default, shows external drives twice in the navigation pane. That’s how it is developed. But conflicting drive letters or corrupt system files can also trigger the problem for some.
When faced with the issue, we will start by deleting the underlying Registry files and then looking for other issues to remove duplicate drives in File Explorer.
How do I delete duplicate drives in Windows 11?
1. Modify the Registry Editor
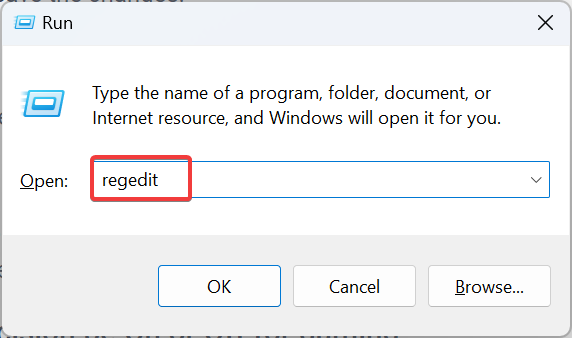
- Press Windows + R to open Run, type regedit in the text field, and click OK.
- Click Yes in the UAC prompt.
- Paste the following path in the address bar and hit Enter:
HKEY_LOCAL_MACHINE\SOFTWARE\Microsoft\Windows\CurrentVersion\Explorer\Desktop\NameSpace\DelegateFolders - Locate the {F5FB2C77-0E2F-4A16-A381-3E560C68BC83} key in the navigation pane, right-click on it, and select Delete.
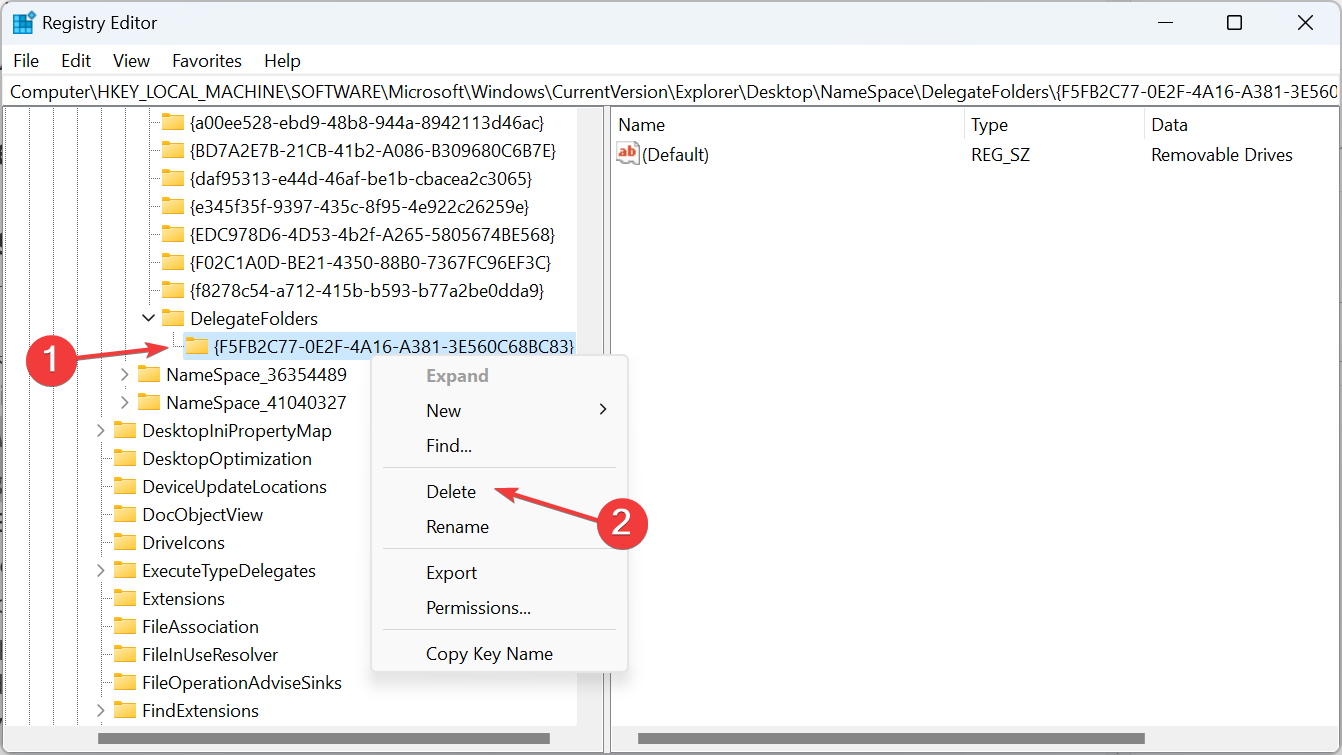
- Click Yes in the confirmation box.
- Restart the computer and check whether File Explorer now shows only one entry for the external drive. If not, and you are running a 64-bit architecture, go to the following path:
Computer\HKEY_LOCAL_MACHINE\SOFTWARE\WOW6432Node\Microsoft\Windows\CurrentVersion\Explorer\Desktop\NameSpace\DelegateFolders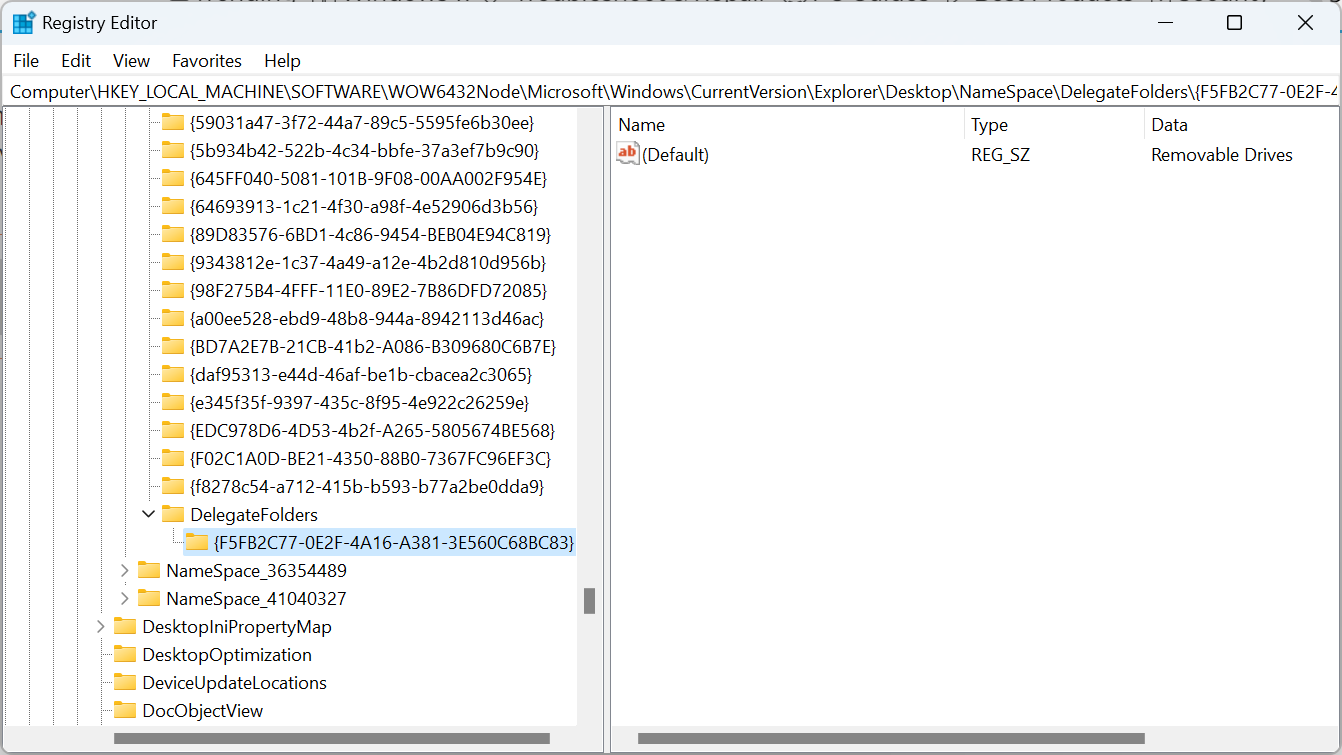
- Finally, delete the {F5FB2C77-0E2F-4A16-A381-3E560C68BC83} key here as well and restart the computer to remove duplicate drives in File Explorer.
Deleting the REG files is one of the best solutions when you find duplicate drive icons in Windows 11. But remember, the Registry Editor is a complex tool. Do not make any other changes, and it’s better that you create a restore point beforehand.
2. Change the drive letter
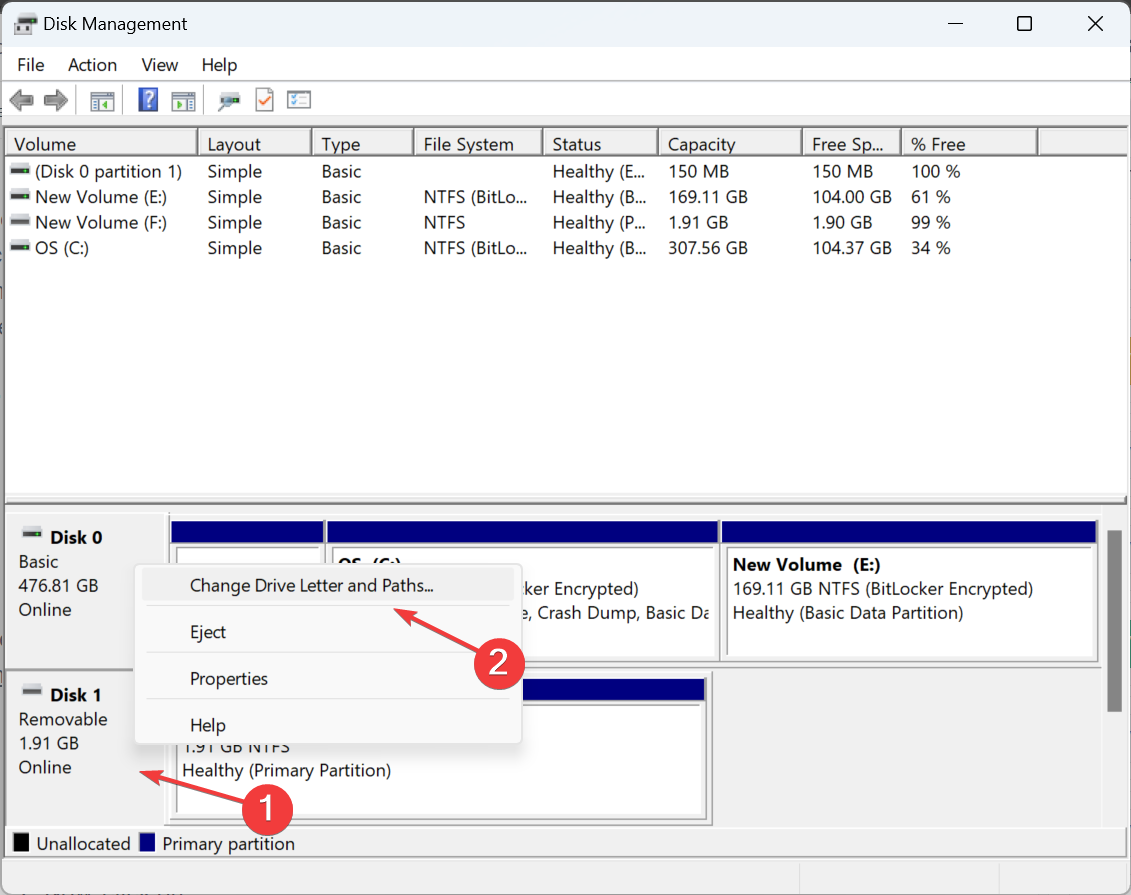
- Press Windows + S to open the Search menu, type Disk Management in the text field, and click on Create and format hard disk partitions.
- Now, right-click the affected drive and select Change Drive Letter and Paths.
- Click the Change button.
- Select the Assign the following drive letter option, choose one from the dropdown menu, and click OK to save the changes.
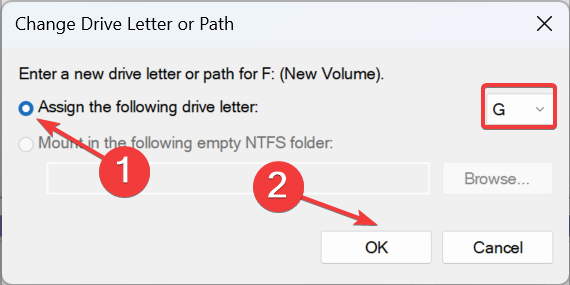
- Click Yes in the confirmation dialog box.
3. Restore File Explorer defaults
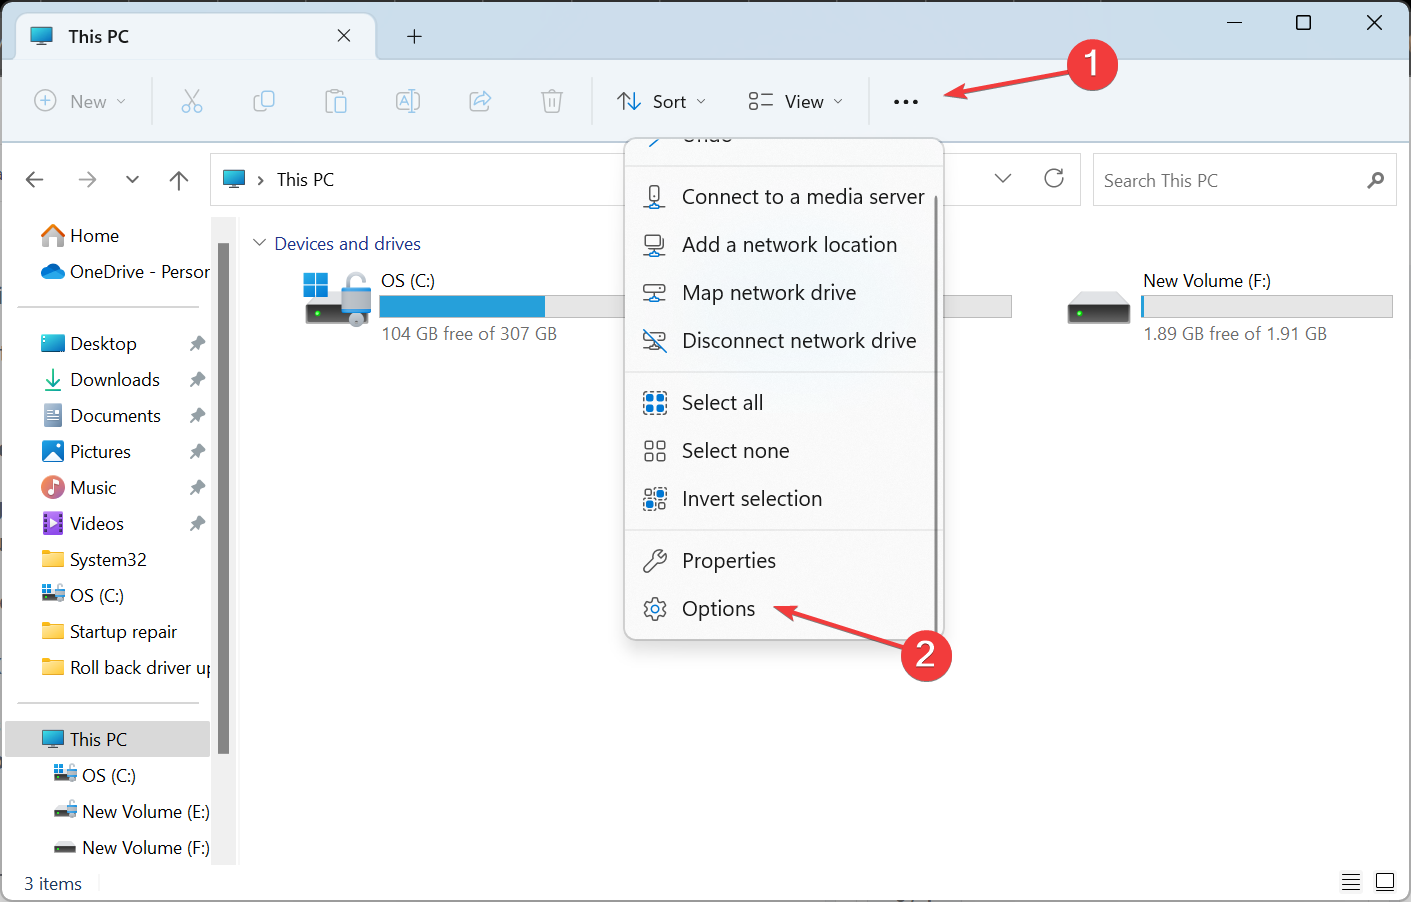
- Press Windows + E to open File Explorer, click the ellipsis near the top right, and select Options from the flyout menu.
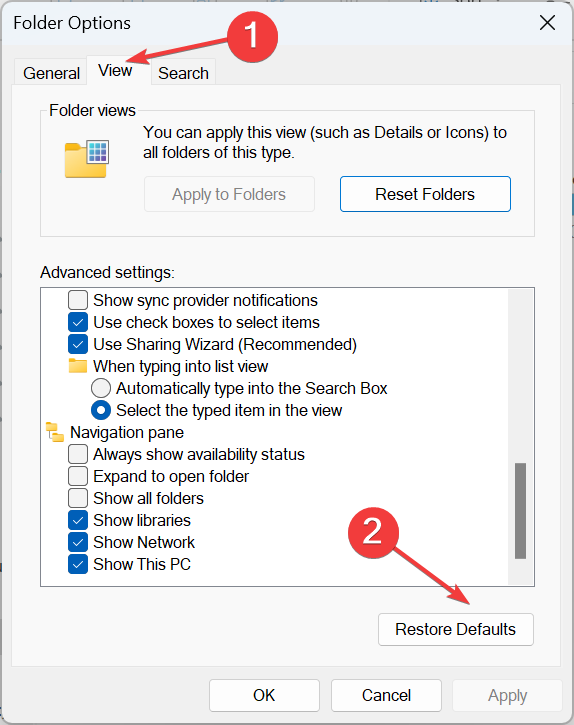
- Go to the View tab, and click the Restore Defaults button.
- Once done, the USB flash drive shouldn’t appear as a separate entry in File Explorer.
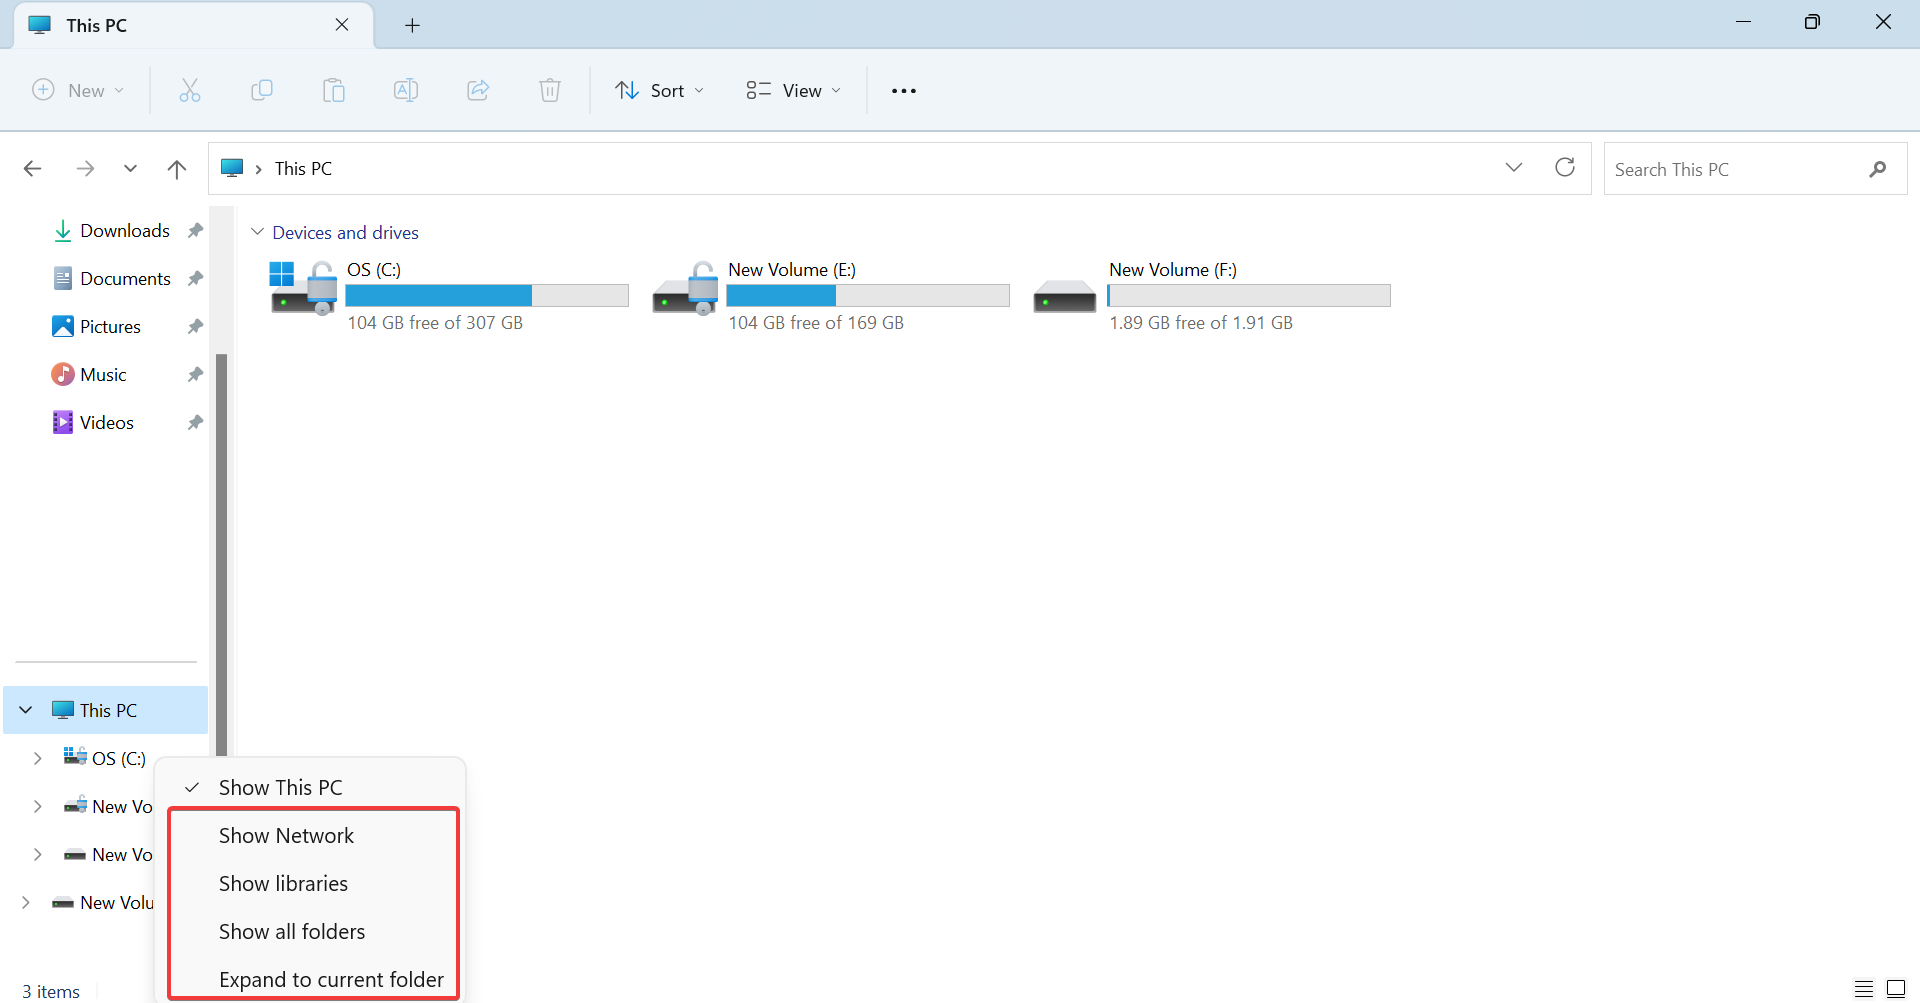
4. Customize the File Explorer’s navigation pane
- Press Windows + E to open the File Explorer.
- Right-click in the navigation pane on the left, and uncheck all the entries except Show this PC. This includes Show Network, Show libraries, Show all folders, and Expand to current folder.
Remember, this is a workaround to unclutter the left pane to some extent and make File Explorer run faster. It won’t have a direct bearing on duplicate drives unless you uncheck Show This PC, but then the internal drives won’t appear in the navigation pane.
You now know why your external drive shows up twice in Windows 11 and how to remove duplicate drives in no time! And while we were focused on drives until now, duplicate files, too, pose a major problem, and these end up consuming more storage space.
An understanding of data deduplication in Windows 11 will help you clear unnecessary files and clutter from the PC.
Besides, remember that it’s just as easy to delete duplicate files in Windows 10. There are both built-in features to find unwanted files and the option to use a third-party file finder tool.
For any queries or to share what worked for you, drop a comment below.
Read our disclosure page to find out how can you help Windows Report sustain the editorial team. Read more


Improve this guide


User forum
0 messages