Find and Delete Duplicate Files in Windows 11 [3 Easy Steps]
Clean up unnecessary files from your device to boost its performance
4 min. read
Updated on
Read our disclosure page to find out how can you help Windows Report sustain the editorial team. Read more
Key notes
- Removing duplicate files clears storage space and boosts the system's performance in Windows 11.
- To do so, you can use File Explorer, execute a few commands in Command Prompt, or use reliable third-party software.
- Also, find out how to delete temporary files in Windows 11 since these also take up considerable space.
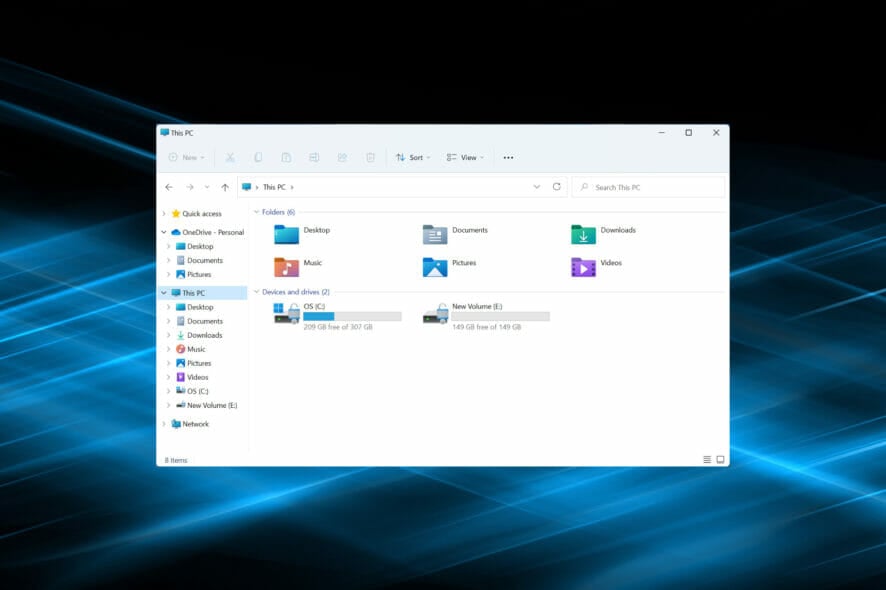
Is your system becoming slow due to low storage? That’s a problem we all face at some point, but everyone has a different approach. While many go around uninstalling applications, it’s recommended that you first remove duplicate files in Windows 11.
No matter how careful you are while arranging the various files on your PC, there’s always a chance that some of these could be duplicated inadvertently. And if these are scattered across folders and drives, the process is even more difficult.
You can also check how to remove duplicate files in Windows 10.
Is there a way to search for duplicate files in Windows?
Before removing duplicate files in Windows 11, you must know how to find them. There are a few ways you can go about this, and here are our top methods:
- Third-party tools – In this domain, you will find more than enough; you, however, must be careful to use only trusted third-party duplicate finder apps.
- Sort function – This works when you are using File Explorer. You can search by Name, Size, and other parameters.
- File Explorer’s view – This may not be the sleekest way to do this globally, but it is efficient, especially while searching through a folder.
If you encounter problems with the File Explorer, the first method would be your preferred option.
Let us explore better ways to find and eliminate these duplicates on Windows 11.
How do I find duplicate files on Windows 11?
1. Via File Explorer
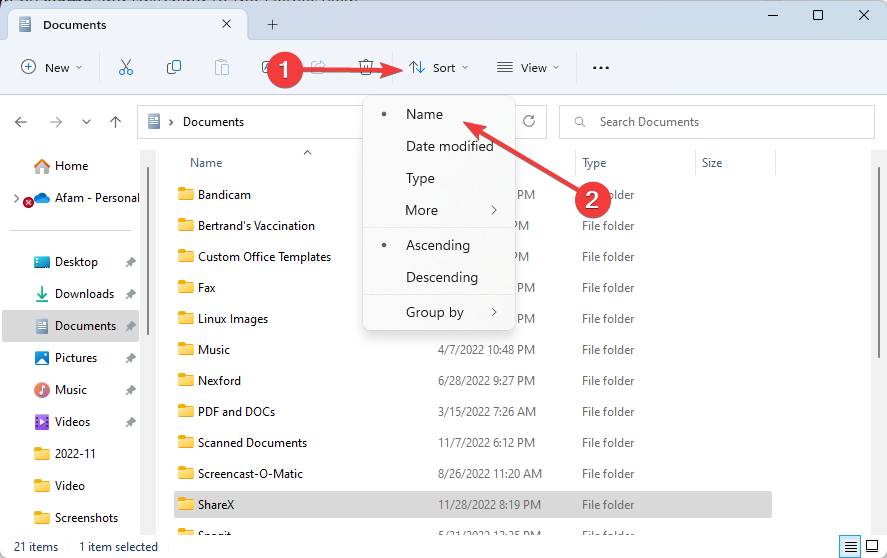
- Click on the Sort menu and select Name.
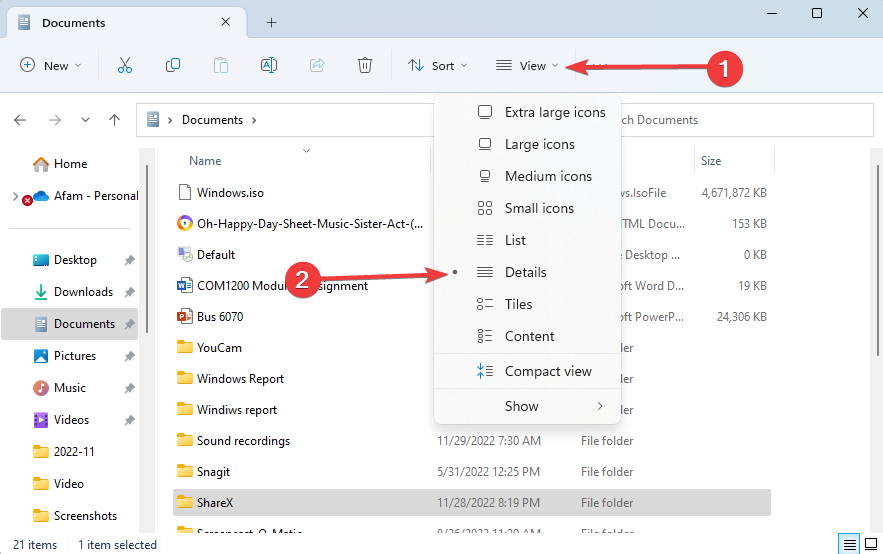
- Click on View and select Details.
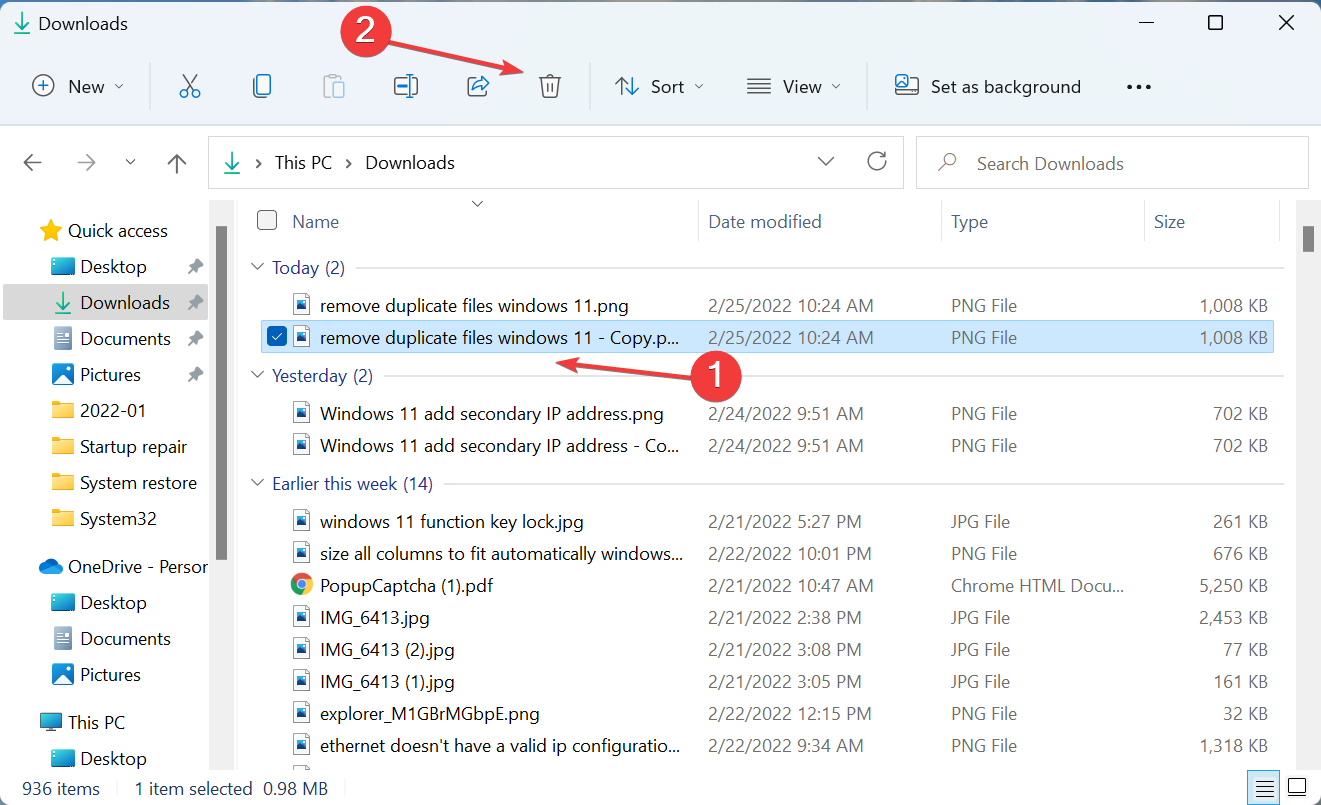
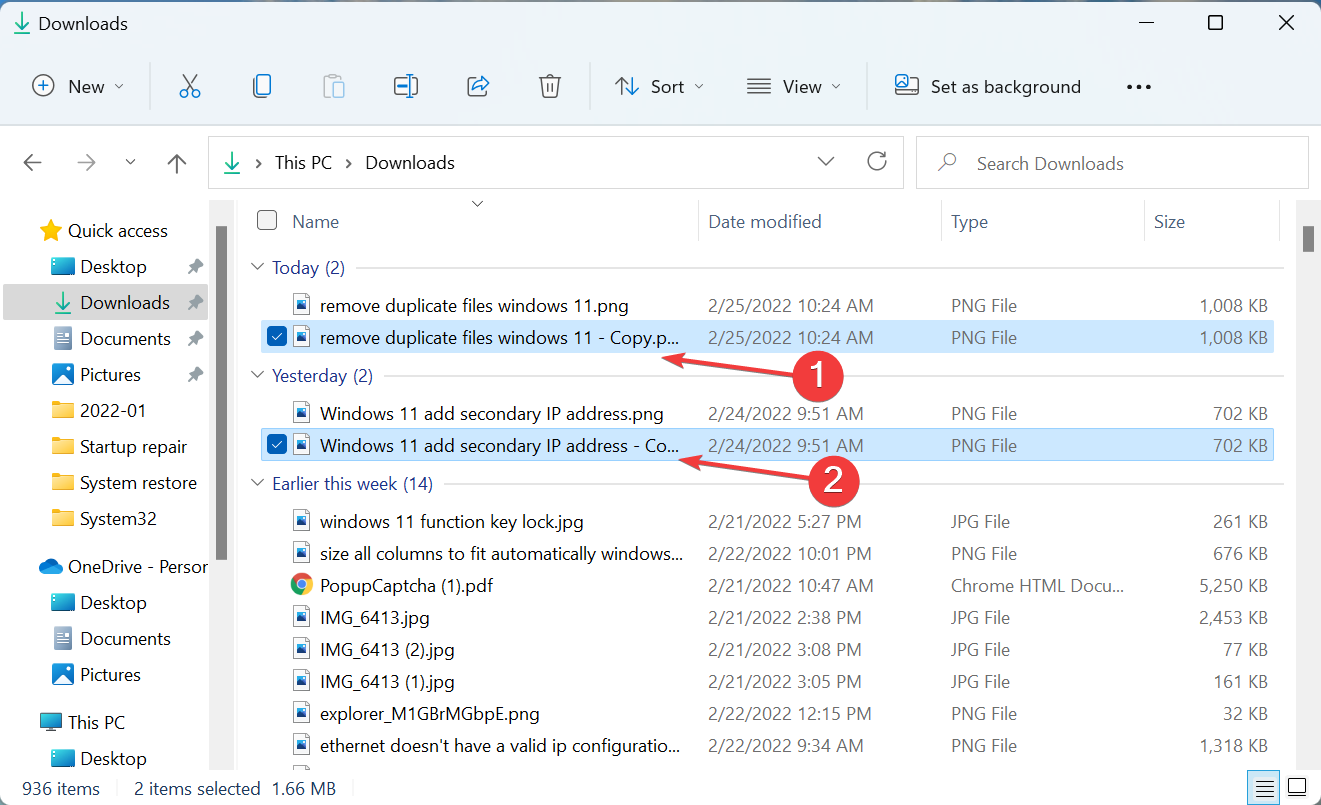
- Select the duplicates individually, and then either click on the Delete icon in the Command Bar or hit the Del key.
- A more straightforward way to delete many in one go would be to press and hold the Ctrl key, select all the files to be deleted, and then hit the Del key.
- Click Yes in case the confirmation box pops up in either case.
This is probably the simplest way to remove duplicate files in Windows 11, but it’s monotonous. Navigating to each folder, sorting the files, finding the duplicate ones, and then removing them might not be something you’re able to do.
But it’s also safer since you don’t delete any critical files. Unfortunately, there have been cases where people used a third-party software solution, and it ended up deleting some important files.
2. Use Command Prompt
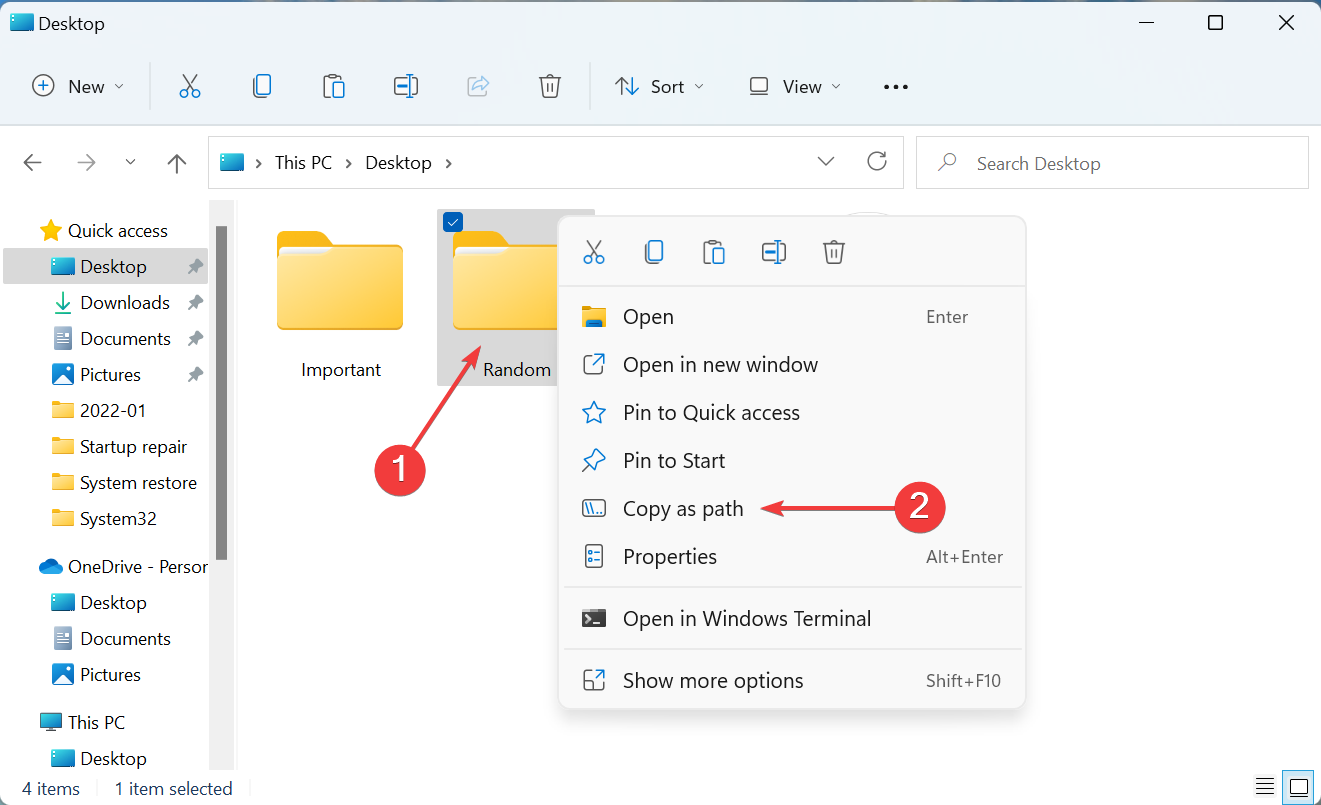
1. Locate the folder where the duplicate files to be removed are stored, right-click on it, and select Copy as path from the context menu.
2. Once you have the path to the folder, press Windows + S to launch the Search menu.
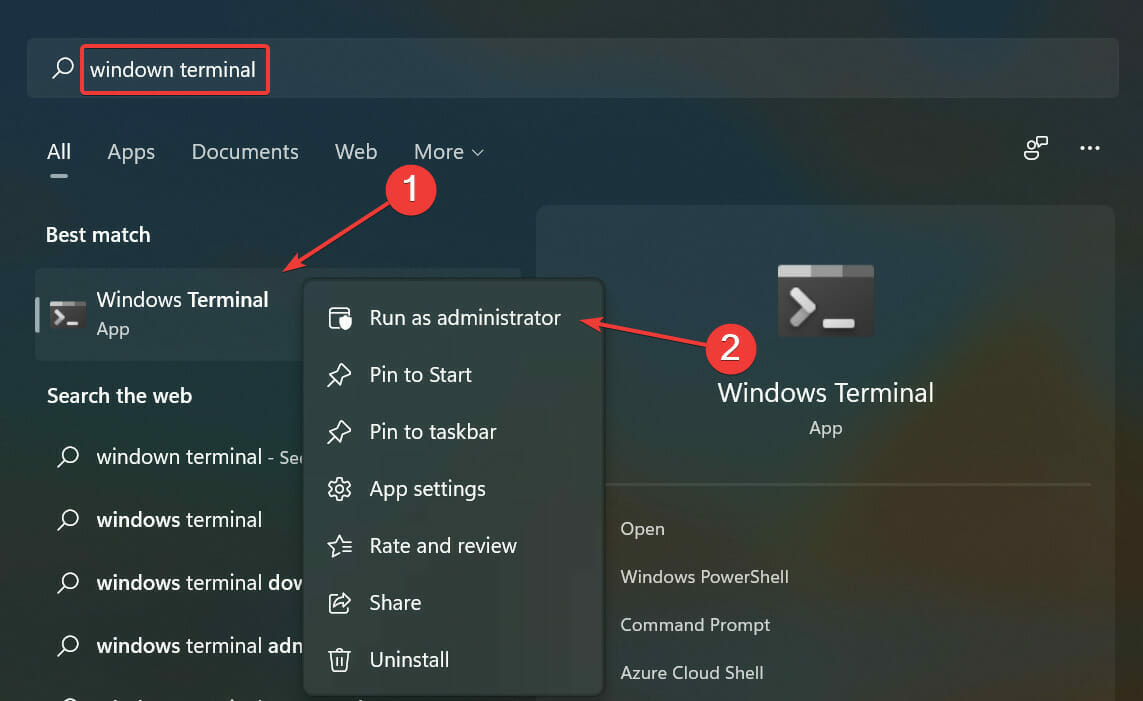
3. Enter Windows Terminal in the text field at the top.
4. Right-click on the relevant search result, and select Run as administrator from the context menu.
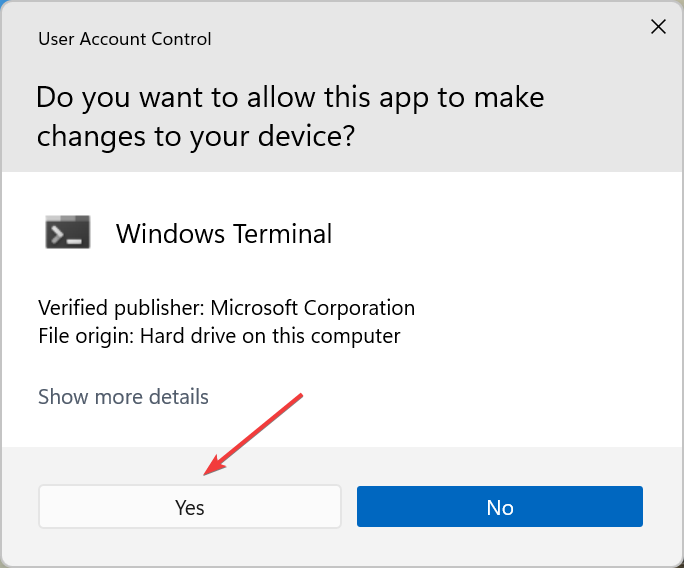
5. Click Yes on the UAC (User Account Control) prompt that pops up.
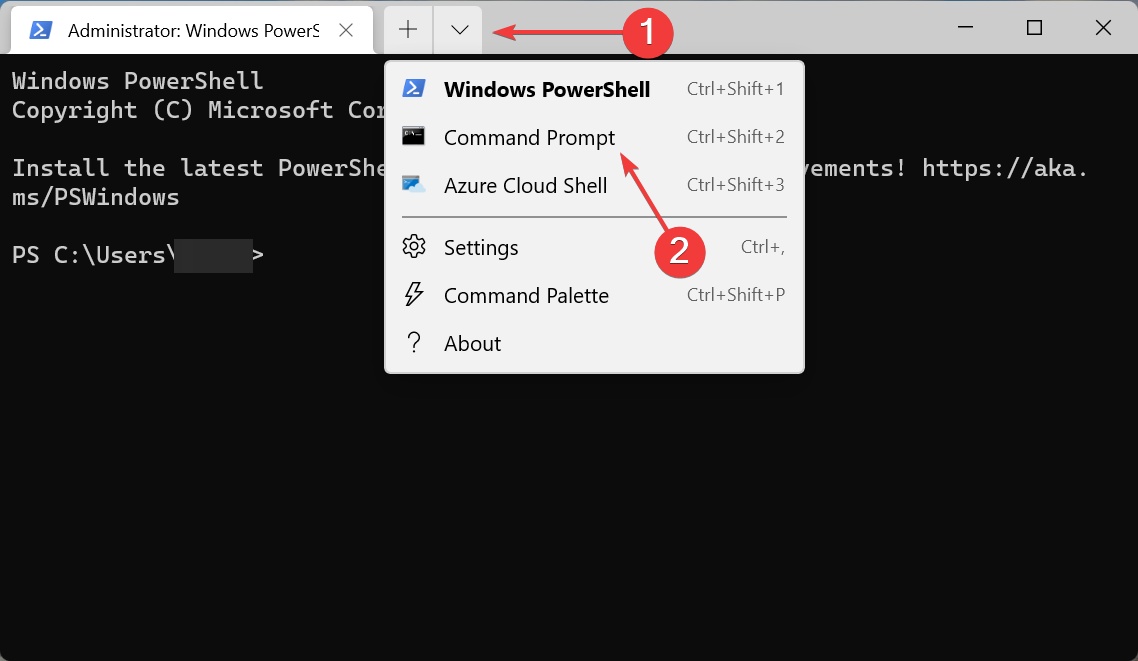
6. Now, click on the downward-facing arrow at the top, and select Command Prompt from the list of options. Alternatively, you can hit Ctrl + Shift + 2 to launch Command Prompt in a new tab.
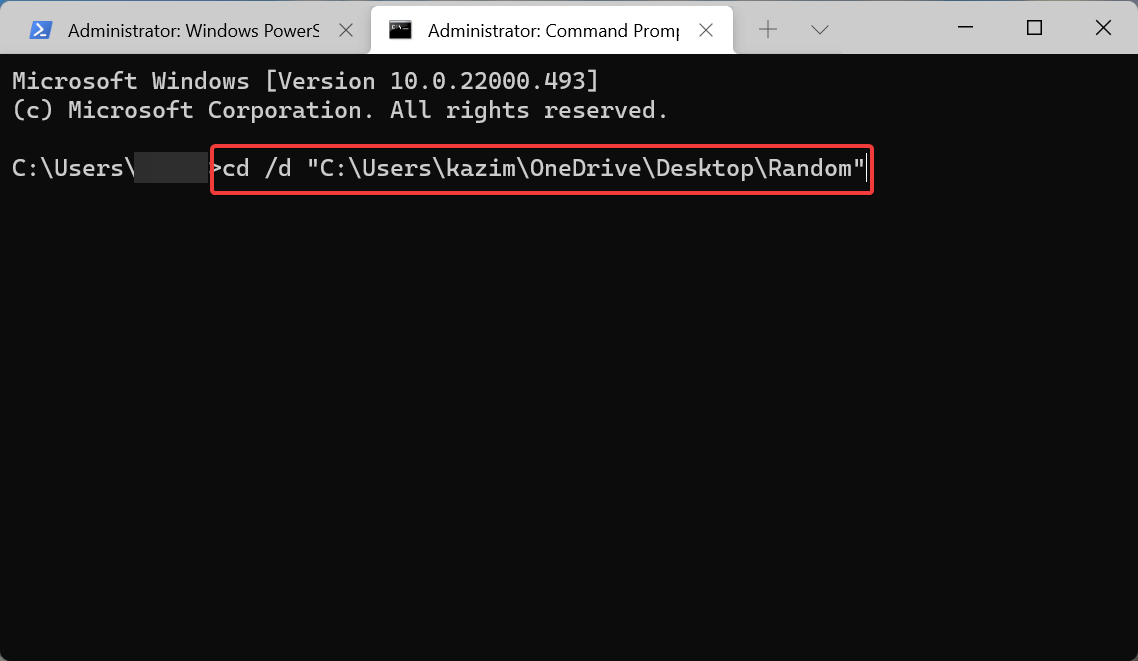
7. Type/paste the following command while replacing the folder path with the actual one that you copied earlier, and hit Enter:
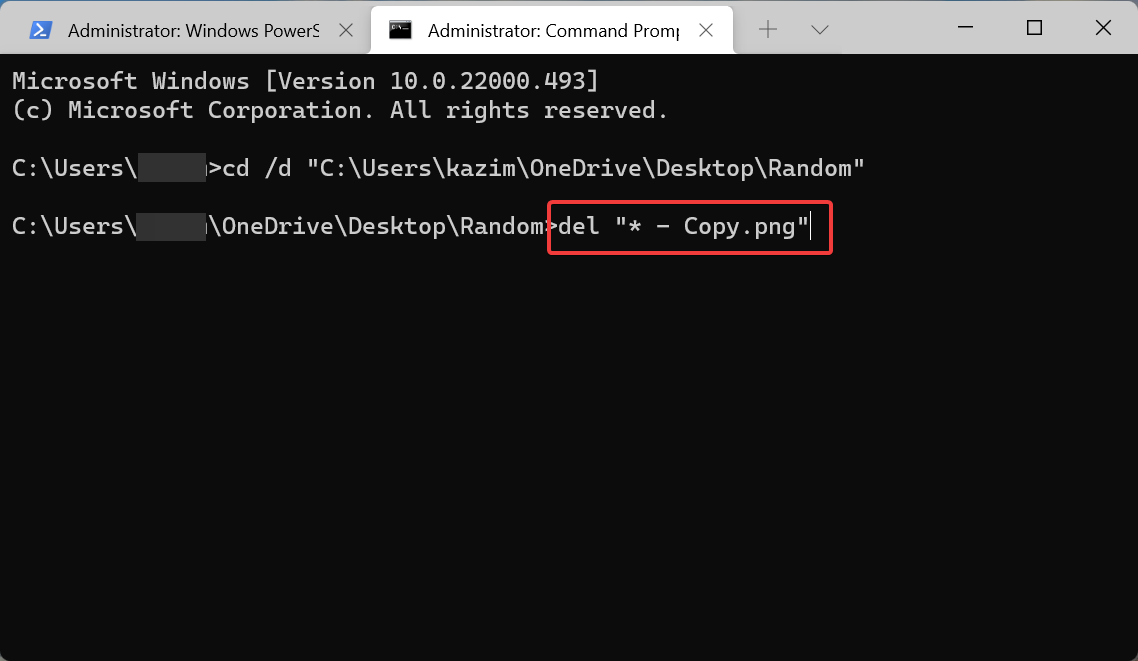
cd /d "folder path"8. Execute the following command while replacing the name and extension here for the files to be deleted:
del "* - Copy.png"For instance, if you want to delete .txt files with the suffix 1, the command becomes as follows:
del "* - 1.txt"
In case you are comfortable using commands to execute tasks, you can use a command line tool to automatically delete a large chunk of duplicate files in one go.
The recommended tool to use is Command Prompt, but this method works with Powershell as well. Through commands, you can modify your PC’s files and sort out the duplicates.
That’s it! The duplicate files under the command will now be removed in Windows 11. It’s simple and quick, but there’s even a more straightforward and faster method, i.e., using reliable third-party software.
3. Use a reliable third-party software
If you do a Google search, it will list a plethora of third-party software. And most of these will claim to be the best in removing duplicate files in Windows 11.
But not all are effective. On the contrary, some could even remove critical files and prevent the OS from booting. So it would be best if you chose reliable third-party software.
We recommend using Easy Duplicate Finder, a dedicated tool that scans for all duplicate files on the computer and allows you to remove them with a single click.
It’s simple to run and one of the quickest. Also, it can find duplicates amongst different file types, be it images, videos, audio clips, and many more. It can find duplicate files on the computer, Google Drive, iTunes, Windows Media, and other platforms.
You now know how to find and remove duplicate files in Windows 11. With a proper understanding of the various ways, you can easily choose the one that best suits your requirements and is the most efficient. And do not forget to remove the duplicate drives as well.
Besides, check the best tools to find and remove duplicate files in Windows 10. This should work in case you have another PC running the previous OS.
Our readers also had problems with removing email duplicates in Outlook, but the highlighted guide will provide help for that.
Tell us which method worked best or if you choose a third-party app to remove duplicate files in the comments section below.



User forum
0 messages