FIX: Rstrui.exe errors in Windows 10/11, 7
8 min. read
Updated on
Read our disclosure page to find out how can you help Windows Report sustain the editorial team. Read more
Key notes
- Rstrui.exe from Windows 10 is connected to System Restore, so if it’s not working you won’t be able to restore your system.
- The Rstrui.exe application error can be triggered by file corruption or drivers problems.
- One way to fix this issue is to use the file fixing apps embedded in Windows 10.
- Running a dedicated software to solve the problem automatically is another good solution.

Rstrui.exe is a Windows 10 file responsible for System Restore and is located in a subfolder of C:WindowsSystem32.
In other words, the rstrui.exe file is an essential part of Windows 10, allowing users to revert their computer’s state to that of a previous point in time.
This feature enables the OS to recover from system malfunctions or other problems.
When you recover system files, applications, the Windows Registry, and other system settings, your system can perform these actions thanks to the rstrui.exe file.
Unfortunately, sometimes Rstrui.exe is not working due to a series of errors.
Rstrui.exe is closely related to the System Restore feature, and if you’re having problems with rstrui.exe, you won’t be able to perform System Restore anymore.
This can be a big problem, and speaking of issues, here are some common problems reported by users:
- Rstrui.exe no restore points – This issue can occur due to your settings. To fix the problem, be sure to check System Restore settings and make sure that the feature is enabled.
- Rstrui.exe not working, won’t run, not recognized – Sometimes file corruption can cause this problem to occur. To fix the issue, perform both SFC and DISM scans.
- Rstrui.exe error Windows 7, 8.1, 10 – This issue can appear on any version of Windows, and even if you don’t use Windows 10, you should be able to apply most of our solutions to your PC.
- Rstrui.exe application error – In some rare cases, this problem can occur due to malware infection, so if you want to ensure that your PC is safe and free from malware, be sure to perform a detailed scan.
- Rstrui.exe missing – This problem can sometimes be caused by certain bugs on your system. However, you should be able to fix the problem by installing the latest updates.
- Rstrui.exe entry point not found – In some cases, this issue can occur due to problems with your registry. Simply clean your registry and check if that solves the problem.
- Rstrui.exe access denied – Your user account can sometimes cause this issue to appear. To fix the problem, create a new user account and check if that helps.
How can I fix Rstrui.exe problems in Windows 10?
1. Use the SFC and DISM tools to repair the system files
1.1 Run the SFC scan
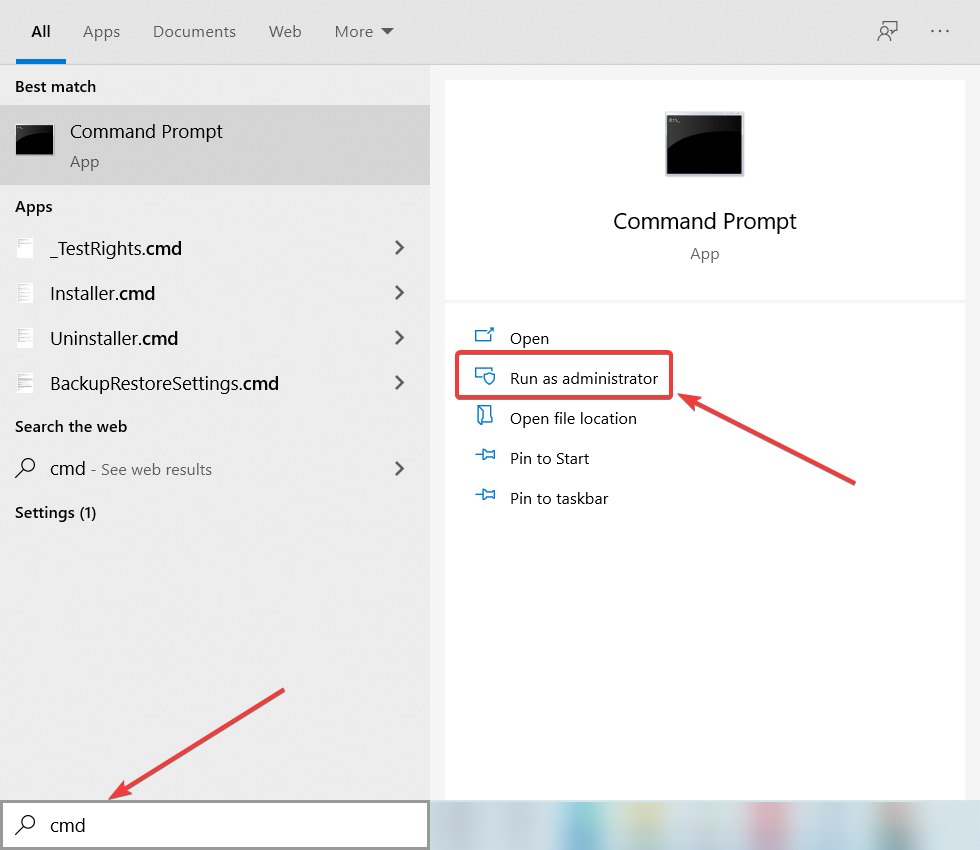
- Press Windows key + S, type cmd and click on Run as administrator to start Command Prompt as administrator.
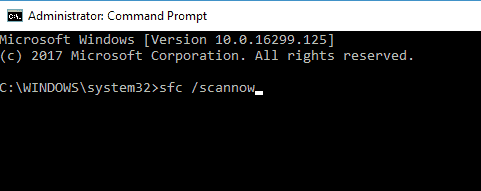
- When Command Prompt starts, enter sfc /scannow and press Enter.
- SFC scan will now start. Keep in mind that this scan can take about 10 minutes, so don’t interrupt it.
Once the scan is finished, check if the problem is still there. If the issue is still present, or if you can’t run the System File Checker scan at all, you’ll need to use the DISM scan instead.
1.2 Run the DISM scan
- Start Command Prompt as an administrator as shown in the previous solution.
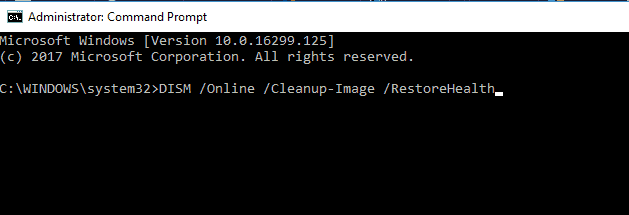
- Now enter the following command and press Enter:
DISM /Online /Cleanup-Image /RestoreHealth - The scan can take about 10-20 minutes, so don’t interrupt it.
Once the DISM scan is finished, the problem should be resolved. If the issue is still there or if you couldn’t run an SFC scan before, try to run it again and check if that solves the problem.
If you’re having problems with rstrui.exe on your PC, the problem might be caused by corrupted system files. This can be a big problem, but you can easily fix it by running an SFC scan. To do that, you just need to follow the steps above.
2. Scan your computer for malware
Sometimes issues with rstrui.exe can occur due to malware infections, and in order to fix the problem, you need to check your PC for malware.
Windows 10 already has a decent built-in antivirus tool called Windows Defender, but sometimes you might need to use a different tool to deal with malware.
Even though Windows Defender provides solid protection, it doesn’t have certain advanced features. If you want an antivirus tool that provides maximum security, we strongly suggest that you consider the antivirus below.
Once you scan your system and remove all malware, check if the problem is still there.
3. Update your Windows
- Open the Settings app. You can do that instantly by pressing Windows Key + I.
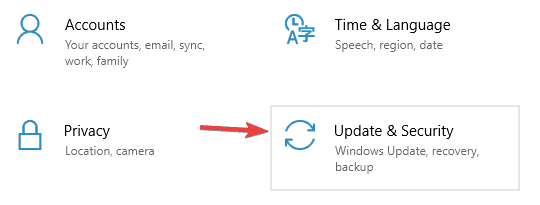
- Now navigate to Update & Security section.
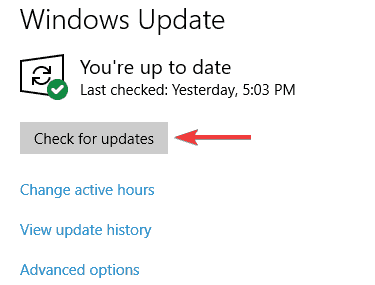
- Click Check for updates button.
In some cases, the problem with rstrui.exe can be caused by your system. Your operating system might suffer from certain glitches, and that can cause problems to occur.
Microsoft is constantly fixing problems using Windows updates, so if you’re having any problems, be sure to download the latest updates.
Windows 10 downloads the missing updates automatically in the background, but you can always check for updates manually by following the previous steps.
If any updates are available, they will be downloaded automatically in the background and installed as soon as your PC restarts. Once your PC is up to date, check if the problem is still there.
4. Repair the Windows Registry
In some cases, the problem might occur due to issues with your registry. A corrupted registry entry might cause issues with rstrui.exe, and to fix the problem, you need to find and remove the problematic entries.
Doing this manually can be a big problem, so it’s better to use registry cleaner software. After you clean your registry, the problem should be completely resolved and everything will start working again.
5. Clean install Windows 10
If none of the above solutions helped you, you may need to perform a clean installation of Windows. Reinstalling Windows will delete everything from your hard drive and will remove all the junk accumulated.
In order to avoid data loss, don’t forget to back up all of your important documents before performing the clean installation.
For more information about the steps to follow in the process, check out our article on how to clean install Windows 10.
6. Update your drivers
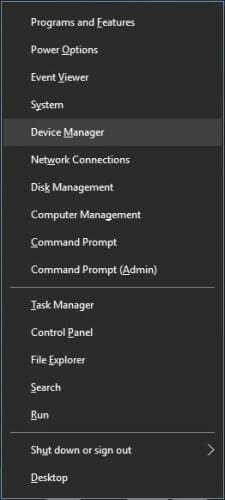
- Right-click the Start button and select Device Manager from the list.
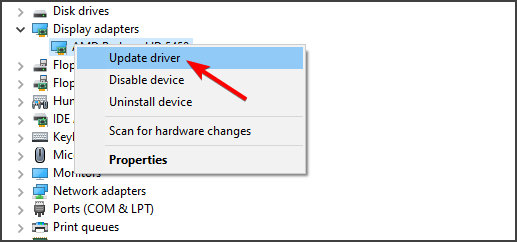
- Click on the component you want to update the driver for to expand it.
- Now right click on the component (in our example the graphics adapter) and select Update driver.
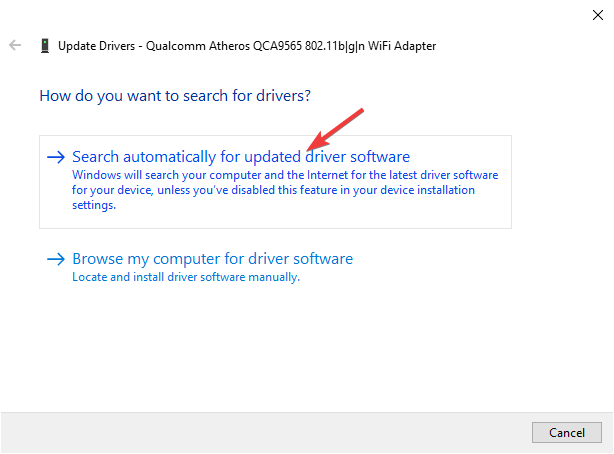
- Select Search automatically for drivers.
- The system will search and install the correct driver for your component.
- You need to do the same for all components and restart the system after each one.
As you can see, you can update your drivers manually, but that can be a tedious and time-consuming task.
There’s a far easier alternative, to use specialized software that will download and repair the drivers for you automatically.
The tool recommended below will repair all the outdated drivers on your system and will make sure you always get the newest ones, without any effort from your side.
7. Create a new user account
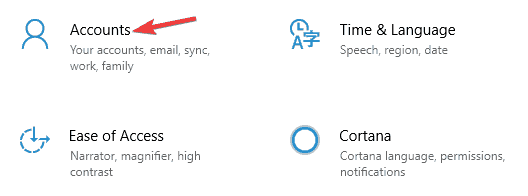
- Open the Settings app and go to the Accounts section.
- In the left pane, select Family & other people. Now choose Add someone else to this PC.
- Choose I don’t have this person’s sign-in information.
- Select Add a user without a Microsoft account.
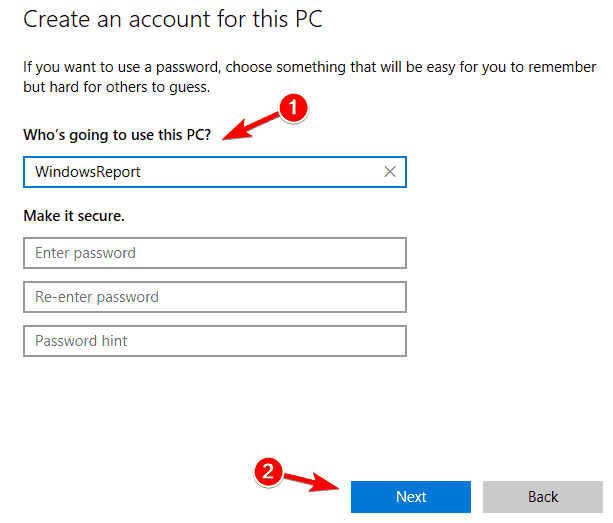
- Enter the desired username and click Next.
If you’re having problems with rstrui.exe, the issue might be your user account. Your account can get corrupted, and that can lead to this and many other errors.
To fix the problem, the simplest way would be to create a new user account. This is quite simple to do, and you can do it by following the steps above
After creating a new user account, switch to it and check if the problem is still there. If not, you might have to move all your personal files from the old account to your new one and start using it instead of your old one.
8. Try using Safe Mode
- Open the Settings app and go to System & Security section.
- Go to Recovery tab and in the Advanced startup section choose Restart now.
- List of options will now appear. Choose Troubleshoot > Advanced options > Startup Settings. Now click the Restart button.
- Once your PC restarts, you’ll be presented with a list of options. Select any version of Safe Mode by pressing the corresponding key.
According to users, sometimes you can fix the problems with rstrui.exe simply by using Safe Mode. Users reported that the System Restore feature didn’t work for them, but they were able to use it from Safe Mode.
In case you’re not familiar, Safe Mode is a segment of Windows 10 that runs with default drivers and settings, which makes it perfect for troubleshooting. To access Safe Mode, you need to perform the previous steps.
Once you enter Safe Mode, try to perform System Restore again and check if the problem is resolved.
If you’ve found other workarounds to fix rstrui.exe errors, you can help the community by listing your fix in the comment section below.





User forum
0 messages