What is SDXHelper.exe and How to Disable It
Reinstall the Office app to fix the issue
![]() 3 min. read
3 min. read
![]() Updated on
Updated on
Share this article

Improve this guide
Read our disclosure page to find out how can you help Windows Report sustain the editorial team Read more
SDXHelper.exe is a process that runs in the background of Windows operating systems, specifically Windows 10. It is a system component that helps to manage and install updates for Windows, Microsoft Store apps, and other related components.
While this process is essential for maintaining the health and security of your PC, it can sometimes consume high CPU and memory usage, slowing down your system’s performance.
How can I disable SDXHelper.exe?
1. Disable the associated task
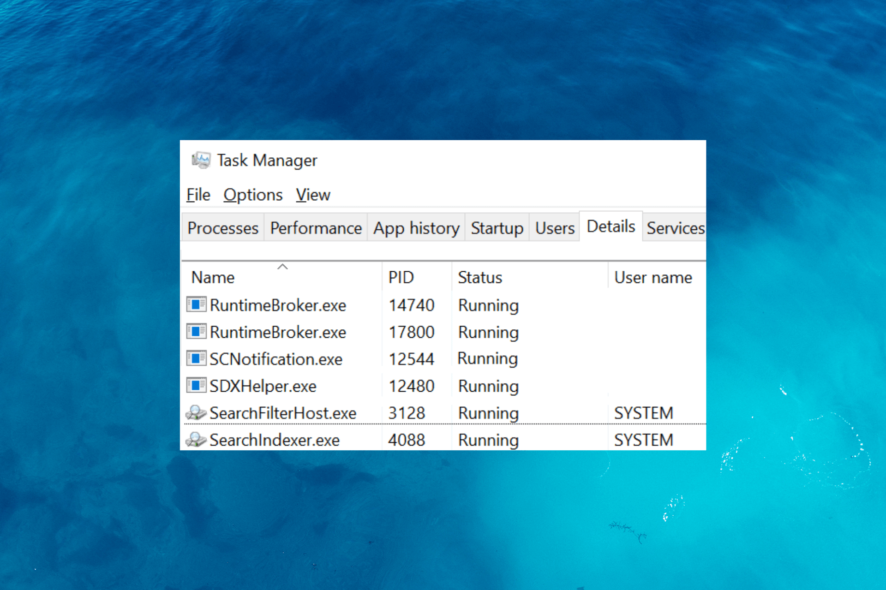
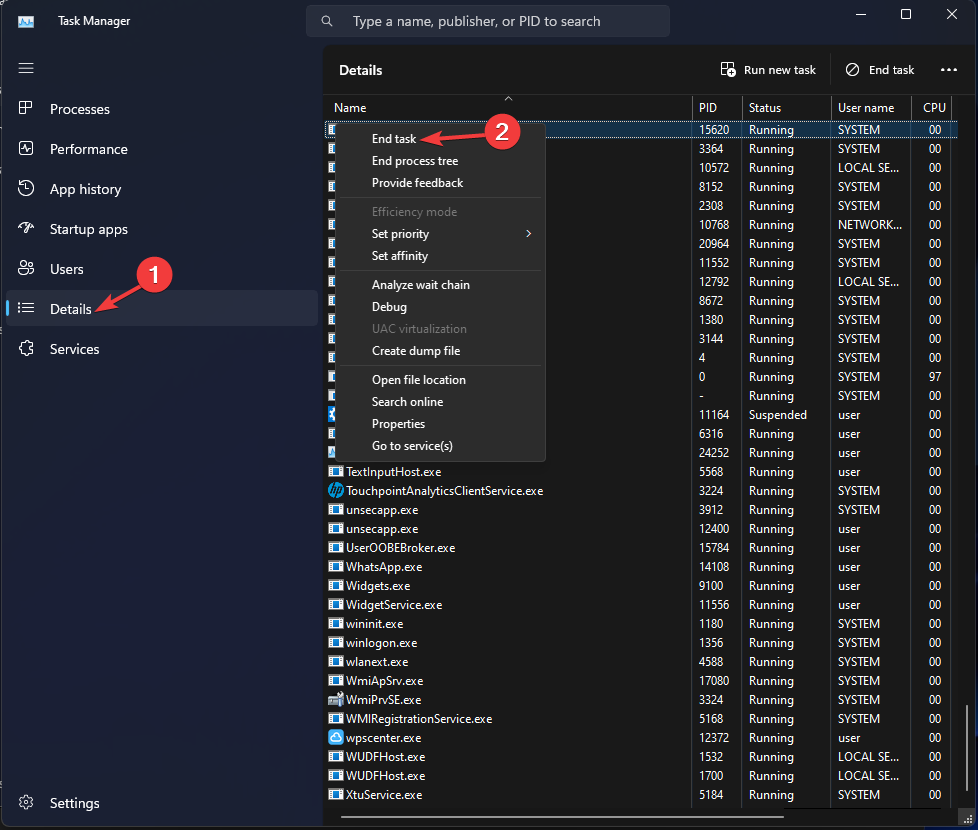
- Press Ctrl + Shift + Esc to open the Task Manager app.

- Go to Details & right-click the SDXHelper.exe, then select End task.
2. Disable the MS Office feature updates
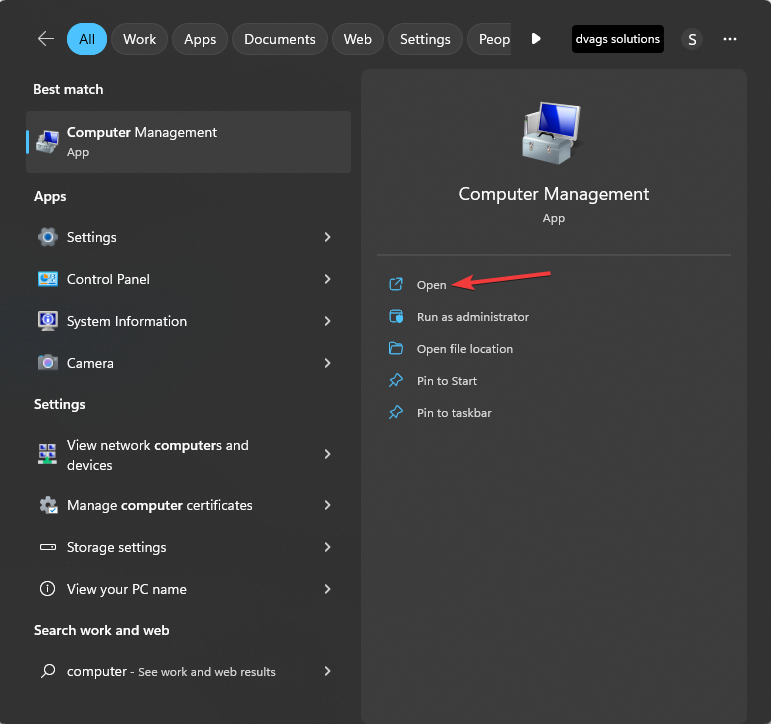
- Press the Windows key, type computer management, and click Open.

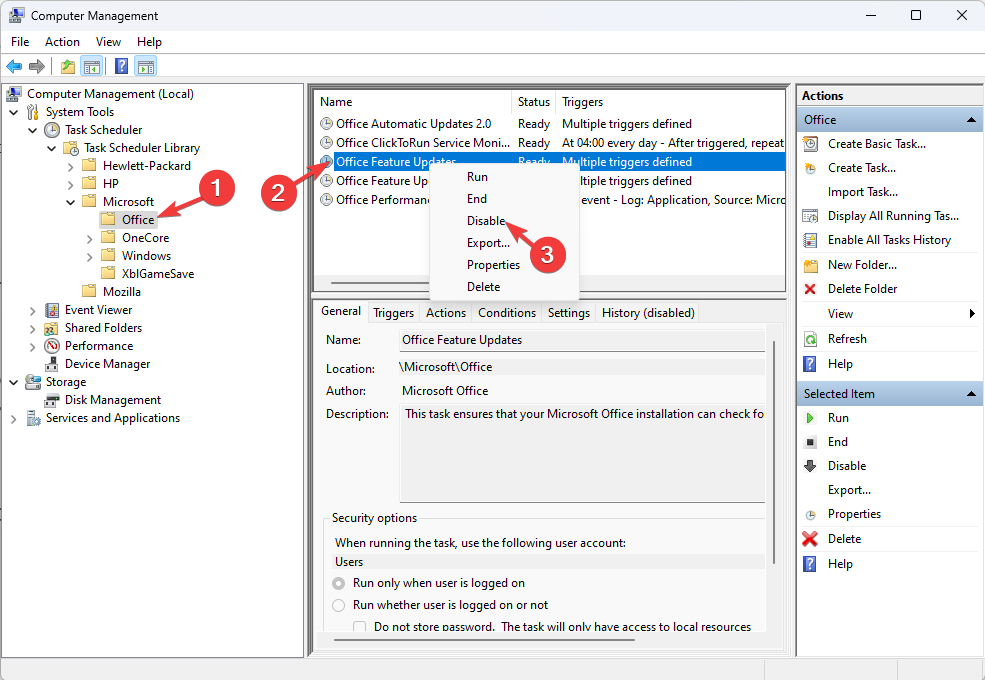
- On the Computer Management window, click the arrow next to the Task Scheduler.
- Then, click the arrow for Task Scheduler Library.
- Click Microsoft, then select Office.
- Right-click Office Feature Updates, and select Disable.

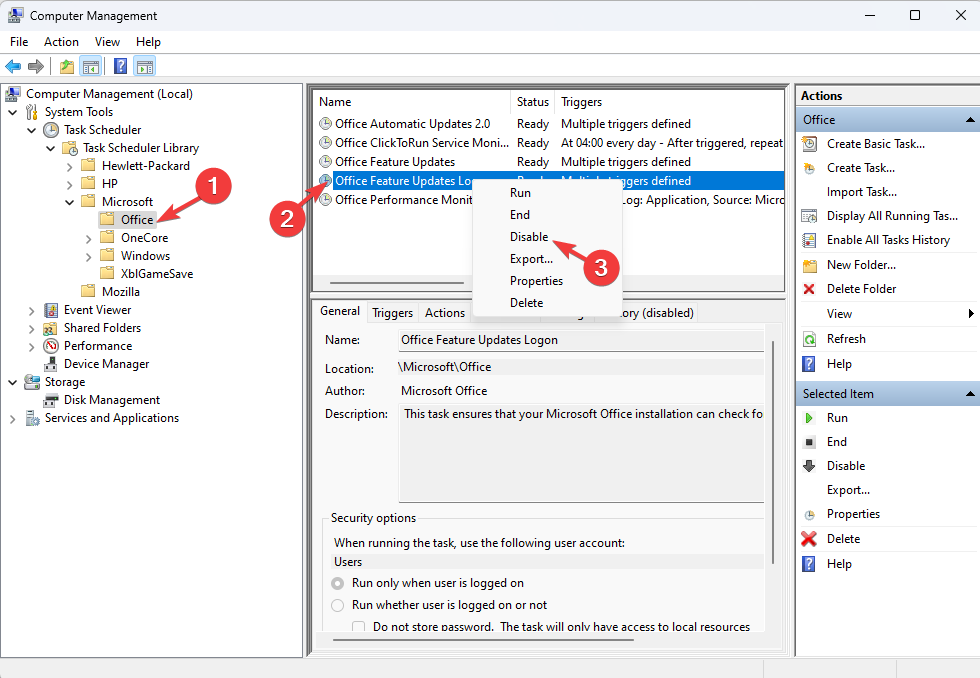
- Now right-click Office Feature Updates Logon and choose Disable.

3. Repair/Reinstall the Office app
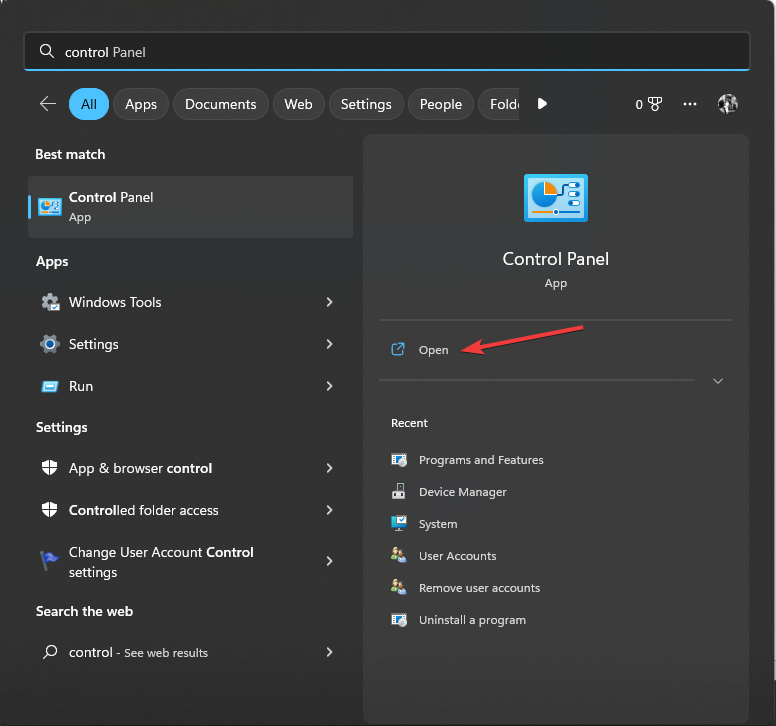
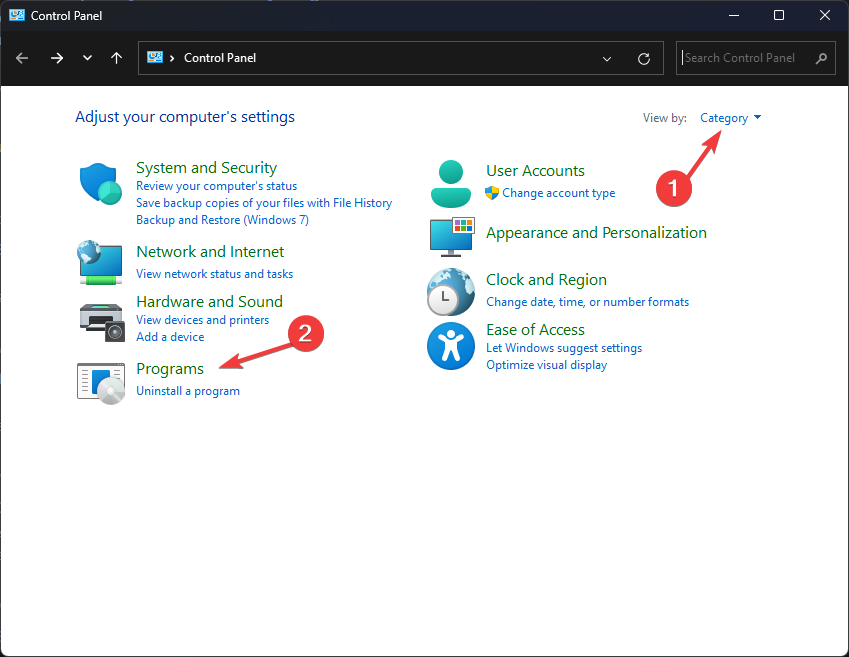
- Press the Windows key, type control panel, and click Open.

- Select View by as Category and click Uninstall a program.

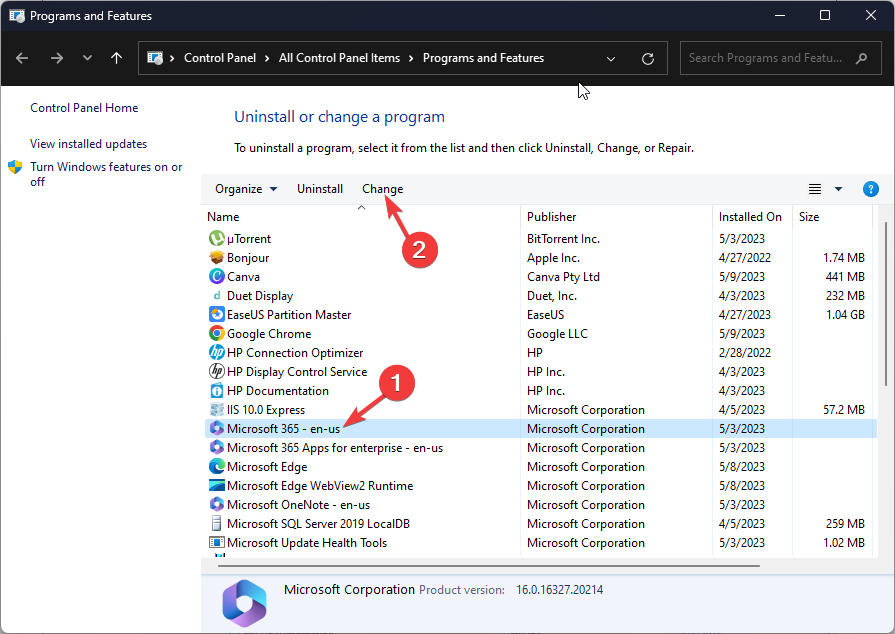
- On the Programs & Features window, select Microsoft Office and click Change.

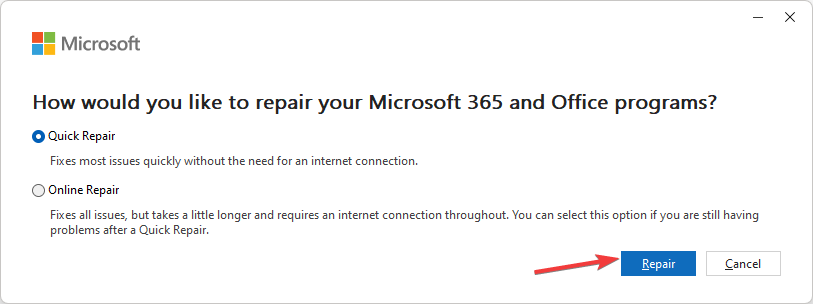
- Click Repair.

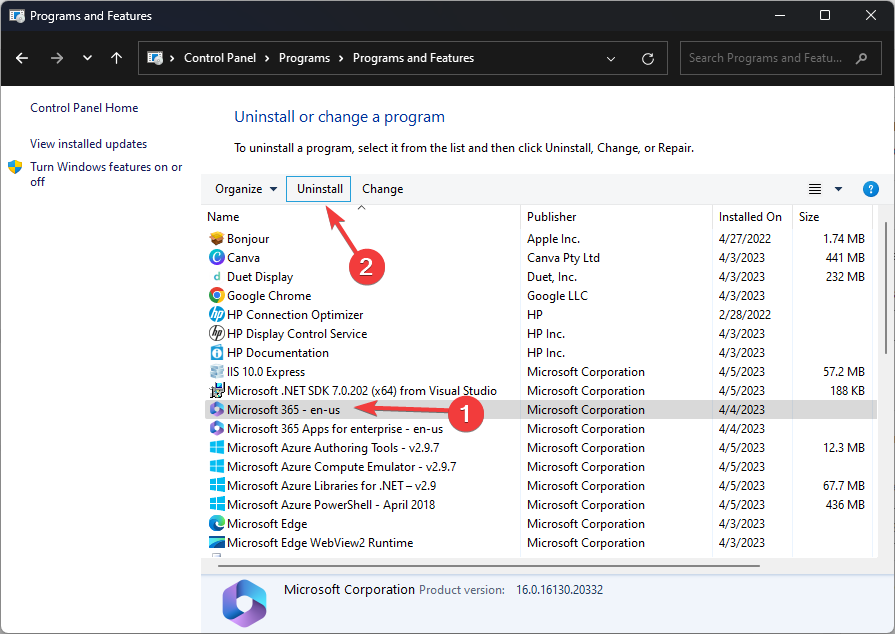
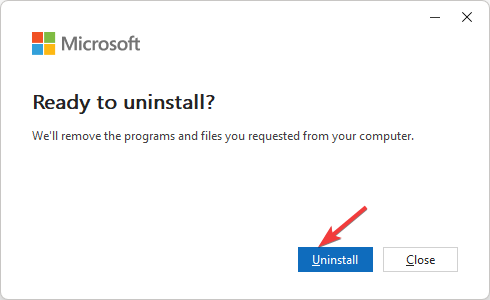
- If this doesn’t help, go to Programs & Features window, select Microsoft Office, and click Uninstall.

- Click Uninstall.

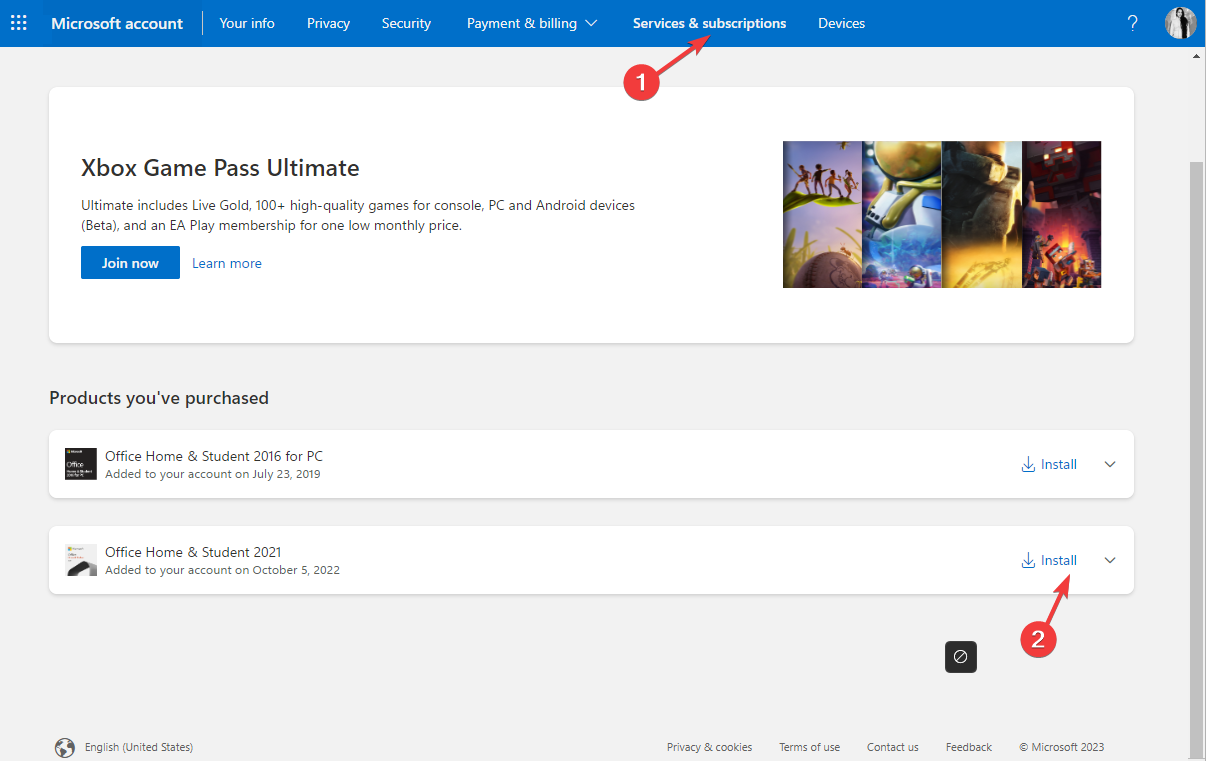
- Now login to your Microsoft account and click Services & subscriptions.
- Click Install.

- Now double-click the downloaded file and follow the onscreen instructions.
Restart your computer to save the changes.
4. Rename the SDXHelper.exe file
- Press Ctrl + Shift + Esc to open the Task Manager app.
- Go to Details, & right-click the SDXHelper.exe, then select End task.
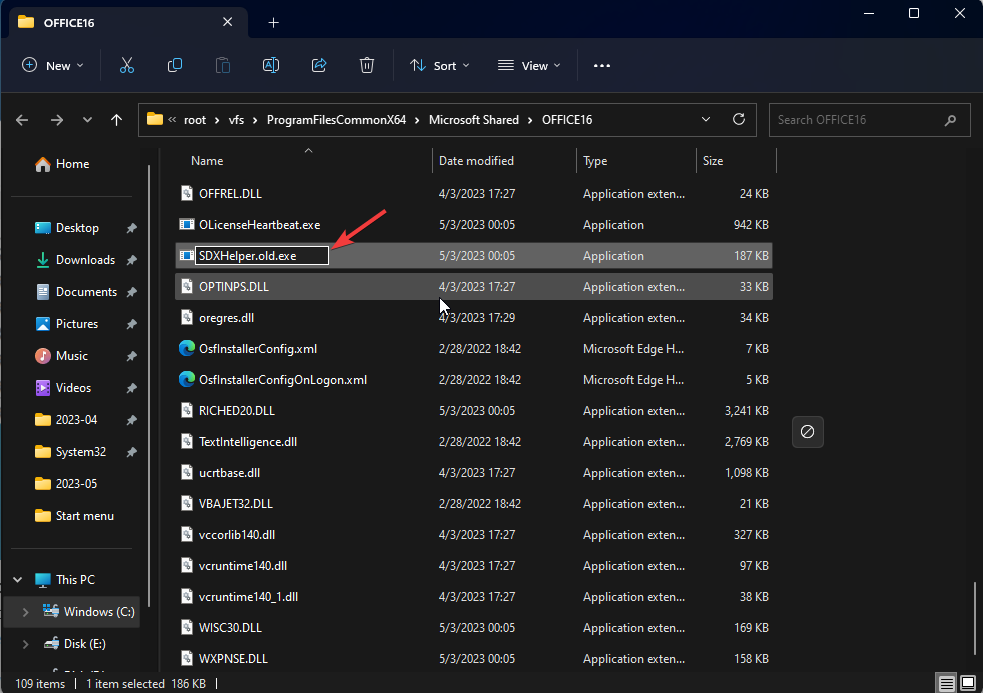
- Press Windows + E to open File Explorer.

- Navigate to this path:
C:\Program Files\Microsoft Office\root\vfs\ProgramFilesCommonX64\Microsoft Shared\OFFICE16 - Locate the SDXHelper.exe and rename it SDXHelper.old.exe.
Open Task Manager and check if the process is still running. Also, if you run into trouble, perform the above solution again and restore the file’s original name.
5. Disable the feature update using the Windows PowerShell
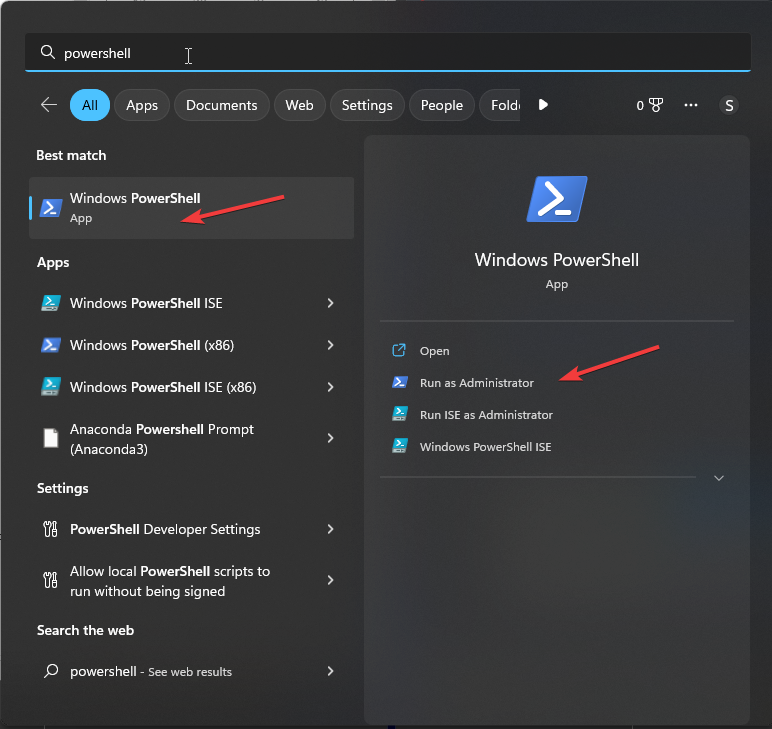
- Press the Windows key, type powershell, and click Run as Administrator.

- Copy & paste the following command one by one and hit Enter after every command:
Schtasks /change /s $_ /tn ‘\Microsoft\Office\Office Feature Updates’ /disable
Schtasks /change /s $_ /tn ‘\Microsoft\Office\Office Feature Updates Logon’ /disable
Now open Task Manager and check if the SDXHelper.exe is disabled. Also, if you run into trouble, perform the solution again to restore the file’s original name.
So, these are methods to disable the SDXHelper.exe safely and quickly and we hope that you have done that successfully. You may also look at our guide on what to do if Windows Update is not working.
If you have questions or suggestions, feel free to mention them in the comments section below.