Shake to Minimize: How to Disable It on Windows 10
Use the Settings app to disable the shake to minimize feature
![]() 2 min. read
2 min. read
![]() Updated on
Updated on
Share this article
Improve this guide
Read our disclosure page to find out how can you help Windows Report sustain the editorial team Read more
Key notes
- The feature lets you declutter your desktop by shaking a window to minimize all other windows in the background.
- You can shake the window again to restore the windows to normal.
Shake to Minimize is a Windows multi-tasking feature that was first introduced with Windows 7. It allows you to quickly minimize all open windows on your desktop by shaking the active window.
The feature is disabled on your Windows by default. However, if it’s not, we can help!
How can I disable Shake to minimize on Windows 10?
1. Use the Settings app
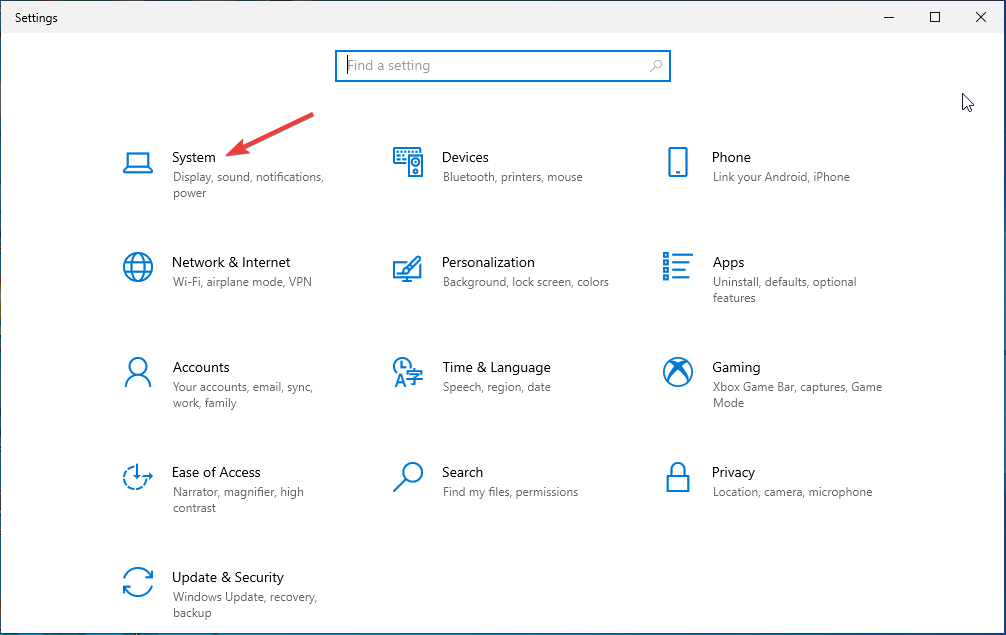
- Press Windows + I to open the Settings app.
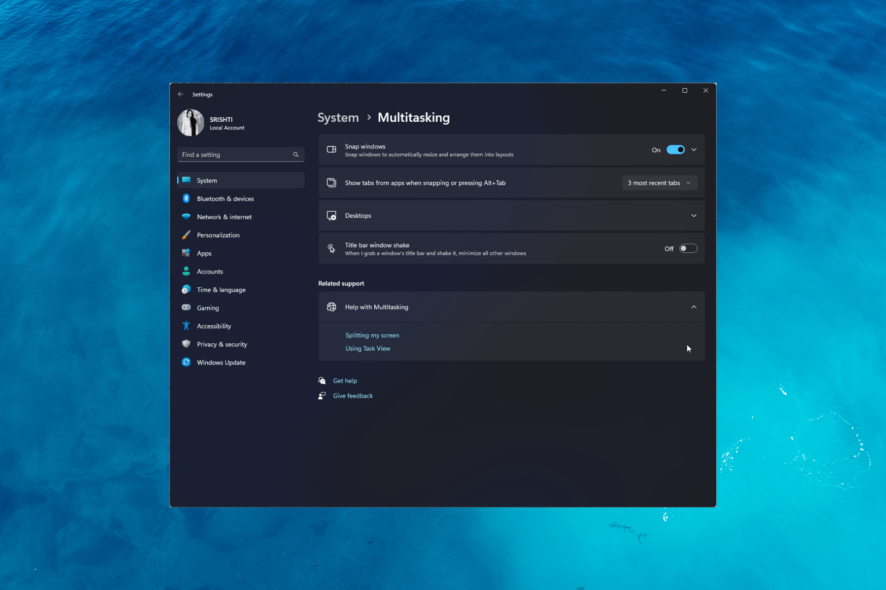
- Go to System.

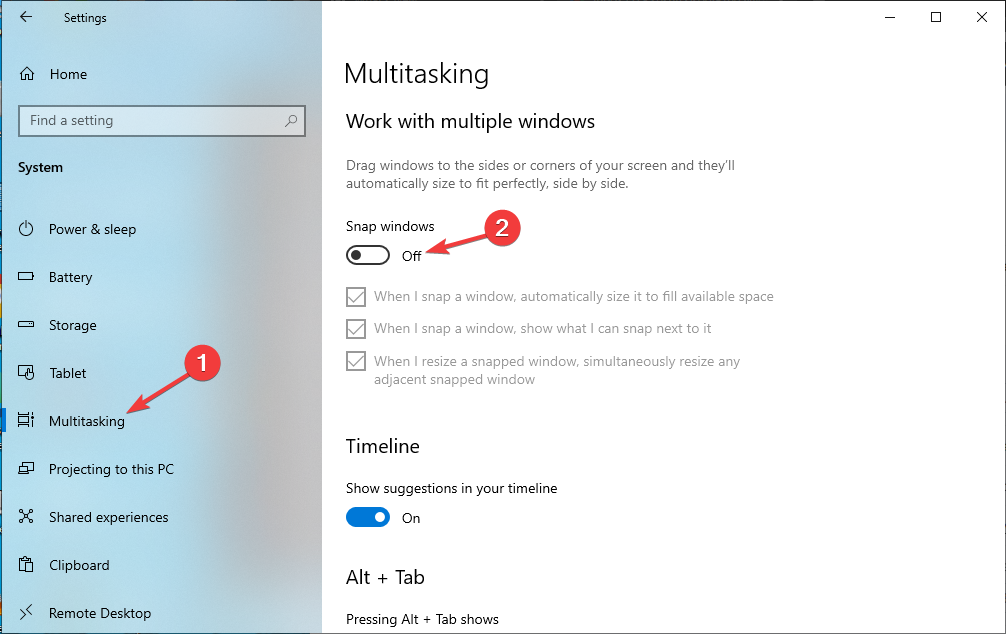
- Click Multitasking from the left pane.
- Locate Work with multiple windows, and toggle off the switch under Snap windows to disable it.

Now you have got control of your desktop back.
2. Use the Registry Editor
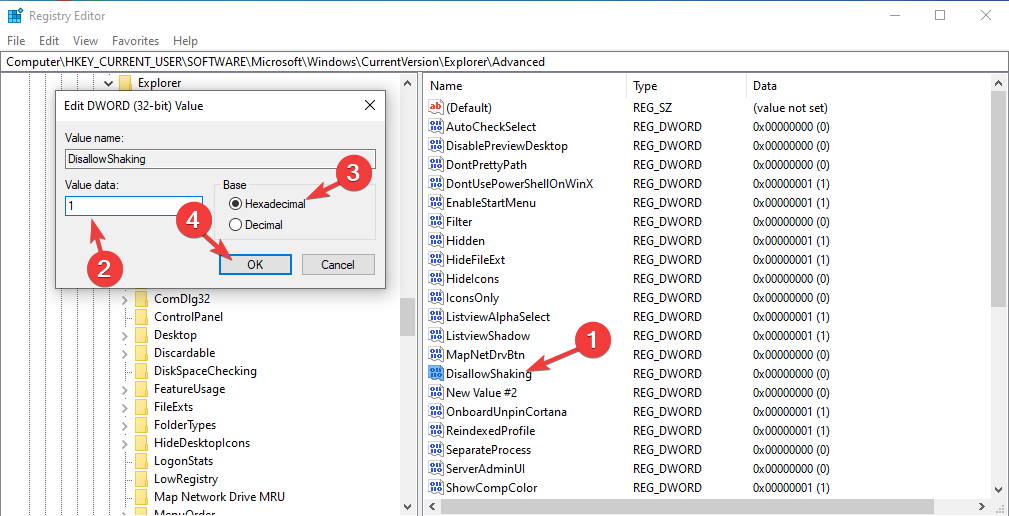
2.1 If DisallowShaking is present
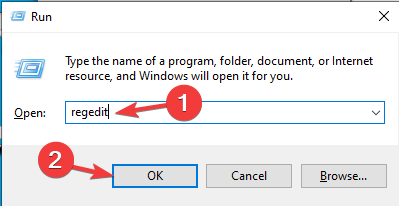
- Press Windows + R to open the Run dialog box.

- Type regedit and click OK to open Registry Editor.
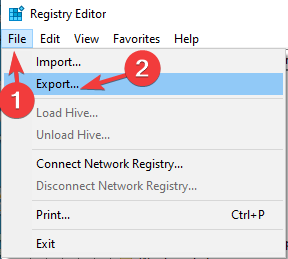
- Click File, then Export, and save the .reg file in the desired location.

- Navigate to this path:
Computer\HKEY_CURRENT_USER\Software\Microsoft\Windows\CurrentVersion\Explorer\Advanced - Locate DisallowShaking, and double-click to modify. Make sure the base is set to Hexadecimal and change the Value data to 1. Click OK.

- Restart your PC to confirm the changes.

2.2 If DisallowShaking is not present
- Press Windows + R to open the Run dialog box.
- Type regedit and click OK to open Registry Editor.
- Click File, then Export, and save the .reg file in the desired location.
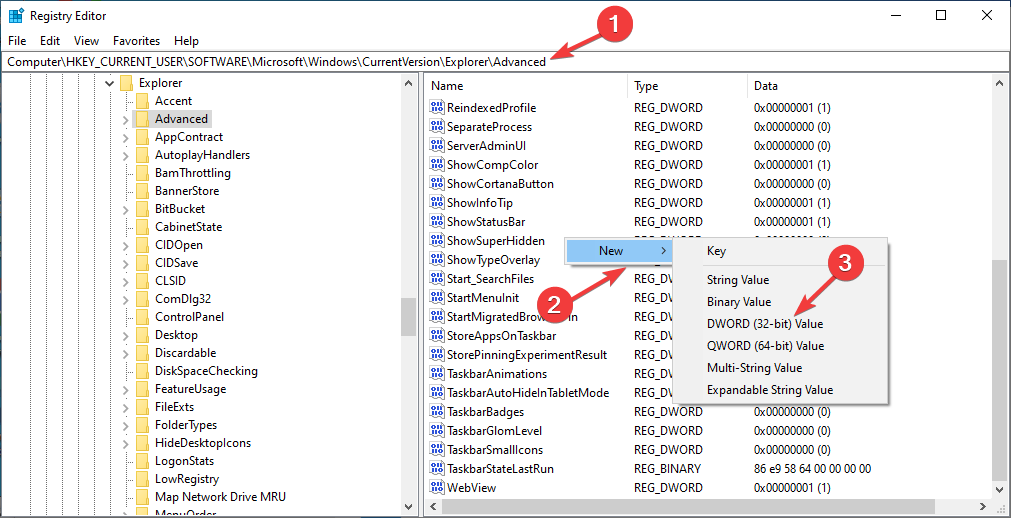
- Navigate to this path:
Computer\HKEY_CURRENT_USER\Software\Microsoft\Windows\CurrentVersion\Explorer\Advanced - Right-click the empty space, select New, then choose DWORD (32-bit).

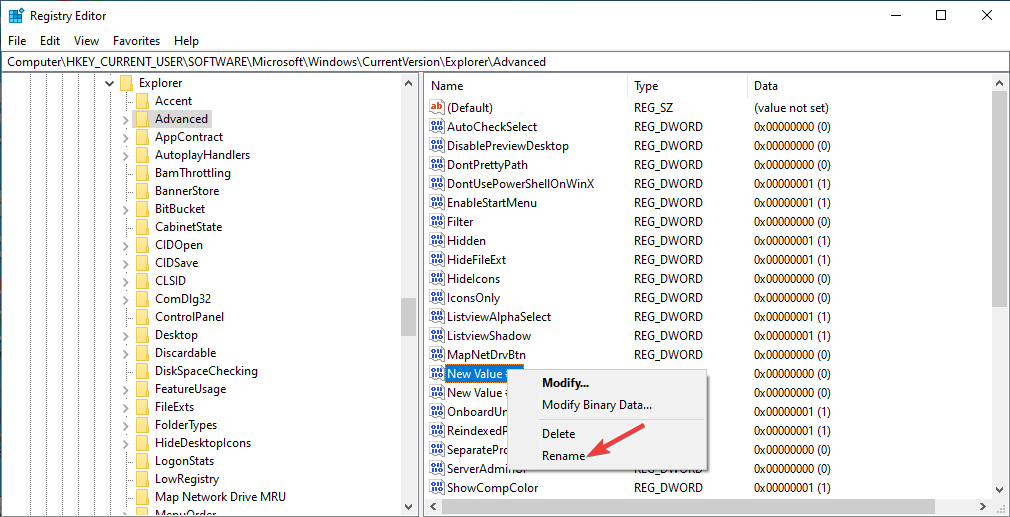
- Now right-click it and select Rename. Name it DisallowShaking.

- Double-click to modify, set the base value to Hexadecimal and change the Value data to 1. Click OK.
- Restart your computer to save the changes.

3. Use the Local Group Policy Editor
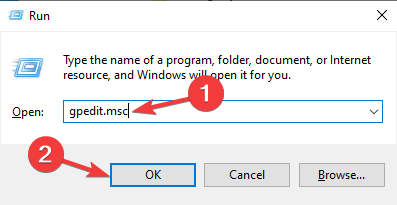
- Press Windows + R to open the Run window.

- Type gpedit.msc and click OK to open Group Policy Editor.
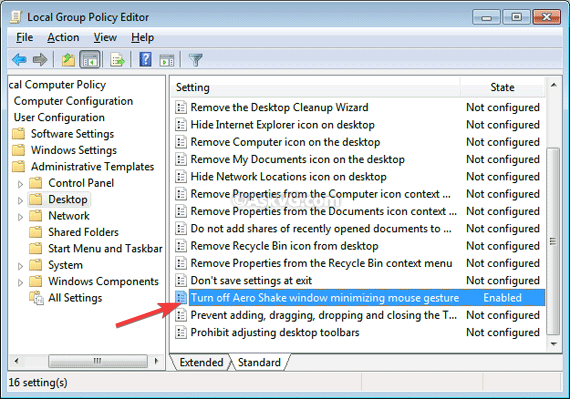
- Go to this path:
User Configuration\Administrative Templates\Desktop - Locate and double-click Turn off Aero Shake window minimizing mouse gesture from the right-side pane.

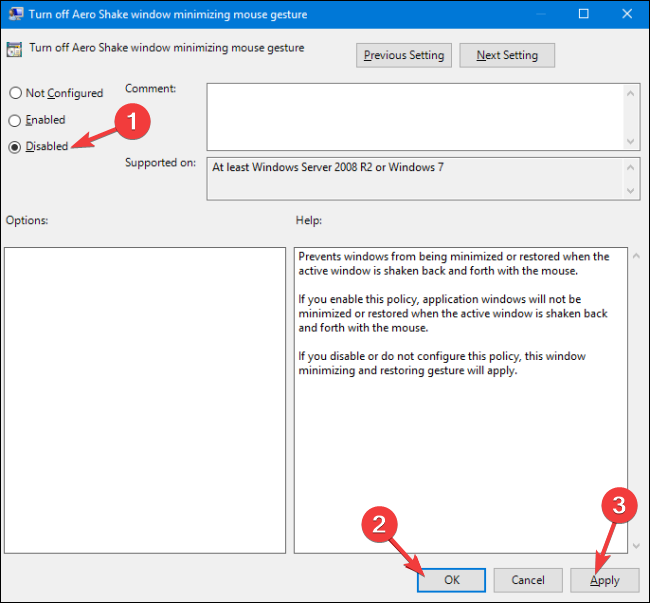
- Select Disabled and click OK.

- Restart your PC to let the changes take effect.
So, these are the methods to disable Shake to Minimize feature on Windows 10 and enjoy a less cluttered and more focused desktop experience.
If you have any questions or suggestions, please mention them in the comments section below.


User forum
0 messages