Disable StartAllBack: 3 Ways to Prevent it From Loading
You can do that from Advanced settings with a single click
2 min. read
Updated on
Read our disclosure page to find out how can you help Windows Report sustain the editorial team. Read more
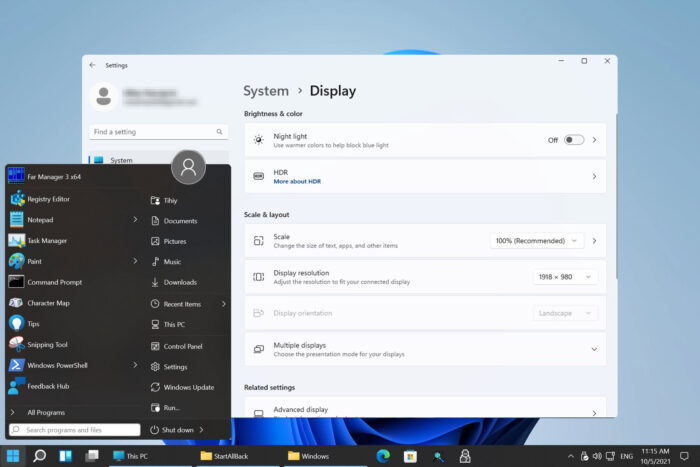
StartAllBack is a useful customization tool, but it can have certain issues, and sometimes you just need to disable StartAllBack. If you want to learn how to do that, keep on reading.
How can I disable StartAllBack?
1. Use the Taskbar
- Right-click the Taskbar and choose Properties.
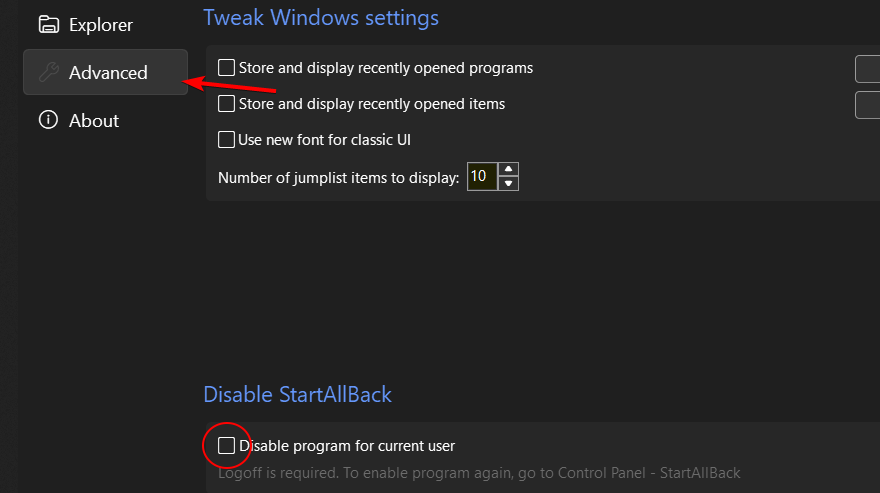
- Next, navigate to Advanced and then check the Disable program for the current user.
- Save changes and restart your PC.
2. Disable it from startup
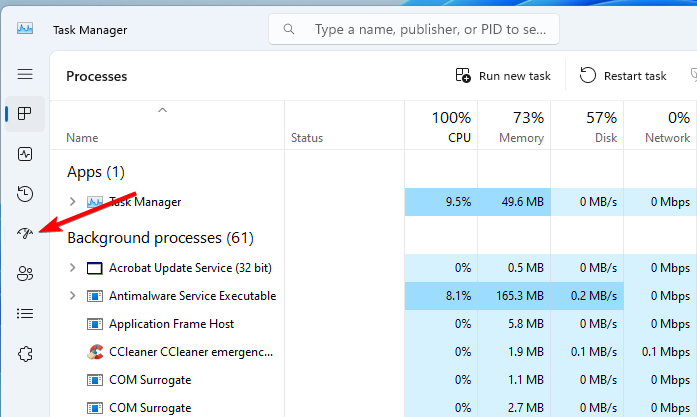
- Press Ctrl + Shift + Esc to open Task Manager.
- Navigate to Startup.
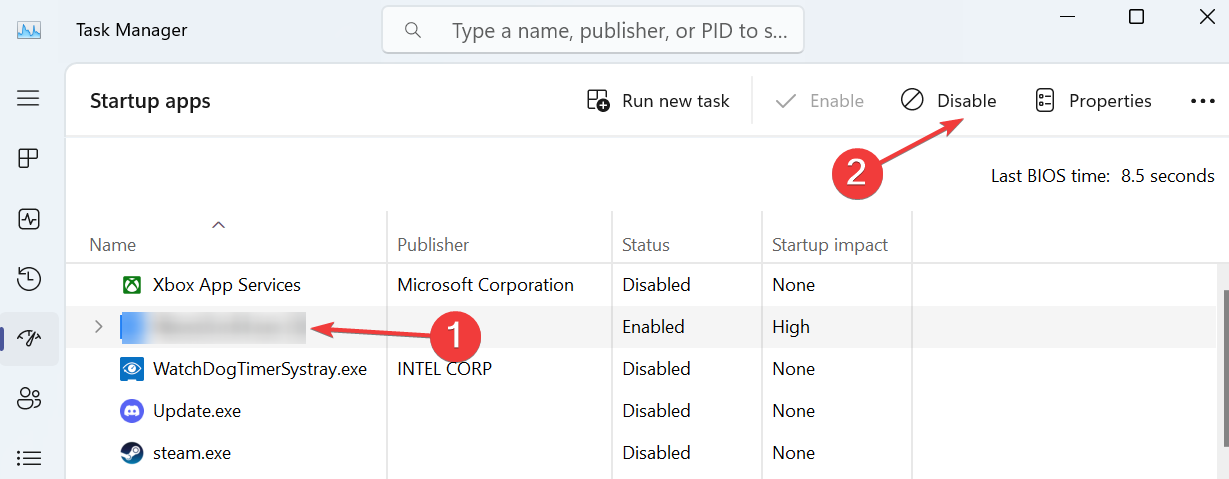
- Locate StartAllBack and click on Disable.
- Restart your PC.
3. Uninstall the software
- Press the Windows key + I. This will launch the Settings app.
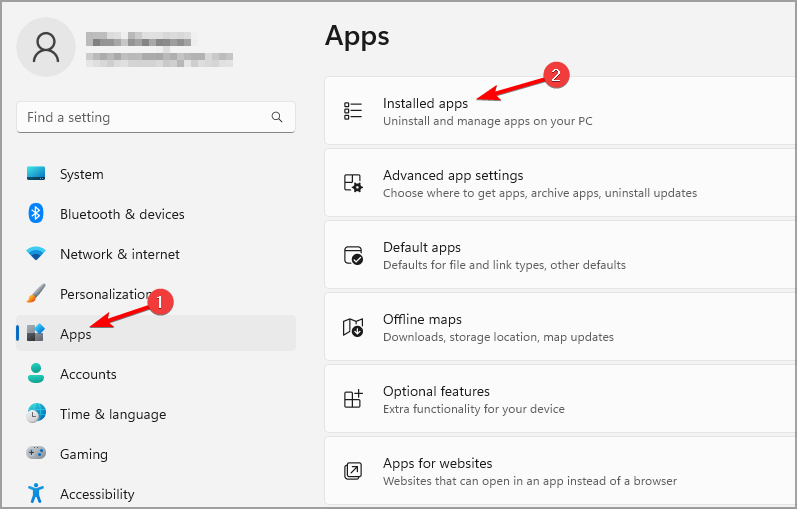
- Next, choose Apps and then Installed apps.
- Locate the application on the list.
- Click the three dots next to it and choose Uninstall.
- Follow the steps on the screen to complete the process.
Use this option only if you weren’t able to disable the application in any other way.
StartAllBack is an amazing tool if you want to move or use a vertical Taskbar on Windows 11, however it can cause issues, and if that happens, you need to disable it.
You may also be interested in our guide on how to properly uninstall StartAllBack if you want to remove it completely.
If you want to learn more about this tool, we have a great guide on how to download and install StartAllBack, so don’t hesitate to visit it. If you’re concerned about the safety, we have a guide that anylzes how safe StartAllBack is, so don’t miss it.
If you’re using an ARM version of Windows, we’re pleased to inform you that installing StartAllBack on ARM is simple and straightforward, so don’t hesitate to give this software a try.


User forum
0 messages