StartAllBack for Windows 10 & 11: How to Download & Use
If you want to get back the customization options Windows 10 had, you should download and install StartAllBack. Don’t worry, we’ll walk you through all the steps to set it up perfectly.
How do I get and use StartAllBack?
1. Download and install it
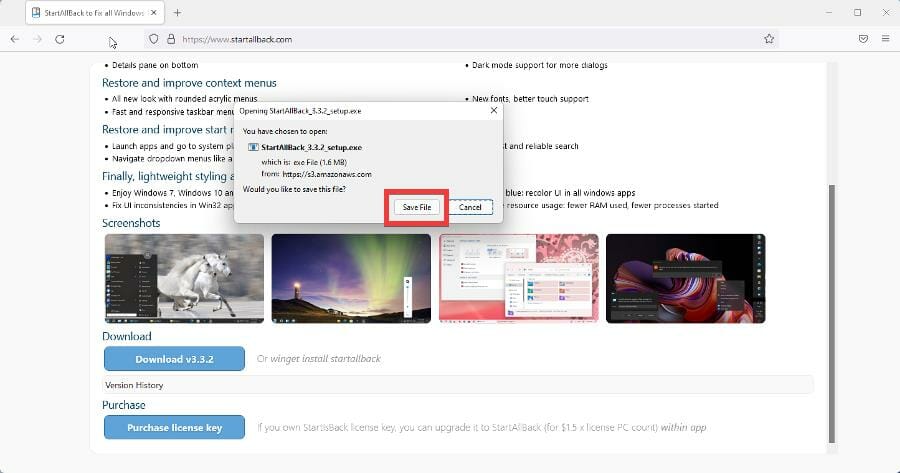
- Open the StartAllBack webpage.
- In the page, scroll down and click the Download button with the latest version of StartAllBack.

- Click Save File in the new window that appears.
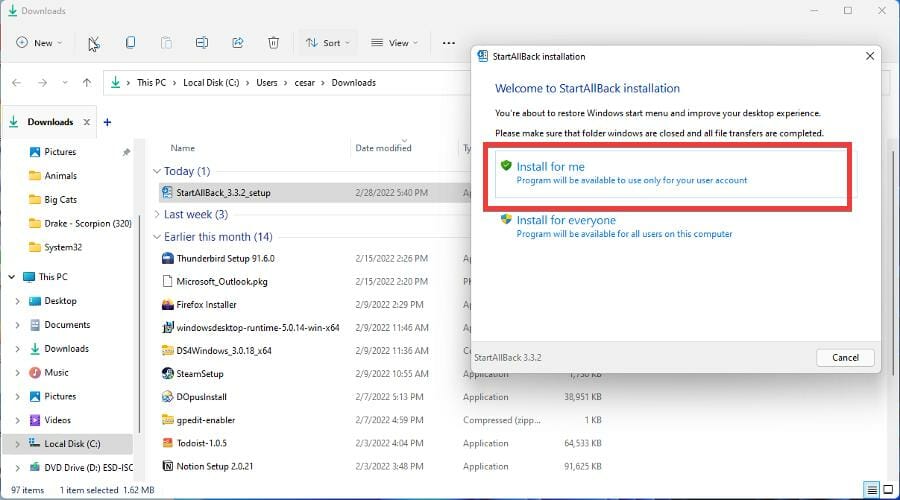
- Locate the file’s location and double-click it to begin installation. Then select Install For Me.
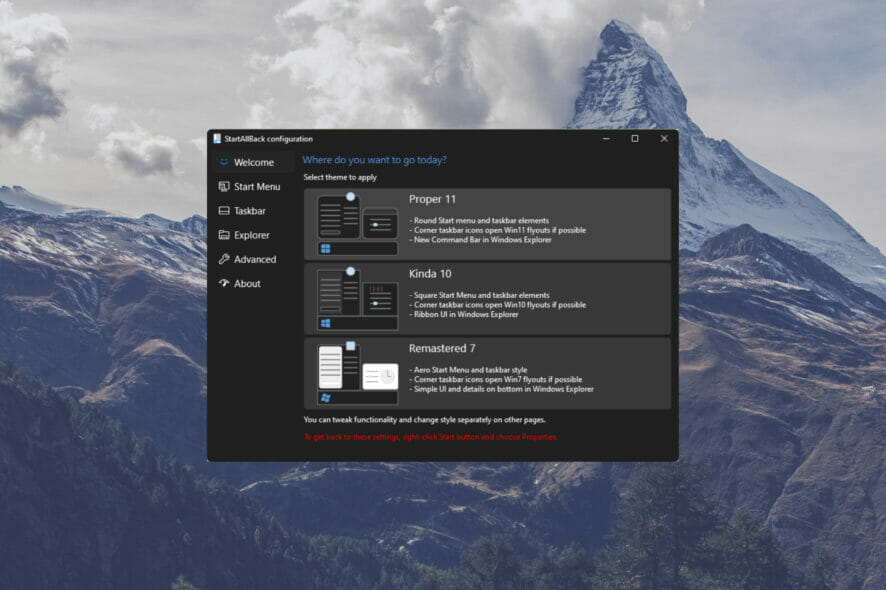
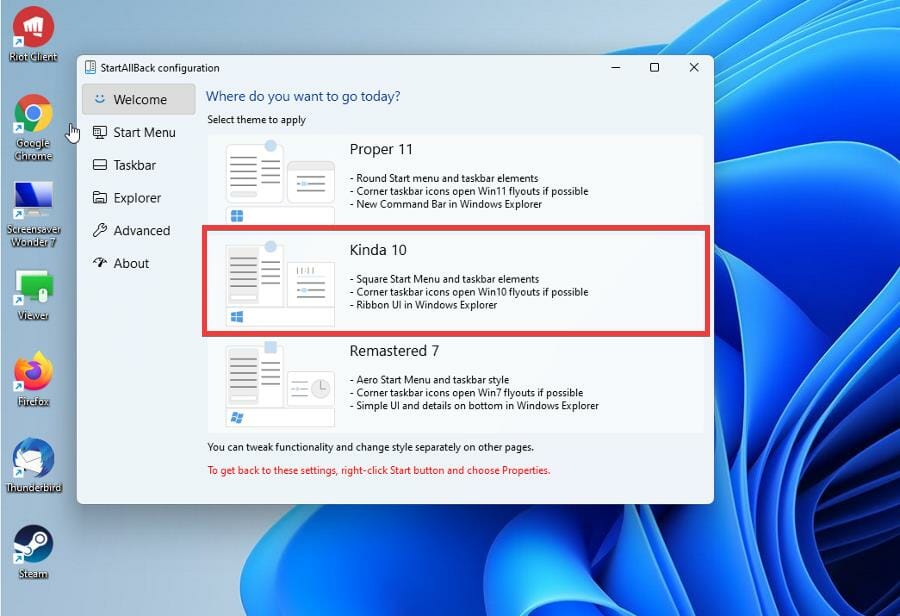
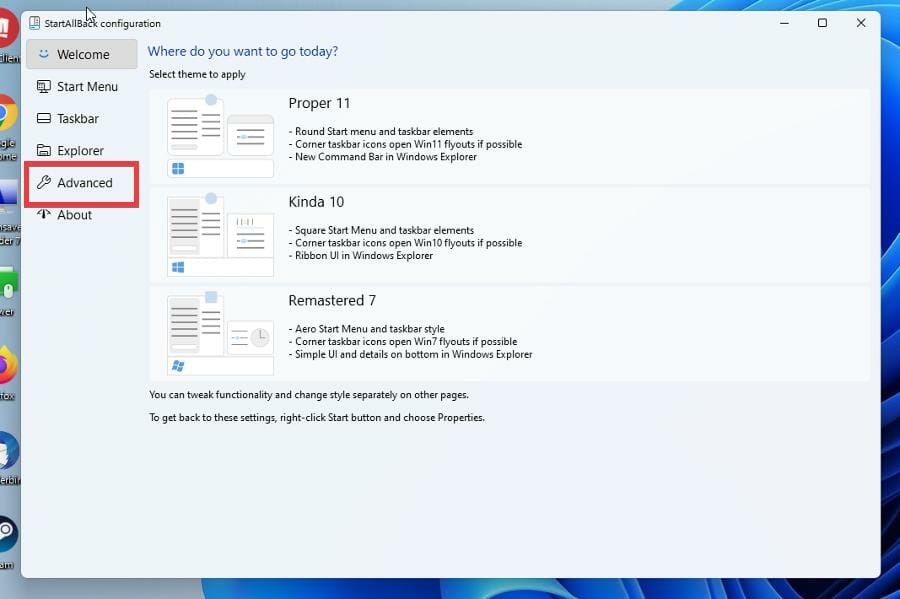
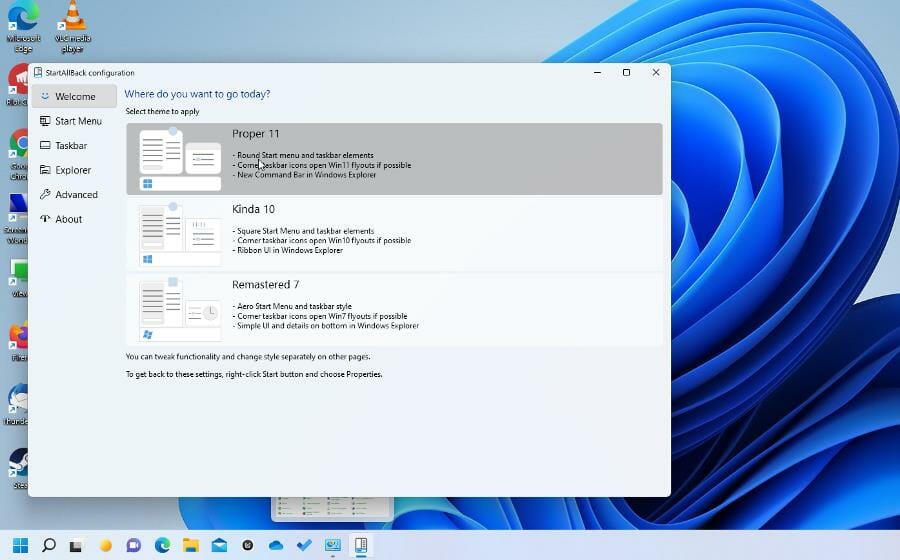
- Next, a window will asking you if you want to stick with Windows 11 look or switch to a Windows 7 or Windows 10 appearance.
- As an example, this guide will choose the Windows 10 option.
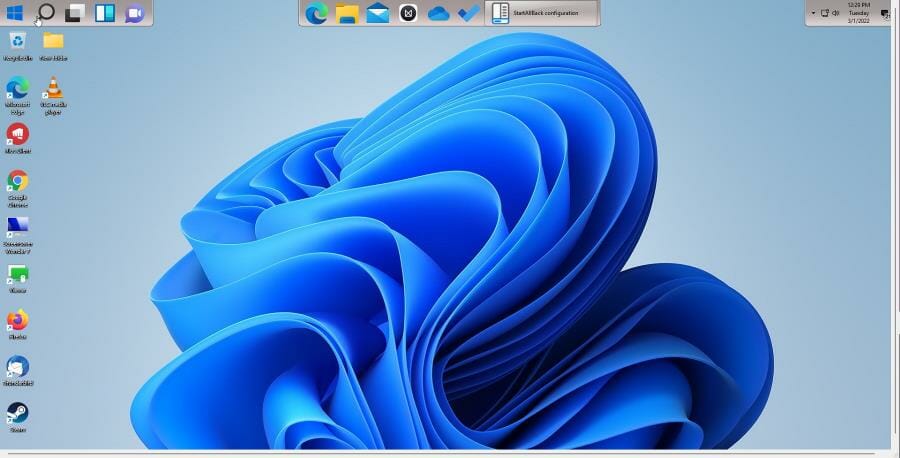
- As you can see from the taskbar, the style has changed to look similar to Windows 10.
- To change the layout, right-click the Start menu and select Properties.
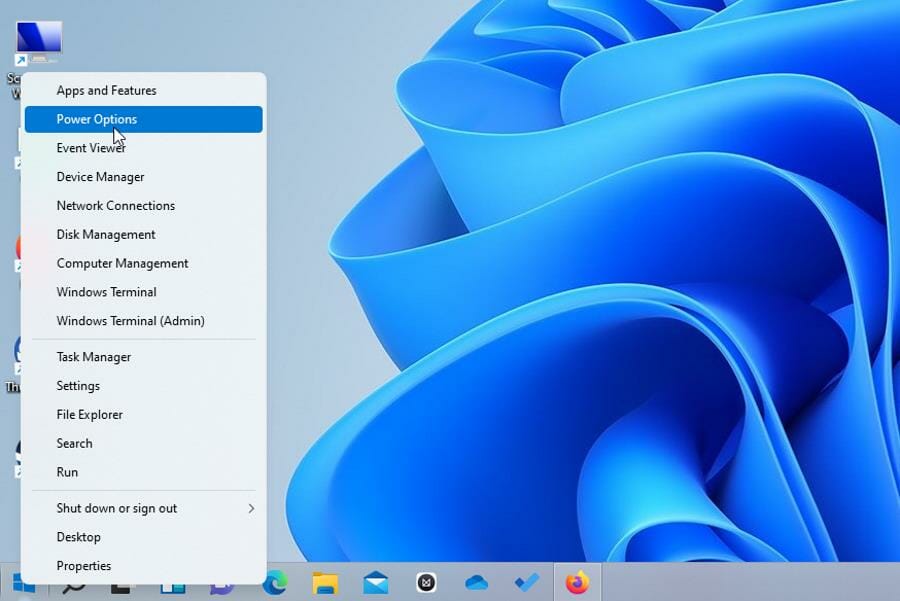
- StartAllBack appears and you can continue customizing.
In case you’re wondering, StartAllBack is safe to use, and it doesn’t come with any hidden malawre.
2. Customize the settings
- The settings options for StartAllBack appears in the left hand menu.
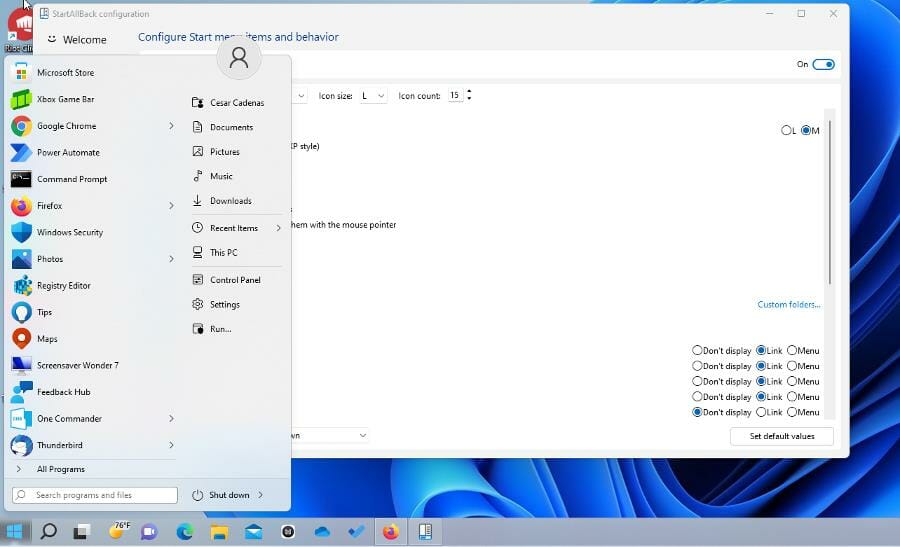
- The Start Menu allows you to customize the Start menu.
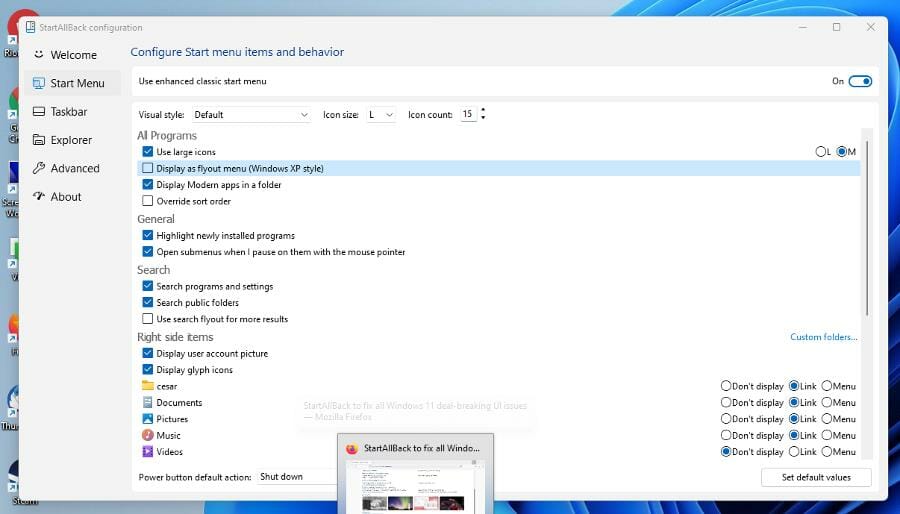
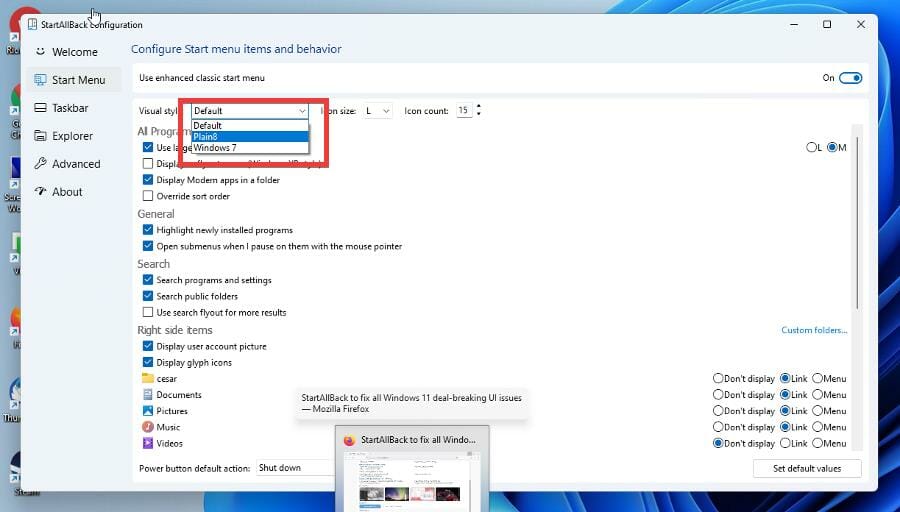
- You change the visual with the drop-down menu at the top. You can change it to match Windows 7, 8, or the default.
- You can also change how big the icon should be, what is displayed on the right, and what is highlighted.
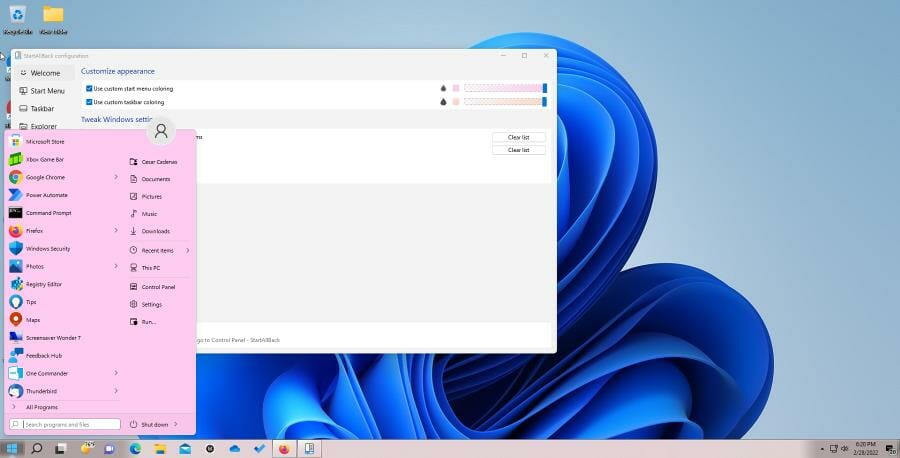
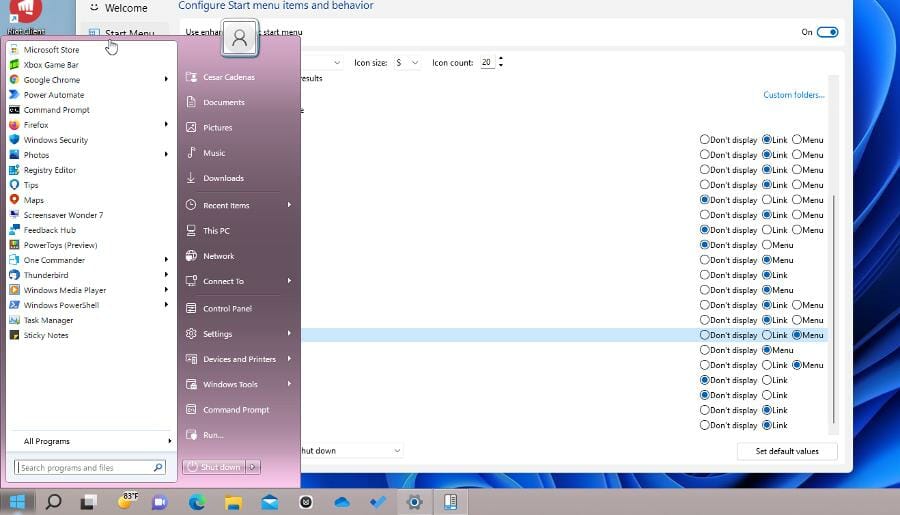
- After configuring the settings, click the Start menu to see how it looks like.
- Taskbar, as the name suggest, allows you to change the taskbar.
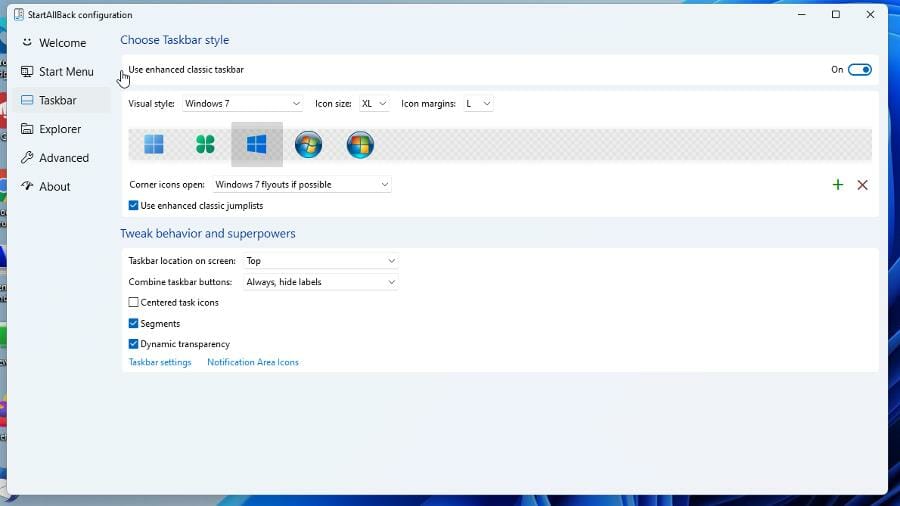
- You change the Start menu icon, where the taskbar sits, and how big the icons should be.
- Customize the settings however you like.

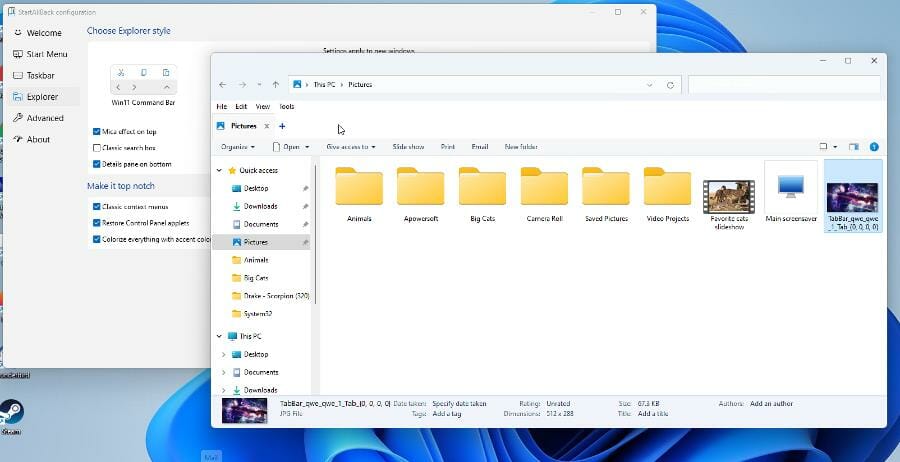
- Explorer customizes the File Explorer.
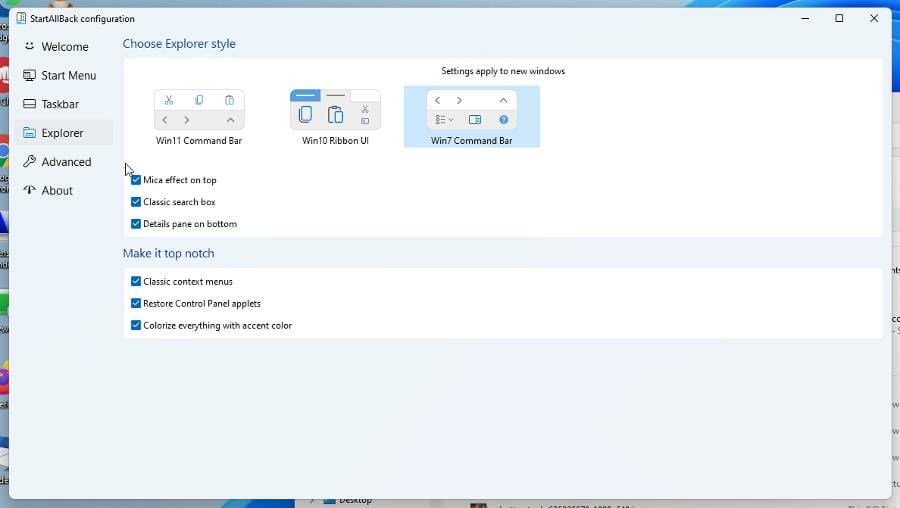
- Options include three different styles, context menus, and a details pane.
- The File Explorer options are admittedly a little difficult to gage.
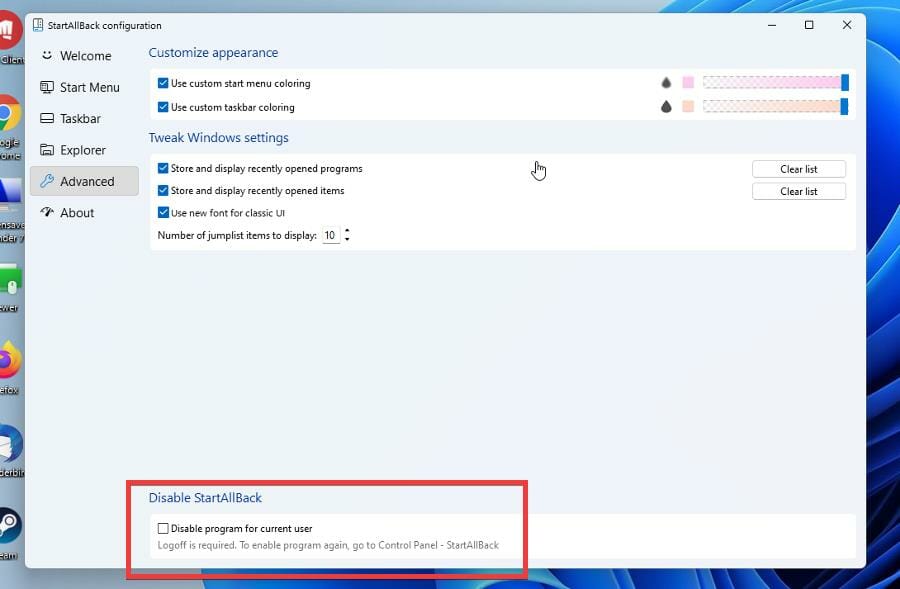
- Advanced allows you to change the color of the Start menu and taskbar.
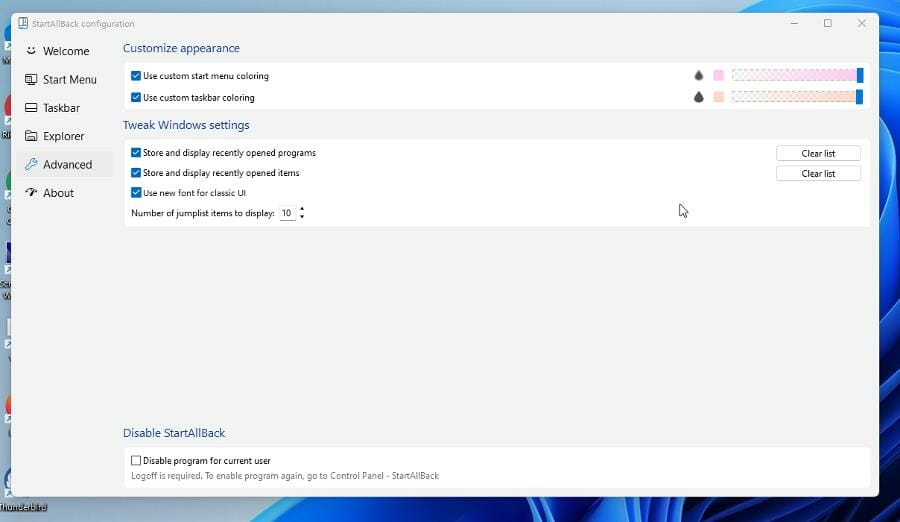
- It also includes options on how to store and display recently opened files.
- Once done, the Start menu and taskbar look very different.
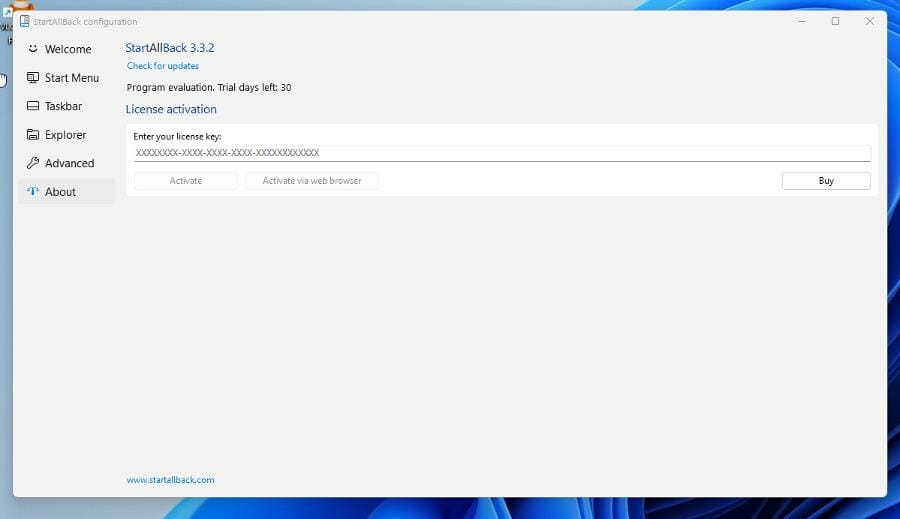
- About doesn’t offer any customization options other than giving the opportunity to purchase the full version and tell you how long you have in the free trial.
3. Create a new Start menu
- To create your own Start menu, begin by selecting what style and how many icons you want.
- For example, the Start menu will be in a Windows 7 style with 20 small icons.
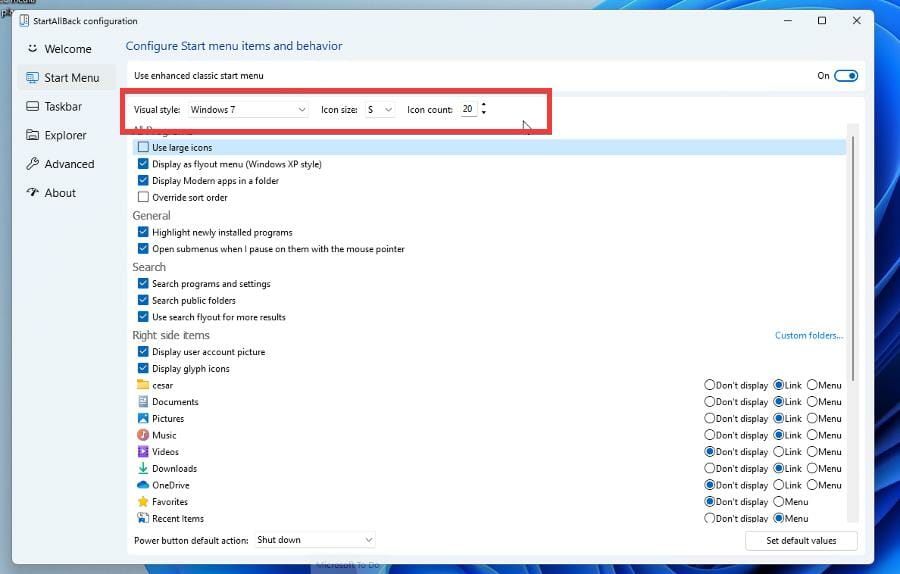
- You can allow what the Search function finds under Search and have the menu highlight new apps.
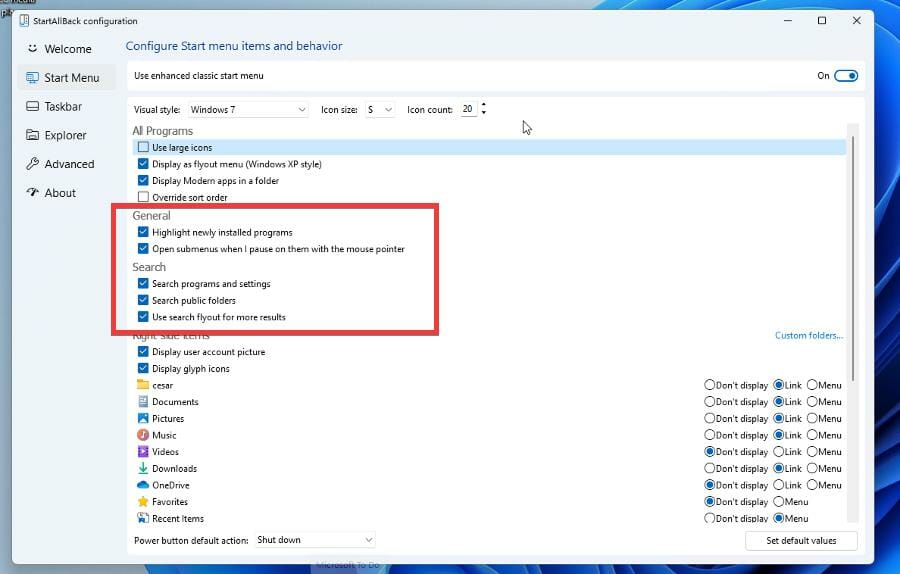
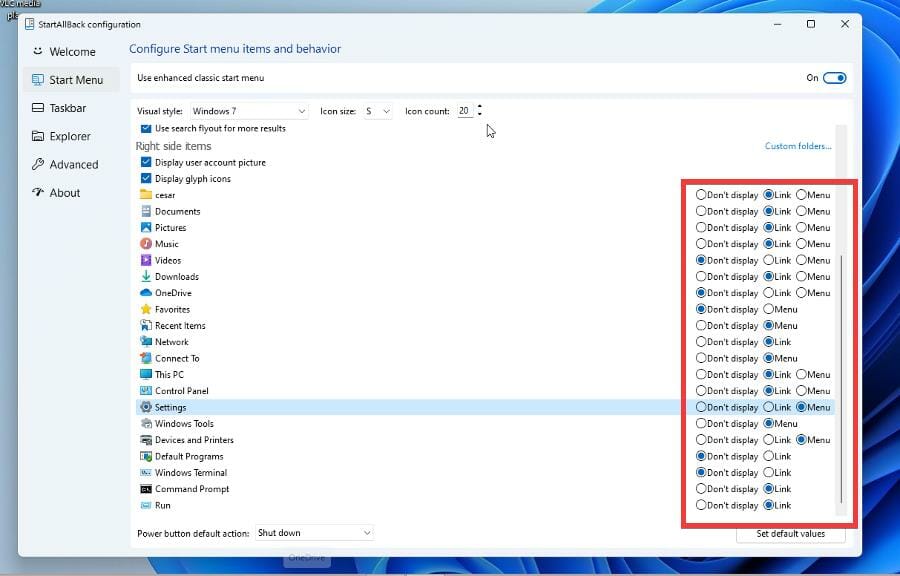
- Under Right Side Items, you can select which apps and feature appear in the Start menu. Selecting Link adds them to the left side and Menu adds them to the right side.
- Open your Start menu and see how it all looks.
4. Create a new taskbar
- Say for example, you want a segmented taskbar that sits at the top with its icons centered in a Windows 7 style with large icons.
- In the Taskbar section, go to the Tweak behavior and superpowers section.
- Make the changes you want like having the taskbar sit at the top segmented with dynamic transparency.
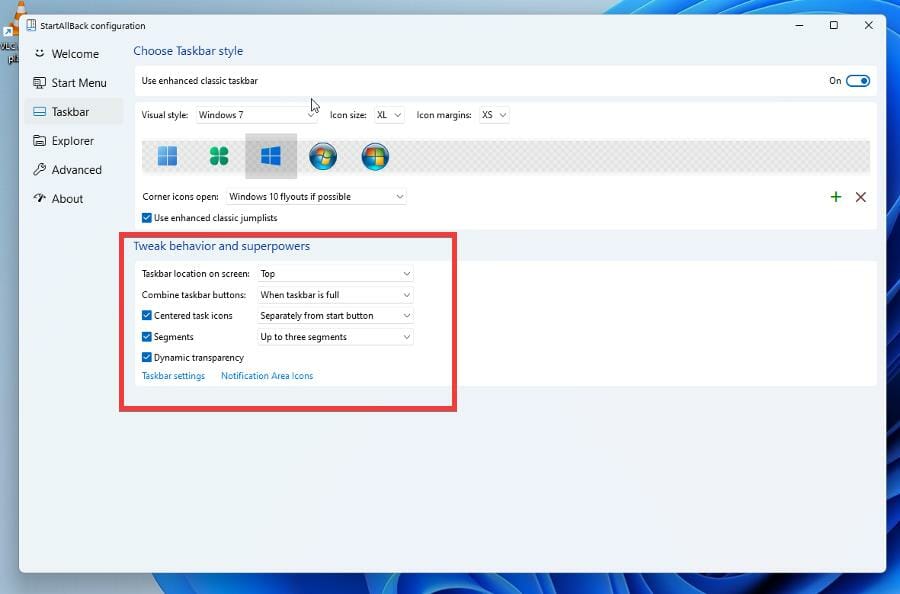
- Underneath Choose Taskbar style, select the changes you want like the visual style, icon size, and margins.
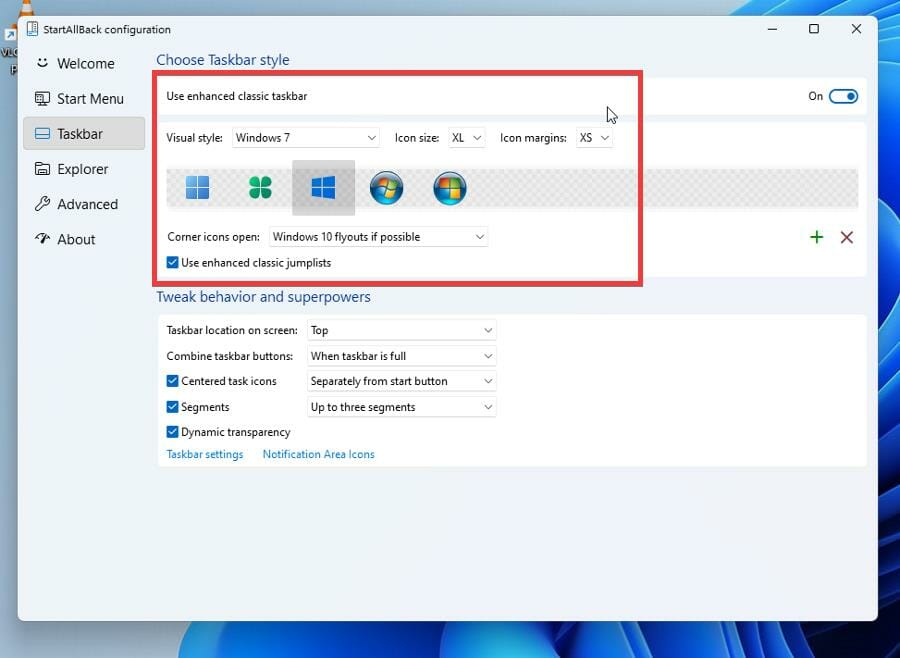
- Once done, the changes will appear immediatedly.
How can I get rid of StartAllBack?
You have two options when it comes to removing StartAllBack and getting back to the original version of Windows 11:
- Disabling the app – the quickest method from the two, and it also allows you to activate it with ease at any point in time if your choose to do so
- Uninstalling the app – this process can take a bit more time, and the process of re-installing the app again will also take extra time.
If you’re not sure which of these options suits you best, think about it like this: If you’re still undecided if you will want to use the app in the future, disable it, and then enable it whenever you need to.
In case you don’t plan on using the app anymore, simply uninstall it and remove the app entirely from your hard drive.
Below, you will find both of these methods described in a step-by-step fashion:
➡ Disable the app
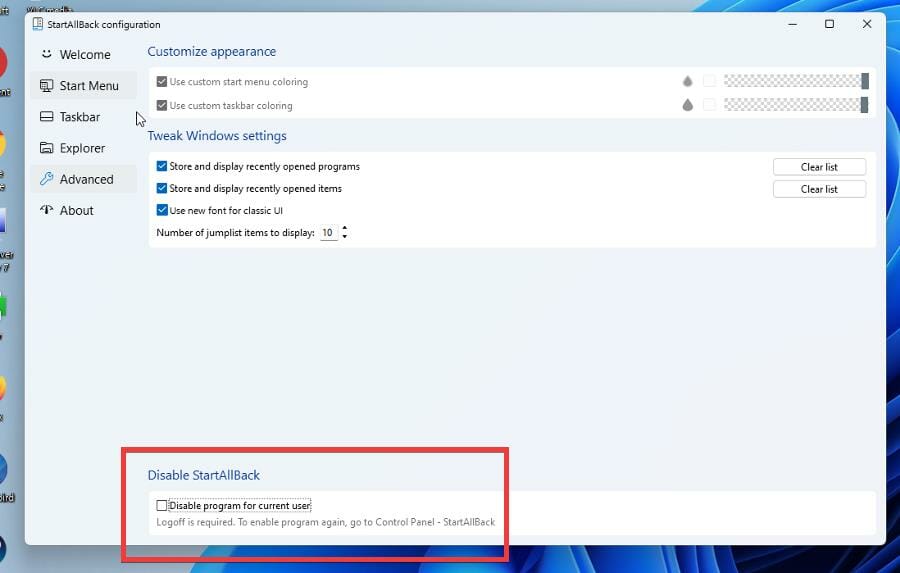
- Go to the Advanced tab on StartAllBack.
- At the bottom of the window will be a box with text that reads Disable program for current user. Click it.
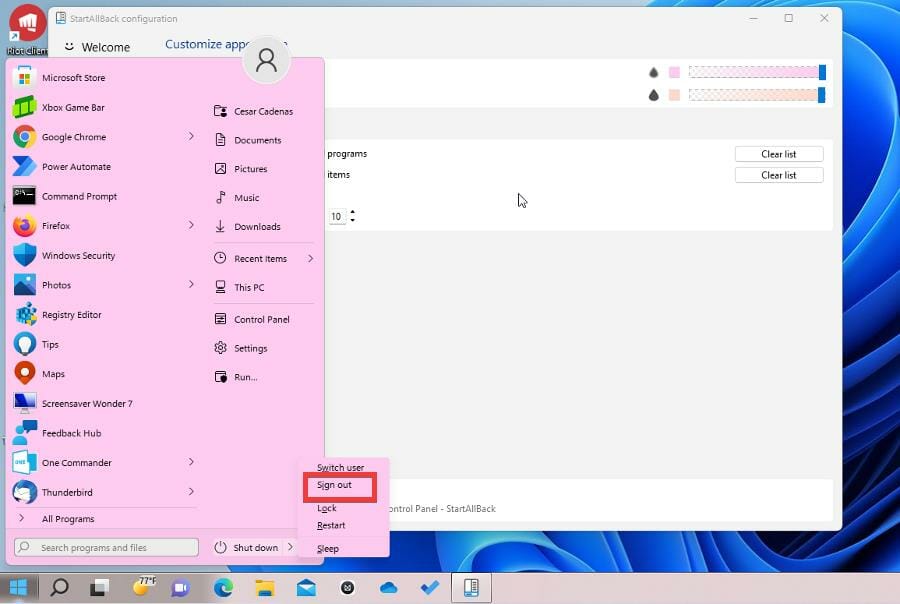
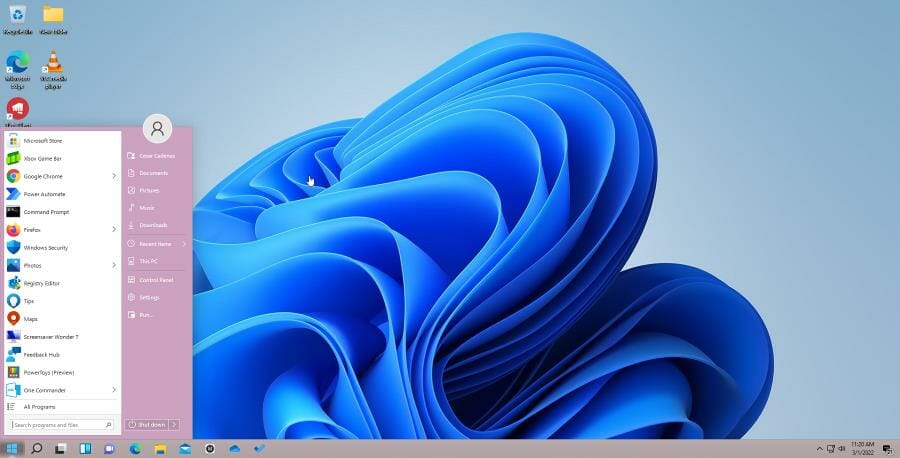
- Next, open the Start menu and click the arrow next to Shut down.
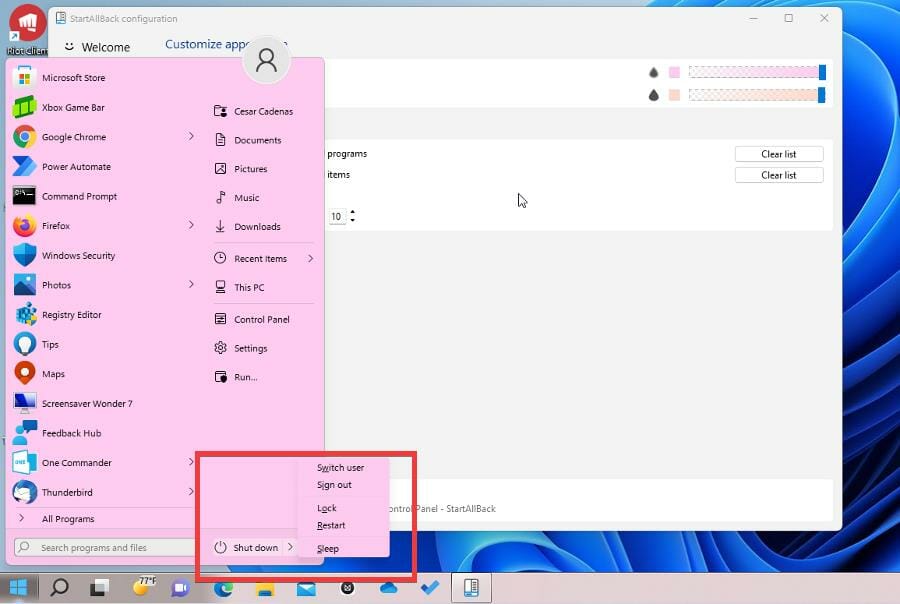
- Select Sign out.
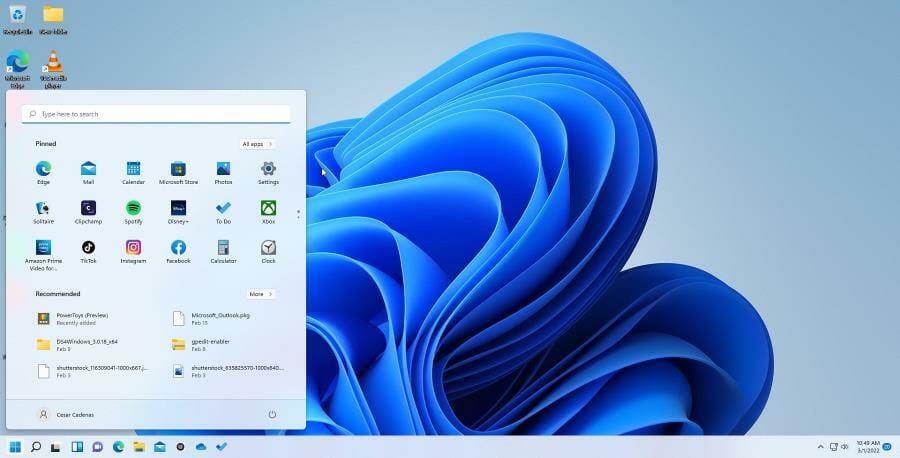
- Sign back in to your Windows 11 computer.
- You will find that all the changes you made have now been disabled.
To learn more, we also have an in-depth guide on how to disable StartAllBack, so don’t miss it.
➡ Re-enable the app
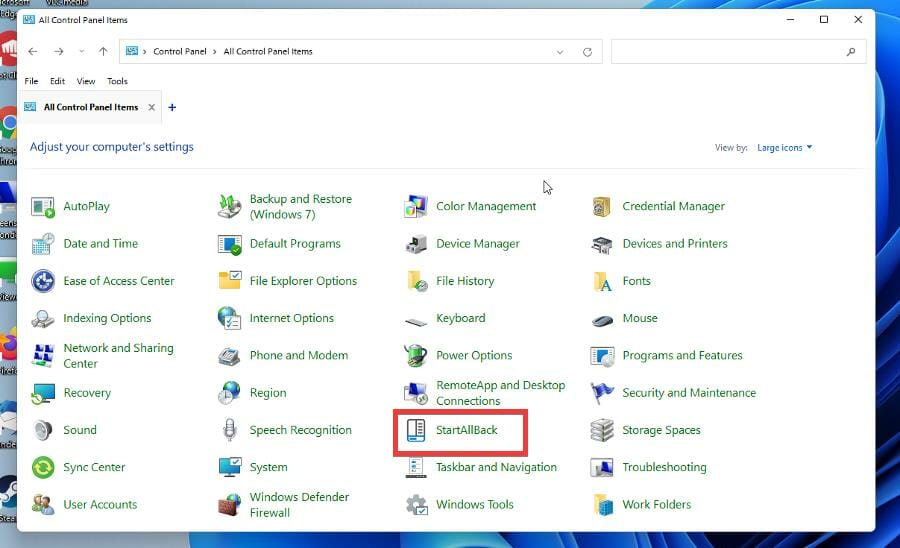
- To enable StartAllBack again, go to the Control Panel.
- Click StartAllBar and the app will open again.
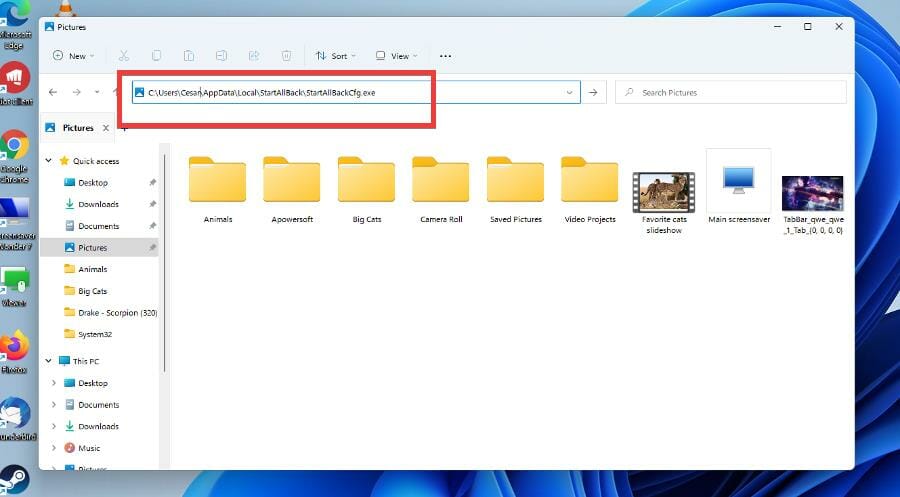
- If StartAllBar isn’t in the Control Panel, open the file explorer.
- In the address bar, type in C:\Users\USERNAME\AppData\Local\StartAllBack\StartAllBackCfg.exe. Where it says USERNAME, type the name of your own.
- StartAllBack will appear. Return to Advanced and deselect the Disable option at the bottom.
- Sign out and back in again. The changes you made previously are now back.
- Conversely, you can uninstall StartAllBack.
➡ Uninstall the app entirely
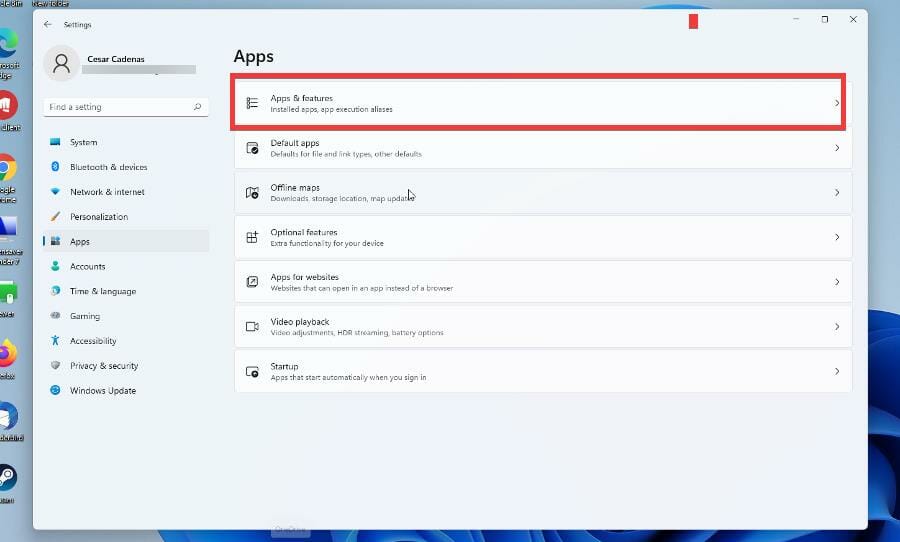
- Start by opening the Settings menu.
- Select Apps on the left hand side.
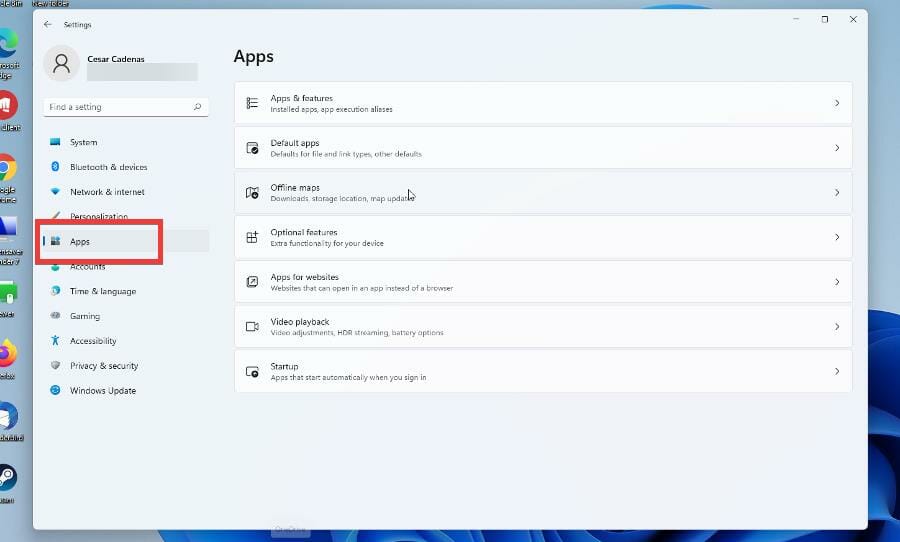
- Click Apps & features.
- Locate StartAllBack in the Apps list.
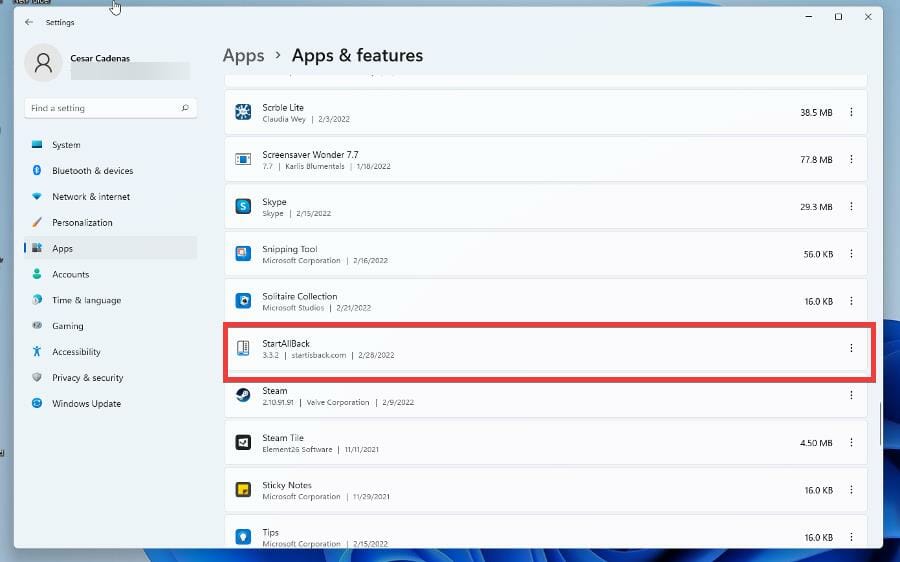
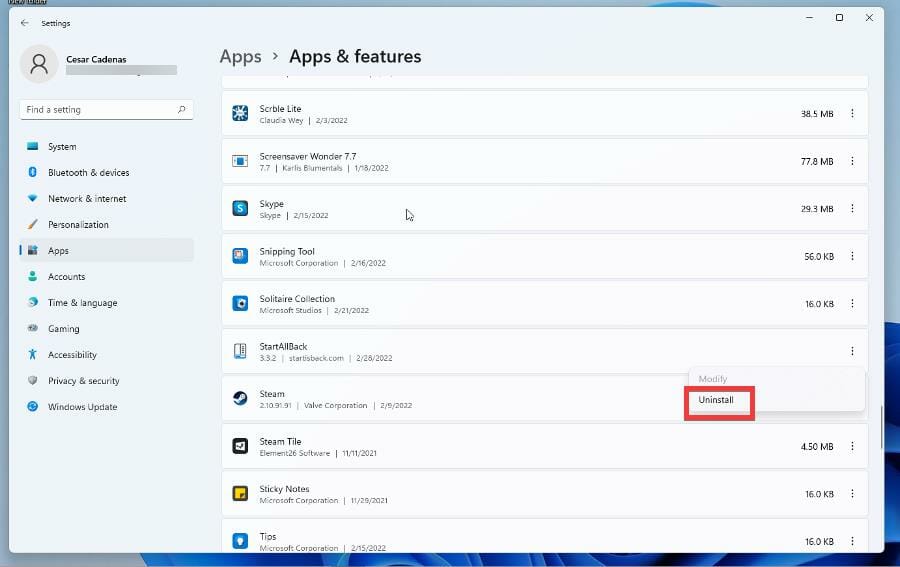
- Click the three dots on the right and select Uninstall.
If you want to avoid going through all these steps to uninstall software and want to ensure that all pieces of any software are removed from your device, we recommend that you use a specialized software uninstaller like CCleaner.
What is the StartAllBack feature?
StartAllBack is a user interface app that intends to “fix” everything that’s wrong with the Windows 11 user interface. It does this by giving people the option to revert things to a Windows 10 style, or even a Windows 7 style for those who miss the old interface.
And it doesn’t stop there as there are a lot of customization options on StartAllBack. You can even make the user interface look like something straight out of a Chromebook.
Other customization options include an improved File Explorer, Control Panel, the ability to move the taskbar to the top of the screen, new menus, new fonts, fast search, and so much more. There’s something it for everyone.
Now, this isn’t a free app that you can download. You do have to purchase a license to get yourself a copy, and there are even Business versions for purchase that allow you to change up to 400 different PCs.
Fortunately, StartAllBack is cheap and there is a free trial available if you want to try out the app.
This guide will show you how to download the free trial of StartAllBack and take you through some of the key features available on that particular version, so you can decide for yourself if you want the full version. The guide will also show how to access the settings and how to uninstall them.
Are there other ways that I can customize my Windows 11 computer?
There are a lot of different ways to customize your machine. For example, you can customize what your Function Keys do thanks to an app called Microsoft PowerToys. After opening the app, you go to the Keyboard option, select which Function Key you want to change, and type in the command. Although, you can’t add CTRL+ALT+DEL to the app.
It’s also recommended that you purchase yourself a remote control software for your computer. It’s a useful app that gives you the ability to control another computer and certain aspects of it from anywhere, so long as the main computer has access to the host.

As for the future, a leak on Twitter has revealed that Windows 11 desktop stickers are making their way to the system. They’re stickers that allow you to pick and place decorative images of cute animals over your desktop. Nothing crazy or life-changing, but it’s certainly a cute way to change your computer’s look.
Summary
Why did Microsoft undo Windows 10’s user interface? People liked that version. It does appear that Microsoft took inspiration from macOS when it was developing Windows 11 and got rid of a lot of the customization options people expect to have.
The changes made to the Start menu, right-click context menu, taskbar, and others have rubbed people the wrong way. People started to raise the question of why fix what wasn’t broken.
If you’re looking to install StartAllBack on ARM version of Windows, you’ll be pleased to hear that the software is fully compatible with it. Moreover, if you’d like to look into viable alternatives, we’ve got you covered.
Feel free to leave a comment below if you have any questions on other Windows 11 apps. Also, leave comments about guides that you’d like to see or information on other Windows 11 features or list guides like this.
Read our disclosure page to find out how can you help Windows Report sustain the editorial team. Read more


Improve this guide


User forum
0 messages