How to Use the Steam Server Browser [Expert Guide]
You can use the web option or the Steam Server Browser with ease
Key notes
- Did you know that you can browse servers in Steam outside a game? Today we’ll show you how to do that.
- You can easily do it both through the desktop client software and the web option.
- To get the best out of the Steam server browser, we strongly recommend trying a specialized browser.
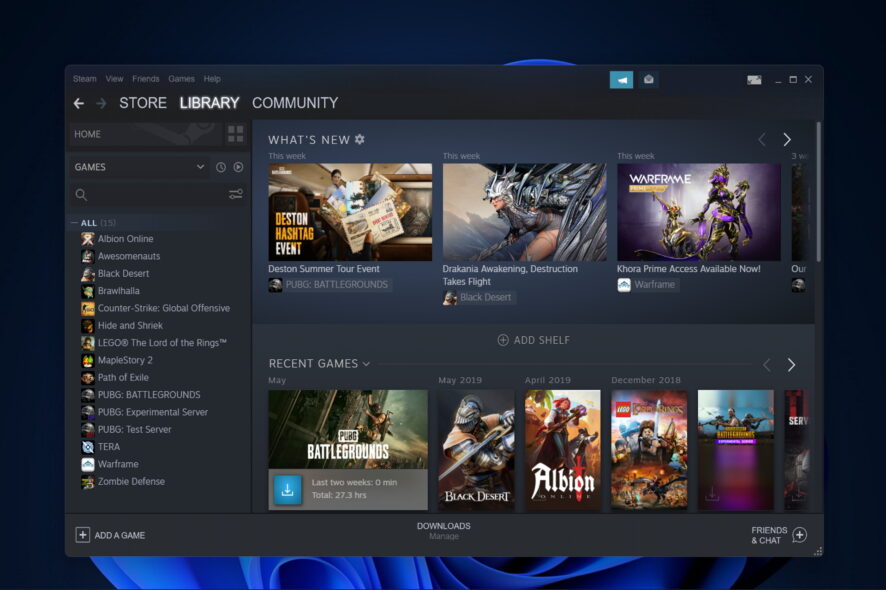
Steam is the largest gaming platform on the desktop with hundreds of multiplayer games. Tons of worldwide users choose it to enjoy their day-to-day gaming experience, so it is no longer a surprise that it is great, especially for professional gamers.
Speaking of multiplayer games, sometimes it’s hard to find a proper server to play on. This is where the Steam Server Browser comes in, and in today’s article, we’re going to show you how to use it properly.
What is the Steam Server Browser?
Everything you need to set up dedicated servers for your game is included in the Steam Game Servers API. You have the option of hosting these gaming servers yourself, or you may delegate that responsibility to the members of your community.
This is the optimal option for games with extremely high levels of competition, such as Dota 2, or games with permanent servers, which continue to operate even after players quit (such as Team Fortress 2).
Can Steam host servers?
For those of you who are wondering if Steam has its servers, well, you have to know that there are tons of these types of servers available all around the world. From Dota 2 to Ark, Steam Server Browser offers connectivity for users.
The whole idea behind the CDNs (Content Delivery Networks) is to put servers everywhere, so that no matter where the user is, he/she can get a good connection.
Steam specifically uses Akamai. This has deployed the most pervasive, highly-distributed content delivery network (CDN) with more than 216,000 servers in over 120 countries and within more than 1,500 networks around the world.
With this technology, Steam Server Browser ensures pings don’t exceed a maximum limit that would put the game on hold.
Quick Tip:
Another way to access Steam servers is on the Opera GX browser through Discord channels and the built-in VPN that offers several private virtual networks.
The live check for RAM and CPU usage and bandwidth limiters are important for a day-by-day gaming session to avoid lags and high pings outside the browser.
Opera GX
It can ease resource consumption when browsing and have the minimum impact over Steam sessions.How do I add a Steam server?
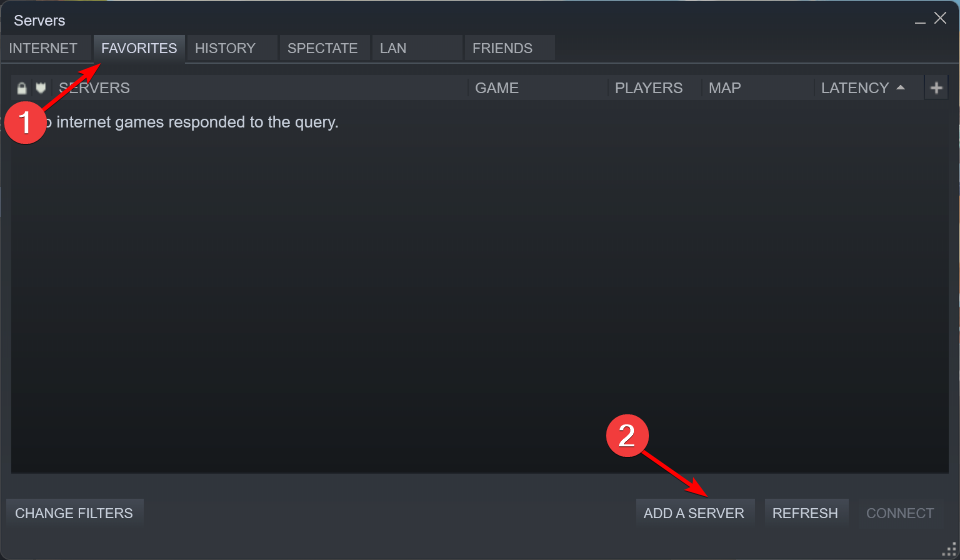
- Open the Steam client and go to View followed by Servers to see the Steam server list.

- Navigate to the Favorites tab and click Add a server.
Now, let’s see how you can easily use the Steam Server Browser ports.
How do I use the Steam Server Browser?
1. Use the Steam software
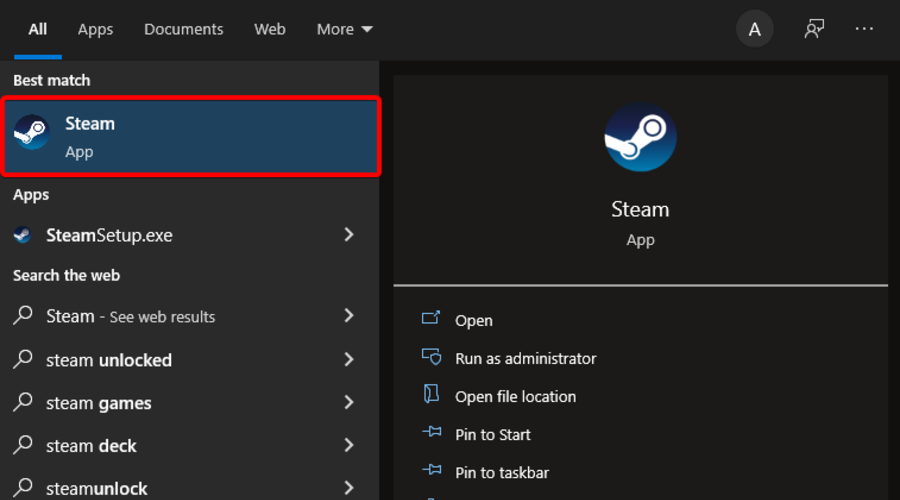
- Press on the Windows key, type Steam, then open the first result.
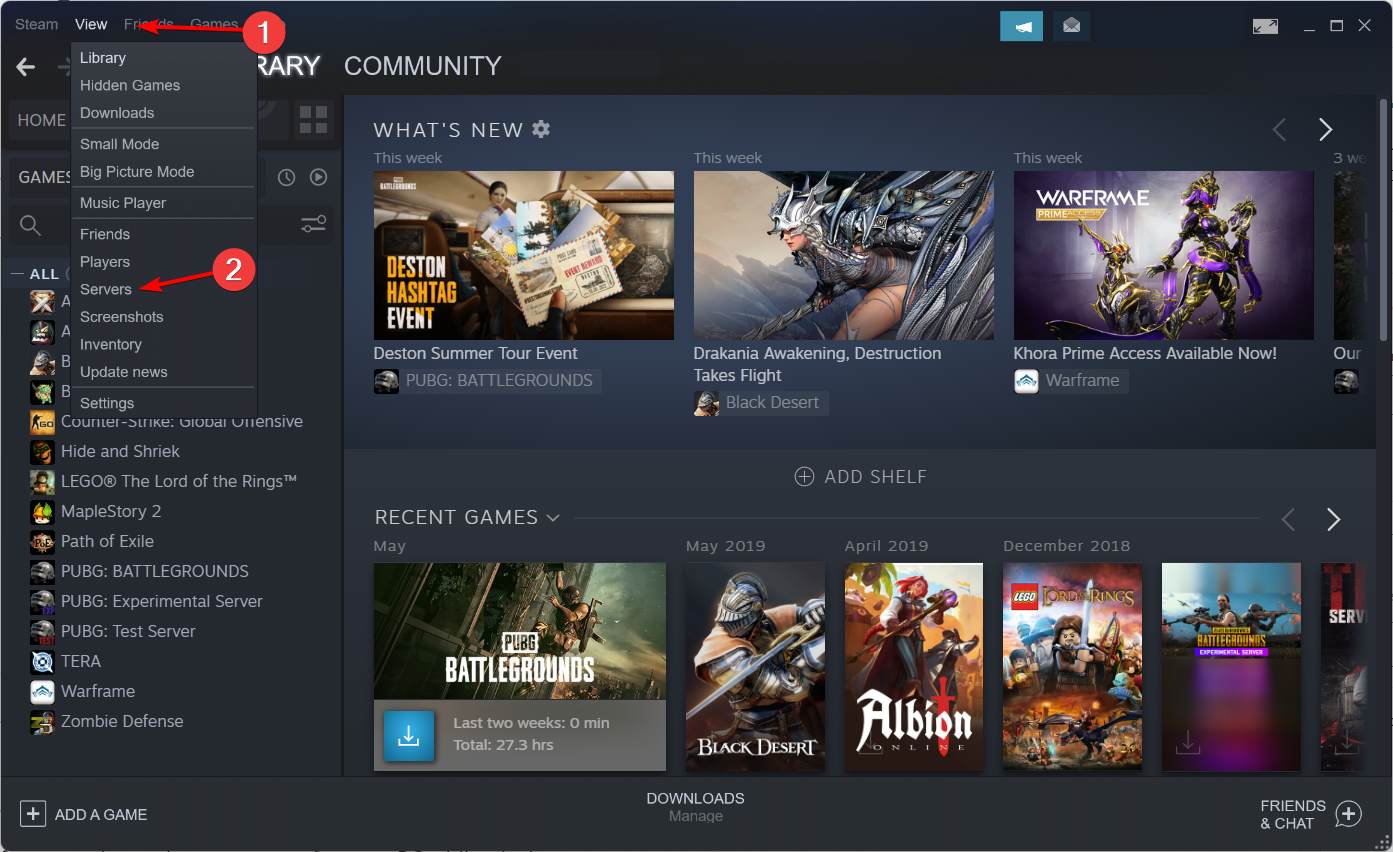
- From the top menu, click on View, and select Servers.
- Double-click the server you want to join.
- If needed, you can change the search settings and select the game you want to play.
As you can see, using the Steam Server Browser directly through the app is extremely simple, but several other methods are worth to be tried.
2. Use the web option
- Visit Steam Browser then configure your search as you wish, and find the desired server.
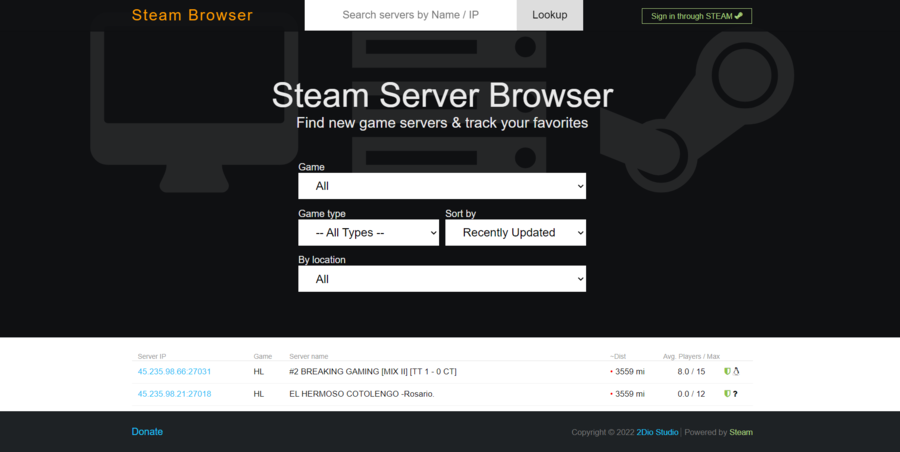
- Once you find a suitable server, you need to copy its IP address and add it to the game to join it.
3. Use the Steam Server Browser
- Subscribe to Steam Server Browser and download the software to run it.
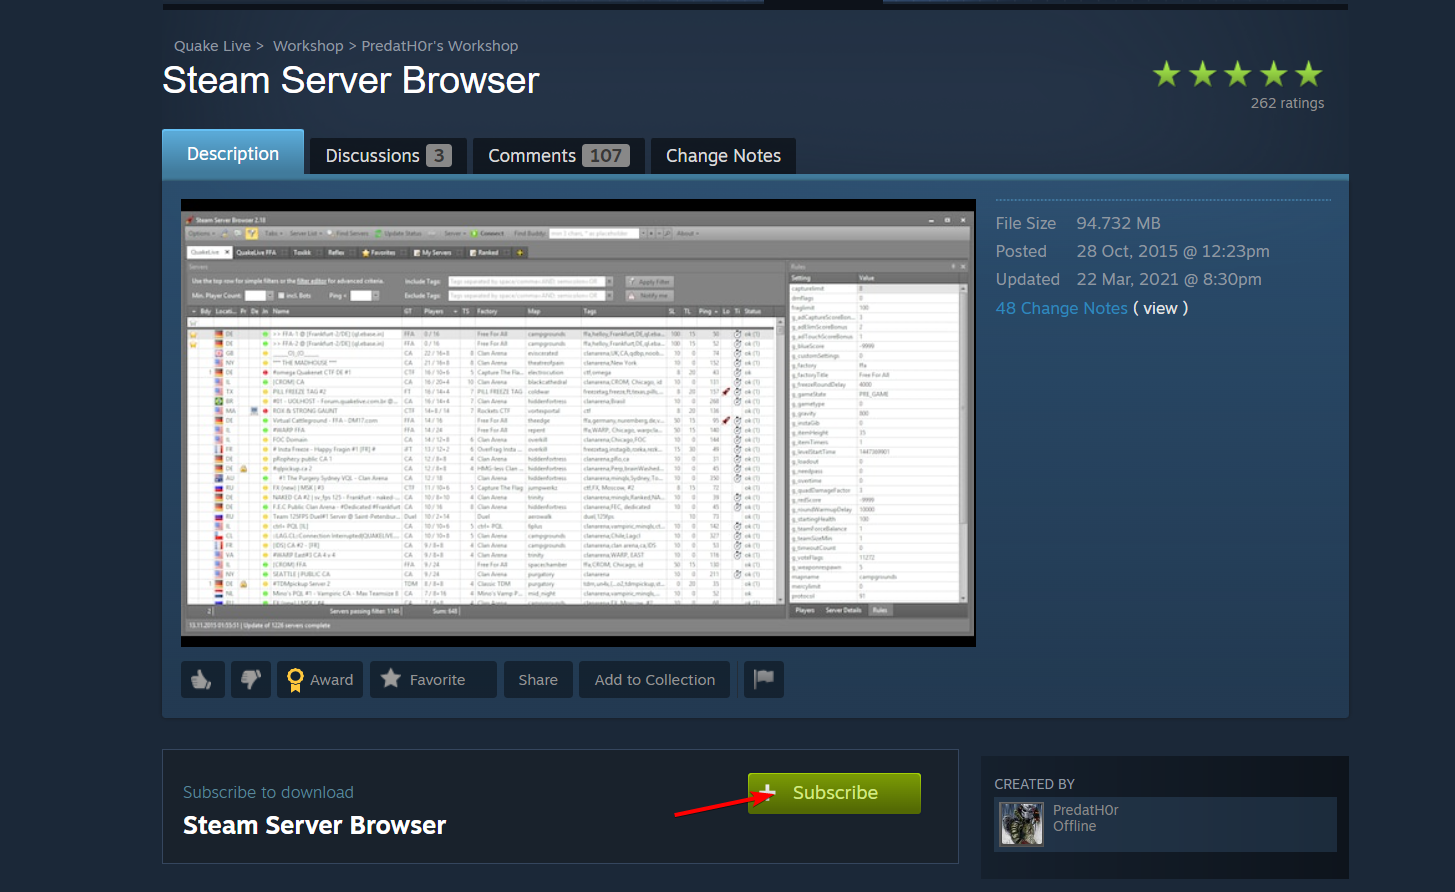
- Locate the desired server, copy its IP address, and paste it into the game in order to join.
Using the Steam Server Browser is a great way to find and join a server for a specific game, and if you already haven’t tried it, this might be a perfect time to do it.
What can I do if the Steam Server Browser is not working?
- Open Windows Search by pressing on the magnifying glass icon and type the following command where you change game_name to the name of the game you are having issues with
%localappdata%\game_name\Saved\Config\WindowsNoEditorthen press Enter.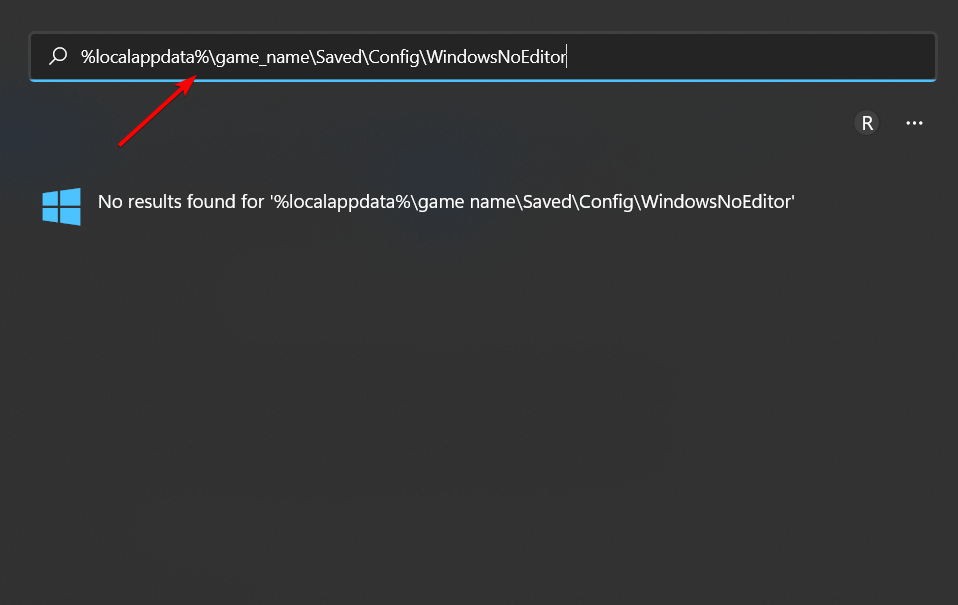
- Next, you need to open Engine.ini with notepad and add the following lines at the bottom of the file:
[OnlineSubsystem] PollingIntervalInMs=100 - Save the file then try to access the server you want again.
How can I make my own Steam server?
1. Choose a game
To set up a Steam server, you’ll first need to check if the game you want to host has dedicated server support. In this matter, navigate to the Steam servers’ official page.
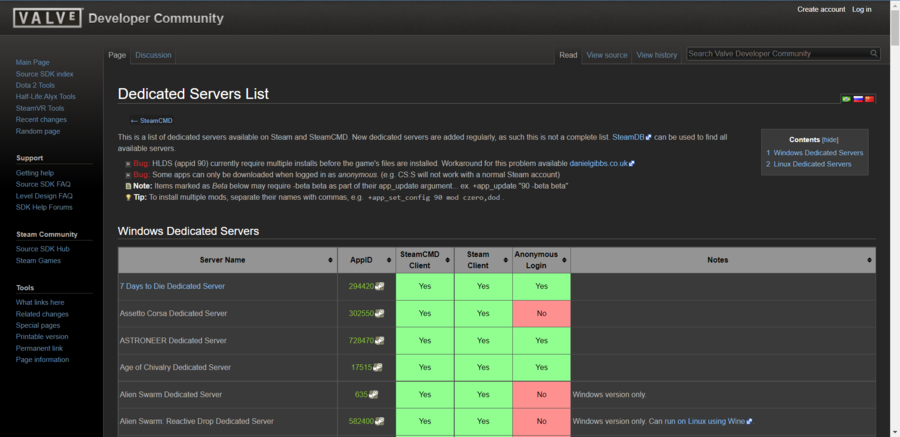
Their list is extremely varied and is continuously growing. There, you can find popular single and multiplayer options la CS: GO, ARK: Survival Evolved, Space Engineers, and many others.
2. Install and run SteamCMD
The second step to set up your server requires Valve’s official command-line tool for running Steam games and game servers, known as SteamCMD.
To download it, navigate to the official SteamCMD page, then go to the Downloading SteamCMD section. If you’re using Windows, download the steamcmd.zip file and extract it to a folder.
Users who want a complete walkthrough for installing, updating, and managing dedicated servers can check this guide on how to use SteamCMD for detailed instructions.
To run SteamCMD, follow the steps below:
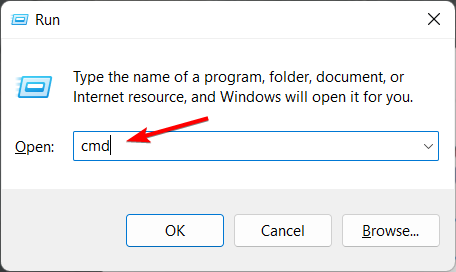
- Use the following keyboard shortcut to open the Windows run dialog box: Windows + R.
- Type cmd, then hit Enter.
- Navigate to the folder where you unpacked the steamcmd.zip file.
- Now, in the Command Prompt window, input the following command, then hit Enter:
steamcmd - SteamCMD automatically updates to the latest version each time you run it.
Some games require the use of Steam credentials to run a server. Others can be hosted anonymously.
To use your Steam login credentials, type in: login anonymous
To log in with an account, type in: login <username>
Do not forget to replace <username> with your Steam username, then press Enter and type in your Steam account pass when prompted.
3. Download the game server files
To download the server files for a game, first choose an installation directory for the server with the command: force_install_dir <path>
Keep in mind that <path> is the full path to the folder where you want to install the server.
Then, you’ll need the AppID for the game and you can find it in the AppID column in the Steam list of the dedicated server.

Download the files by typing:
app_update <app_id> validate
Also, do not forget that <app_id> is the AppID for the game. This command downloads and validates the server files.
Your server is now ready to be configured and launched. We hope that this information helped you to use the Steam Server Browser properly.
If you have any other information or questions concerning the Steam Server Browser on the Windows platform, feel free to tell us in the comments section below.
Read our disclosure page to find out how can you help Windows Report sustain the editorial team. Read more


Improve this guide


User forum
0 messages