SteamVR Settings Not Working [2 FIXES THAT REALLY WORK]
3 min. read
Updated on
Read our disclosure page to find out how can you help Windows Report sustain the editorial team Read more

Some users trying to use Steam VR with the WMR (Windows Mixed Reality) headsets have reported that they can’t access the Steam VR settings.
Here is what a user had to say about this topic on Reddit:
I have been troubleshooting this issue for a while and I have not found a fix yet. When selecting the “Advanced Settings” menu in SteamVR dashboard (in VR), an empty screen shows up. I can still run OpenVR Advanced Settings from the desktop, but not solving this issue is driving me nuts. Uninstall/reinstall did not help.
This issue seems to be present when users tried the WMR headset inside Steam VR on computers using an integrated graphics card and also a dedicated graphics card.
Even though this issue is not very common, it can be extremely annoying not to be able to access the advanced settings inside their Steam VR application.
For these reasons, in this article, we will explore some of the best solutions to deal with this issue, and get back to playing your favorite VR games using Windows Mixed Reality headsets inside Steam VR.
What to do if SteamVR isn’t working?
1. Try using the Beta versions of Steam VR
- Open up the Steam application on your PC.
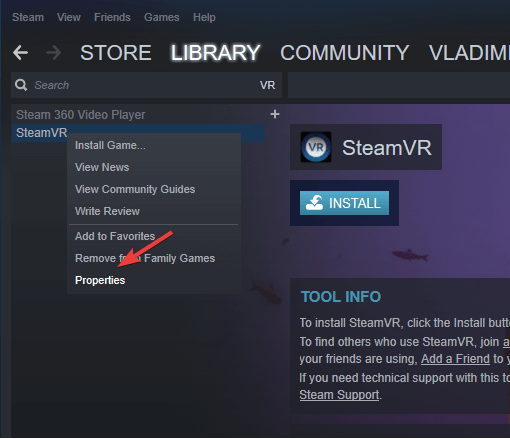
- Click Library -> right-click Steam VR -> select Properties.
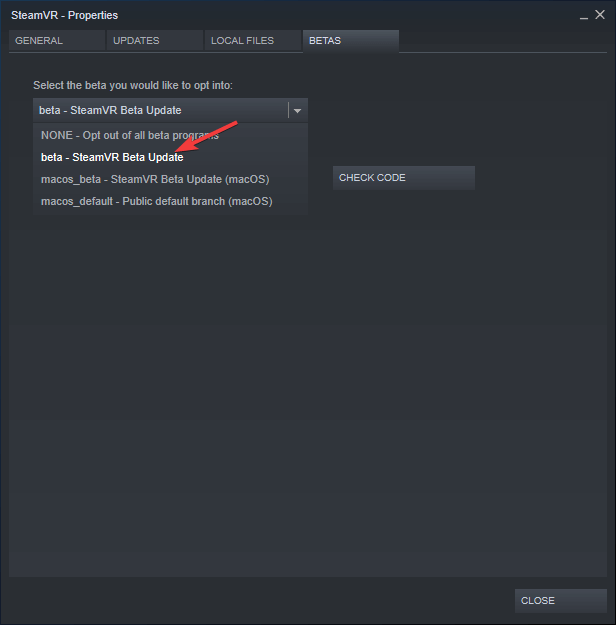
- Select the Betas tab.
- Under Select the beta you would like to opt into list -> select beta – SteamVR Beta Update.
- Close the window and wait for the update process of SteamVR to finish.
SteamVR Home has stopped working? Fix it now with this guide!
2. Change settings in Nvidia/AMD control panel
Note: You will need to force Steam, Steam VR, VR.exe, and also WMR applications to run on the dedicated graphics card.
- Right-click on an empty area on your desktop -> select NVIDIA Control Panel option.
- Select the Desktop menu -> enable Run with graphics processor.
- Go back to your desktop -> right-click the app you want to force to use the dedicated GPU.
- Hover your mouse over the option Run with graphics processor -> select High-performance NVIDIA processor.
- Right-click on an empty area on your desktop -> select Catalyst Control Center.
- Select Power -> select Switchable application graphics settings.
- Here you will be able to see a list of apps AMD apps that can be modified.
- Click on Add application button -> select the EXE of the app you want to modify.
- After selecting the specific app -> click the drop-down menu next to it -> select High Performance.
In this article, we explored the best solution to deal with Steam VR settings not allowing you to access the menu. Please follow these steps carefully in order to avoid any issues.
Let us know if this guide helped you solve your issue by using the comment section below.
READ ALSO:
- 9 best VR zombie games to play on Steam in 2019
- Windows Mixed Reality headsets will get SteamVR this month
- When is VR support coming to No Man’s Sky?

