How to fix the SteamVR Home has stopped working error
Key notes
- SteamVR is Valve's virtual reality system that most Steam users have lots of fun with.
- Verify the integrity of the SteamVR Tool cache to replace corrupted or missing files.
- If you're interested to learn more about virtual reality, check our VR section.
- Steam is a huge platform for online gaming. Read more about it from our Steam Hub.

SteamVR is Valve’s virtual reality system that most Steam users have lots of fun with.
However, some users have stated on forums that SteamVR crashes on launch when they start games for it with error messages along the lines of SteamVR has stopped working or Steam not found.
These are a few potential resolutions if SteamVR Home isn’t working for you.
How can I fix SteamVR Home issues?
- Verify the SteamVR Tool Cache
- Run the Steam Software as an Administrator
- Optimize Windows for SteamVR
- Uninstall Conflicting Third-Party Software
- Update the Graphics Card Driver
- Reinstall the SteamVR Software
1. Verify the SteamVR Tool cache

SteamVR won’t work with corrupted or missing files. Verifying the integrity of the SteamVR Tool cache replaces corrupted or missing files. You can verify the tool cache as follows.
- Click Library in the Steam client software to open a drop-down menu.
- Then select Tools on the drop-down menu to open the Tools library.
- Right-click SteamVR and select Properties on its context menu.
- Select the Local Files tab on the window that opens.
- Press the Verify Integrity of Tool Cache button.
2. Reinstall the SteamVR Software
Some Steam users have fixed SteamVR by reinstalling it. You can do that by opening the Library drop-down list within the Steam client software.
- Click Tools on the drop-down menu.
- Then you can right-click SteamVR on the Tools drop-down menu to open its context menu.
- Select the Properties option on the context menu.
- Select the Local Files tab, which includes a Delete Local Tool Content option.
- Press the Delete Local Tool Content button to uninstall SteamVR.
- Before reinstalling SteamVR, unplug the Vive control box.
- Then plug the headset back in again to reinstall drivers.
- Thereafter, double-click SteamVR listed in the Tools library to reinstall it.
To reinstall the software properly, first, you need to uninstall it properly. You can struggle with the regular means or otherwise consider dedicated uninstalling tools.
In order to successfully uninstall any application from your computer, it’s not always enough to perform it manually from your Windows.
You have multiple software that can deliver great support for uninstalling any programs from your device, including all file leftovers like temporary files.
Hence, take advantage of the most effective uninstaller programs if you need reliable support for fully erasing SteamVR software.
3. Run the Steam Software as an Administrator
Running the Steam client software as an administrator might kick-start SteamVR. To do that, right-click Steam.exe in its folder. Select the Run as administrator option on its context menu.
4. Optimize Windows for SteamVR
There are a few ways you can optimize Windows to ensure SteamVR games run more smoothly.
If your laptop or desktop has an Nvidia GPU, you can configure the power management mode for max performance with Nvidia Control Panel options.
This is how you can optimize Windows for SteamVR with the Nvidia Control Panel’s 3D settings.
- Right-click the Windows desktop and select Nvidia Control Panel.
- Click 3D Settings to expand that tab category.
- Then select the Manage 3D Settings tab shown in the snapshot directly below.
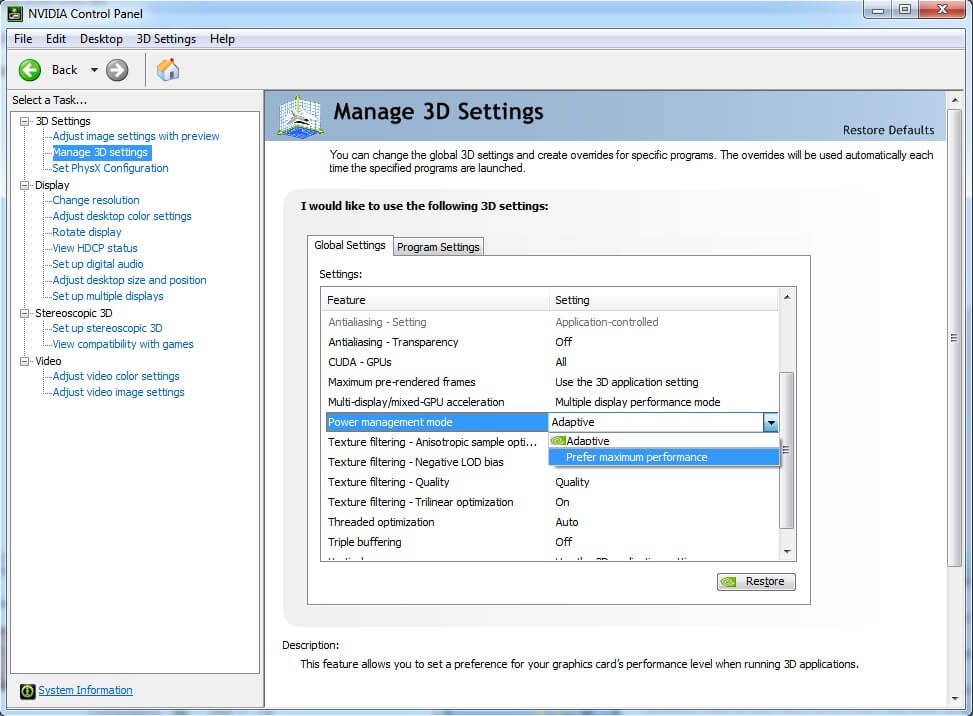
- Select Prefer maximum performance from the Power management mode drop-down menu.
- Press the Apply button.
5. Uninstall Conflicting Third-Party Software
There are a few programs that Valve has confirmed conflicts with SteamVR.
The Asus AI Suite, JDSLabs ODAC USB Audio device, TP-LINK 300Mbps Wireless N PCI Express Adapter, and Apple Cinema displays are some of the software that conflicts with SteamVR.
If you have any of that software installed, uninstall it and then restart Windows.
Some Steam users have also stated that uninstalling GeForce Experience and Avast anti-virus helps revive SteamVR.
6. Update the Graphics Card Driver
SteamVR has stopped working error messages can often be due to driver compatibility issues. For instance, SteamVR stopped working for some users after the Windows 10 Creators Update.
As such, updating your graphics card’s driver might fix SteamVR. You can update a graphics card driver as follows.
- First, you’ll need to note down platform and graphics card details. Press the Windows key + R hotkey and enter ‘dxdiag’ in Run’s text box to open the window shown directly below.
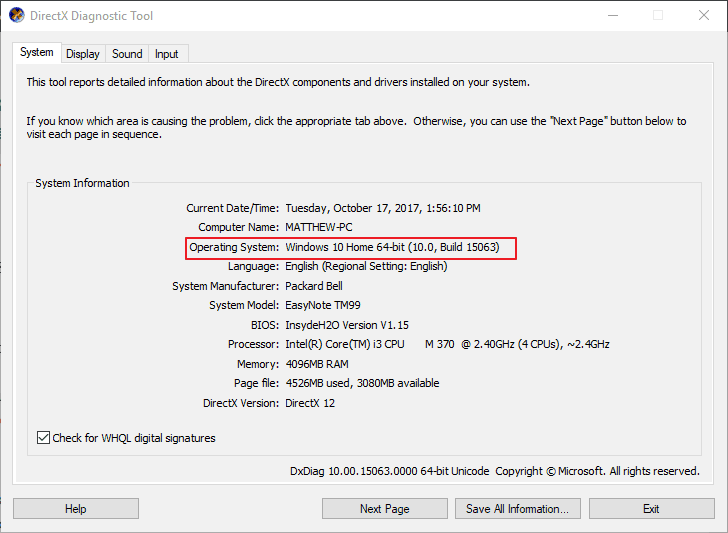
- Note down the operating system listed on the General tab.
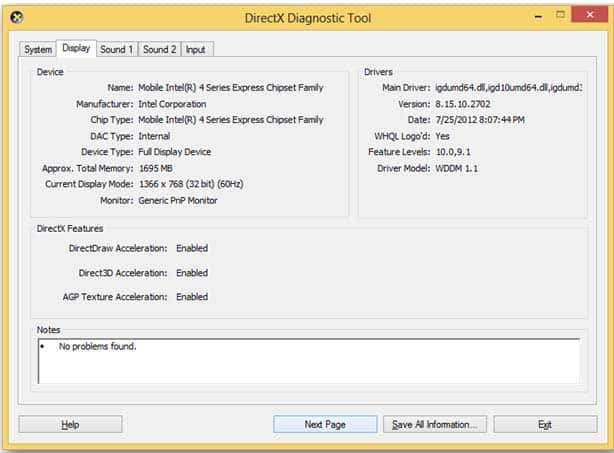
- Click the Display tab, and note down the graphics card listed there.
- Next, open your graphics card manufacturer’s website in a browser.
- Open the driver download section on the manufacturer’s website.
- Both the Nvidia and AMD websites have drop-down menus with which you can find drivers for your graphics card. So select your graphics card model and operating system from the drop-down menus.

- Then click the Download button for your graphics card’s latest compatible driver.
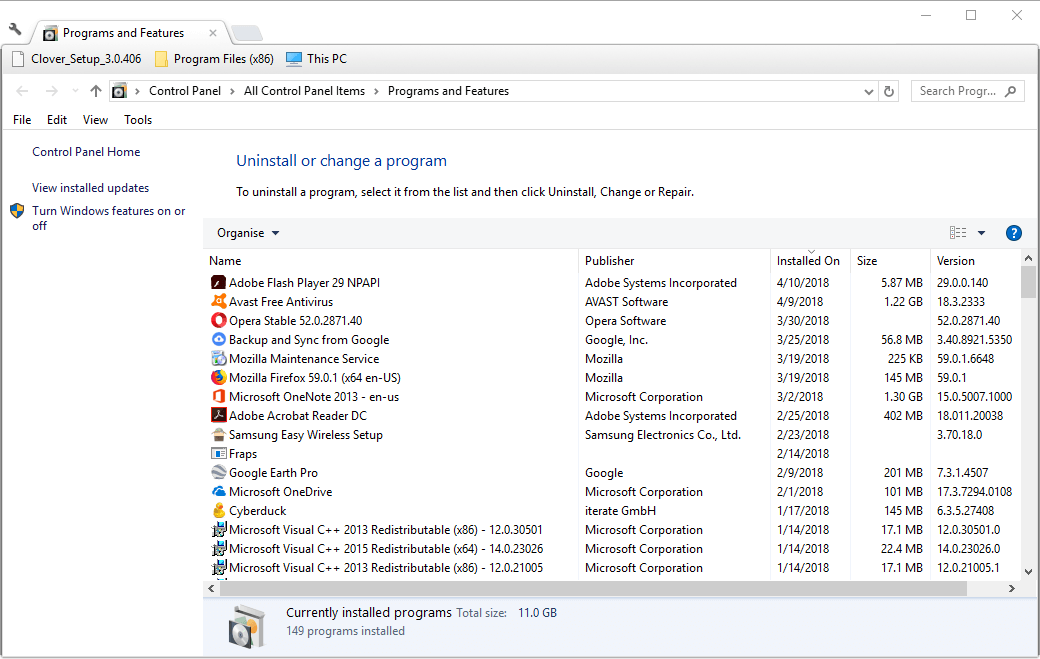
- Uninstall the current graphics card driver by entering appwiz.cpl in Run, selecting the graphics card driver to remove and pressing the Uninstall button.
- Thereafter, open the folder you saved the new driver to.
- Open the graphics card driver’s setup file as an administrator to launch its installer. Then you can go through the installer to add it to Windows.
- Restart Windows after updating the driver.
Those are some of the fixes that might get SteamVR up and running for you. If you’re getting a Vive 208 error, here’s an expert guide to fix that problem.
If you have other resolutions for SteamVR not working, feel free to share them below.
Read our disclosure page to find out how can you help Windows Report sustain the editorial team. Read more


Improve this guide


User forum
0 messages