Create Parity Volume With Storage Spaces [2 Simple Ways]
You can easily create a Parity volume in Windows Settings
3 min. read
Updated on
Read our disclosure page to find out how can you help Windows Report sustain the editorial team Read more
Key notes
- Windows Storage Spaces offers five types of resiliencies when creating parity volume.
- The Parity volume is well suited to long-term data storage.
- Storage Spaces require at least three drives to create a parity volume.
Windows 11 provides users with tons of features, one of which includes Storage Spaces. It’s a feature that allows users to create virtual drives with varying protection levels.
Hence, we’ll show you the best ways to create a parity volume with storage space in Windows.
What is a parity storage layout?
Parity is one of the five types of resiliencies offered by Storage Spaces. This type of resiliency writes your data with parity information on the available drive to protect against data failure. Also, it is quite similar to the RAID 5 technology.
Data and parity information are stripped across pool member disks in a parity storage layout. This option is better suited for data archiving and streaming music and videos.
Parity also requires a minimum of three storage drives to protect it from a single data failure and a minimum of seven to protect it from two disk failures.
How do I create a parity volume with Storage Spaces?
1. Create it via the Control Panel
- Press the Windows key, type Control Panel, and hit Enter.
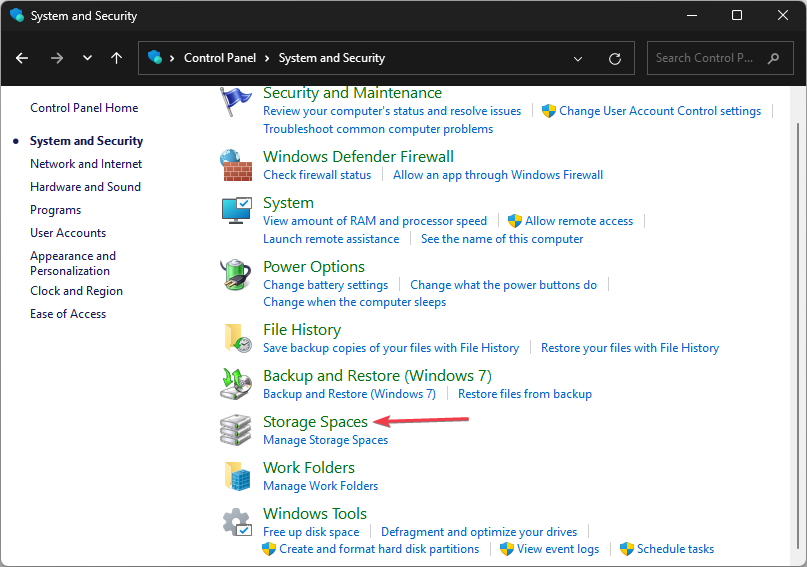
- Then, click on System and Security, and click Storage Spaces in the next window.
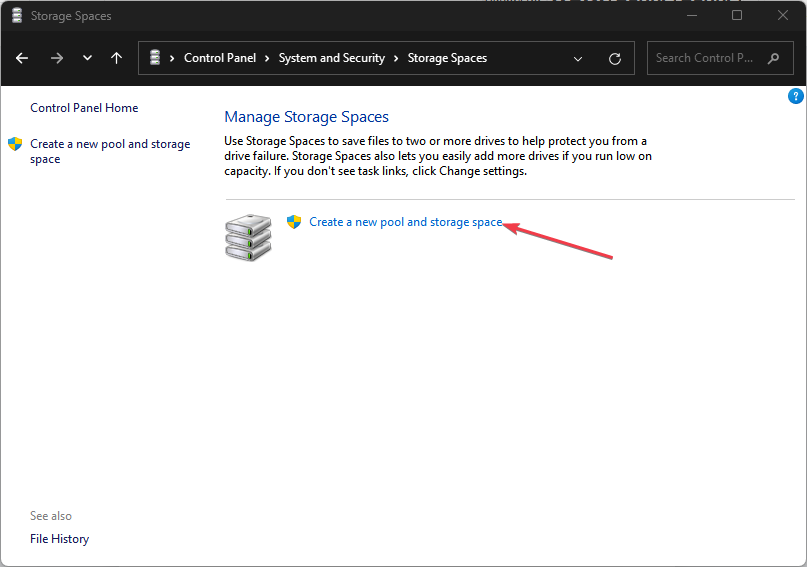
- In the Storage Spaces window, click on Create a new pool & storage space.
- Click Yes in the mini prompt to confirm your actions.
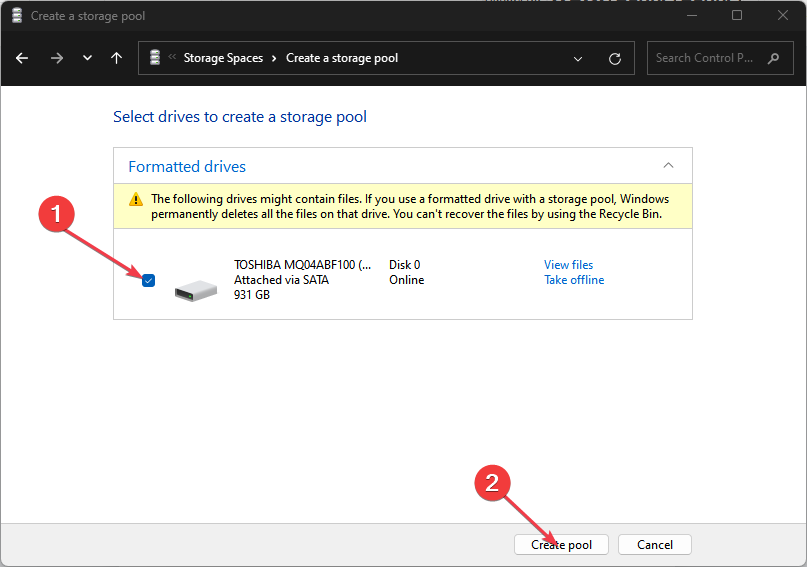
- In the next window, check all the checkboxes next to your listed drives, and click on Create Pool.
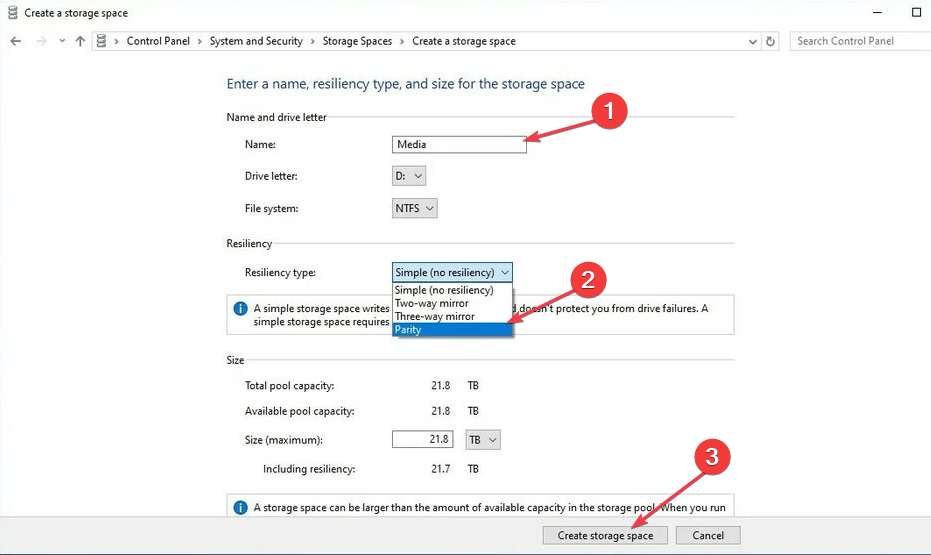
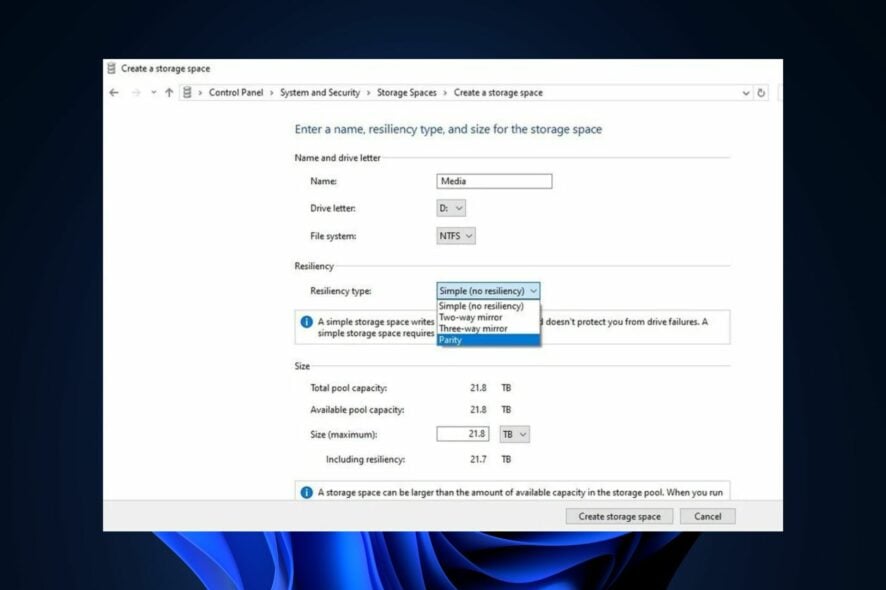
- In the next window, rename the drive according to your preference by editing the Name tab, and selecting Parity from the drop-down menu next to Resiliency Type.
- Also, click Create Storage Space to create your new drive, and wait for the process to be completed.
- Once the Storage Space is created, you can verify if the drive was created by checking your File Explorer.
2. Create Parity Volume in Windows Settings
- Press the Windows key + I to open the Settings app.
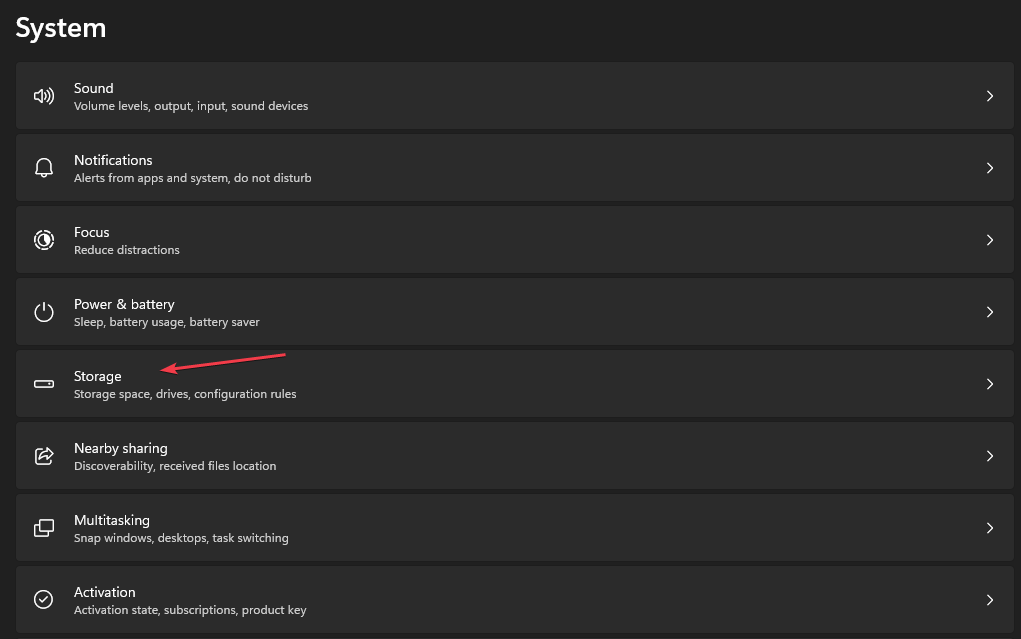
- Then, click on System and click Storage.
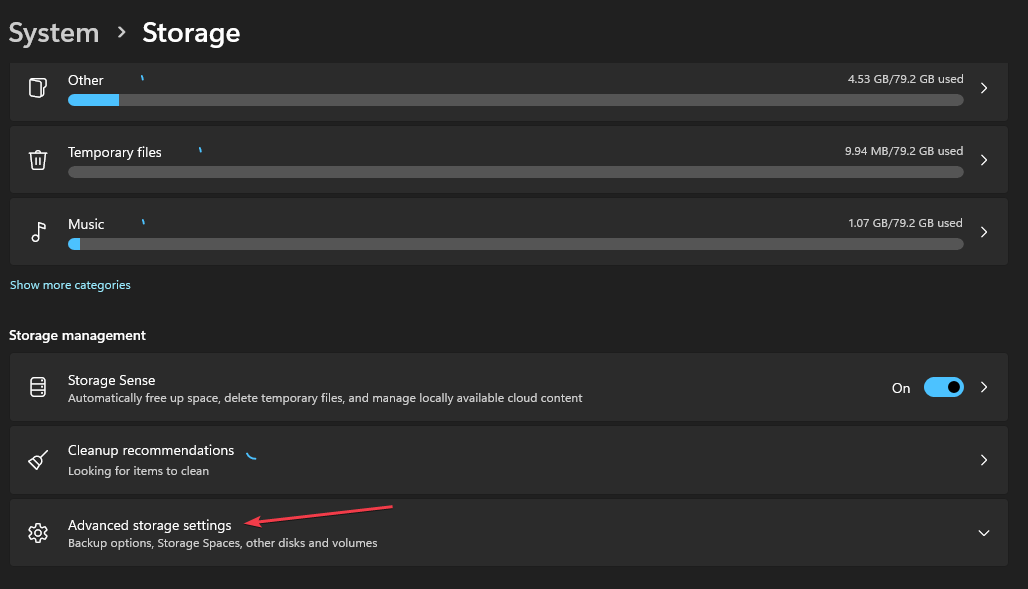
- Under the Storage Management section, click the Advanced Storage Settings option.
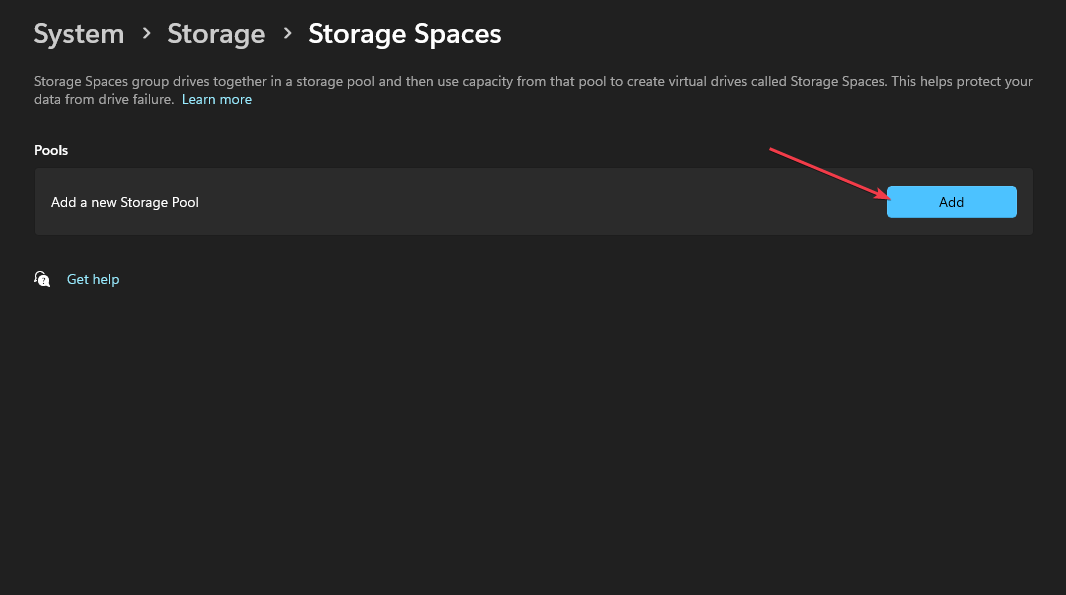
- Then, select the Storage Spaces option, and click the Add button next to Add a new Storage Pool.
- Confirm the name of the Storage Pool and select a minimum of three drives to create a pool parity.
- Further, click on Create, and enter your preferred name for the storage space.
- Specify the size of the space and select the Parity option under the Resiliency section.
- Then, click Create, and specify a label and name for the newly created drive.
- Under the File System, select NTFS, and click on Format.
This will create a new drive which can be viewed on File Explorer. Also, if a drive fails after creating a parity volume, the storage and data will be available.
However, you’ll have to replace the faulty hard drive because a second drive failure will lead to data loss. Also, here are the best data recovery software for Windows.
Further, a parity volume is a very efficient method of storing data and is very suited to long-term data storage. If you’ve been searching for the best way to create a parity volume, you should be able to accomplish it by the end of this article.
If you’ve any suggestions on creating a parity volume, let us know in the comments.

