Surface Slim Pen 2 Tips & Tricks – how to get the most out of your new pen
5 min. read
Published on
Read our disclosure page to find out how can you help Windows Report sustain the editorial team. Read more
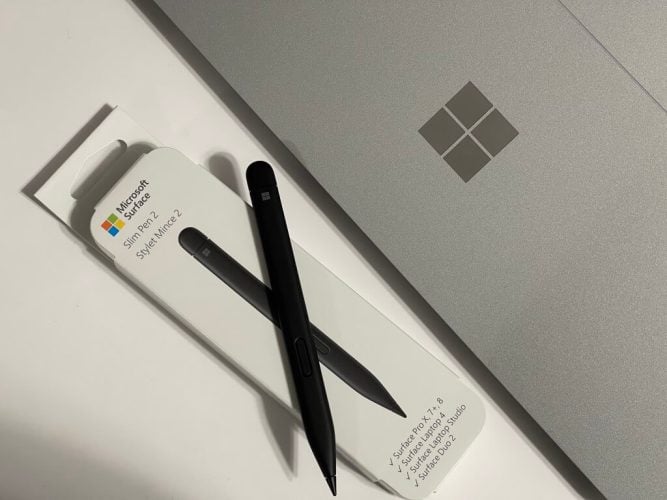
If you’re buying the new Surface Pro 8 or Surface Laptop Studio, then the Surface Slim Pen 2 should be a natural purchase. Available for $130, the newest Surface Pen brings some minor design advancements over the first generation, as well as a haptic feature that make inking on the Surface Laptop Studio & Surface Pro 8 more lively. That’s why we put together this guide for you with some tips and tricks and how you can get the most out of your new Surface Slim 2 pen.
Editor’s note: This guide is designed around the Slim Pen 2 & Windows 11. We have a legacy guide for older Surface Pens & Surface devices.
A note on the pen
We want to begin this piece by noting that the Surface Slim Pen 2 is designed for the newer Surface Pro 8 and Surface Laptop Studio. However, like most Surface Pens, it is backwards compatible with older Surface devices. You won’t be getting the special haptic feedback if you use Slim Pen 2 on an older Surface, but it is certified for legacy Surface devices. That includes the Surface Pro 3 -Surface Pro 7+, Surface Pro X, Surface Duo, Surface Go 2, Surface Laptops 1-4, Surface Studio 1-2, and Surface Book 1-3.
Change your haptic feedback settings
That said, let’s jump into our first tip which relates the haptic feedback. Officially Microsoft calls this feature of the Slim Pen 2 “tactile signals.” This is thanks to a haptic motor built into the bottom half of the pen, near the tip which provides slight vibrations as you ink on the screen. By default, the settings for these signals are set to medium-low. However, if you go to Bluetooth & devices in Windows 11’s settings menu, followed by Pen & Windows Ink, you can change the tactile intensity so that it’s all the way up. When you do this, you’ll be able to feel stronger friction as you drag the pen across the screen for your inking. It creates more of a pen-to-paper feel.
Find your lost Surface Slim Pen 2
The second tip on our list involves finding lost Surface Pens. This not only applies to the Slim Pen 2, but any other Surface Pen you might own. Since a Surface Pen is usually tied to a Surface, you can locate it by using the Find my Pen Under Privacy & Security followed by Find by Device. This pulls the location data from your Surface and gives you a map of where Windows thinks your pen might be. Of course, it’s not always accurate since it’s pulling data from Wi-Fi networks, and just showing you a general map. If you lost the pen inside your home, or at the office, you might be a bit out of luck.
Change your Windows Ink shortcuts
A signature feature of Windows 11 is the new inking menu that pops up whenever you pick up or connect a Surface Pen. In the case of the Slim Pen 2, once Windows detects a Slim Pen 2 is nearby and in your hands after being detached, you’ll see a pop-up menu above the taskbar with shortcuts to some suggested apps. You can switch these apps to your own liking if you please. Simply click the settings cog, and then the Edit pen menu. You can then add two more pinned apps to make it easier to jump into the inking action.
Change your pen pressure sensitivity in the Surface app
Surface Slim Pen 2 has a total of 4,096 pressure levels. That’s a lot of pressure to deal with, so you feel like the pen is too sensitive, though, you can tweak things down a bit. Just open the Surface App, and then click the bottom area to summon the Slim Pen 2 settings. You can then draw to test the pen pressure, and drag the slider around to change how light or heavy the pressure sensitivity is. The settings you choose will be system and app-wide and will remain in effect after you restart your Surface.
Change your Slim Pen 2 button functions
The last tip on our list involves the Slim Pen 2 button functions. Just like with the pressure sensitivity, you can tweak the buttons on your pen to fit your own needs. Open the Settings app, choose Bluetooth & devices, then choose Pen & Windows Ink. From there, you can click Choose with your shortcut button does. There will be options for what single-click, double-click, press and hold can do. Under each of these menus, you can choose one of the pre-set options like Whiteboard or Screen Snip, or the Pen Menu and OneNote. Or, you can tweak things so that you can open a specific program or app.
How are you inking?
We hope that these tips and tricks help you get more out of your new Surface Slim Pen 2. If you decide to use our new tips, let us know how you’re enjoying your Slim Pen in the comments below. And, be sure to keep tuned for more, as we’re planning additional coverage on our favorite inking, drawing, and note-taking apps on Windows 10 and Windows 11.







User forum
0 messages