SYSTEM PTE MISUSE: Causes & How to Fix This BSoD Error
Try disabling the PPT security from BIOS
6 min. read
Updated on
Read our disclosure page to find out how can you help Windows Report sustain the editorial team Read more
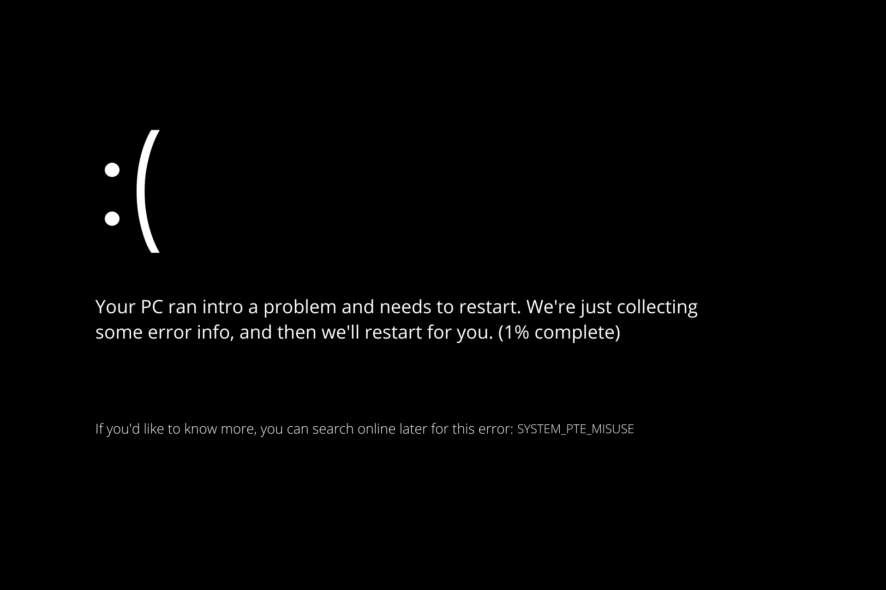
SYSTEM PTE MISUSE is a BSoD (Blue Screen of Death) problem that causes your computer to crash and forces you to restart it. A problem with certain files (such as file corruption or mismatched drivers) will almost always cause these types of warnings to appear.
Another cause for the SYSTEM PTE MISUSE error code, in some cases, is the mechanism that is implemented by the firmware. It is possible for this situation to arise as a result of the deployment of two separate types of security technologies: PTT and TPM.
You may remedy this issue quickly by disabling them in the BIOS when the computer is rebooted, or by updating your BIOS.
How can I fix the SYSTEM PTE MISUSE error in Windows 11?
1. Disable PTT security in BIOS
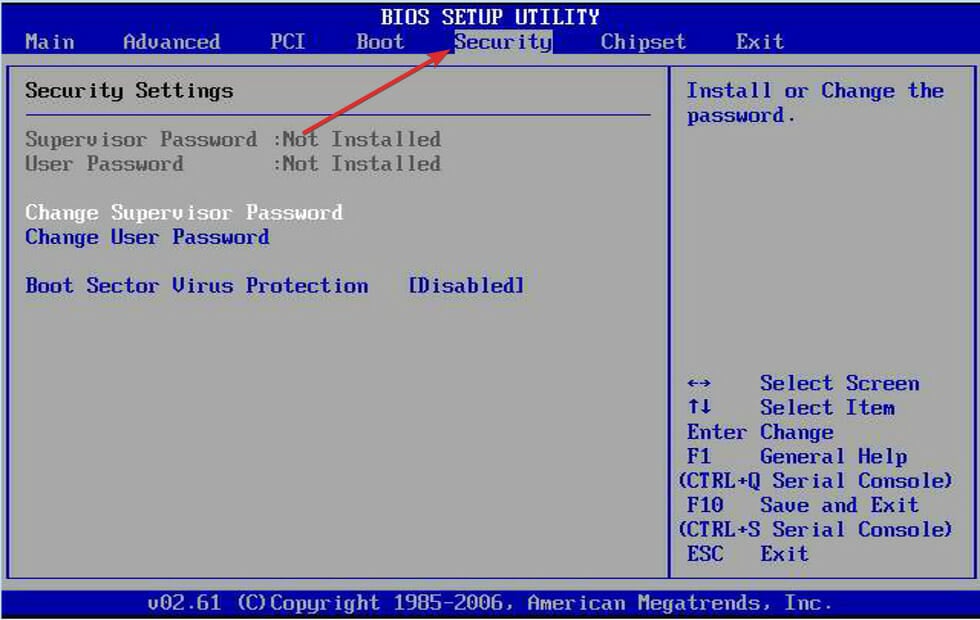
- Restart your PC and while your system boots, keep pressing the F2 or Del key to enter the BIOS screen.
- Use the arrow keys to navigate to the Security tab or a similar-sounding tab inside BIOS. Inside, select an option named PTT or PTT Security and set it to Disabled.
- Navigate to the Exit section and choose to Exit Saving Changes. This will proceed with the computer’s boot.
2. Set TPM as hidden
- Restart your PC and while your system boots, keep pressing the F2 or Del key to enter the BIOS screen.
- Use the arrow keys to navigate to the Security tab or a similar-sounding tab inside BIOS. Inside, select an option named TPM and set it to Hidden or Disabled.
- Navigate to the Exit section and choose to Exit Saving Changes. Now your PC will restart and apply the changes made.
3. Update your BIOS
Looking for the motherboard manufacturer’s website, such as Dell’s official page, and finding the Downloads or Support page for the motherboard model that you are interested in will be the first step to take.
The readers out there who have reported getting the SYSTEM PTE MISUSE error and who use HP computers should instead go to the official HP website for more information.
In a similar vein, for our Lenovo users, we recommend that you visit Lenovo’s official page for drivers and updates.
Download the version of the software to which you wish to make an upgrade and save it to your computer. Unless you have a specific requirement for an earlier version, you should generally go for the most recent one that is currently available on the market.
Your download will almost definitely be in the form of an archive, generally a ZIP file, and will take some time to complete. Once it is downloaded, you will have to unzip it, by right-clicking the file and tapping on the Extract all files option.
The flashing tool you choose will be determined by the motherboard you have. There are many different sorts of such tools available. The readme file that comes with the firmware upgrade should be able to assist you in determining which option is the best fit for your particular hardware setup.
Once the package has been unzipped, copy the documents to a USB drive and restart your computer. After that, navigate to the BIOS screen and select the BIOS update option.
More information and methods can be found in our post on how to upgrade your BIOS, which includes thorough guides with images attached to them to simplify the process.
4. Run a quick SFC scan
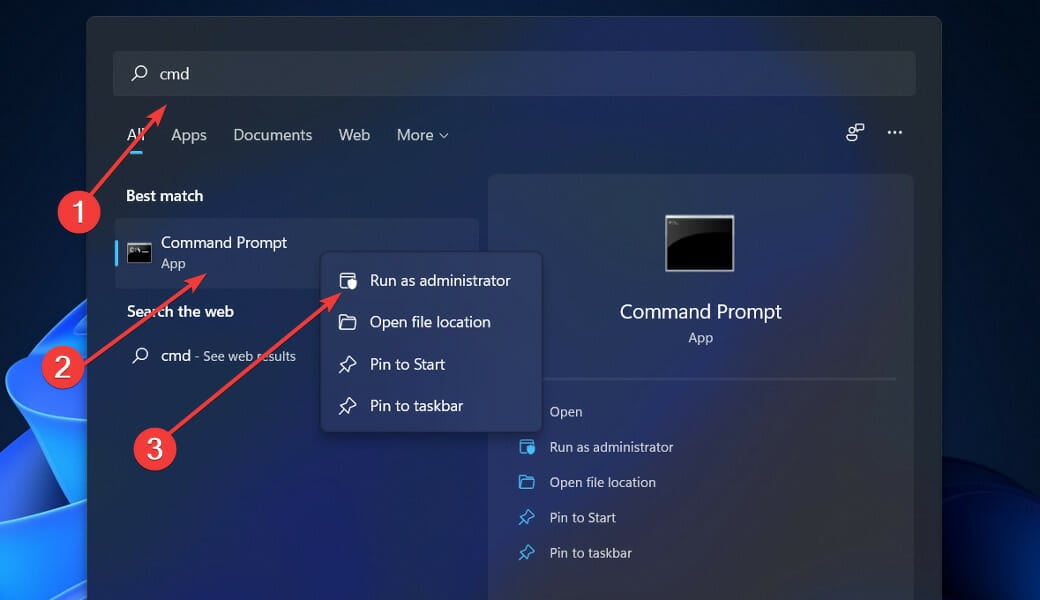
- Press the Windows + S key to open the Search bar, right-click on the most suitable cmd result and select Run as Administrator.
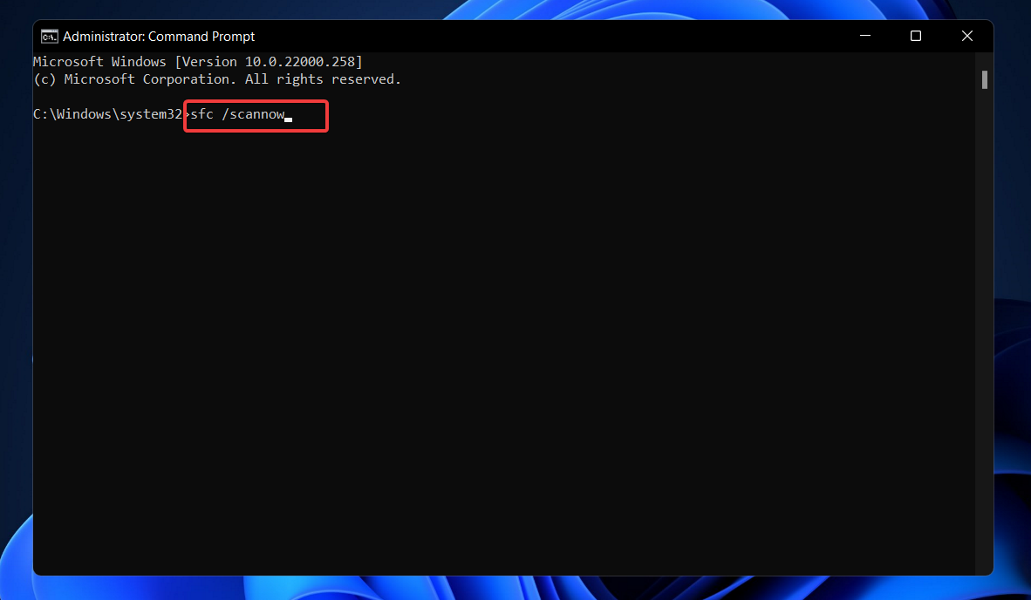
- Press Enter after you type or paste in the following command inside your cmd window:
sfc /scannow
Restart your computer when the process is completed. Note that it could take some time, make sure not to stop it midway.
5. Update Windows
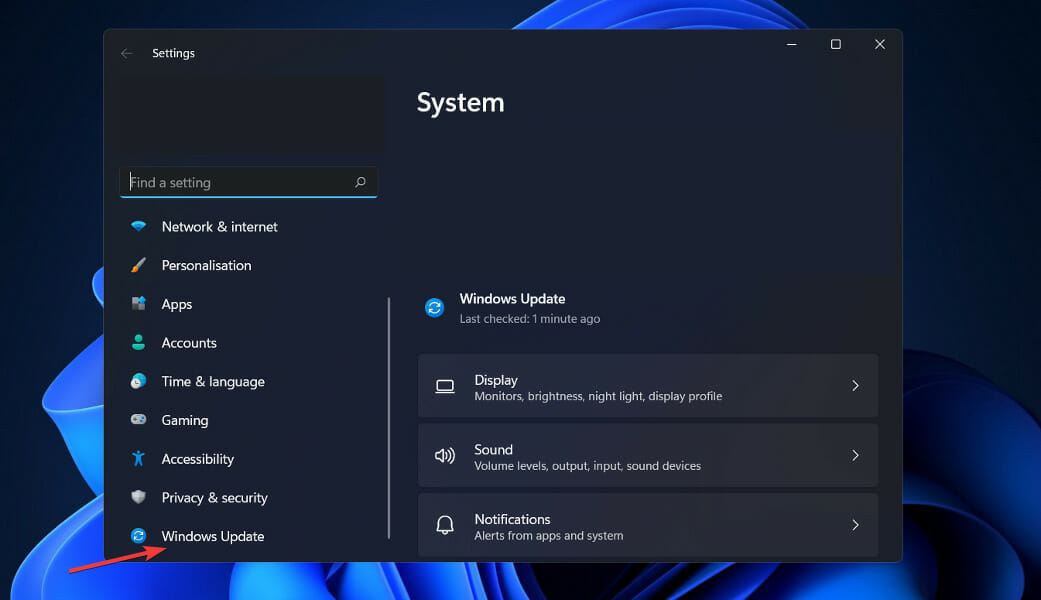
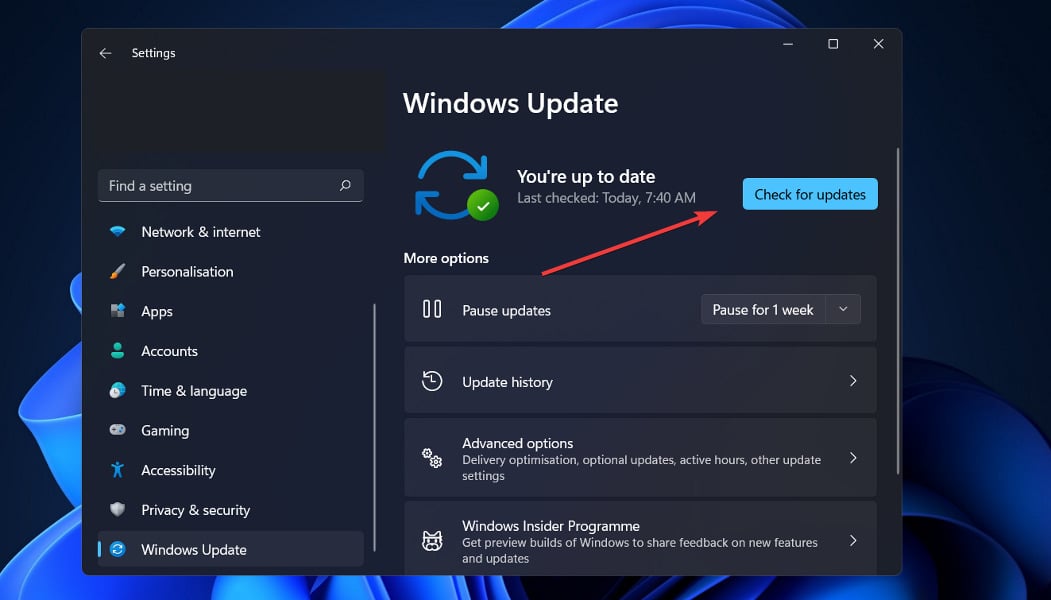
- Press the Windows key + I to open the Settings app, then click on Windows Update in the left panel.
- To see if there are any new updates available, click the Check for updates button, otherwise click on the Install now option and then wait for the download to complete.
It is possible that running an older version of Windows is a contributing factor to the SYSTEM PTE MISUSE issue. Luckily it can be remedied by simply updating the operating system.
6. Update drivers
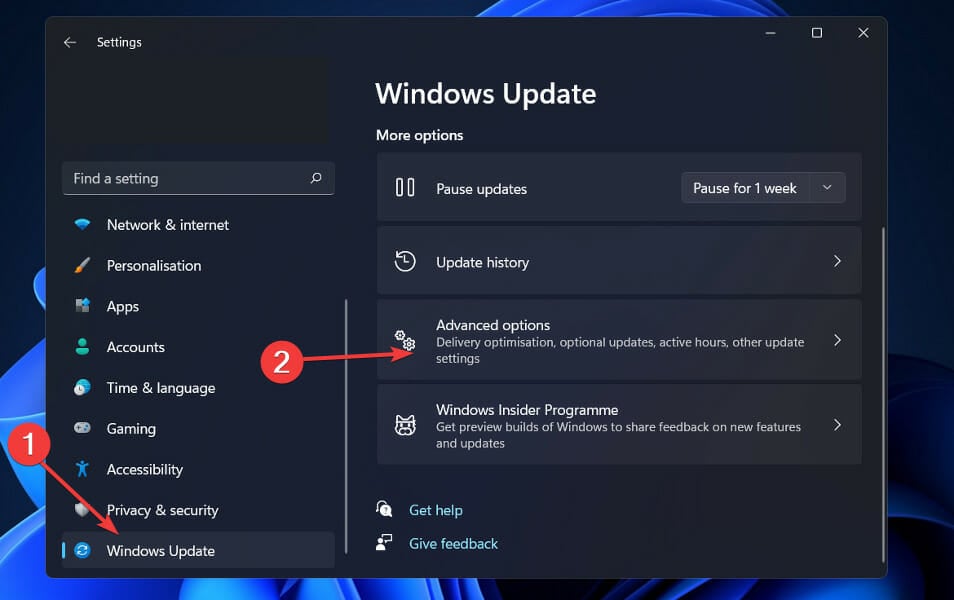
- Press the Windows key + I to open the Settings app, and click on Update & Security from the left panel. Now navigate to Advanced options as we’ve shown below.
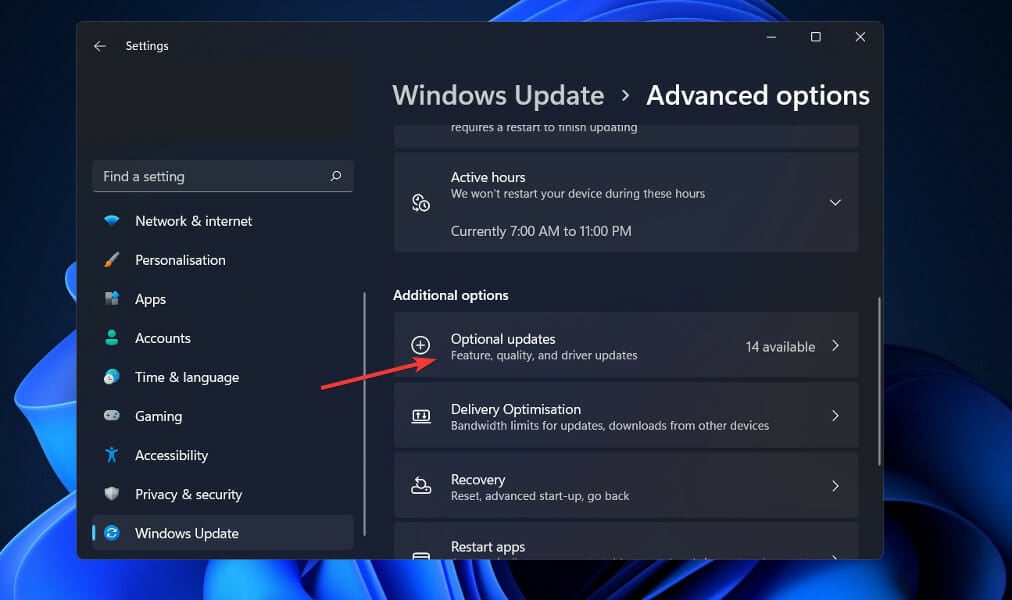
- After you have found the Additional options area, click on Optional updates to proceed to the next step.
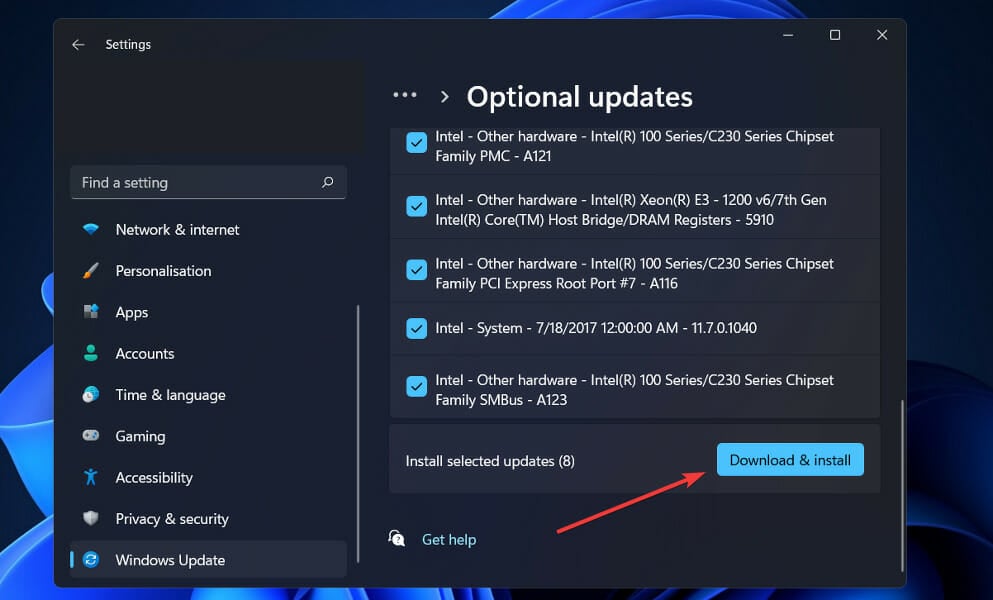
- Now click on the Driver Updates option, then select all the boxes listed and lastly click on the Download & install button.
When an issue occurs, you can manually seek updates, even though Windows is frequently in charge of driver updates. However, we strongly advocate using a specialized program such as PC HelpSoft Driver Updater to do automatic scans of out-of-date drivers.
Can a BSoD hurt my computer?
The answer is a resounding no. In reality, the entire purpose of a BSoD is to safeguard your computer’s hardware. When Windows detects that something has the potential to inflict serious harm, it immediately suspends all operations, culminating in the famed Blue Screen of Death.
A blue screen of death (BSoD) might be a symptom of a hardware failure. In that instance, it may appear as if the error was the root cause of the problem itself.
Despite that it will not harm your hardware, it might make your day miserable. Everything comes to a grinding halt while you’re busy working or playing. You’ll have to restart your computer, then reload any programs or files that were currently open.
And it’s possible that you’ll have to redo some of the work. When Windows fails, it takes with it everything that is currently in RAM. You will lose everything you have written since your word processor last saved it to disk.
Check out our guide on how to resolve the SYSTEM PTE MISUSE error code in Windows 10 for more information on remedies that may be applicable to your Windows 11 PC as well.
After you encountered the SYSTEM PTE MISUSE issue, we bet you could use some help with future BSoD errors, thus we recommend you to use a professional BSoD repair utility.
Alternatively, you should take a look at our post on what causes a Blue Screen of Death to learn more about how to prevent future errors from occurring.
Please let us know in the comments section below which method worked the best for you, as well as how frequently you get the BSoD screen.


