Teams Machine Wide-Installer: What is it & How to Set it Up
The file installs Teams for all user profiles on a PC
Key notes
- To set up Microsoft Teams Machne Wide Installer, download the x86 or x64 MSI installer, then use PowerShell to install the app.
- Keep reading to know the detailed steps.
Microsoft Teams is one of the popular collaboration tools that also comes with Machne Wide Installer, which can help streamline deployment across organizational systems.
In this comprehensive guide, we will discuss the step-by-step process to harness the power of this installer, ensuring Microsoft Teams’ smooth integration across all user profiles on a computer.
Benefits of installing Teams machine wide-installer
- Streamlines the deployment process of Microsoft Teams across multiple user accounts, saving time & effort in installation.
- Centralized installation and management of Microsoft Teams using the machine-wide installer, simplifying administrative tasks like overseeing and updating the app.
- Updates and patches are installed uniformly across all the profiles in a computer, reducing potential security risks.
- Provides a standard user experience due to a uniform configuration of Microsoft Teams settings across all users on a machine.
- Auto-install approved apps in Microsoft Teams.
What is Teams machine-wide installer, and do I need it?
The Microsoft Teams machine-wide installer is an MSI-based installation method for Teams that allows mass installation and updates of Teams via SCCM or Microsoft Endpoint Configuration Manager across all user accounts on a computer.
If you have a powerful centrally managed endpoint solution like SCCM, you can use this method to streamline deployment and make sure Teams is available & updated as soon as a new user signs in.
Preparing for Teams installation
Check Requirements and System Compatibility
| Component | Requirements |
| OS | Windows 11, Windows 10 (excluding Windows 10 LTSC for Teams desktop app), Windows 10 on ARM, Windows 8.1, Windows Server 2019, Windows Server 2016, Windows Server 2012 R2. |
| Computer and processor | Minimum 1.1 GHz or faster, two-core |
| Memory | 400 GB RAM |
| Hard disk | 3.0 GB of available disk space |
| Display | 1024 x 768 screen resolution |
| Graphics hardware | Windows OS: Graphics hardware acceleration requires DirectX 9 or later, with WDDM 2.0 or higher for Windows 10 |
| .NET version | .NET 4.5 CLR or later |
| Video | USB 2.0 video camera |
| Devices | Standard laptop camera, microphone, and speakers |
| Avatars for Teams app | To get the best experience when using avatars, it is recommended to have a computer that has a four-core CPU with at least 8GB of RAM. |
- Set up Admin Credentials in Active Directory and Registry Key – Configure the essential admin credentials in the Active Directory and set up registry Keys with suitable permissions to ensure smooth installation and updates.
- Update Channel Selection & Default File Format Pop-Up Page – Verify and configure the suitable update channels for the app to make sure it gets regular updates and features.
- Designate User Profiles, Accounts, and Experience – Define user profiles and accounts for accessing and using the software and check for proper permissions & roles according to their job roles.
- All users must have an Office 365 or Microsoft 365 account.
- Check the installation status of the Microsoft Teams app – Press Windows + I to open Settings>Apps>Installed apps. If Microsoft Teams is already on the list, remove it.
How can I install Teams using Teams Machine Wide-Installer?
- Download the Microsoft Teams MSI file in 32-bit or 64-bit according to your system architecture.
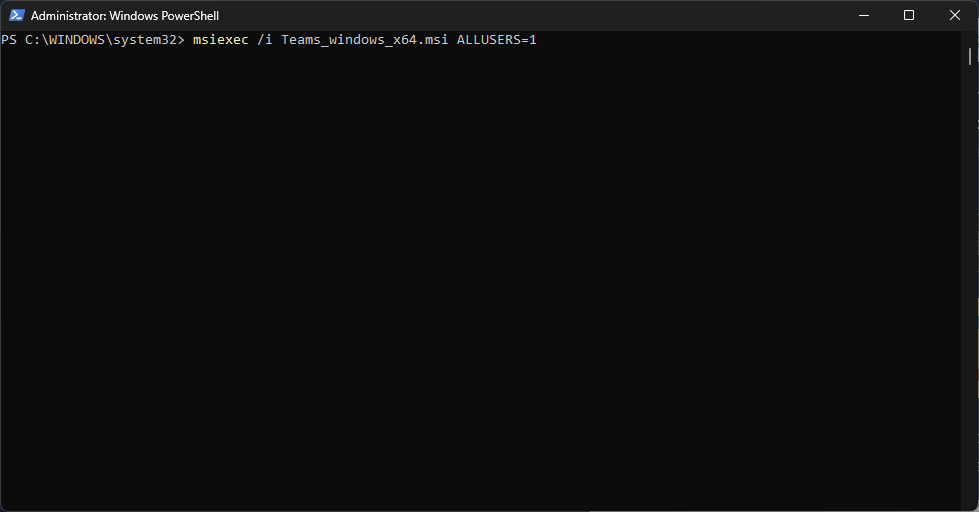
- Once the installer is downloaded, press the Windows key, type powershell, and click Run as administrator.
- Copy & paste the first command for 32-bit and the second command for 64-bit architecture computer, and hit Enter:
msiexec /i Teams_windows.msi ALLUSERS=1
msiexec /i Teams_windows_x64.msi ALLUSERS=1
- ALLUSERS=1 in the commands make sure the Teams Machine-Wide Installer appears in the Programs and Features list on the Control Panel or Installed apps list on the Settings app.
- Once done, the Teams machine-wide installer will store the app in C:\Program Files\Teams Installer or C:\Program Files (x86)\Teams Installer
- As soon as a new user logs on to the computer, the installer will automatically install Microsoft Teams to the user’s folder under C:\Users\userprofile
- To verify if the Teams installation is successful, type the following command and press Enter:
Get-AppxPackage -name '*teams'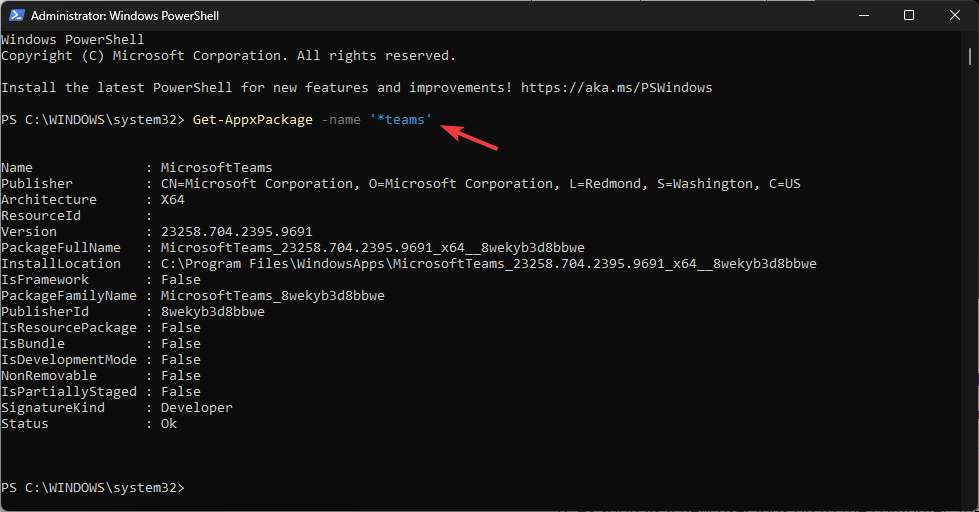
How do I update the Teams client to the latest version?
Microsoft Teams desktop app can install updates automatically with the help of its own proprietary update engine. The updates are released every two weeks and usually on Tuesdays.
The administrators can’t modify or interrupt the whole process, however, users can always check for updates manually. All they need to do is click the profile icon>select Settings>About Teams. You will get the version of the app.
To update the Microsoft Teams machine-wide installer, you can also download the latest version of MSI installer & use the same steps mentioned above to install it.
However, this will not upgrade the existing version but will update the version installed for the next user logins on PCs.
Can I remove the Teams machine-wide installer?
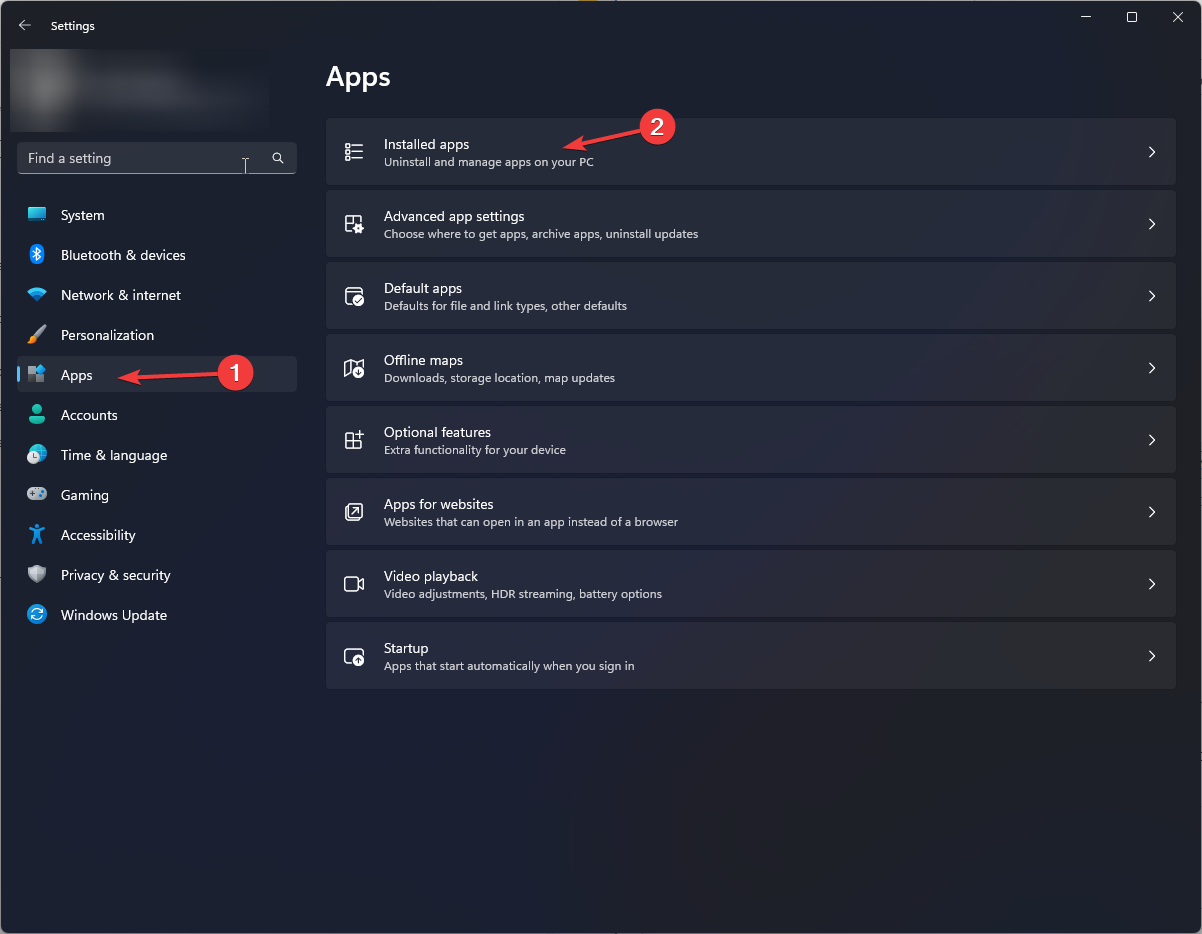
- Press Windows + I to open the Settings app.
- Go to Apps, then click Installed apps.
- Locate Teams machine-wide installer, click the three dots, and select Uninstall.
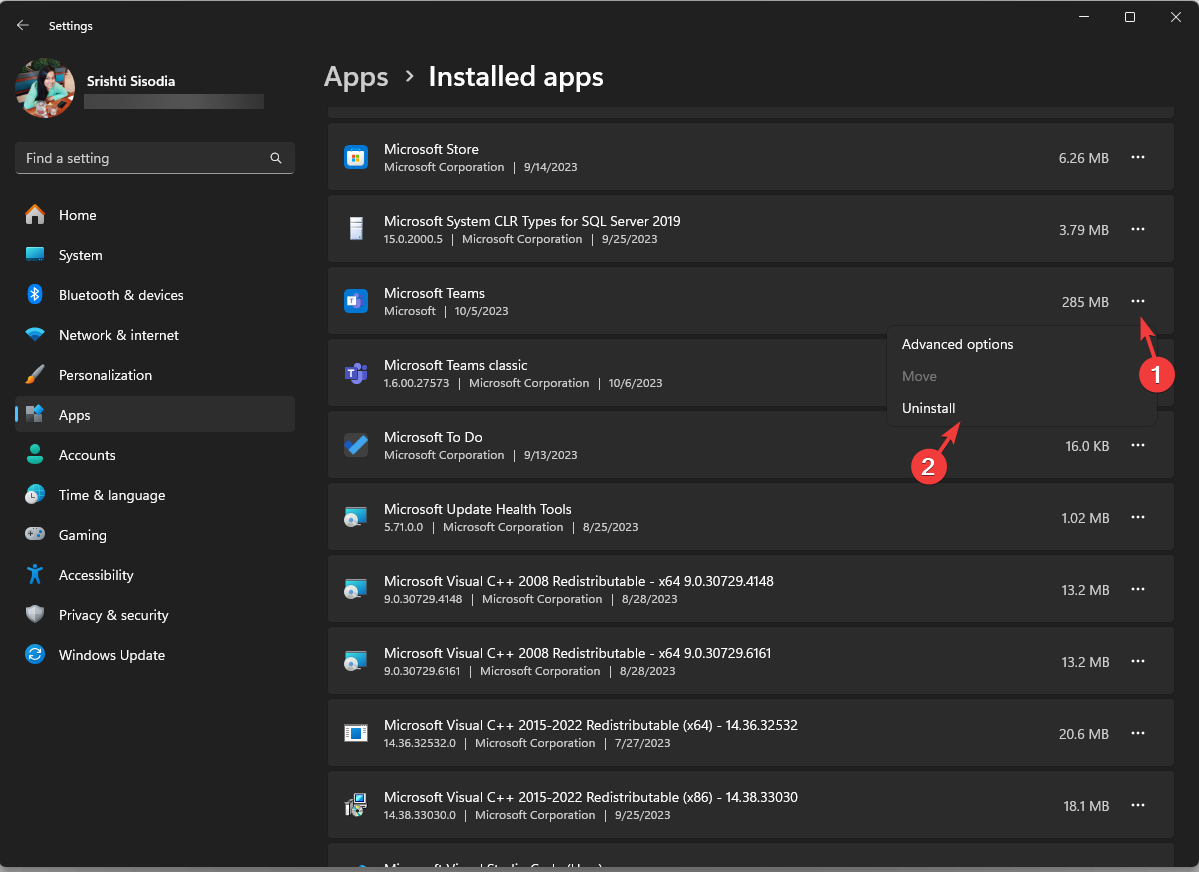
- Click Uninstall again to confirm the choice.
- Press Windows + E to open File Explorer; navigate to this path:
%LocalAppData%\Microsoft\Teams\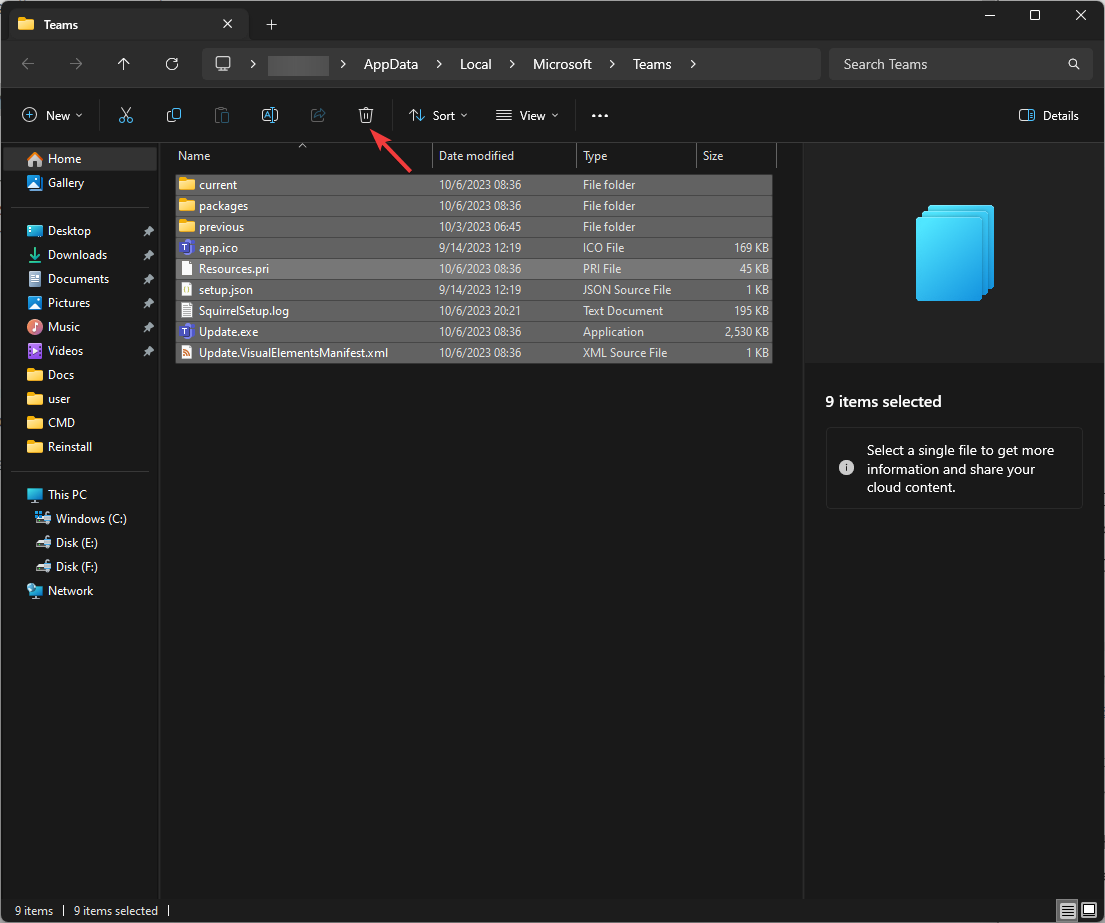
- Delete the Teams folder.
You can also use Control Panel> Programs and Features to remove the app. Repeat these steps for all the user profiles on your computer to completely remove the app and stop it from installing again.
In case you can’t uninstall Microsoft Teams, restart your PC & try again; if the issue persists, check this guide for other solutions.
Just like other Microsoft products, the Teams newer version, Teams 2.0, will also get AI assistant Copilot and a revamped interface; read this guide to know more.
If you have any questions or suggestions about the subject, don’t hesitate to mention them in the comments section below.
Read our disclosure page to find out how can you help Windows Report sustain the editorial team. Read more


Improve this guide


User forum
0 messages