How to Create a VirtualBox Shared Folder in Windows 11
Key notes
- Working with VirtualBox shared folders in Windows 11 entails 2 processes; creating a shared folder and mapping the drive.
- Shared folders are a viable way of networking between a host and a guest machine, alternatively dragging and dropping files between the machines may suffice.
- The process discussed in this article is basic and will work for VirtualBox on both Windows 11 and 10.
When you install a virtual machine, you may have to transfer files between guest and host operating systems. This is essential to interact with documents or install programs on VirtualBox.
There are a few ways to accomplish this. For example, you may set up a virtualization solution to allow you to drag files into a virtual machine, or you may share files from a folder created on the host computer.
Creating a shared folder is a helpful solution when storage peripherals stop working or the functionality to mount an ISO file is malfunctioning.
Whatever your motivation for sharing data, VirtualBox on Windows 11 provides two options: mapping a folder as a network drive and utilizing a shared folder.
In this article, you’ll learn how to share a folder for use on VirtualBox in Windows 11.
How do I create shared folders for VirtualBox in Windows 11?
1. Create a VirtualBox shared folder
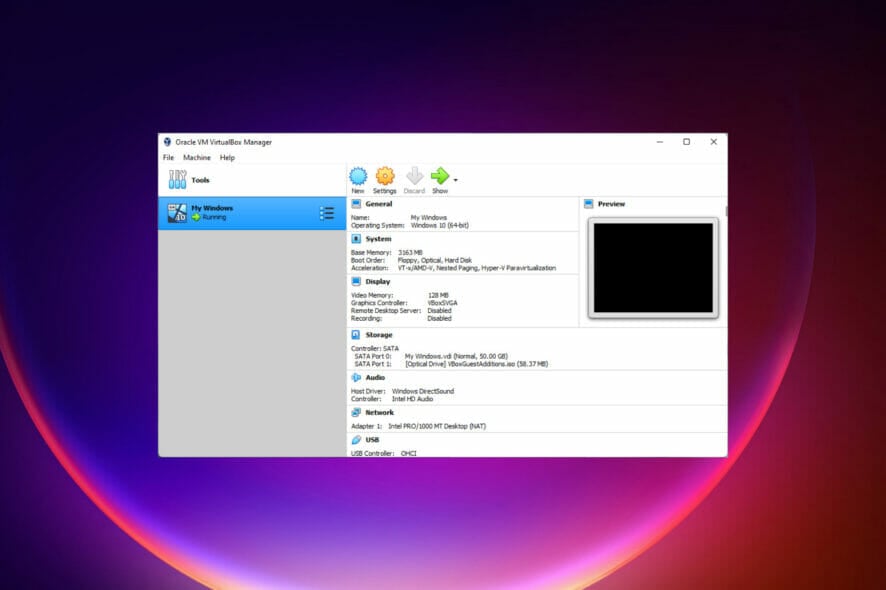
- Open the VirtualBox app.
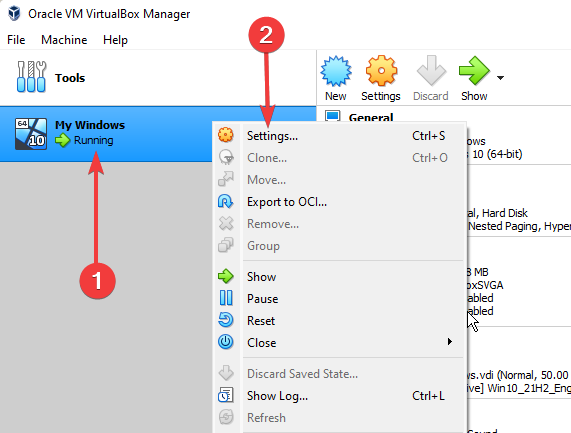
- Right-click on the virtual machine you need on the left pane and select the Settings option.

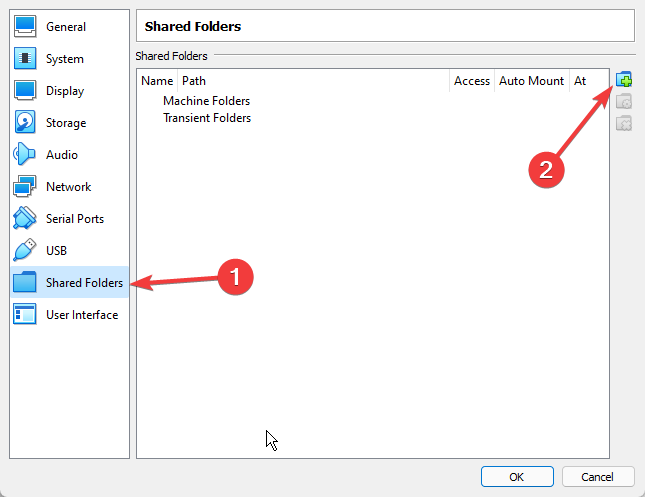
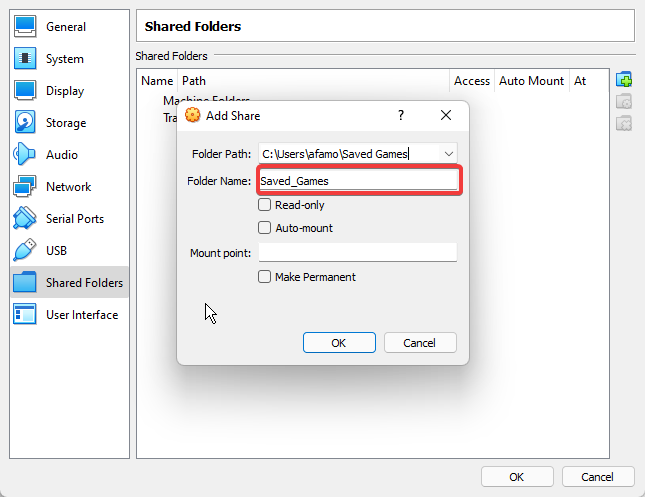
- Select the Shared Folder option on the left pane, and on the far right corner, click the folder with the plus sign.

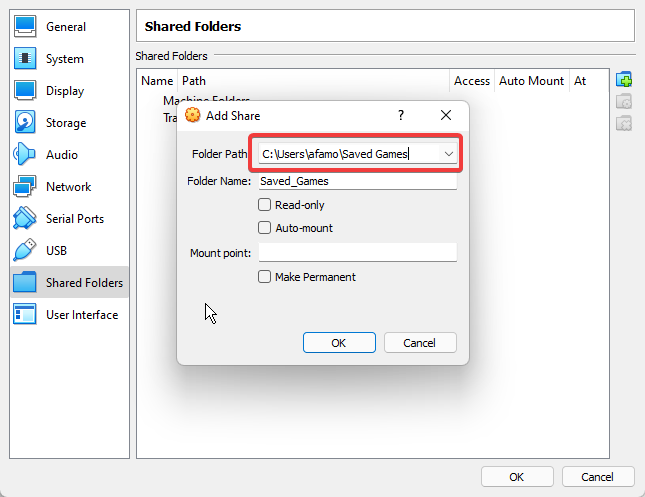
- Click on the arrow sign on the Folder Path option to confirm the folder’s location to be shared. Alternatively, you can type or paste the path here if you know the path.

- In the Folder name field, ensure that the automatically generated name is consistent with the file you intend to share. You can edit the name to match the folder to be shared.

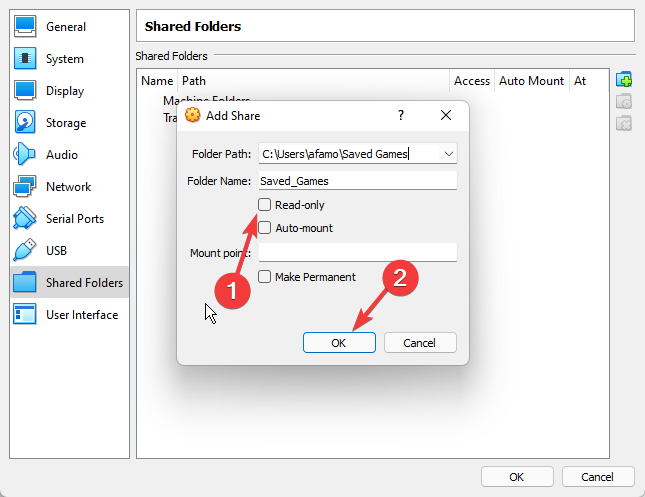
- You may select the Read-only checkbox if you do not want your virtual machine to be able to save files in this folder, then click OK.

Once this is successfully done, move to the next step.
Shared folders work only when the required drivers and integration tools are present, so make sure to install VirtualBox Guest Additions before creating or mapping any shared folder on Windows 11.
You can confirm that your VirtualBox environment works correctly by reviewing this guide on how to install Kali Linux on VirtualBox, which helps you understand the setup process before configuring shared folders.
2. Create your VirtualBox mapped drive
- Open the VirtualBox app.
- Start the virtual machine by selecting the machine on the right pane and clicking the green start arrow.

- At the top menu of your virtual machine, select Devices, then from the drop menu, select Shared Folders, and click on the option for Shared Folder Settings.

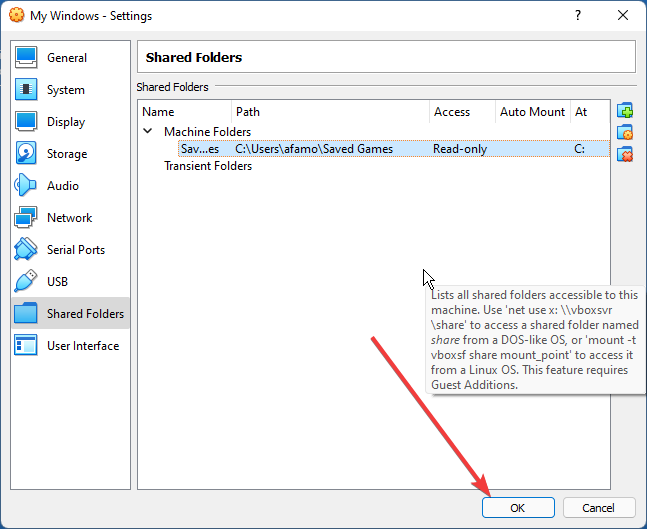
- Select the Shared Folder option on the left pane, and double click to select the newly added folder from the lists of shared folders.

- Check the Auto-Mount checkbox, input the drive alphabet corresponding to the shared folder location in the mount point field, check the Make Permanent checkbox, and click OK.

- Click OK again on your virtual machine settings window.


Your chosen folder will mount as a drive on your virtual system when these steps are taken.
 Tip
Tip
That is how you create a shared folder on a VirtualBox virtual machine on Windows 11. This procedure is basic, and as long as you follow the instructions in this guide, you will be able to share files and essential documents between a host and your virtual machine.
The process will still work if you are using a Windows 10 PC. Also, remember that to share files, you may use a simple drag and drop, but creating a shared folder is great for networking if you constantly need the same resources for all your machines.
Our guide on how to fix failed VirtualBox Installations will come in handy if you are having problems with your installation.
Do not hesitate to let us know if you managed to complete the above procedure by using the comments area.
Read our disclosure page to find out how can you help Windows Report sustain the editorial team. Read more


Improve this guide


User forum
0 messages